How to Build a 4-in-1 Activity Table
If you’re staring down a long summer with kids who can’t stop arguing long enough to figure out what they want to do next, I have a project for you. This DIY 4-in-1 kids activity table is one of my favorite builds — and based on the feedback I got from my brother after I gifted it to my three nephews, it genuinely delivers on the “keep them busy for hours” promise.
I originally built this table in 2016 as a late birthday and early Christmas present for my nephews. My brother called me after they opened it and said the kids spent the entire day at it without a single fight. That’s basically the highest praise a gift can get.
In this post, I’m sharing the free printable plans for this project as well as what I learned building it. The best part? It’s a weekend build. You don’t need advanced woodworking skills — just a Kreg Jig, some plywood, and a Saturday afternoon.
Download the free printable building plans here
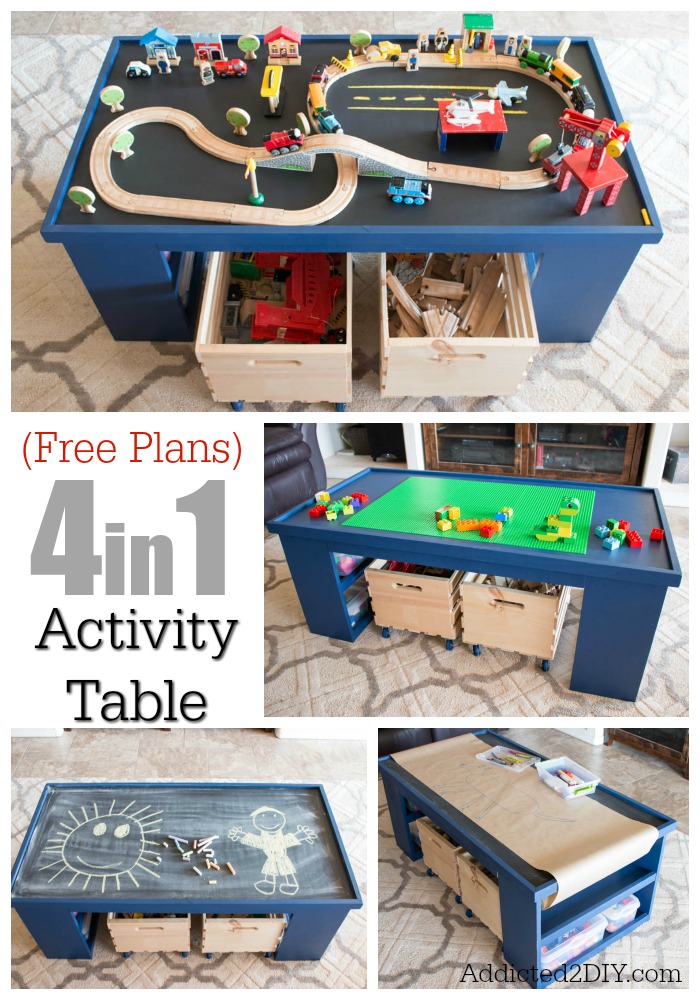
What Makes This a 4-in-1 Table?
Each side of the tabletop serves a completely different purpose, which is what makes this build so worth the effort:
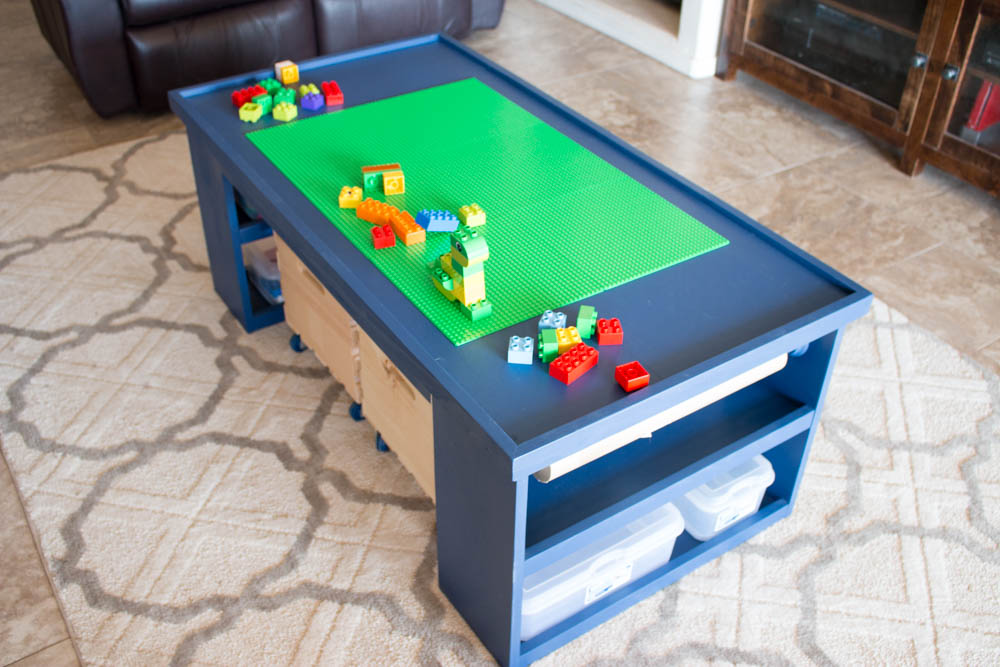
- Lego surface — Six Lego base plates glued directly to the tabletop for open-ended building
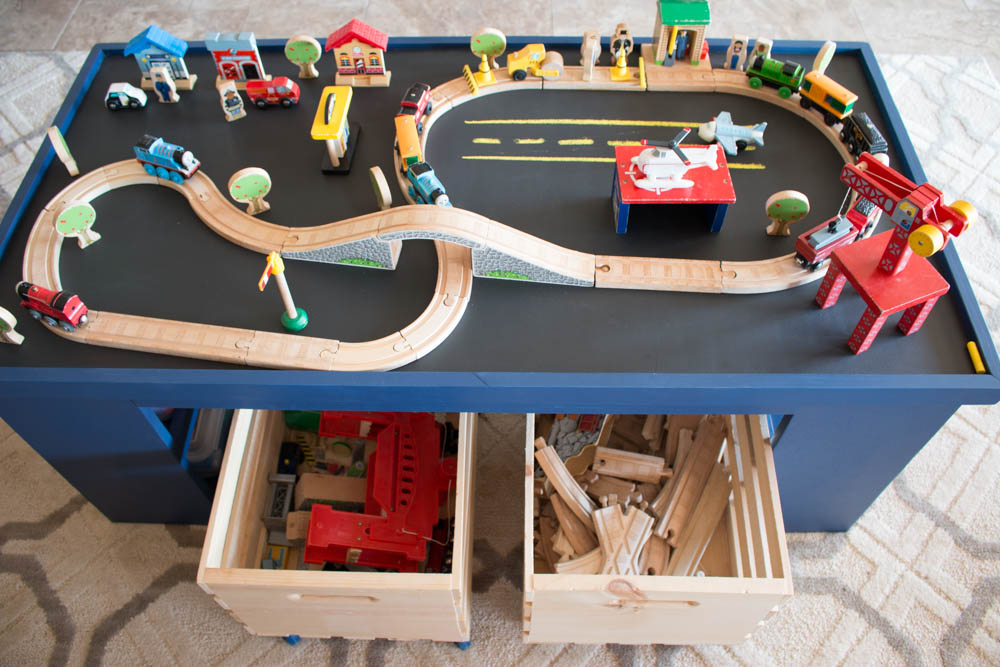
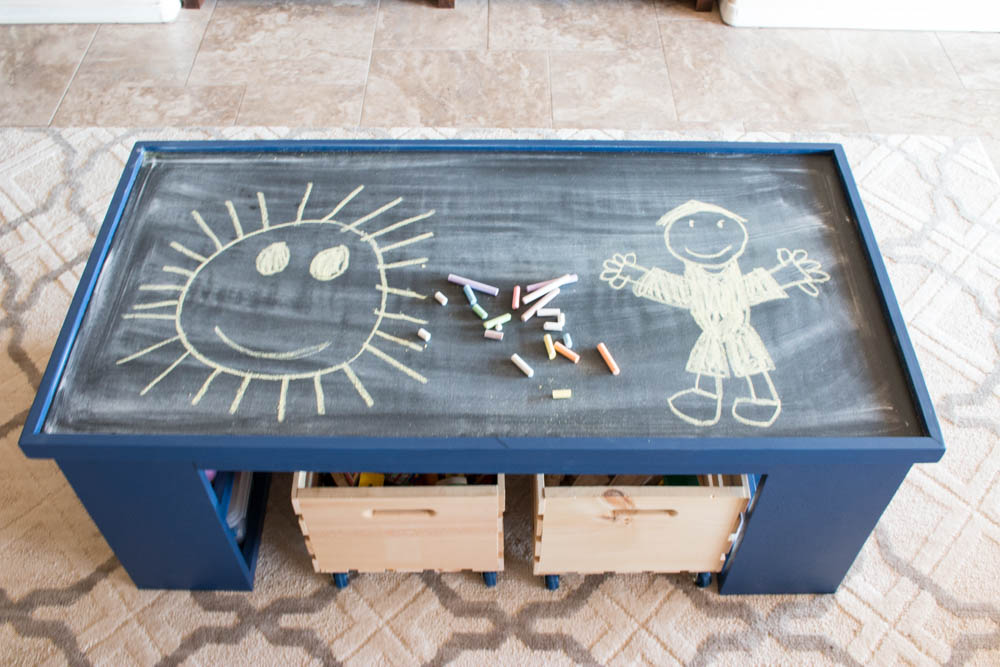
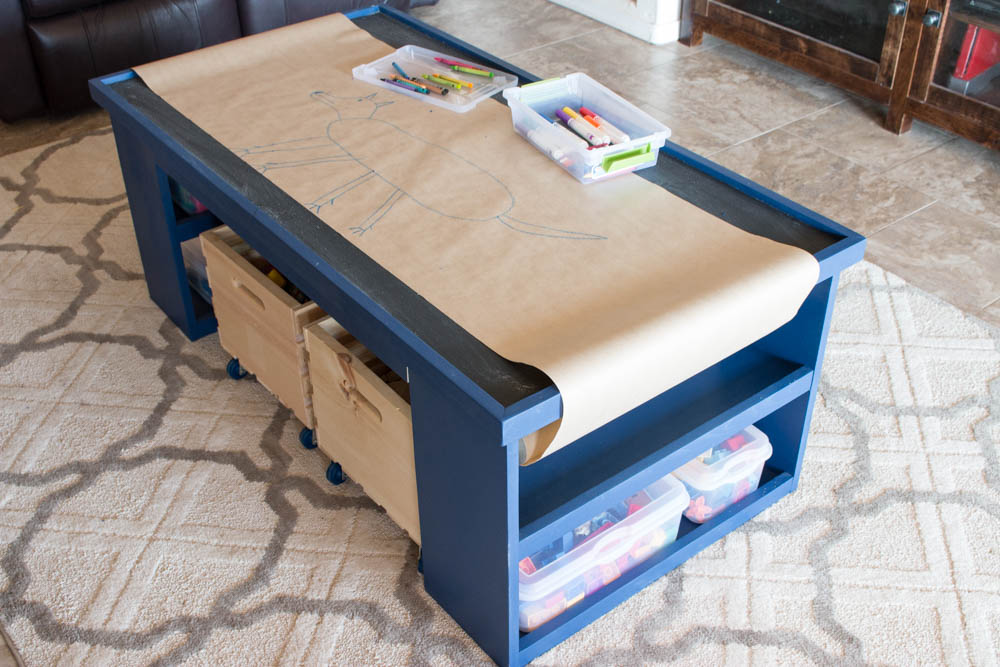
- Chalkboard side — Kids can draw roads, trees, rivers, or whatever backdrop they want for their train layouts
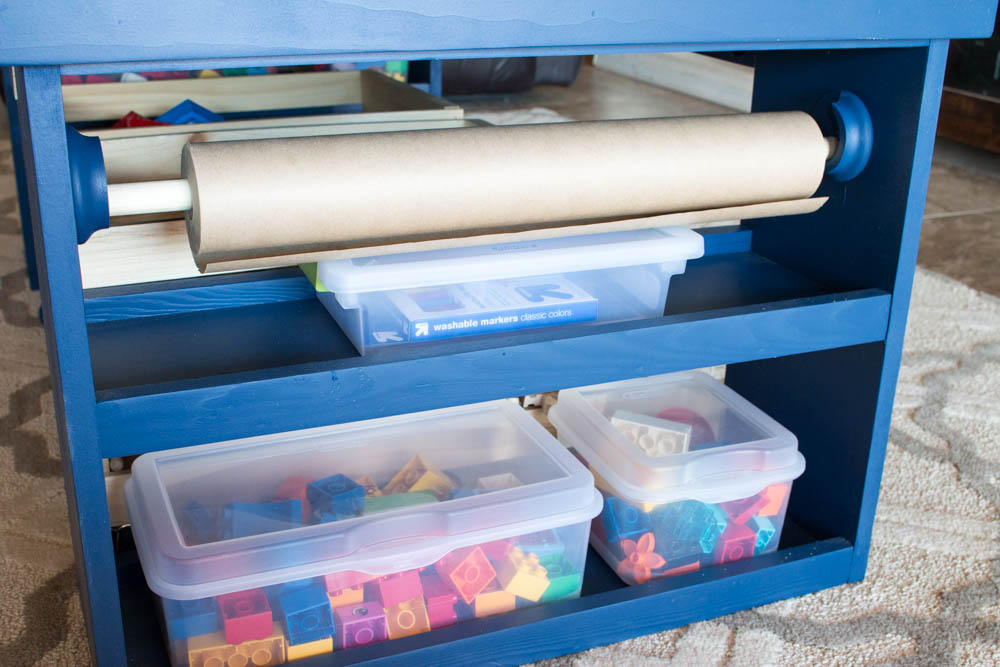
- Drawing paper roll — A closet rod socket and 3/4″ dowel hold a full roll of paper right at the table
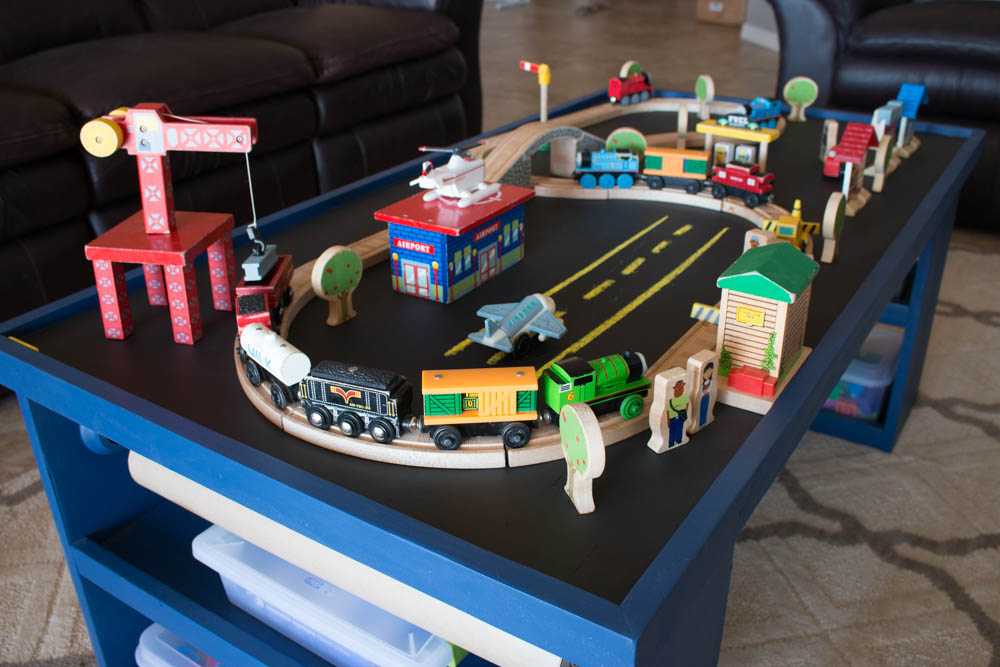
- Train track setup — The chalkboard surface doubles as a flat, drawable surface for setting up tracks and towns
The tabletop is light enough that kids can flip it themselves, so they can switch activities without needing help. Even my own boys — who were 7 and 9 at the time — were flipping it back and forth independently within the first hour.
Materials and Cut List
Download the free building plans for the complete materials list, cut list, and exact dimensions. Here’s a general overview of what you’ll need:
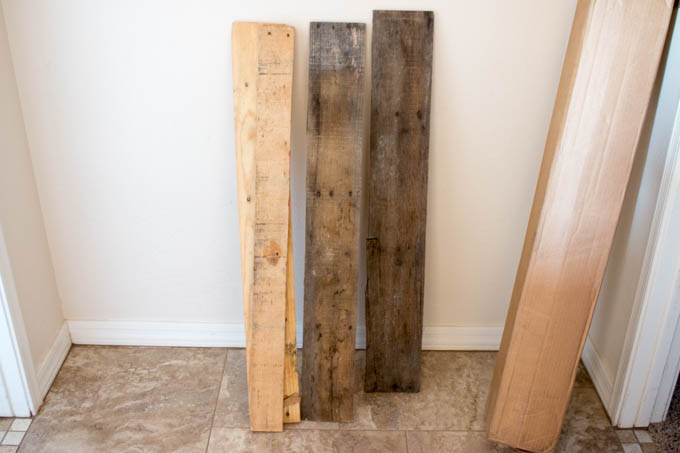
- 3/4″ birch veneer plywood (base and tabletop) — I sourced mine from Home Depot
- 1×2 and 1×3 boards
- Kreg Jig and 1 1/4″ pocket screws
- 1 1/4″ brad nails and wood glue
- Iron-on veneer edge banding
- Chalkboard paint
- Six Lego base plates
- Closet rod sockets and a 3/4″ dowel
- Storage crates with casters (I used ones from Home Depot and added my own casters)
How to Build the DIY 4-in-1 Activity Table
Step 1 — Cut the Base Pieces
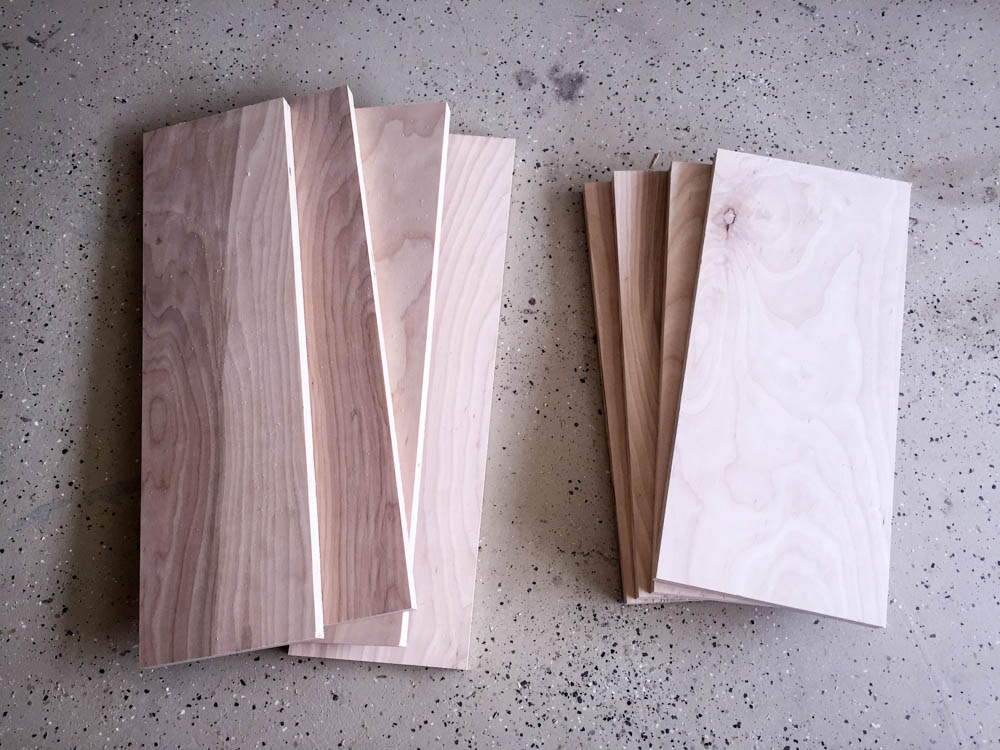
Start by cutting the plywood pieces for the base using the cut list from the free plans. I used 3/4″ birch veneer plywood throughout — it’s widely available, takes paint well, and holds pocket screws reliably.
Step 2 — Drill Pocket Holes
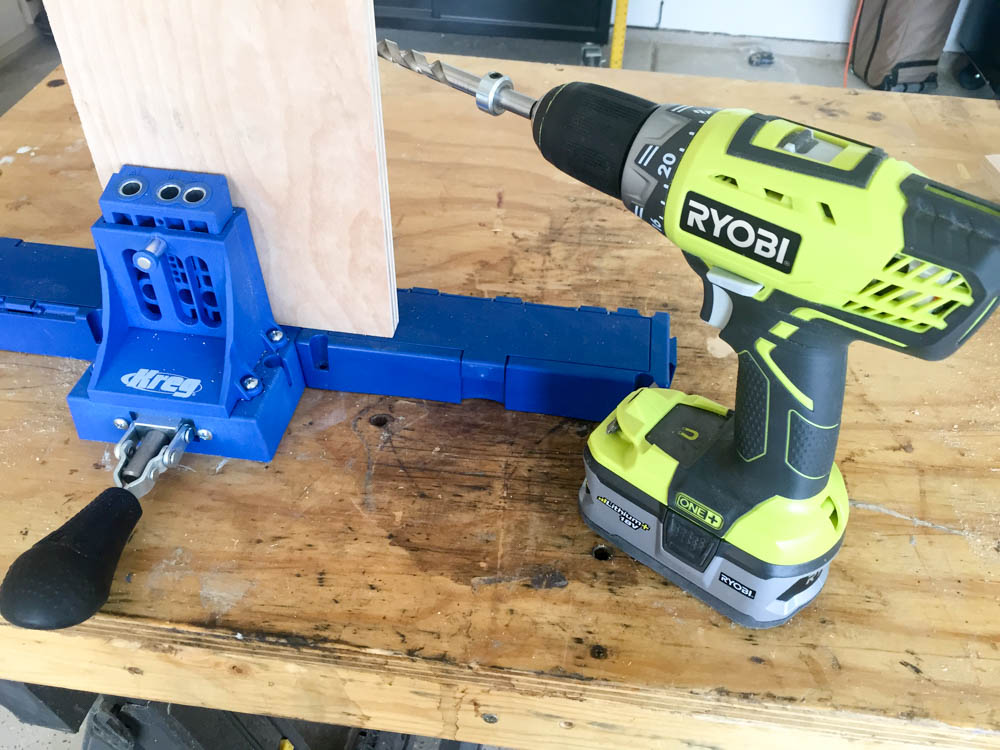
Using a Kreg Jig, drill 3/4″ pocket holes into each end of the bottom and middle shelves. If you haven’t used a Kreg Jig before, this is a great beginner project for it — the joints are simple and forgiving.
Step 3 — Attach the 1×2 Trim to the Shelves
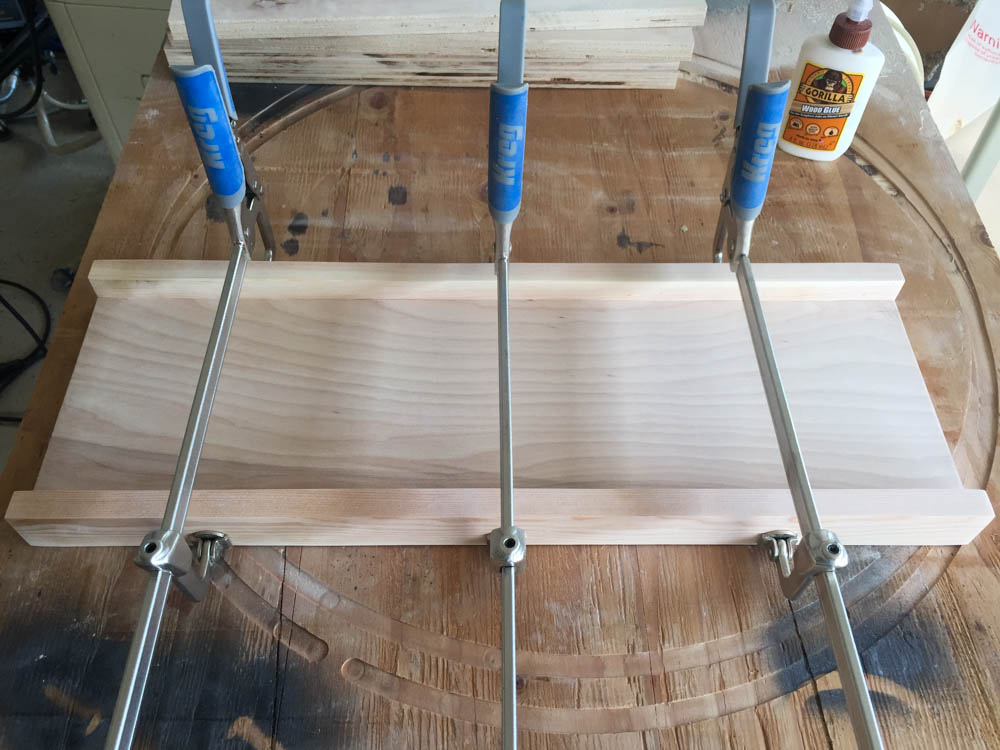
Glue and clamp the 1×2 pieces flush with the bottom of each shelf, then secure with 1 1/4″ brad nails.
Step 4 — Assemble the Base
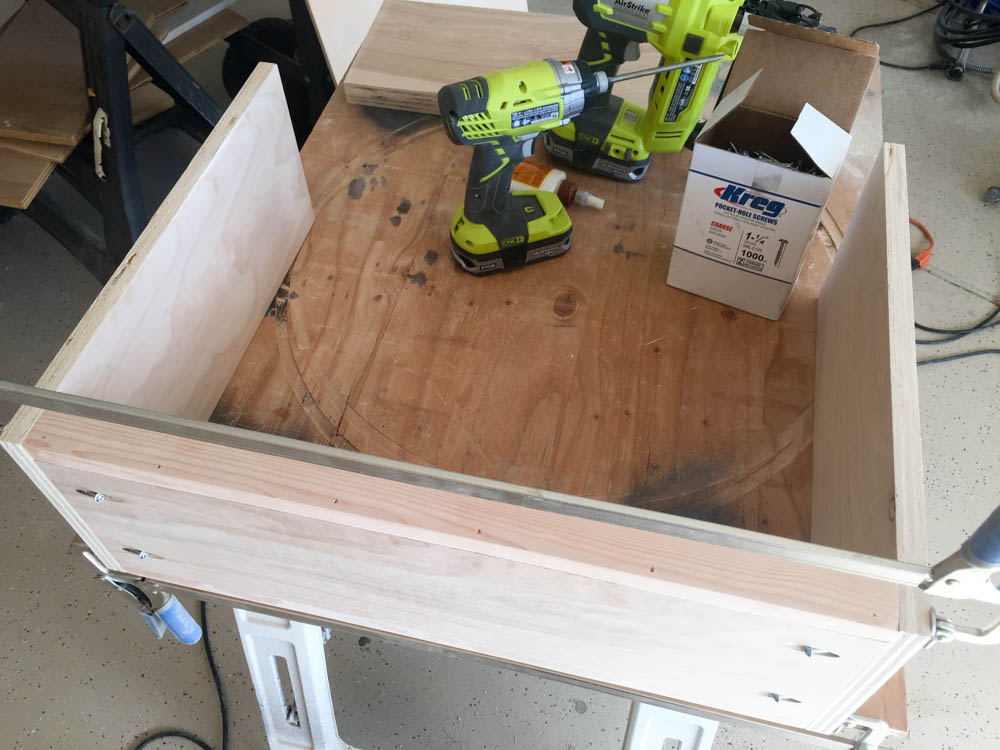
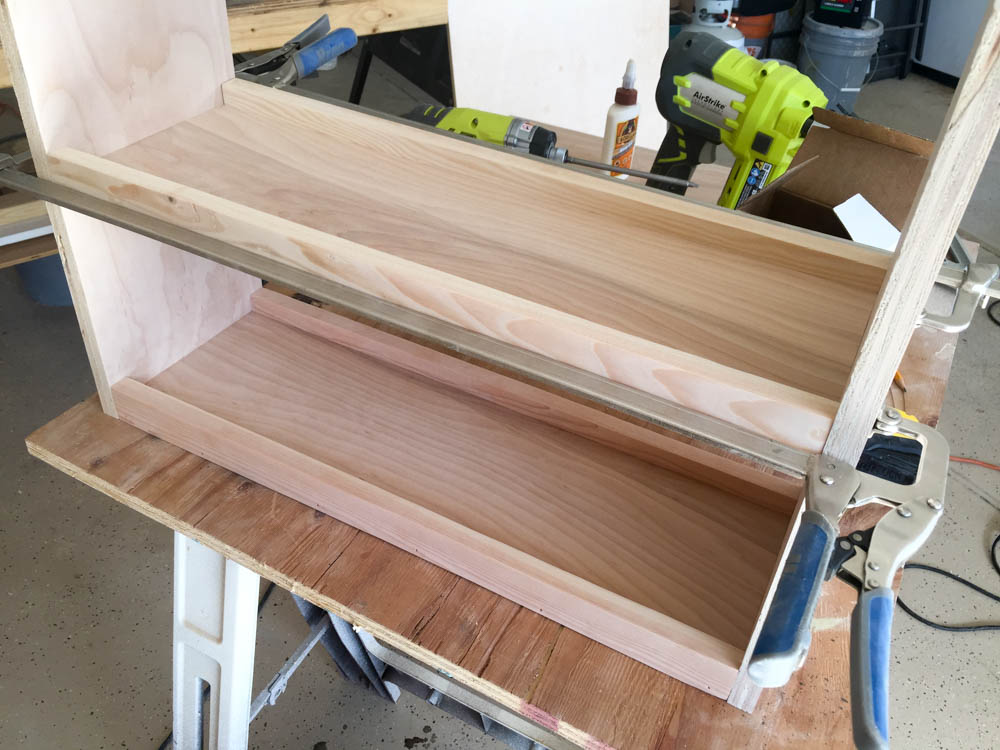
Attach the front and back vertical pieces to the shelves using wood glue and 1 1/4″ pocket screws. Attach the middle shelf the same way, leaving 7 1/4″ between the bottom of the middle shelf and the top of the 1×2 on the bottom shelf. Check for square at every step here — it makes the rest of the build go much smoother.
Step 5 — Add the Stretchers
Attach the 1×3 stretchers flush with the top of the base using 1 1/4″ pocket screws, but skip the glue on this step intentionally. Keeping these unglued means the entire base can be disassembled when needed. This turned out to be a bigger feature than I expected — my brother had to fit the table into their SUV to drive it back to Nebraska, and being able to break it down made that completely painless.
Step 6 — Attach the Tabletop
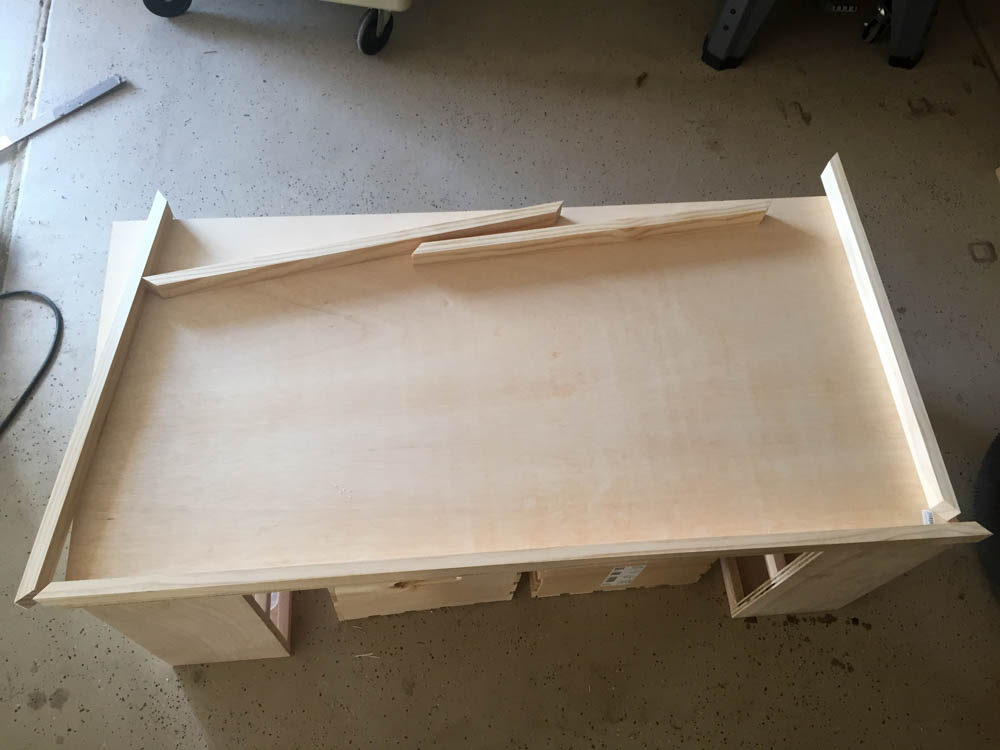
Center the 2′ x 4′ plywood sheet over the base. Cut the 1×2 trim to fit around the edges, then glue and nail in place with 1 1/4″ brad nails.
Step 7 — Apply Edge Banding and Sand
Apply iron-on veneer edge banding to any exposed plywood edges, then sand the entire table smooth. Don’t skip the edge banding — it gives the finished table a much cleaner, more polished look and protects the edges from wear.
Step 8 — Paint and Add the Chalkboard Surface
Paint the full table first, then apply chalkboard paint to one side of the tabletop. I did the entire table in one color and used chalkboard paint on just that one face — it keeps things simple and the contrast is nice.
Step 9 — Install the Paper Roll Holder
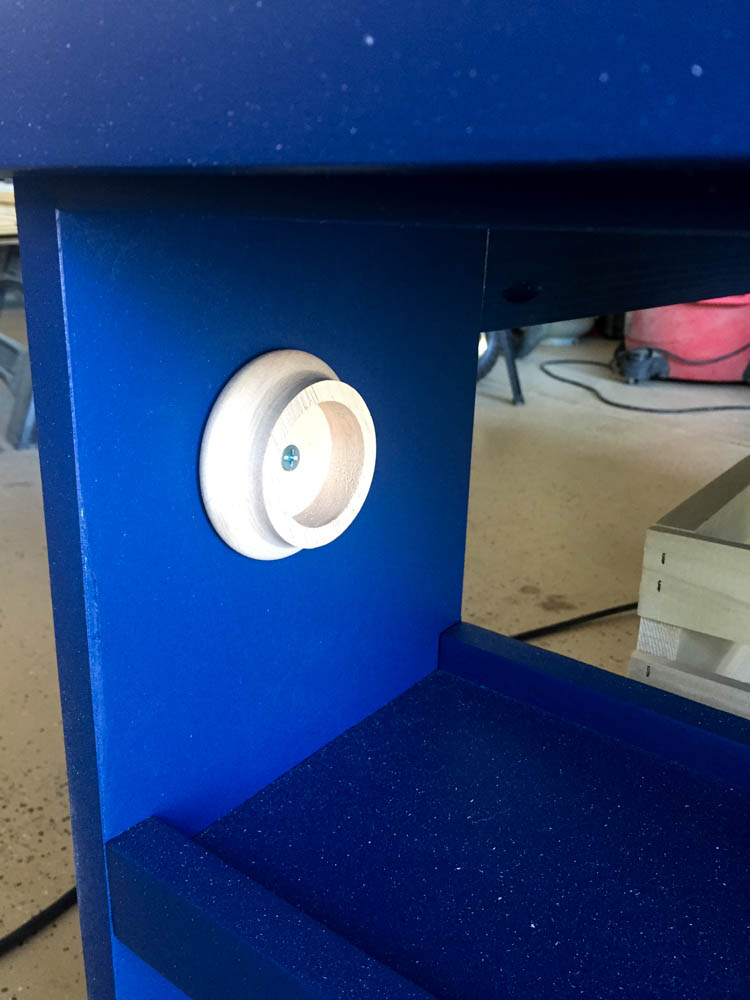
Mount closet rod sockets on one end of the table. Thread a 3/4″ wooden dowel through a roll of drawing paper and rest it in the sockets. I added mine after the table was already painted, so I finished them by hand — not a big deal, but worth noting if you want to be more efficient about it.
Step 10 — Glue Down the Lego Base Plates
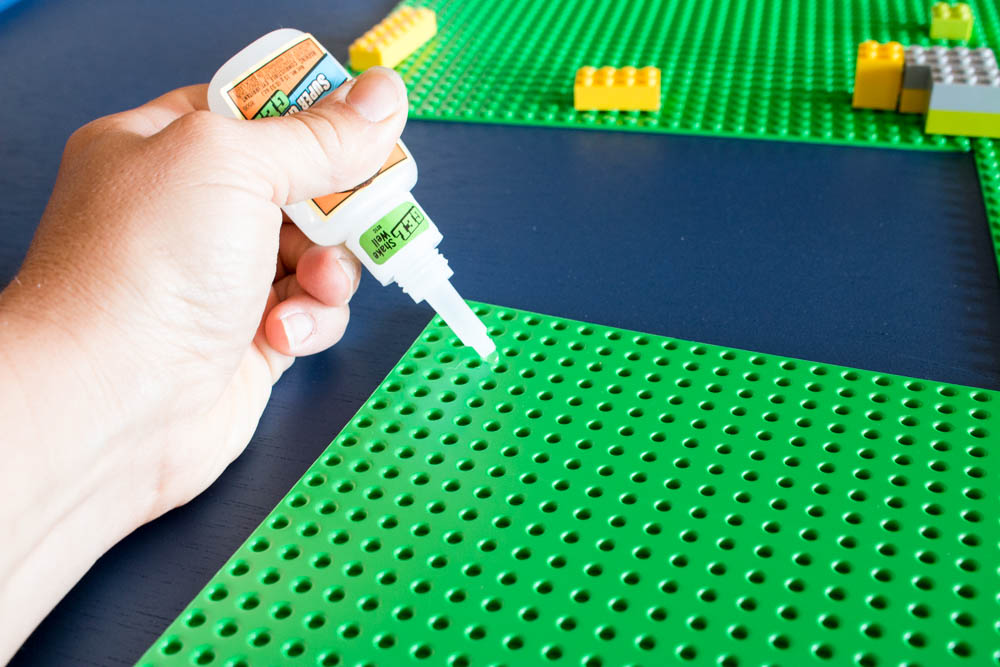
On the side opposite the chalkboard, glue down six Lego base plates. Here’s the trick I learned the hard way: before gluing, snap Lego bricks across two adjacent plates at a time to hold them in position while the glue dries. If you glue the plates flush against each other without doing this, the spacing ends up slightly too tight and bricks won’t snap down cleanly. That small step saves a lot of frustration.
Step 11 — Add Storage Crates
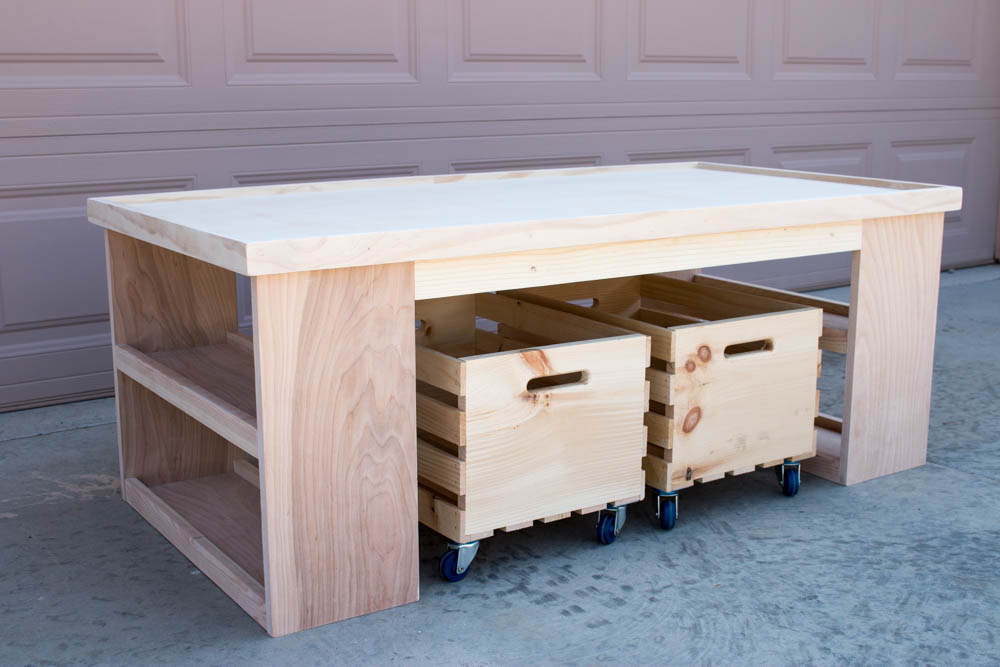
Add casters to the bottoms of storage crates and slide them under the table. They’re the perfect size for train tracks, Lego bricks, cars, or whatever else tends to take over the floor. The crates I used from Home Depot fit the base perfectly and roll in and out easily.
What I’d Do Differently
Every build teaches you something. A few things I’d tweak if I built this again:
Paint before installing hardware. I mounted the paper roll sockets after painting and had to touch them up by hand. It’s a minor thing, but doing a quick coat on the hardware before installing saves time.
Pre-drill for the casters. Adding casters to the storage crates is simple, but if you pre-drill the holes before painting the crates, you avoid any splintering on the finished surface.
Let the chalkboard cure fully before use. Chalkboard paint needs time — at least 24 hours, ideally longer — before it works well. I’d build in that cure time before gifting or unveiling it to impatient kids.
Frequently Asked Questions
What age is this activity table best for?
This table works well for kids roughly ages 3 and up. My nephews ranged from toddler to early elementary when I built theirs, and all three used it constantly. Younger kids gravitate toward the chalkboard and drawing paper; older kids tend to take over the Lego side.
How long does this project take to build?
Most builders can complete this in a weekend. Construction is straightforward — the most time-consuming steps are waiting for glue to dry and applying edge banding. If you have your materials prepped ahead of time, you can realistically have it built in a single Saturday with finishing the next day.
Can this table be taken apart for storage or moving?
Yes, and that’s by design. The stretchers are attached with pocket screws only — no glue — so the base disassembles easily. My brother drove this from Arizona to Nebraska in the back of their SUV, broken down flat. It went back together without any issues.
What kind of paint should I use?
Standard latex paint works well for the base and sides. For the chalkboard surface, use a dedicated chalkboard paint and apply two coats. Let it cure fully before use — rushing that step results in a surface that doesn’t erase cleanly.
Where can I find the free building plans?
The full materials list, cut list, and dimensions are available as a free printable download. Click here to download the free 4-in-1 activity table plans.