DIY Mobile Miter Saw Bench with Cabinet Storage
If your miter saw is currently living on a makeshift table or a sheet of plywood across sawhorses, this build is for you. I finally made the upgrade in my own shop after years of that exact setup, and I can honestly say it’s one of the best improvements I’ve ever made to my workspace.
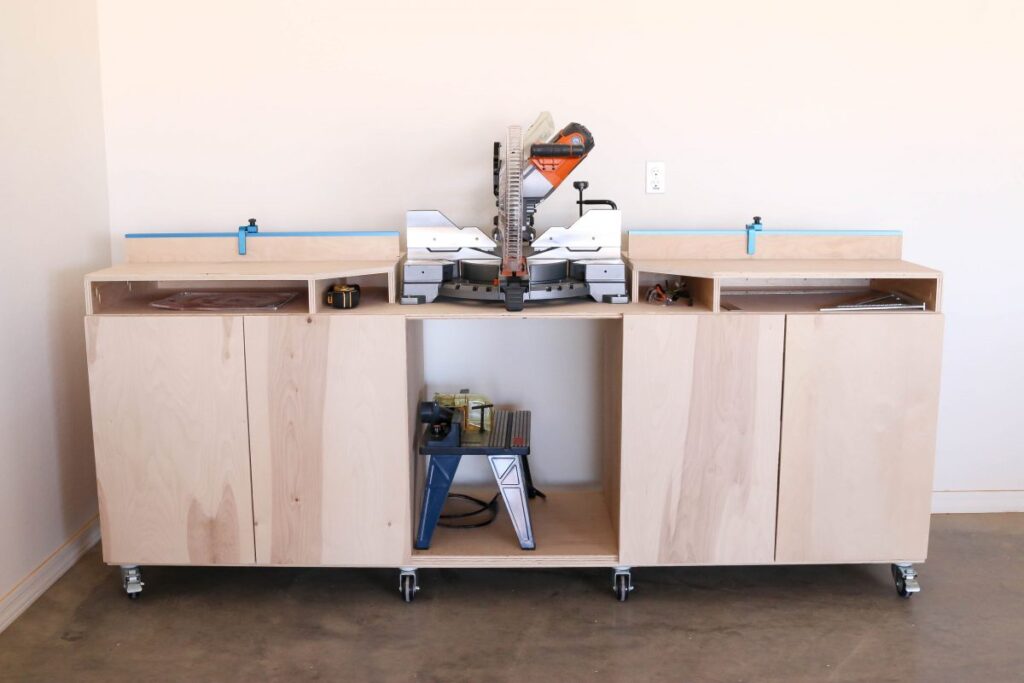
This DIY mobile miter saw bench features:
- A full cabinet base with pull-out shelves for tool storage
- A fence with flip stops for fast, repeatable cuts
- T-track with a built-in tape measure
- Locking casters so the whole station rolls where you need it and stays put when you don’t
▶️ Want to see the full build in action? I’ve put together a complete step-by-step video walkthrough on YouTube. It covers every stage of the build from the first plywood cut to the finished rolling station.
This project was built in partnership with Rockler Woodworking and Hardware. Be sure to grab the free printable plans below — they include a full materials list and cut list to get you started.
Tools and Materials
Tools Needed
- Miter saw
- Circular saw or table saw (for breaking down plywood)
- Jigsaw (for corner cutouts)
- Drill/driver
- Pocket hole jig (Kreg Jig or similar)
- Carpenter’s square
- Drawer slide installation jig (optional but highly recommended — more on this below)
- Grinder (for cutting t-track to length)
Materials
- 3/4″ plywood (carcass, shelves, table tops, and fence)
- 1-1/4″ pocket screws
- 1-1/4″ wood screws
- 5/8″ wood screws
- Wood glue
- 3″ swivel casters (x2, for center of bench)
- 3″ locking swivel casters (x4, for outside corners)
- 22″ side-mount drawer slides, 100 lb capacity
- Euro hinges
- Double T-track fence cap (36″, cut to 34″)
- Tape measure insert for T-track (optional)
- Flip stops
- Threaded insert nuts and bolts (for securing saw to bench)
Step 1: Cut and Assemble the Main Carcass
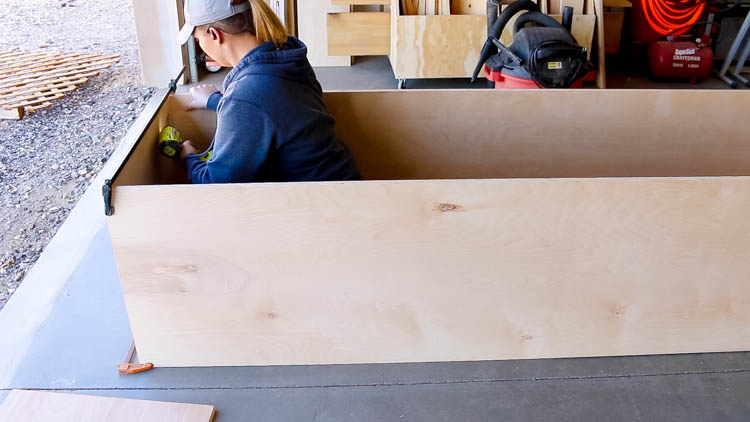
Start by cutting all of your plywood pieces for the main carcass. Once your pieces are cut, drill 3/4″ pocket holes into the ends of the bench sides and attach them to the top and bottom panels using wood glue and 1-1/4″ pocket screws.
Pro Tip: Cut all your plywood parts before you start assembling. Dry-fitting everything first saves you from discovering a mismatch mid-build.
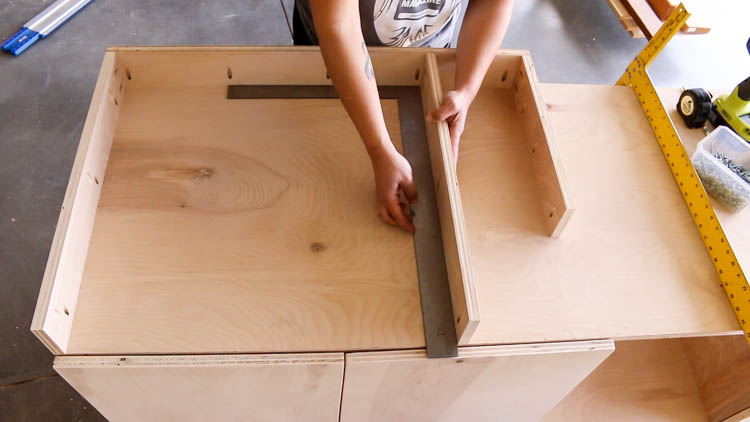
Step 2: Install the Center Dividers
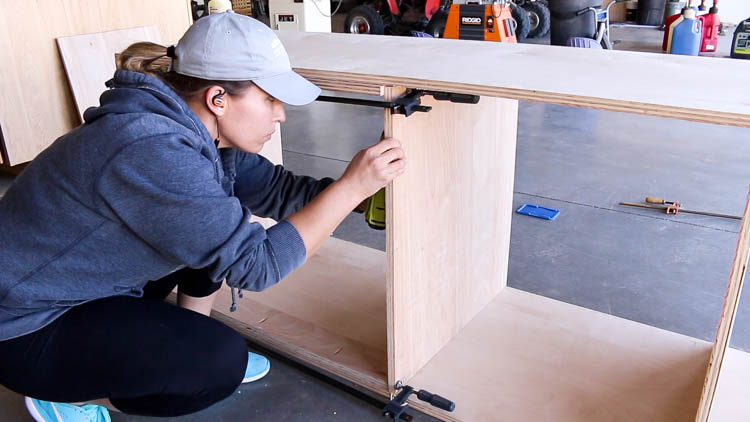
With the outer carcass assembled, install the center dividers. Use your rear stabilizing stretchers as spacer blocks to find the correct placement, then glue and fasten the dividers with 1-1/4″ pocket screws.
Getting the dividers plumb and square at this stage matters — they’ll also serve as the mounting surface for your drawer slides later.
Step 3: Attach the Rear Stabilizing Stretchers
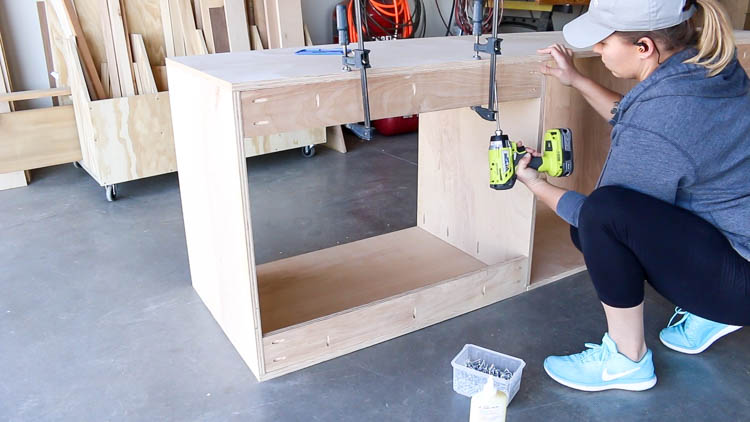
Install the rear stabilizing stretchers with glue and 1-1/4″ pocket screws. These run across the back of the bench and are what keep the whole structure from racking once the bench is loaded up and in use.
Step 4: Build and Attach the Bottom Frame
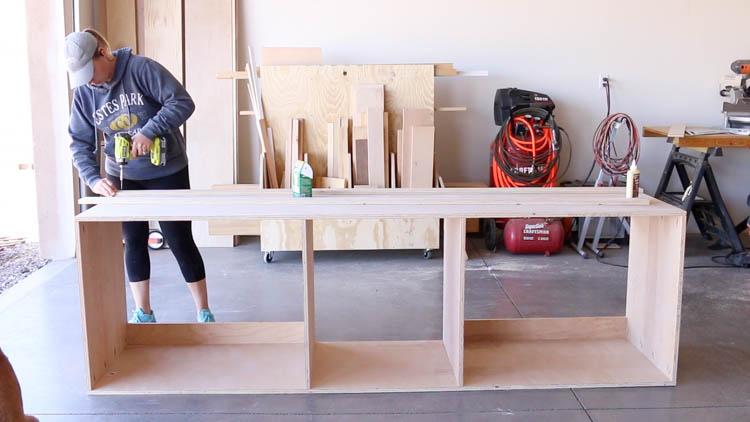
To beef up support at the bottom, rip 3″ strips of plywood and build a simple frame. Attach it to the underside of the bench with 1-1/4″ wood screws and glue. This frame also gives you a solid mounting surface for the casters.
Step 5: Add the Casters
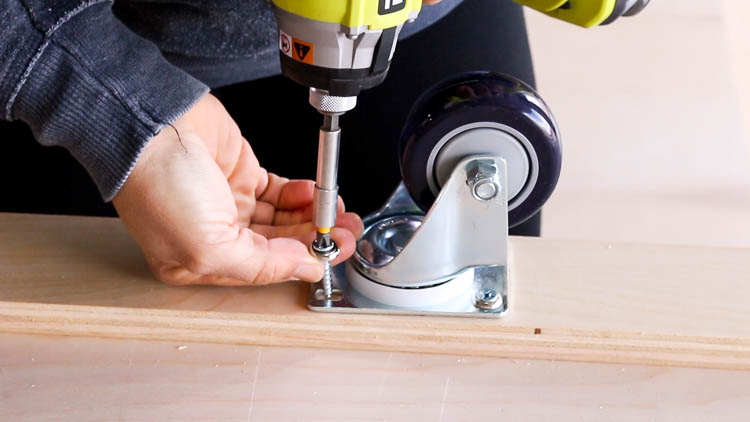
With the bottom frame in place, install your casters:
- 3″ swivel casters at the two center mounting points
- 3″ locking swivel casters at all four outside corners
The locking casters are essential — you want this bench to stay exactly where you park it while you’re cutting.
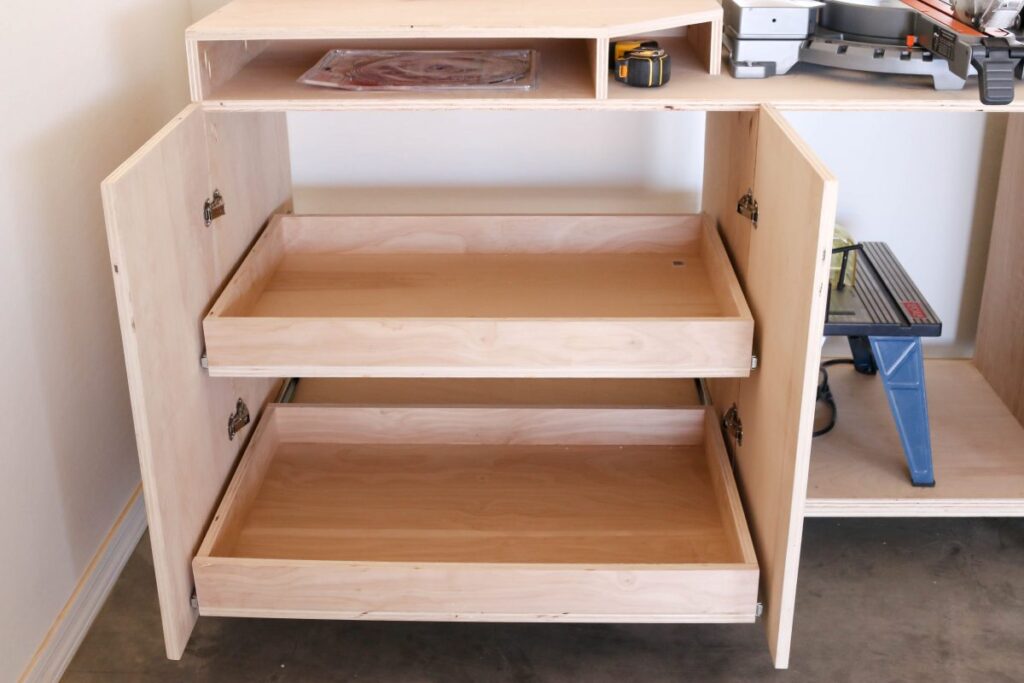
Step 6: Build the Pull-Out Shelves
Rather than standard fixed shelves, I went with pull-out shelves on drawer slides. Workshop cabinets have a way of becoming a black hole — things go in and are never seen again. Pull-outs fix that completely.
Build your shelves to fit the cabinet openings, leaving the appropriate clearance on each side for your chosen drawer slides.
Step 7: Install the Drawer Slides

Install 22″ side-mount drawer slides rated at 100 lbs capacity — more than enough for tool storage.
Tool Recommendation: If you don’t already own a drawer slide installation jig, this is the time to get one. The Rockler Universal Drawer Slide Jig makes this process dramatically faster and more accurate. I’ve used mine on everything from shop furniture to bedroom dressers and it never disappoints.
Step 8: Hang the Cabinet Doors
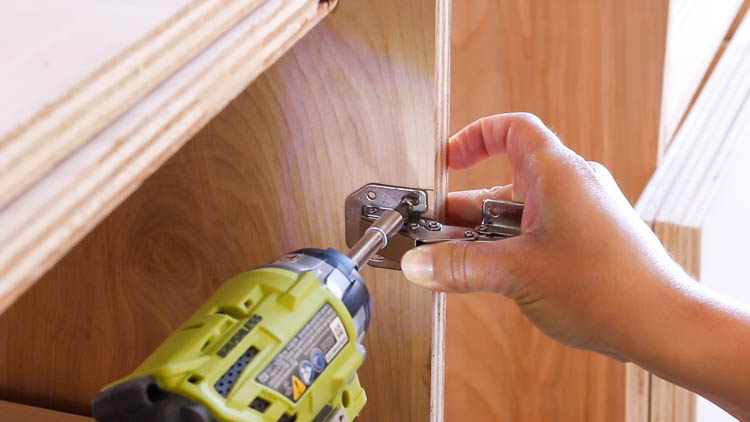
Mark and pre-drill your cup hinge holes before installing the euro hinges. It takes an extra two minutes and saves you from fighting screws into undrilled plywood. Don’t skip this step — you’ll regret it if you do.
Install the euro hinges and hang the doors, adjusting for a consistent gap and flush alignment.
Step 9: Build and Attach the Table Top Frame
The table top needs to sit flush with the top of your miter saw base. Here’s how to calculate the frame height:
Frame piece width = Miter saw base height − Plywood thickness
For example: if your miter saw base is 4-1/2″ tall and your plywood is 3/4″ thick, cut your frame pieces at 3-3/4″ wide.
Note: Measure your actual plywood thickness rather than assuming it’s exactly 3/4″. Sheet goods vary, and even a 1/32″ difference can throw off your flush surface.
Step 10: Cut the Table Top Corners
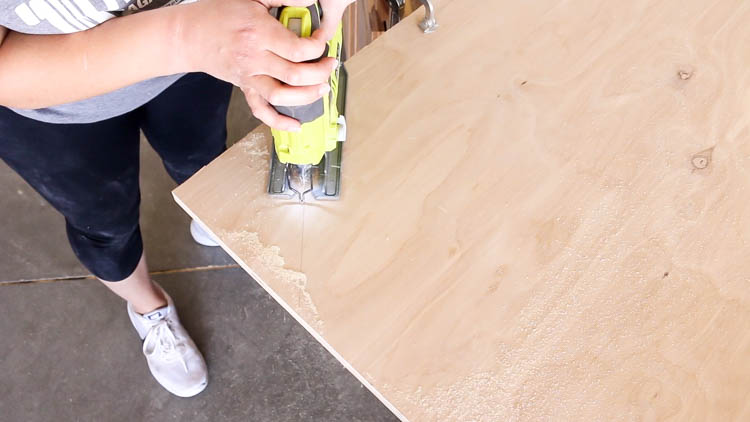
Because a miter saw base swings left and right for bevel and angle cuts, the front corners of the table top need to be notched out to allow clearance. Measure your saw’s swing radius, mark the corners, and cut them off with a jigsaw.
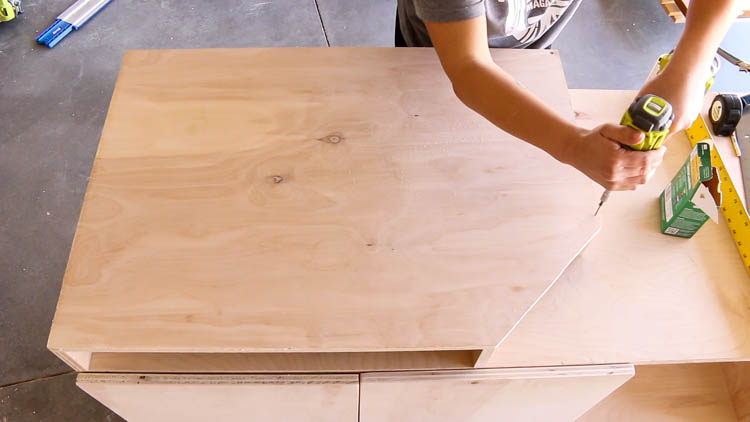
Attach the table tops with wood glue and 1-1/4″ wood screws.
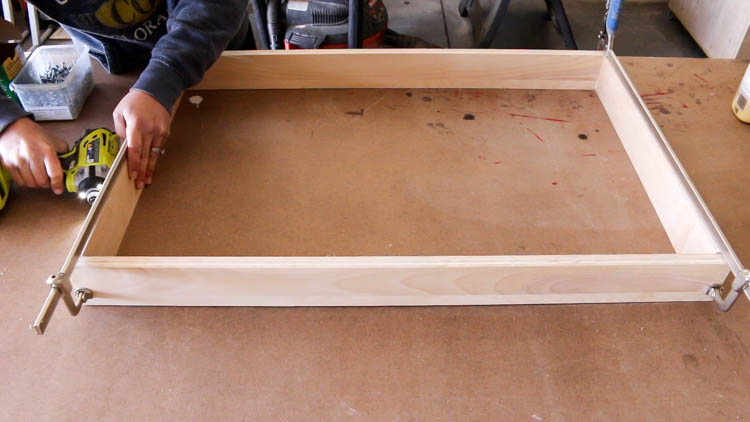
Step 11: Install the Fence
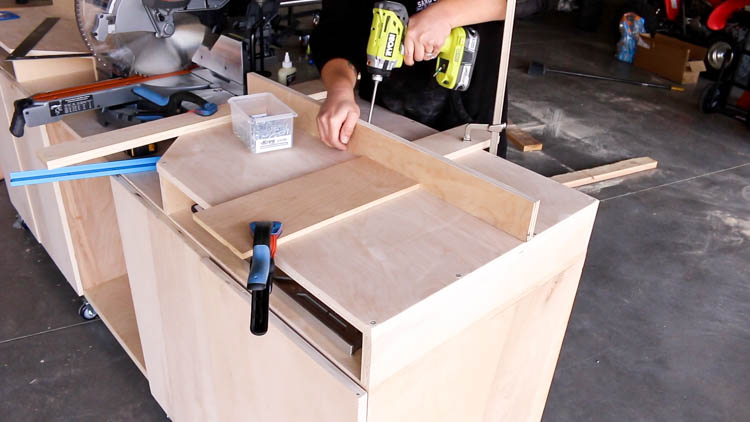
Position your miter saw exactly where you want it on the bench. Use a carpenter’s square to make sure the saw fence is perfectly perpendicular to the ends of the bench, then clamp a scrap wood guide in place.
Glue and attach the plywood fence using 1-1/4″ pocket screws.
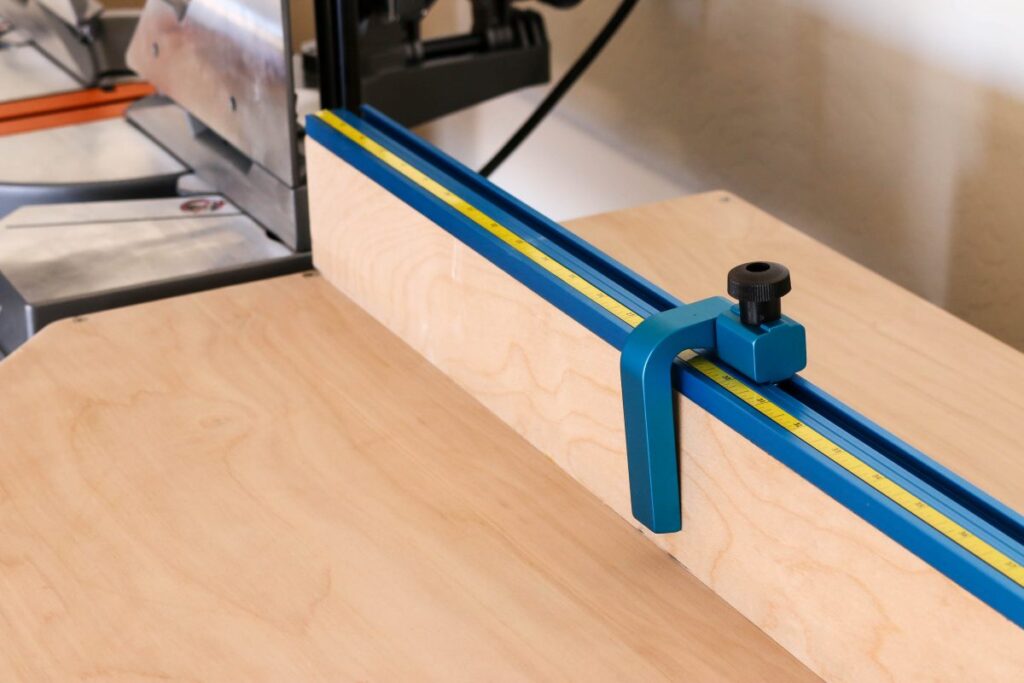
Step 12: Add the T-Track Fence Cap
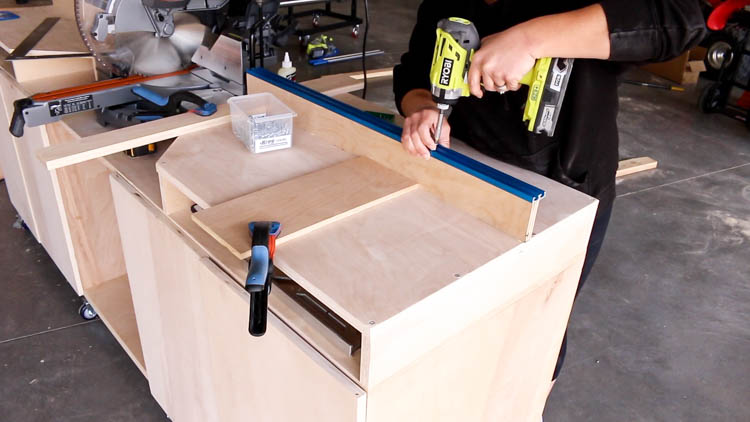
Install the double T-track fence cap using 5/8″ wood screws. The fence cap comes in 36″ lengths — since the bench fences are 34″, trim 1″ off each end rather than cutting 2″ off one end. Cutting from one end only means slicing through a pre-drilled hole, which looks sloppy. Worth the extra step.
Use an angle grinder with a metal cutoff disc to trim the aluminum track cleanly.
Step 13: Bolt the Saw to the Bench
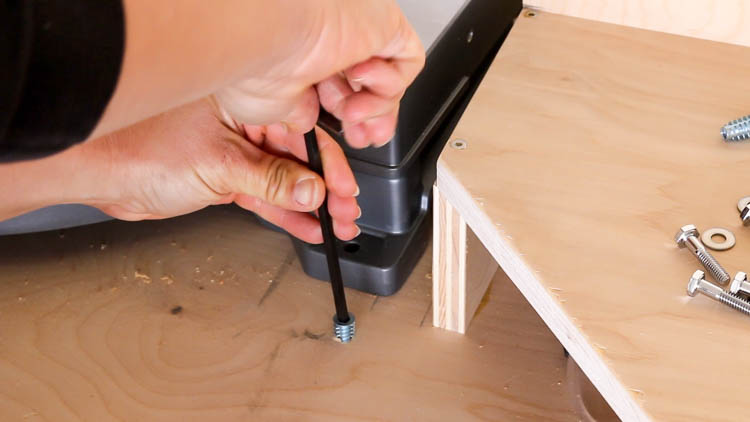
Bolt your miter saw down to the bench. If your saw’s mounting holes happen to land over internal dividers (as mine did), use threaded insert nuts instead of through-bolts. Install the inserts into the bench top and bolt the saw down — it’s rock solid and you don’t have to relocate anything.
Step 14: Install the Tape Measure Insert and Flip Stops
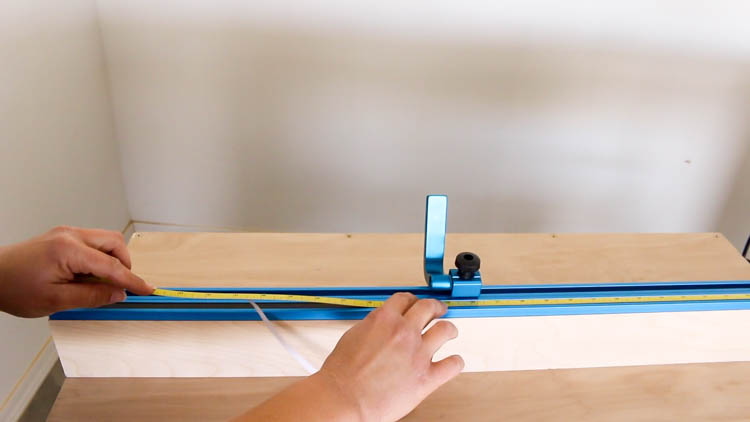
The T-track tape measure insert is an optional but genuinely useful add-on. The insert slides into the T-track — it’s a tight fit by design, so you may need to shave the bottom or edges slightly for it to seat.
To set it up correctly:
- Measure the distance from your miter saw blade to the edge of the T-track
- Trim your tape measure to start at that measurement (mine was 14″)
- Peel the adhesive backing and stick it down to the insert
- Slide the insert into the track
Finally, slide your flip stops into the track and your bench is complete.
Finished Build
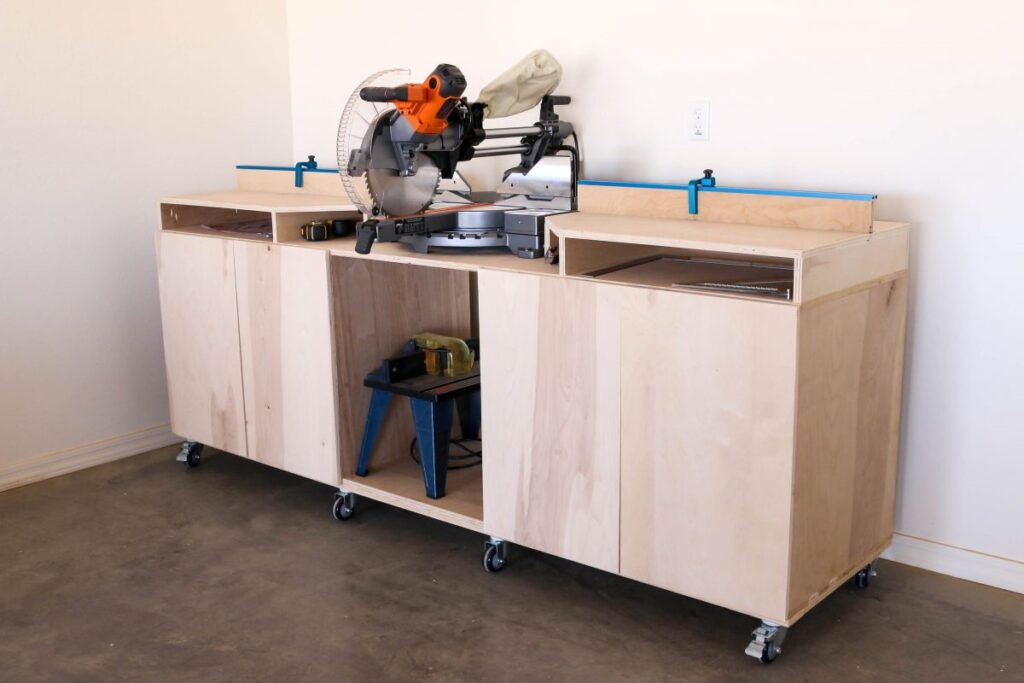
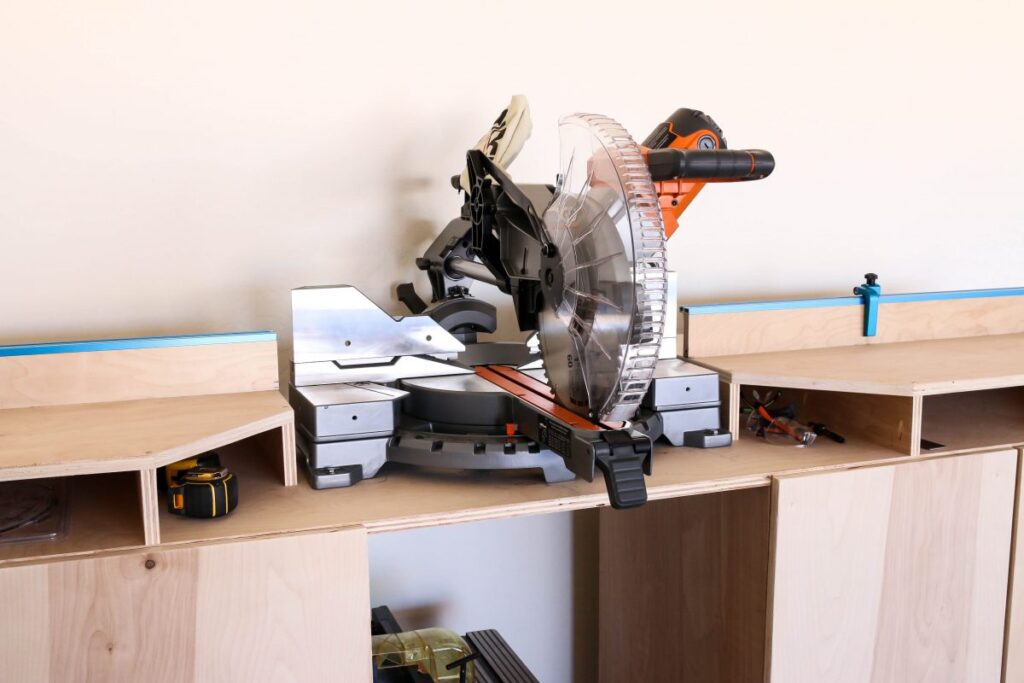
This miter saw station completely changed how I use my shop. Having a table surface that’s perfectly level with the saw base means no more stacking scrap wood to prop up long boards — they just rest flat and supported on both sides of the blade. The pull-out shelves keep everything accessible, and the flip stop fence makes repetitive cuts faster and more accurate than I ever managed before.
📐 [Download the Free Printable Plans] — includes full materials list and cut list ▶️ [Watch the Full Build Video on YouTube]
Related post — Mobile Cart for the Kreg Foreman with Hidden Dust Collection
Frequently Asked Questions
What size plywood do I need for this miter saw bench? The main carcass, shelves, table tops, and fence are all built from 3/4″ plywood. A project like this typically requires 3–4 full sheets depending on your bench dimensions.
What’s the best way to determine table top height? Measure the height of your miter saw base, then subtract the thickness of your plywood. That gives you the width to cut your frame pieces so the top sits perfectly flush with the saw base.
Do I need to bolt the miter saw to the bench? Yes — bolting the saw down prevents any shifting during use. If your mounting holes land over internal structure, threaded insert nuts are an elegant solution that still gives you a solid, removable connection.
Can I build this bench without a pocket hole jig? You can substitute other joinery methods (dowels, biscuits, or even just screws with pilot holes), but a pocket hole jig makes this build significantly faster and the joints are plenty strong for shop furniture.
What caster size should I use? 3″ casters work well for most shop floors. Go with at least locking swivel casters on the corners so the bench doesn’t creep during use.
Disclosure: This post was created in partnership with Rockler Woodworking and Hardware. Product and/or compensation were provided. All opinions and project details are entirely my own. This post contains affiliate links — if you purchase through one of these links, I may earn a small commission at no additional cost to you.