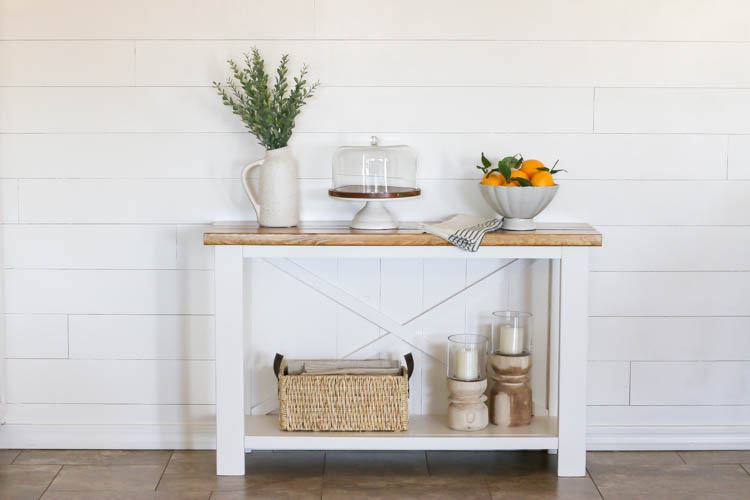
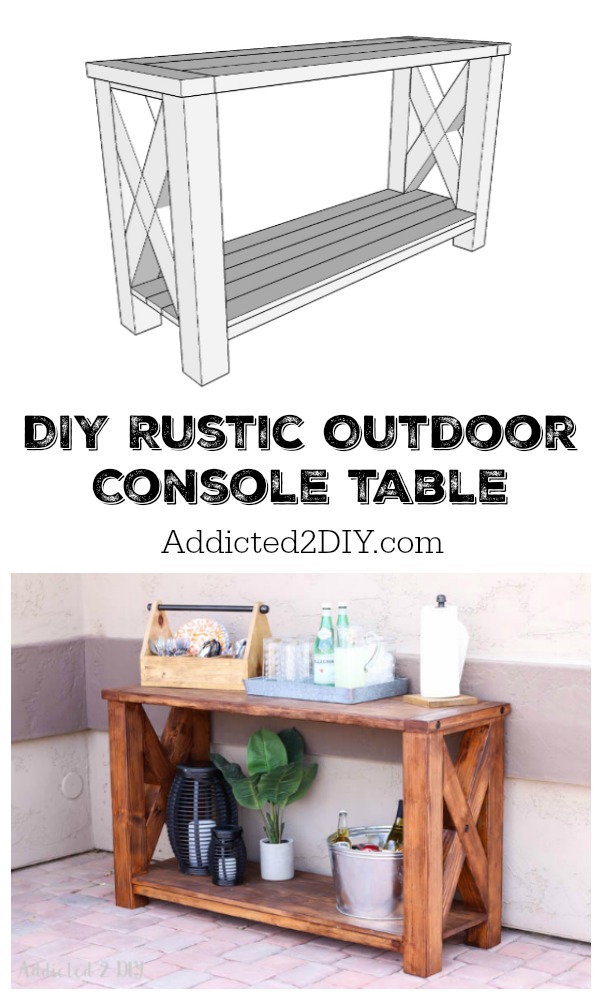
DIY Rustic Outdoor Console Table
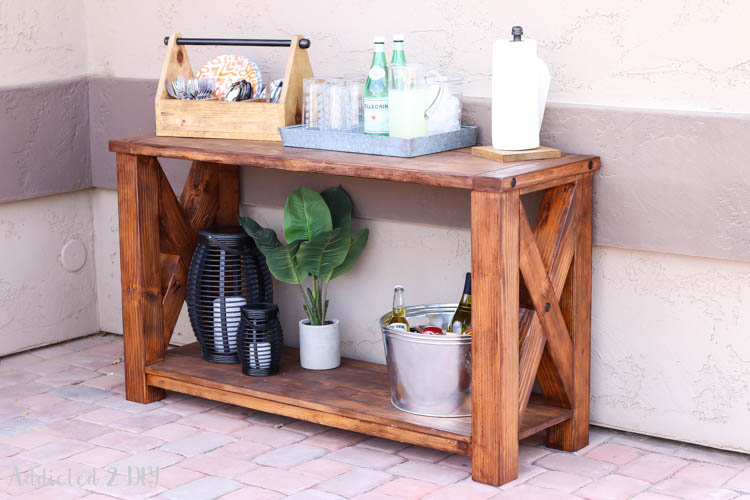
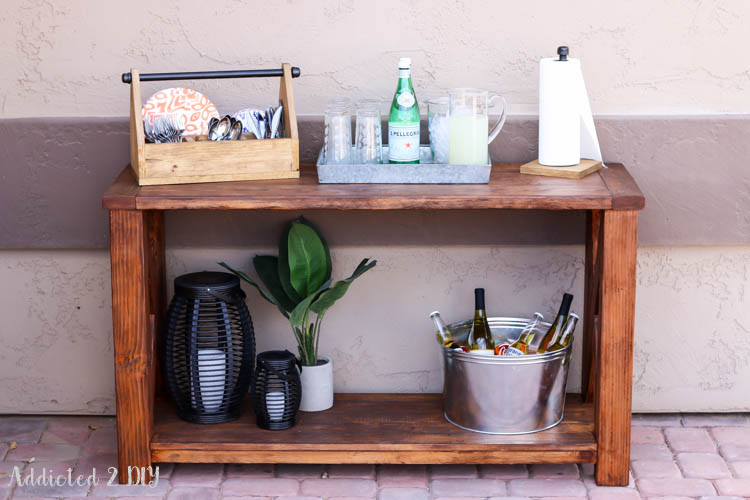
If you’ve been looking for a way to upgrade your patio without spending Pottery Barn prices, this DIY rustic outdoor console table is the project for you. I built this nearly 5-foot-long beauty for less than $100 lumber — and yes, I was shocked too.
This build was my entry for the Great Outdoors Challenge, a blog hop where DIYers and makers created outdoor projects with a building element. Scroll to the bottom to link up your own project — no website required!
What I Used as Inspiration
This table is modeled after the Pottery Barn Benchwright Outdoor Console Table. I loved the X-brace detail, the chunky breadboard ends, and the decorative lag bolts — but I did not love the price tag. Our back patio desperately needed a furniture upgrade. The old baker’s rack had turned into a dumping ground for random stuff, and this console was the perfect replacement for a drink station or party buffet.
Download the free printable plans to build your own.
Materials & Tools
Materials:
- 4×4 lumber (legs and X-braces)
- 1×4 boards (top supports)
- 1×2 boards (bottom shelf frame)
- 2×6 and 2×8 planks (tabletop)
- 3/4″ lag bolts (spray-painted oil rubbed bronze)
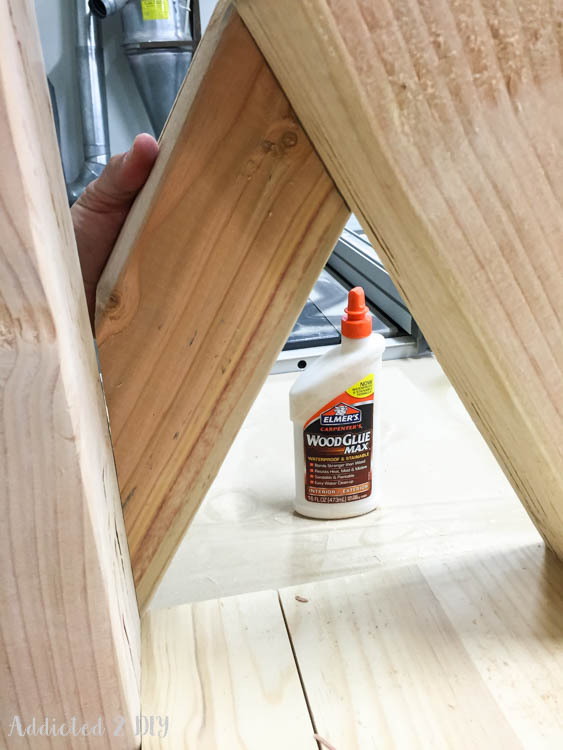
- Wood glue
- 1-1/4″ pocket screws
- 2-1/2″ pocket screws
- 3″ wood screws
- Minwax Gel Stain in Hickory
Tools:
- Kreg Jig (3/4″ and 1-1/2″ pocket holes)
- Kreg R3
- Drill with offset adapter
- Impact driver
- Circular saw or miter saw
- 1″ forstner bit
- 27/64″ drill bit
- 3/4″ ratchet
- Sander
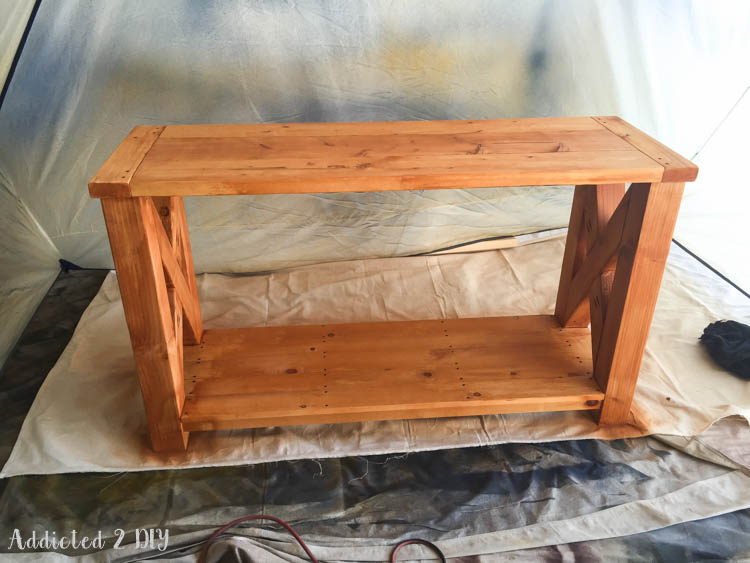
How to Build a DIY Rustic Outdoor Console Table
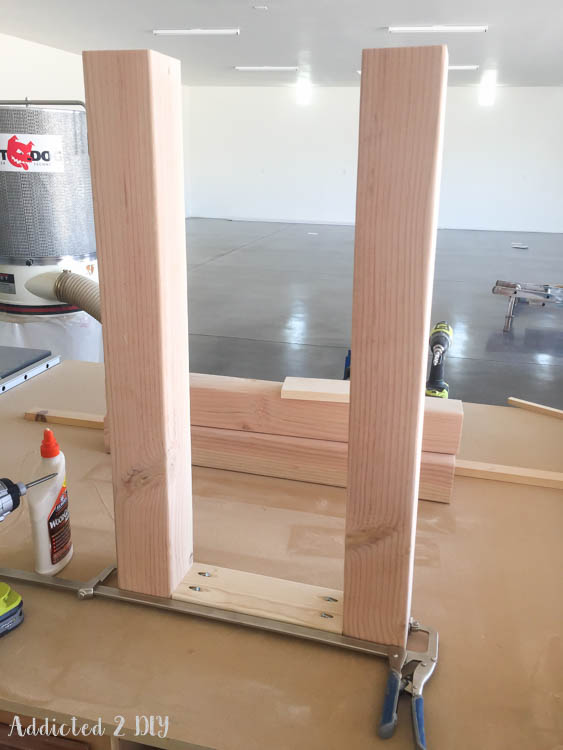
Step 1: Assemble the Leg Frames
Start by assembling each end’s leg frame. Drill 3/4″ pocket holes into the 1×4 top supports using your Kreg Jig, then attach them to the 4×4 legs with wood glue and 1-1/4″ pocket screws.
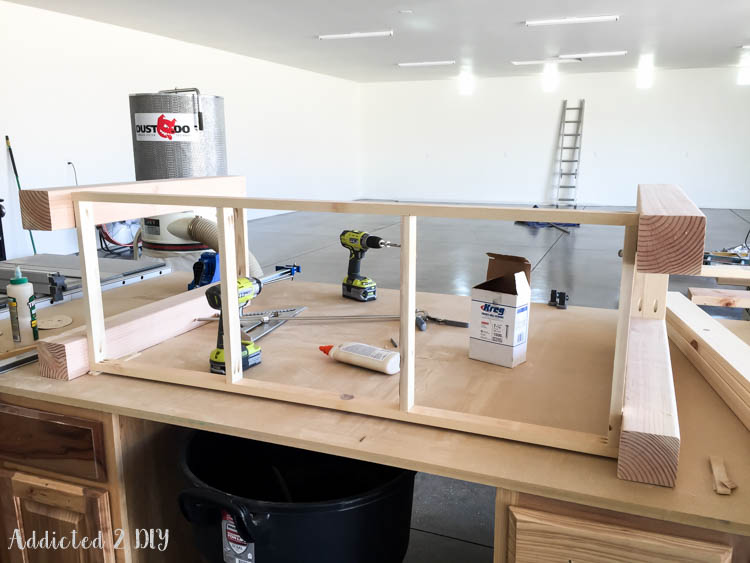
Step 2: Build the Bottom Shelf Frame
Once both leg assemblies are complete, build the support frame for the bottom shelf. Drill 3/4″ pocket holes into the ends of the front, back, and cross supports, then join everything with 1-1/4″ pocket screws and wood glue. Attach the end 1×2s to the 4×4 legs with 1-1/4″ wood screws and glue.
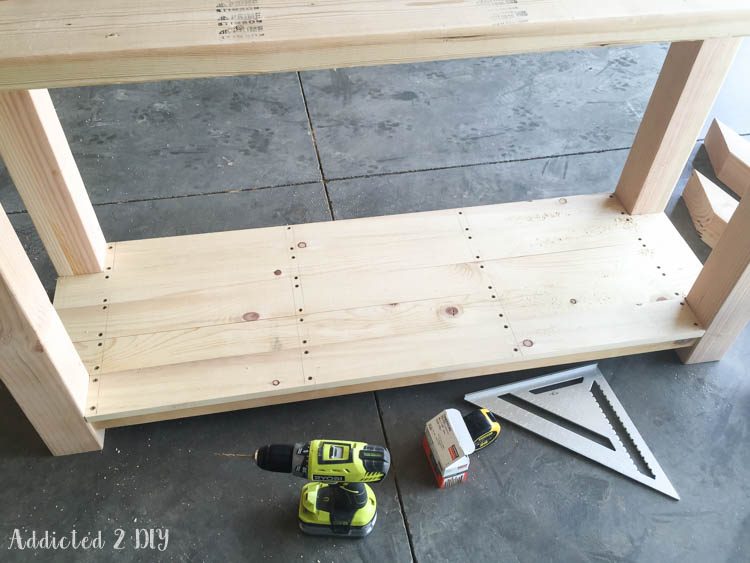
Step 3: Attach the Bottom Shelf Boards
Cut your bottom shelf boards to length, then attach them to the frame using wood glue and 1-1/4″ wood screws.
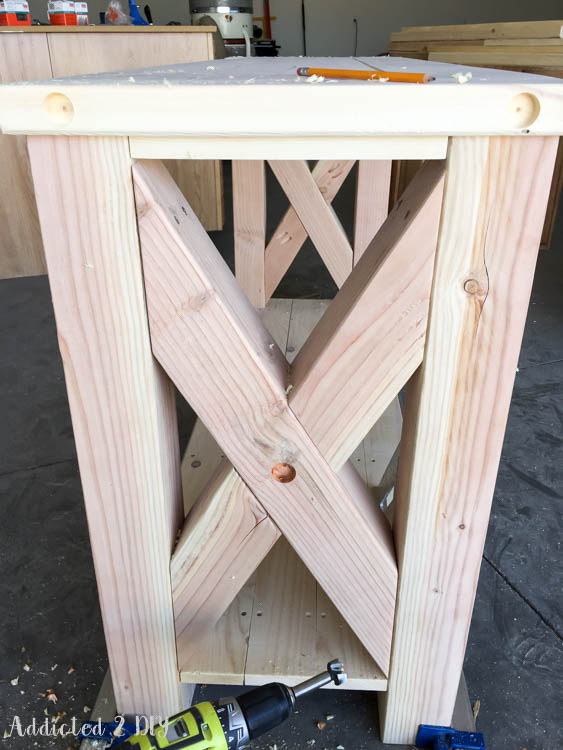
Step 4: Cut and Attach the X-Braces
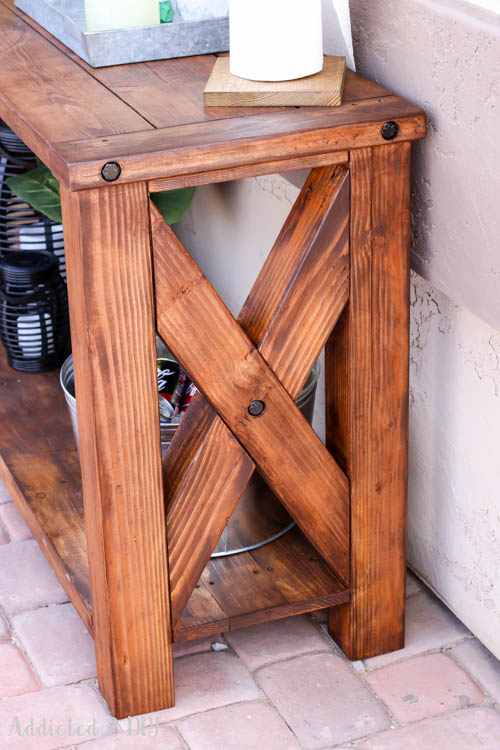
Hold the 4×4 brace pieces up to the legs and mark the angles with a pencil. For this table, each long piece gets a 60-degree cut on both ends. The short center pieces get 60-degree angles where they meet the legs and a 30-degree angle where they join in the middle.
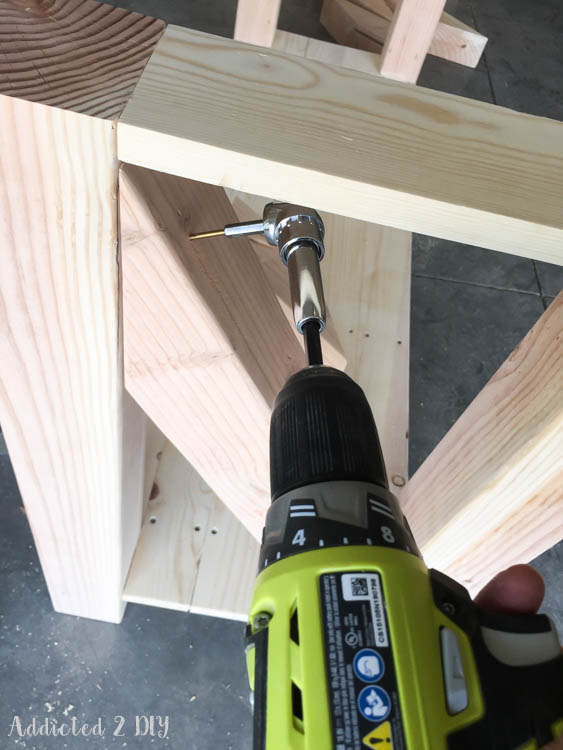
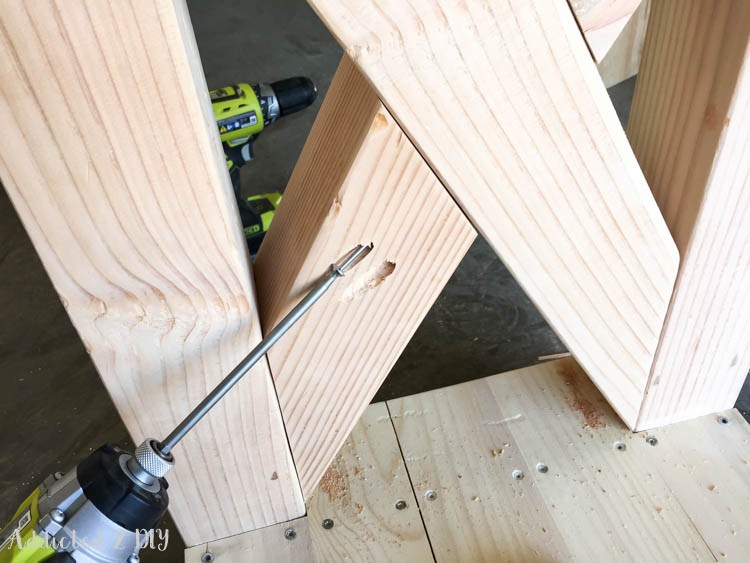
Drill 1/8″ pilot holes at the leg ends and drive 3″ wood screws into the 4×4 legs. An offset drill adapter is a lifesaver here — it’s a tight spot to work. Use your Kreg R3 to drill 1-1/2″ pocket holes into the center meeting points and join with 2-1/2″ pocket screws.
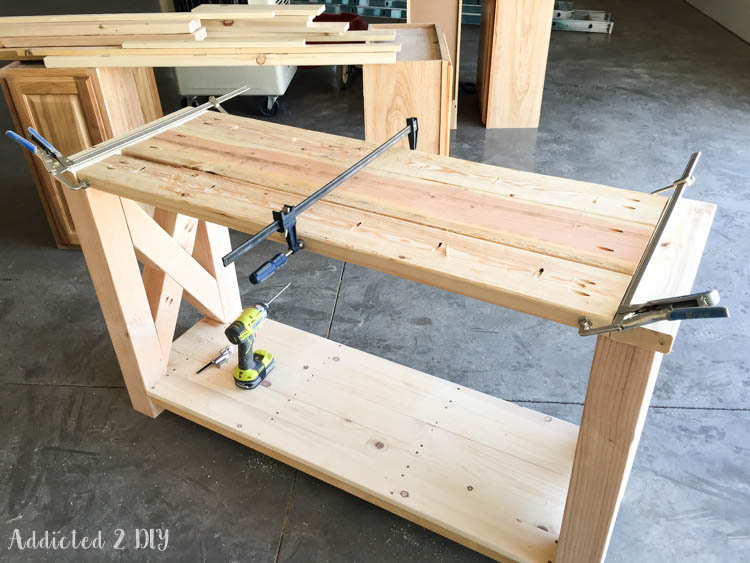
Step 5: Build the Tabletop
Drill 1-1/2″ pocket holes into the inside edges and ends of each 2×6 and 2×8 plank, then join them all together with 2-1/2″ pocket screws. Cut your breadboard ends to size, clamp them in place, and attach them to each end of the tabletop.
Step 6: Attach the Top to the Base
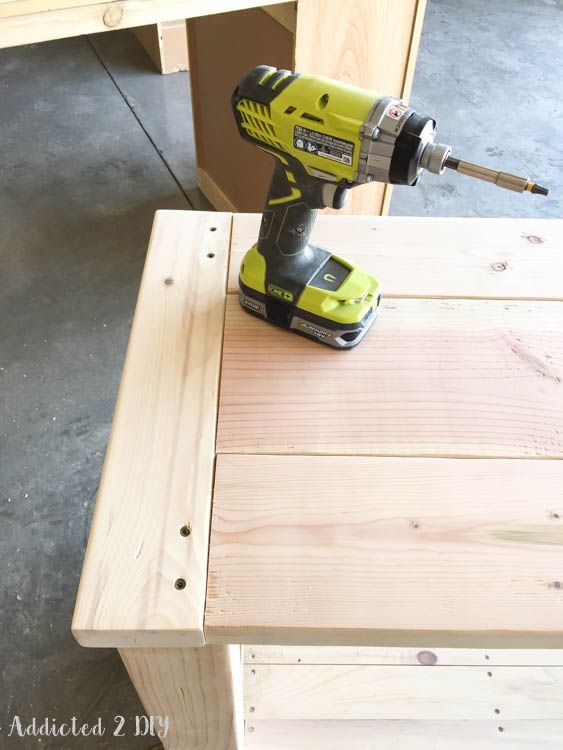
Sand the tabletop, flip it over, and drill 1/8″ pilot holes through the breadboard ends to attach them to the 4×4 legs using 3″ wood screws. For extra strength, drive 1-1/4″ wood screws up through the bottom of the 1×4 top braces into the breadboard ends.
Step 7: Add the Decorative Lag Bolts
Drill countersunk holes approximately 1/2″ deep using a 1″ forstner bit — one in the center of each X-brace and one on each corner of the breadboard ends. Then drill pilot holes using a 27/64″ bit for the 3/4″ lag bolts.
Spray the lag bolts with oil rubbed bronze spray paint, let them dry, then screw them into place with a 3/4″ ratchet.
The Staining Disaster (And How I Fixed It)
Let’s talk about what went wrong — because it went very wrong.
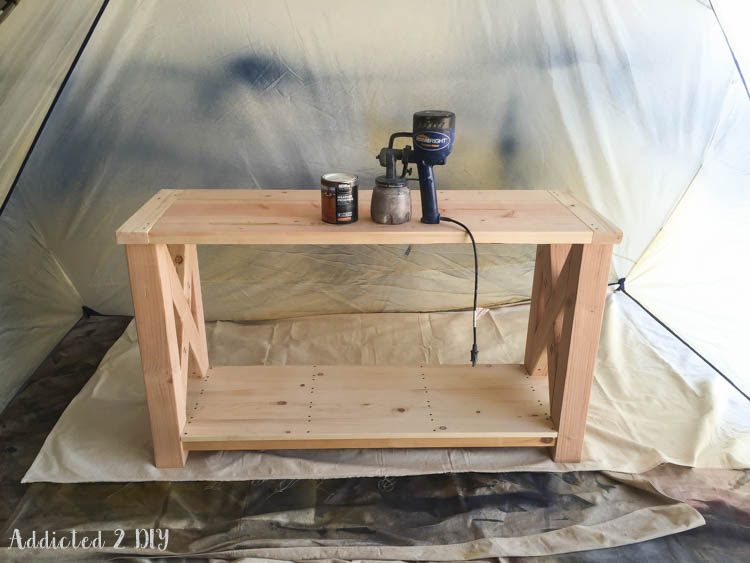
I settled on a transparent weatherproof stain in “natural cedar,” thinking it looked fine on the wood swatch. Spoiler: never fully trust wood swatches. I sprayed the entire table before realizing it had turned a bright, deeply upsetting shade of orange. I was devastated. (Not gonna lie — I briefly considered dragging it to the yard and lighting it on fire.)
Fortunately, some blogging friends talked me off that ledge and suggested gel stain. I’d never used it before, but it saved this project.

I sanded the entire table down to pull back the orange, then tested Minwax Gel Stain in Hickory on a small area. It worked beautifully. Since this table lives under a covered patio — completely shaded and protected from the Arizona sun — I wasn’t worried about using an interior gel stain on an outdoor piece.
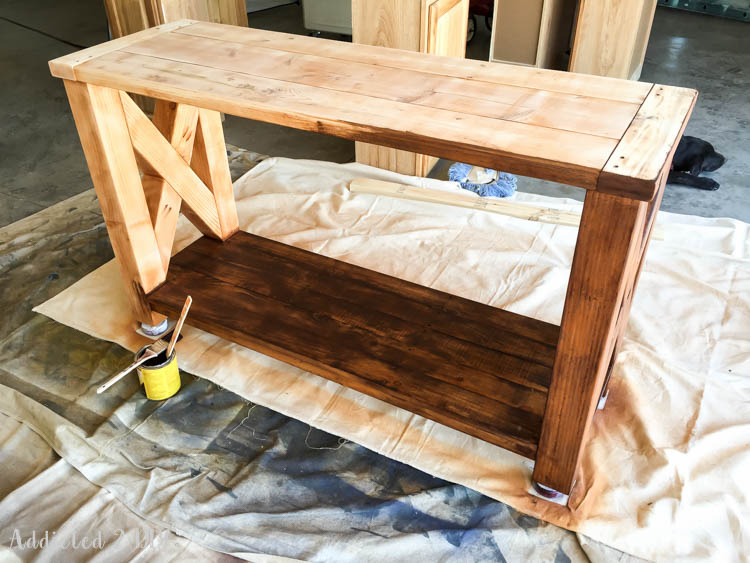
Takeaway: Gel stain is a great rescue tool when a stain job goes sideways. If your project looks like a pumpkin, reach for gel stain before reaching for the matches.
Finished Dimensions
- Length: Nearly 5 feet
- Depth: Just over 18 inches
- Total lumber cost: Under $100
This size works perfectly as a patio drink station, a backyard buffet table, or a decorative console to anchor an outdoor seating area. In fact, I built this table 10 years ago and it’s still going strong on the back patio!
Frequently Asked Questions
Can this table be used fully outdoors? This particular table is finished with an interior gel stain, so it’s best suited for a covered patio or shaded area that’s protected from direct rain and harsh sun. If you plan to use it in a fully exposed location, use a weatherproof exterior stain or sealant instead.
What wood should I use for an outdoor console table? Cedar and redwood are naturally rot-resistant and hold up well outdoors. For a covered patio, standard pine or SPF lumber works fine with proper sealing.
How difficult is this build for a beginner? This is an intermediate build. The X-brace angles require a bit of confidence with a miter saw, but the rest of the joinery is straightforward pocket-hole construction. The free printable plans walk you through every cut. You can also omit the X brace legs and this immediately becomes an easy, beginner project.
What do the decorative bolts actually do? In this build, they’re purely decorative — added for the Pottery Barn-inspired industrial look. The real structure comes from the pocket screws and wood glue.
How much does it cost to build? I spent less than $100 in lumber and materials.