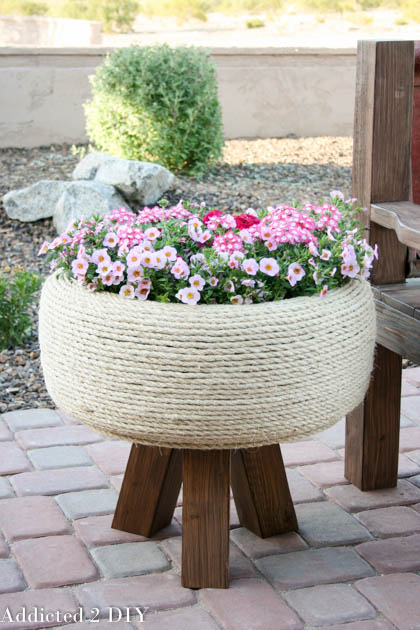
Turn An Old Tire Into A Gorgeous Planter
Earth Day is coming up next month, which makes it the perfect time to start thinking about ways to reduce, reuse, and recycle. I’ve always loved the challenge of finding creative ways to keep things out of the trash and turn them into something useful instead. If you don’t believe me, you should see my scrap wood pile. I hate throwing things away when they could become a great project.
For this tire planter, I was able to recycle an old tire from my local Discount Tire and use scrap wood I already had on hand. I love how it turned out, and it’s such a fun way to turn something old into something beautiful for your porch or patio.
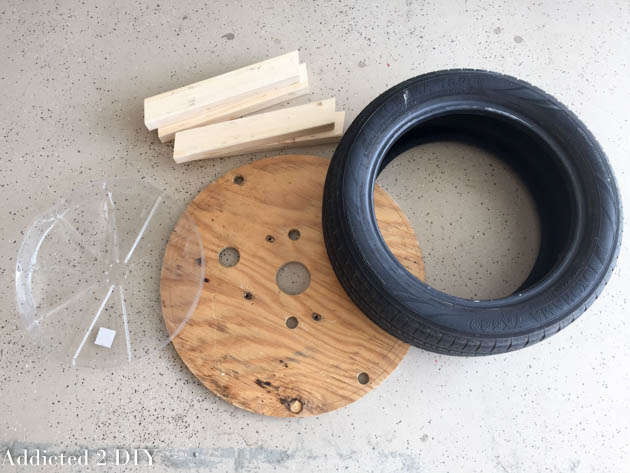
Supplies Needed
Here’s what you’ll need to build your own tire planter:
- 1 old tire
- 1 4×4 board, cut into 3 pieces, each 12 inches long, with 15-degree angles at each end
- Approximately 200 feet of 3/8-inch sisal rope
- Weatherproof stain
- 2-inch pocket hole screws
- Kreg Jig or angle brackets
- 2-inch bolts and nuts
- 3/4-inch plywood or the end of a wooden spool
- Jigsaw with a scroll blade
- Drill with 3/8-inch drill bit
- Hot glue gun
- Super glue
- Plastic planter tray
Step 1: Cut the Legs
I originally planned to use 1×3 boards for the legs, but once I started laying everything out, they just didn’t feel substantial enough. Since this planter would need to support the weight of the tire, soil, and flowers, I switched to a 4×4 from my scrap wood pile instead.
I cut three legs, each 12 inches long, with 15-degree angles at both ends. Using three legs gives the planter a nice balanced look, and the angled cuts help the finished piece sit well.
Step 2: Make the Wooden Base
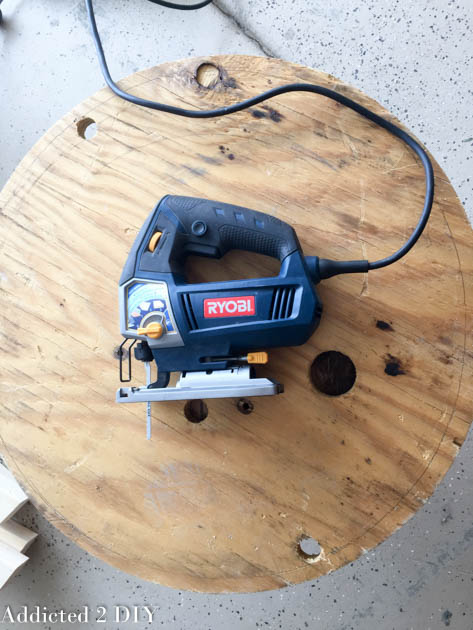
For the base, I used the end of an old wooden spool that I had left over from another project. If you don’t have one, a piece of 3/4-inch plywood works just as well.
To size the base, I set it on top of the tire and traced around the inside so I could get the right diameter. I wanted the wood base to be about 1 inch smaller than the tire all the way around. That way, it would fit nicely inside without showing too much.
Once I had my circle marked, I cut it out using a jigsaw.
Step 3: Drill Holes for the Bolts

Next, I needed to attach the wood base to the tire. I grabbed some nuts and bolts from our hardware stash and figured out where I wanted them placed.
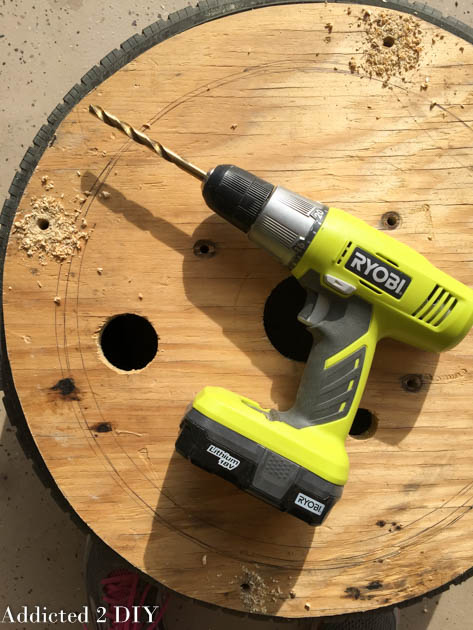
Using a 3/8-inch drill bit, I drilled four holes through the wood base and into the sidewall of the tire.
Step 4: Bolt the Base to the Tire
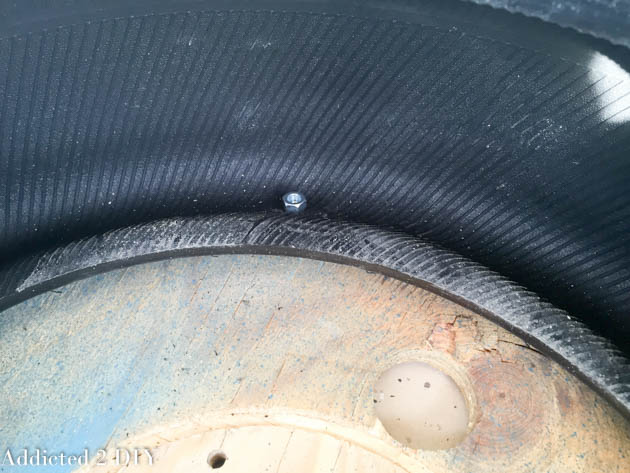
After drilling the holes, I pushed the bolts through the wood and tire, then flipped the tire over so I could attach the nuts.
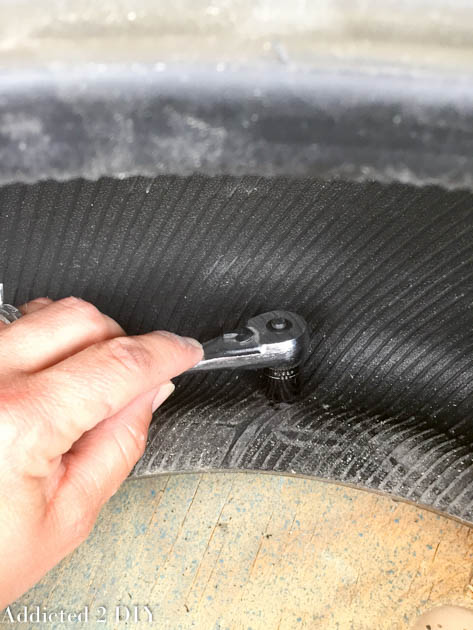
This part was a little awkward because the bolts didn’t stick out very far at first. I found that standing on the inside of the tire sidewall pushed the bolts through just enough to get the nuts started.
Once they were all in place, I tightened everything down with a ratchet.
Step 5: Wrap the Tire with Rope
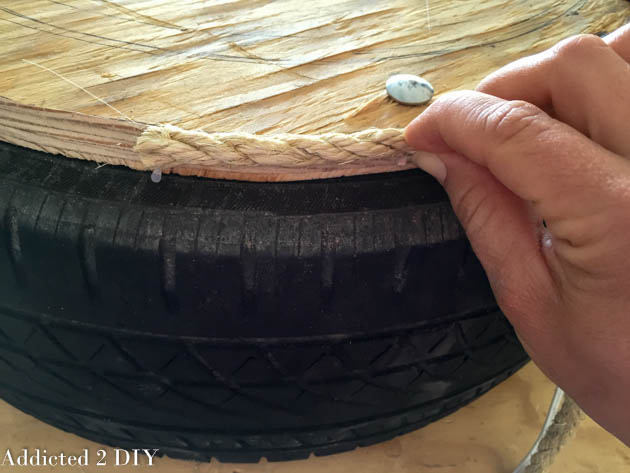
This is the step that really transforms the whole project.
Starting at the bottom edge of the wood base, I began gluing the sisal rope around the outside of the tire. I used both hot glue and super glue as I worked. The hot glue helped hold the rope in place right away, while the super glue gave it a stronger, more permanent hold.
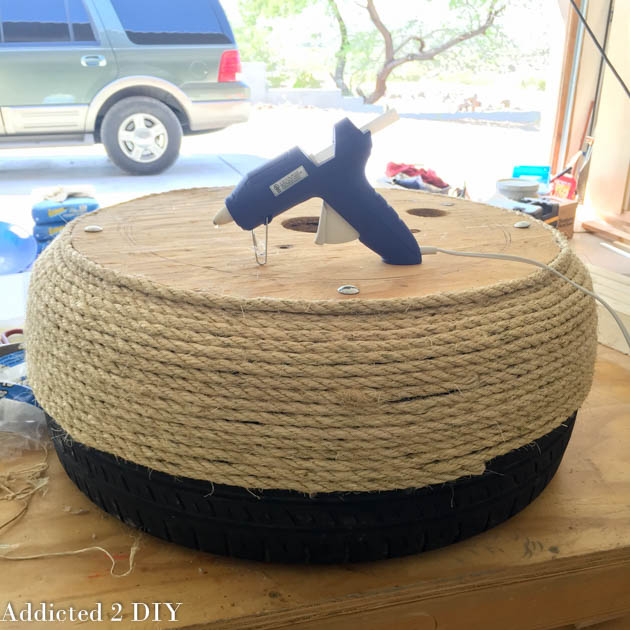
I kept wrapping the rope tightly around the tire, one row at a time, until the entire outside was covered.
This step definitely takes a while, so don’t rush it. I actually carried the tire inside and worked on it while watching TV. It made the process much more enjoyable.
Step 6: Find the Leg Placement
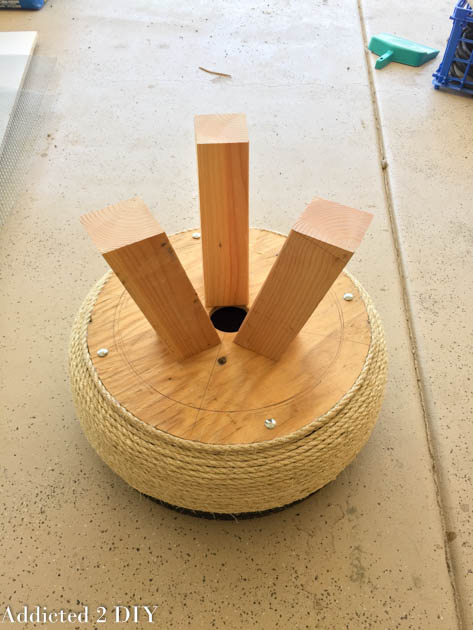
Since I had never built anything with only three legs before, figuring out where to place them took a little trial and error.
I found the center point of the base and arranged the legs in a triangle pattern so they would be evenly spaced. Once I liked the placement, I marked each leg position with a pen.
Taking a few extra minutes here is worth it because it helps the planter sit evenly when it’s finished.
Step 7: Drill Pocket Holes in the Legs
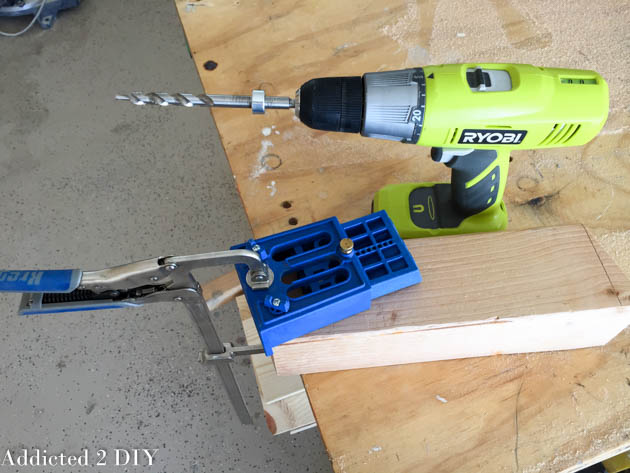
To make sure the planter would be sturdy enough to hold the tire and flowers, I drilled 1 1/2-inch pocket holes into two sides of each 4×4 leg.
If you have a Kreg Jig, this part is pretty simple. If you don’t, you can use angle brackets instead.
Step 8: Attach the Legs
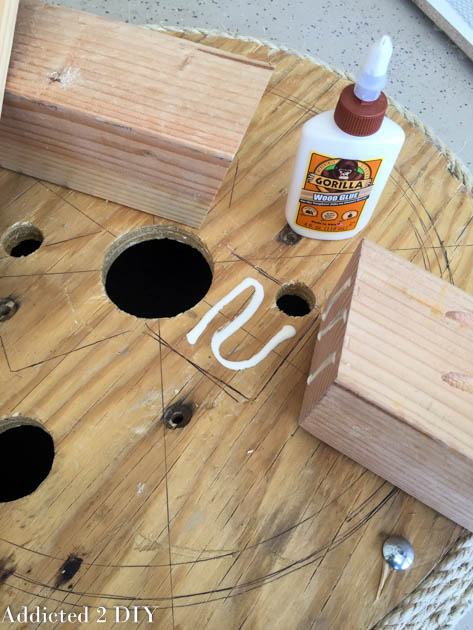
Once the pocket holes were drilled, I glued the legs in place and attached them to the wooden base using 2-inch pocket hole screws.
At this point, the planter really started to come together. It finally looked like more than just a tire and a pile of supplies.
Step 9: Sand and Stain the Legs
After the legs were attached and all of the rope was glued on, I sanded the legs smooth and applied a weatherproof stain.
I used Behr tintable weatherproofing stain in Padre Brown, and a sample-size can was more than enough for this project.
This step helps protect the wood and gives the planter a more finished look.
Step 10: Add Your Flowers
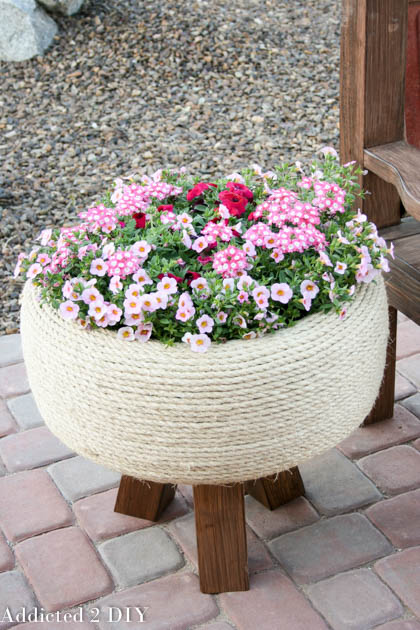
To keep the wood base from staying wet, I added a plastic planter tray inside the tire before putting in my flowers.
I bought a pot of mixed flowers from my local home improvement store, and it fit perfectly inside the planter. I love how colorful it looks, but this would also be so cute planted with herbs or even strawberries.
One thing I really love about the height of this planter is that it helps keep the bunnies in our yard from nibbling on everything.
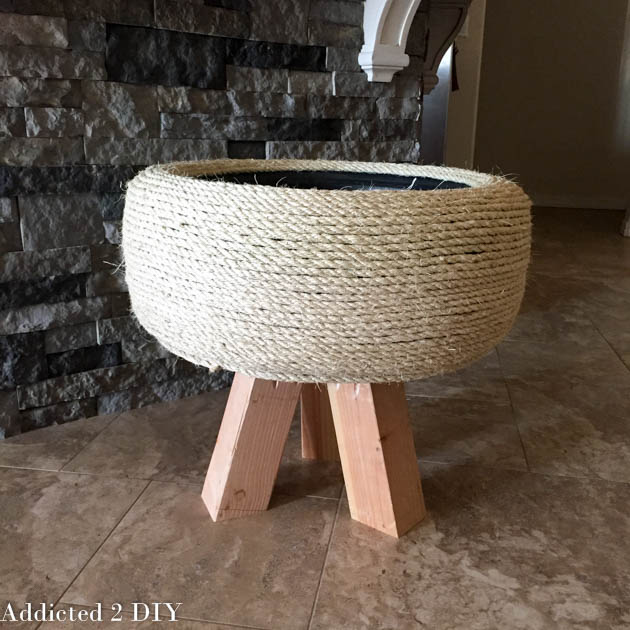
Finished DIY Tire Planter
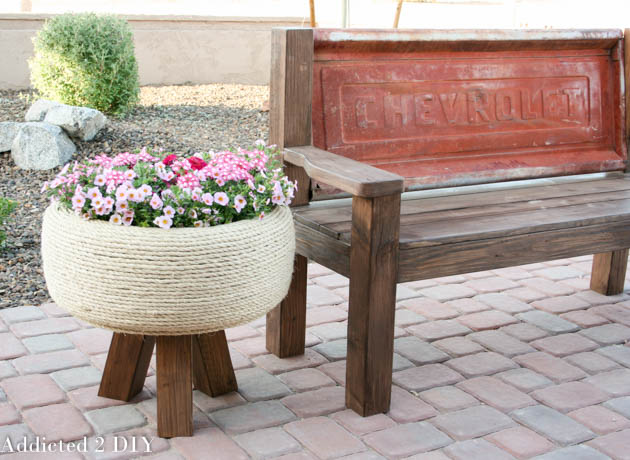
I absolutely love how this tire planter turned out. I had gone back and forth on different ideas for weeks, but once the rope wrapping idea came to me, everything finally clicked. It turned out even better than I imagined.
Truth be told, my husband was not a fan of the idea of me building something with an old tire. But once he saw the finished planter, even he had to admit it looked pretty great. Better Homes and Gardens magazine also thought it was pretty great and they featured me and this project in their magazine the following year!
To keep with the upcycling theme, I also built a bench from an old ’55 Chevy tailgate I had been hanging onto. It ended up being the perfect companion piece to this planter.
If you’ve ever made something from recycled tires, I’d love to hear about it. It’s always fun to see how other people turn old materials into something new. And if you want to try this project yourself, check with your local tire shop. They may be more than happy to help you find an old tire ready for a second life.