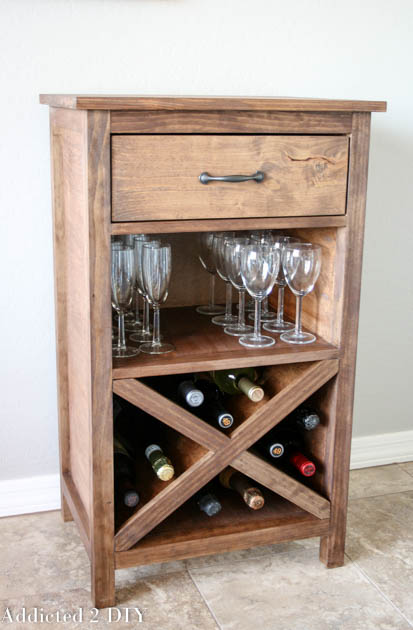
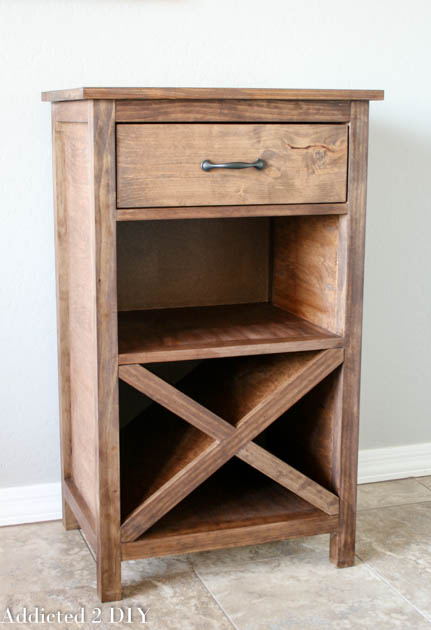
DIY Wine Cabinet
Want a beautiful, handmade place to store your wine bottles and glasses? This DIY wine cabinet holds up to 12 bottles, features a classic X-style wine rack, a middle shelf for glasses, and a small drawer for accessories — all built with basic tools and beginner-friendly pocket hole joinery.
This project is perfect for a weekend build and makes a stunning handmade gift. Download the free printable plans below, then follow the step-by-step instructions to build your own.
Before you start: Read through this entire post and the plans before making a single cut. The full cut list and materials list are included in the downloadable plans.
This post contains affiliate links. If you purchase through one of my links, I earn a small commission at no extra cost to you.
Free Downloadable Plans
The plans include a complete cut list, materials list, and detailed diagrams.
What You’ll Need
Tools
Below is a list of tools that you will need for this build. I have a lot of them linked in my Amazon Storefront!
- Kreg Jig (pocket hole jig)
- Miter saw
- Kreg Rip-Cut or table saw (for breaking down plywood)
- Drill
- Clamps
- Chisel (3/4″)
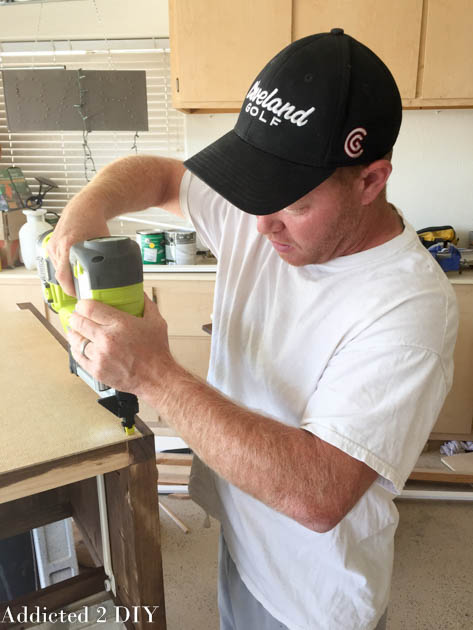
- Brad nailer
Materials
- 2×2 select pine (legs and rails)
- 1×2 pine (trim pieces)
- 1×4 pine (drawer box)
- 3/4″ plywood (side panels, shelves, X wine storage)
- 1/2″ plywood (drawer bottom and back panel)
- Pine project panel (top)
- Pocket screws: 2-1/2″ and 1-1/4″
- Brad nails: 1-1/4″ and 1″
- Wood glue
- Wood filler
- Drawer slides
- Drawer pull
- Stain of your choice
- Polyurethane (3 coats recommended)
Step-by-Step Instructions
Step 1: Build the Cabinet Sides
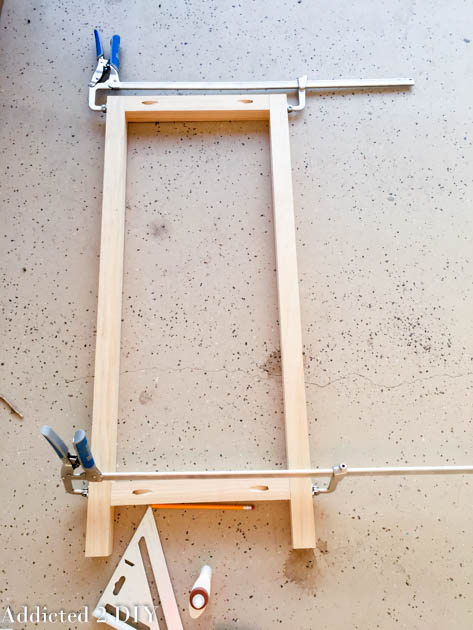
Start by building both side assemblies. Cut your 2×2 select pine legs and rails to size according to the cut list in the plans.
Drill 1-1/2″ pocket holes into each end of the 2×2 rails. Apply wood glue, then attach the rails to the legs using 2-1/2″ pocket screws.
Step 2: Cut the Plywood Side Panels
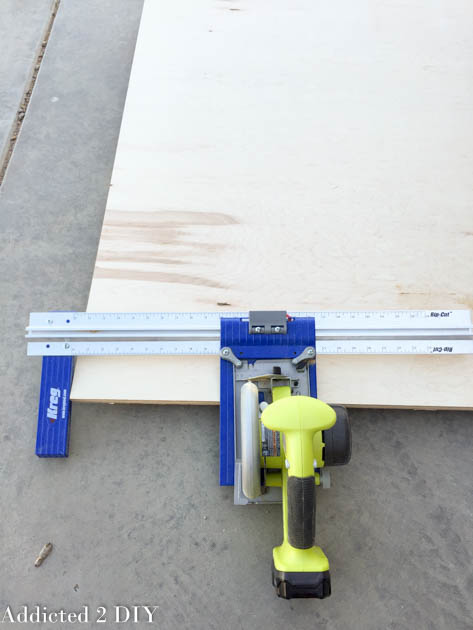
Use a Kreg Rip-Cut or table saw to rip the plywood panels to width for the sides and shelves.
No table saw or Rip-Cut? Your local home improvement store can make rip cuts for you — just keep in mind cuts are typically accurate to +/- 1/8″, so adjust your remaining measurements accordingly.
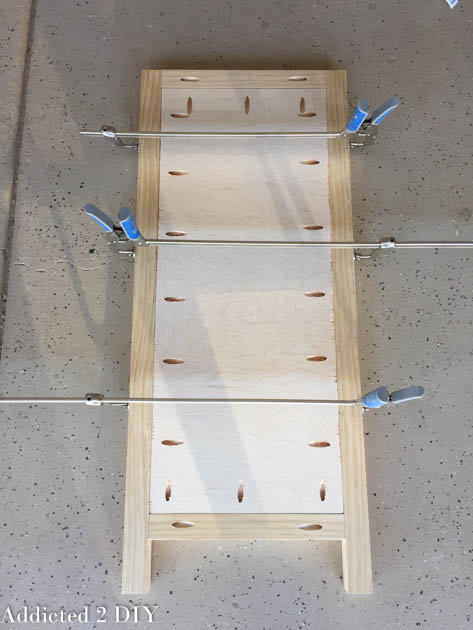
Drill 3/4″ pocket holes into the side panels. Set each panel flush with the inside edge of the cabinet legs and rails, clamp in place, and attach with 1-1/4″ pocket screws.
Step 3: Assemble the Cabinet Frame
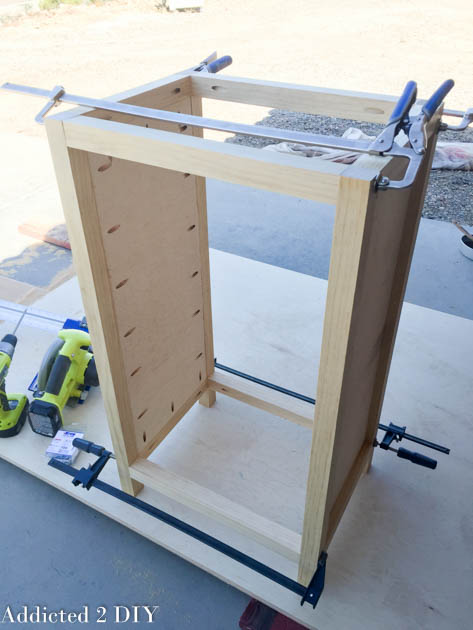
Attach the front and back 2×2 rails to connect the two side assemblies and complete the frame:
- Top rails: flush with the tops of the legs
- Bottom rails: 2-7/8″ up from the bottom of the legs
Step 4: Install the Bottom Shelf
Measure and cut the bottom shelf to size. Drill 3/4″ pocket holes into each side of the shelf, clamp it in place so it sits flush with the top edge of the bottom rails, and attach with 1-1/4″ pocket screws.
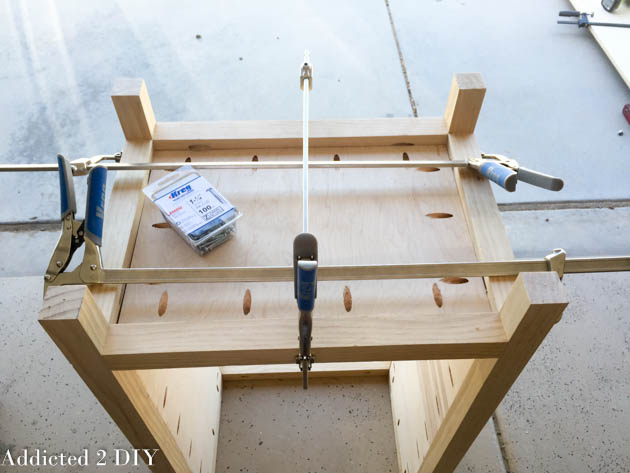
Step 5: Add the Middle Shelf and Front Trim
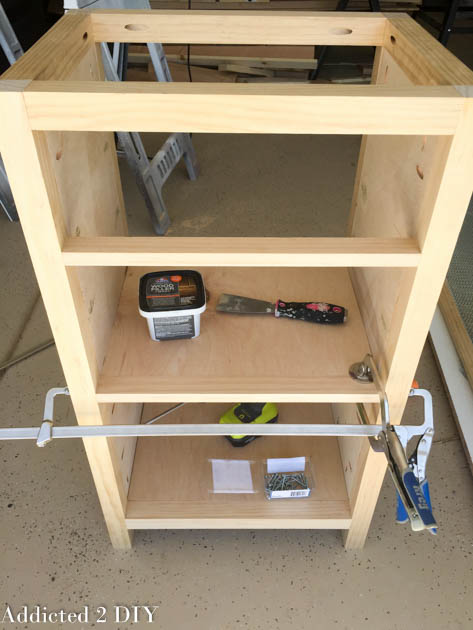
Cut the middle shelf to size and attach it the same way as the bottom shelf.
Cut the 1×2 front trim pieces and attach them using 3/4″ pocket holes and 1-1/4″ pocket screws.
While you have access to all the pocket holes, go ahead and fill them all with wood filler now. Let it dry fully before sanding.
Step 6: Make the X Wine Storage
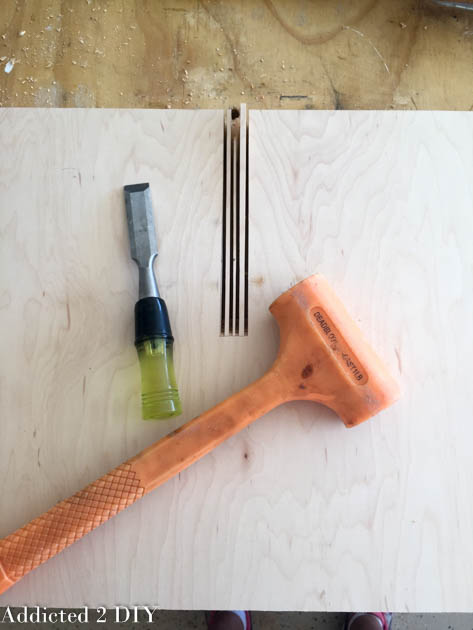
This is the most satisfying part of the build! Here’s how to create the X:
- Measure the diagonal opening and cut two plywood pieces to size.
- Find the center point of each piece and mark the notch location — the notch width equals the 3/4″ thickness of the plywood, and the notch depth equals half the board’s width.
- Use a miter saw to make the outer cuts of each notch, then make a few relief cuts between them.
- Use a 3/4″ chisel to knock out the remaining material and clean up the notch.
- Fit the two pieces together to form the X.
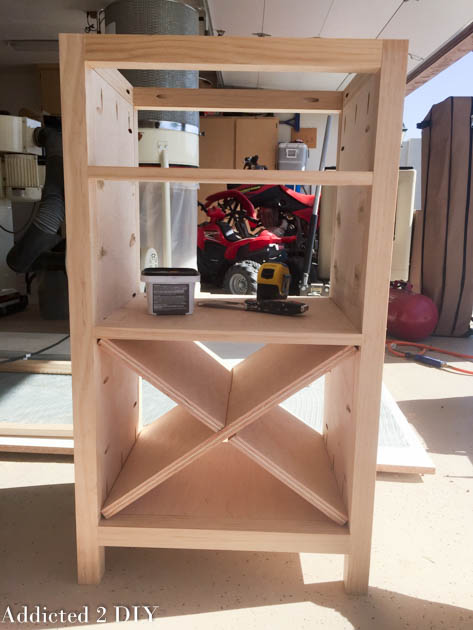
Slide the completed X into the bottom section of the cabinet. It should sit 3/4″ inset from the cabinet face so the trim can sit flush.
Step 7: Cut and Attach the X Trim
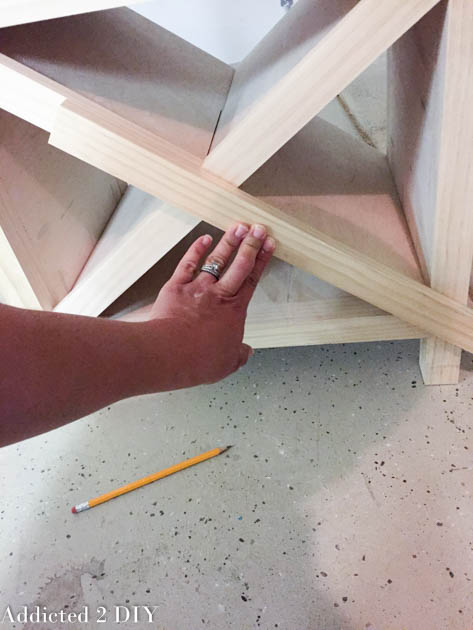
To get the correct miter angle for the trim pieces around the X:
- Hold each 1×2 trim piece in position against the frame.
- Mark the inside edge with a pencil where it meets the X opening.
- Transfer those pencil lines to your miter saw to determine the exact angle.
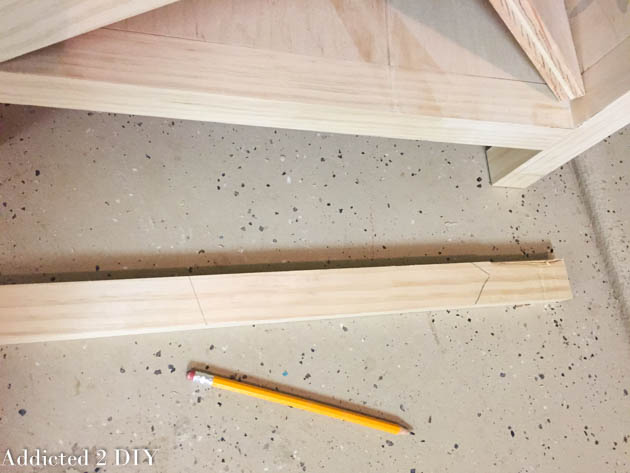
Once cut, glue and nail the trim pieces in place using 1-1/4″ brad nails.
Step 8: Build and Install the Drawer
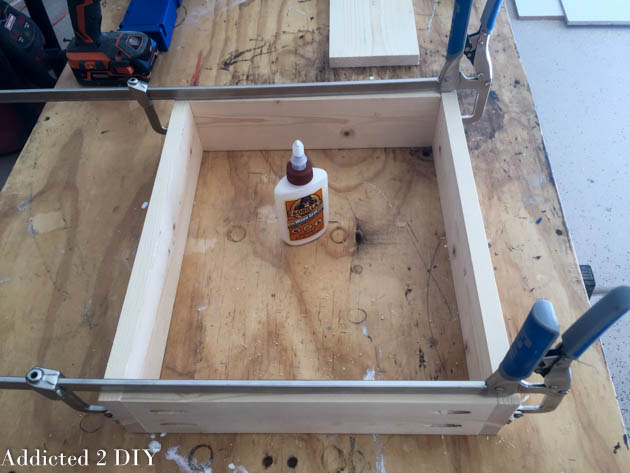
Build the drawer box from 1×4 pine (or substitute 1/2″ plywood as shown in the updated plans). Assemble the four sides with pocket holes and screws.
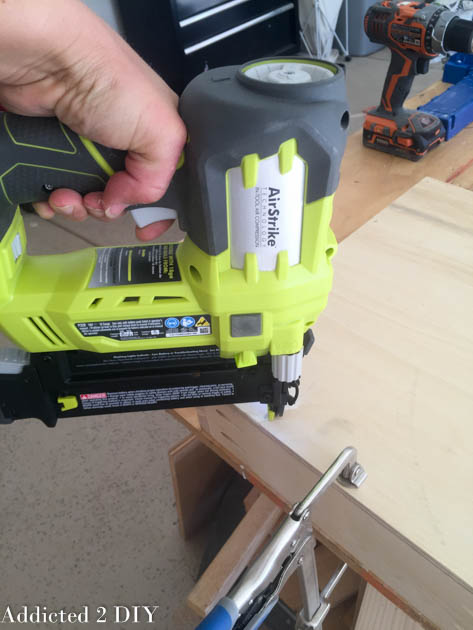
Once the box is assembled, glue and nail the 1/2″ plywood bottom on using 1″ brad nails.
Step 9: Sand, Stain, and Finish
Sand the entire cabinet smooth, working up through the grits. Apply your stain of choice and let it dry fully.
Install the drawer slides, then have a helper hold the back panel in place while you nail it on.
Attach the top: Cut a pine project panel to size so it overhangs 3/4″ on the front and both sides, and sits flush at the back. Glue it to the cabinet top and secure it with countersunk 2″ wood screws.
Apply 3 coats of polyurethane, lightly sanding between coats.
Once the finish is dry, attach the drawer face and install the drawer pull.
Finished DIY Wine Cabinet
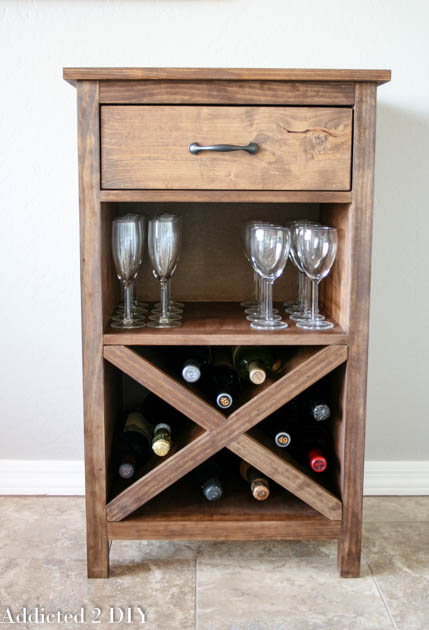

The finished cabinet can hold up to 12 wine bottles in the X storage below, wine glasses and accessories on the middle shelf, and corkscrews, stoppers, and other small items in the drawer.
Frequently Asked Questions
How long does this project take? This is a true weekend project. Plan for about 6–8 hours of build time, plus drying time for wood filler, stain, and polyurethane between coats.
What skill level is this project for? This is a beginner-to-intermediate build. If you’re comfortable using a Kreg Jig and a miter saw, you can build this cabinet. The X notching is the trickiest step but is very manageable with a chisel.
Can I modify the plans? Absolutely! One reader omitted the drawer and middle glass shelf and added a second X for more wine bottle storage — a great modification if wine storage is the priority.
What type of wood should I use? The plans call for select pine, which is affordable, easy to work with, and takes stain beautifully. You could also use poplar for a harder, smoother finish.
How many wine bottles does it hold? The X wine rack holds 9 bottles in the standard configuration.
Get the Free Plans
Ready to build? Download the free printable plans below — they include the full cut list, materials list, and diagrams.
DOWNLOAD FREE WINE CABINET PLANS
If you build this cabinet, I’d love to see it! Share a photo in the comments or tag me on social media.