How To Build A Faux Fireplace
Learn how to build a DIY faux fireplace with storage and a faux brick backing using this step-by-step tutorial. This project adds a beautiful focal point to any room—without the cost or complexity of a real fireplace.
This faux fireplace is perfect if you want the cozy look of a fireplace, plus hidden storage for everyday items. With a mix of woodwork and faux brick with a German schmear finish, it’s a functional statement piece you can customize to fit your space.
👉 Don’t forget to grab the printable plans before you get started!
Watch the YouTube Video
Why Build a Faux Fireplace?
Not every home comes with a built-in fireplace—but that doesn’t mean you can’t have one.
This DIY faux fireplace:
- Creates a warm, cozy focal point
- Adds functional storage (drawer + cabinets)
- Can be customized to match your style
- Is much more budget-friendly than installing a real fireplace
Materials & Tools
For this project, I used some of my go-to products from DAP Products:
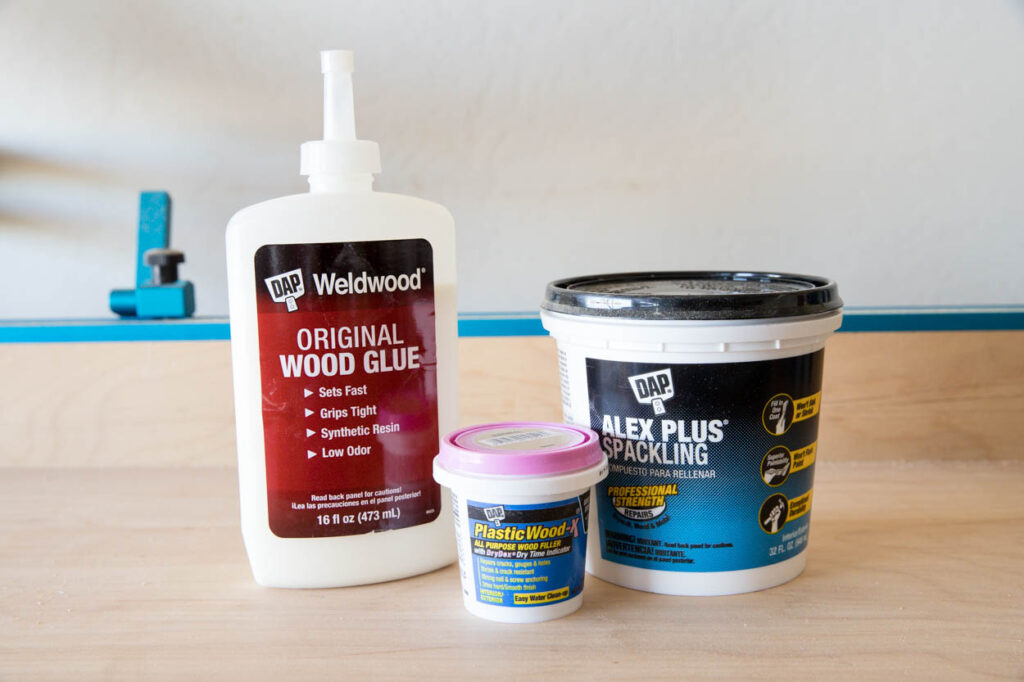
- Plastic Wood-X Wood Filler
- Weldwood Carpenter’s Wood Glue
- Alex Plus Spackling
You’ll also need:
- Plywood and trim
- Pocket hole jig
- Brad nailer
- Drawer slides
- Euro hinges
- Faux brick panel
- Paint and primer
How to Build a Faux Fireplace
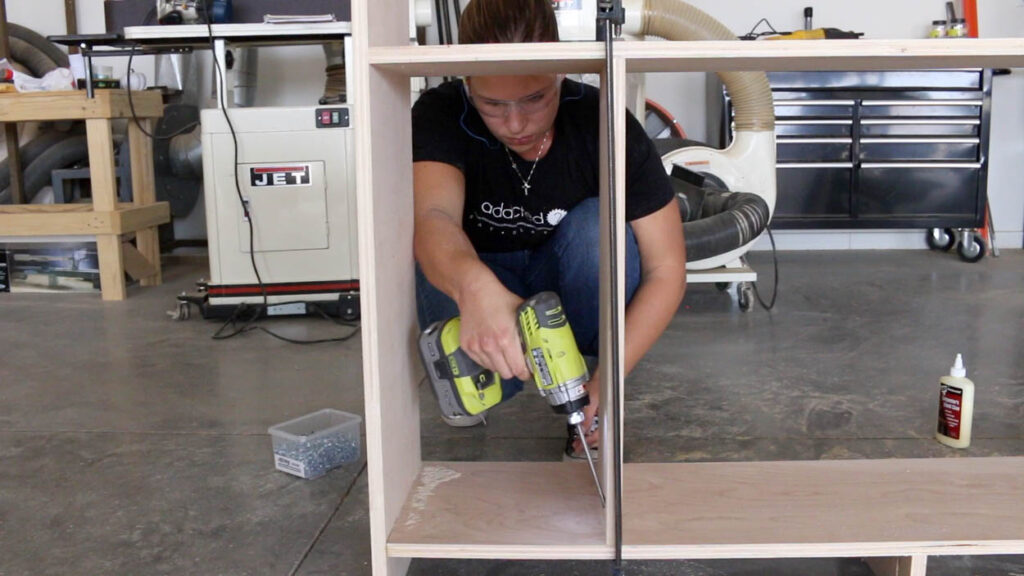
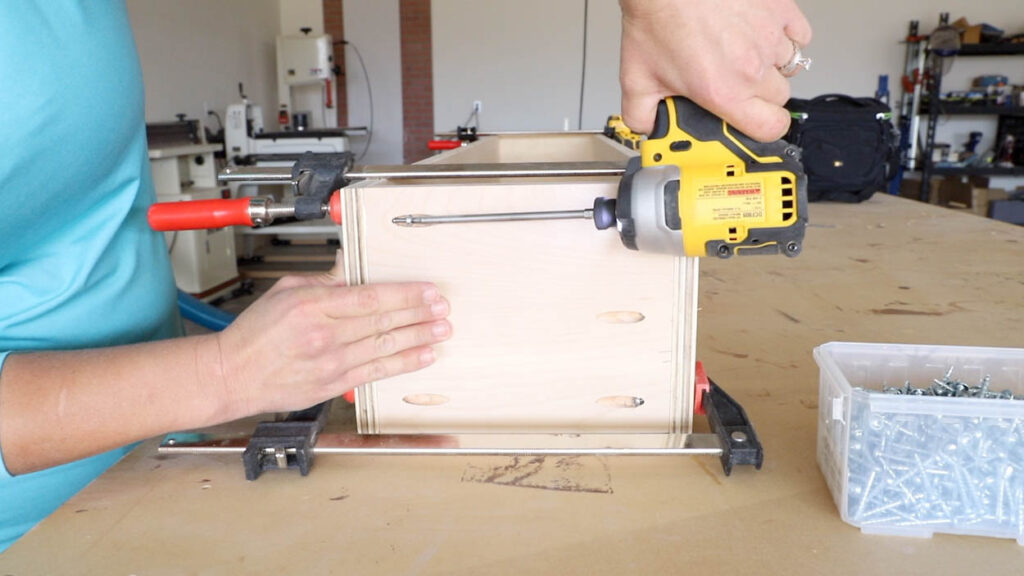
Step 1: Build the Fireplace Carcass
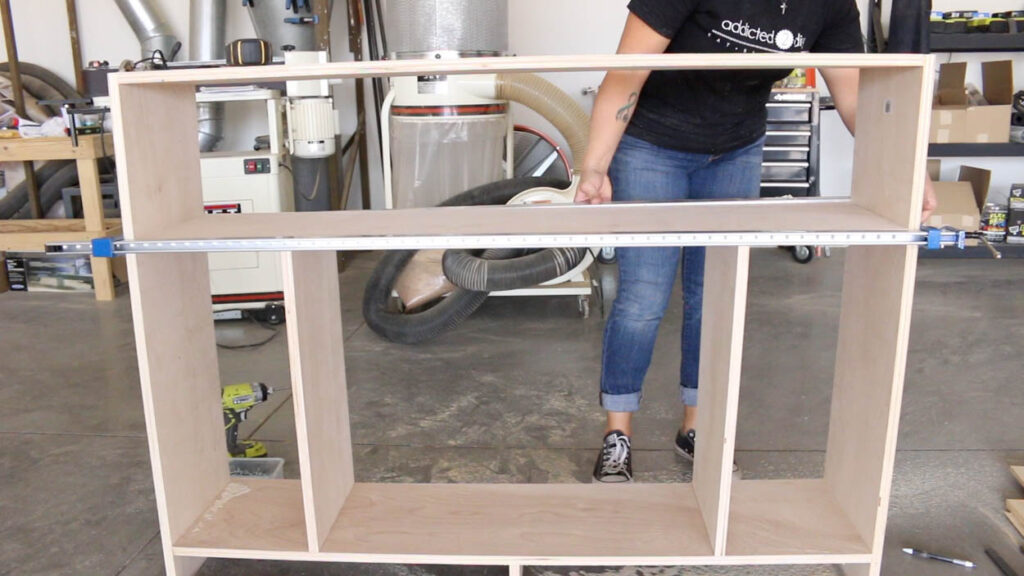
Drill 3/4″ pocket holes into the top, middle, bottom, and vertical panels. Glue and clamp everything together.
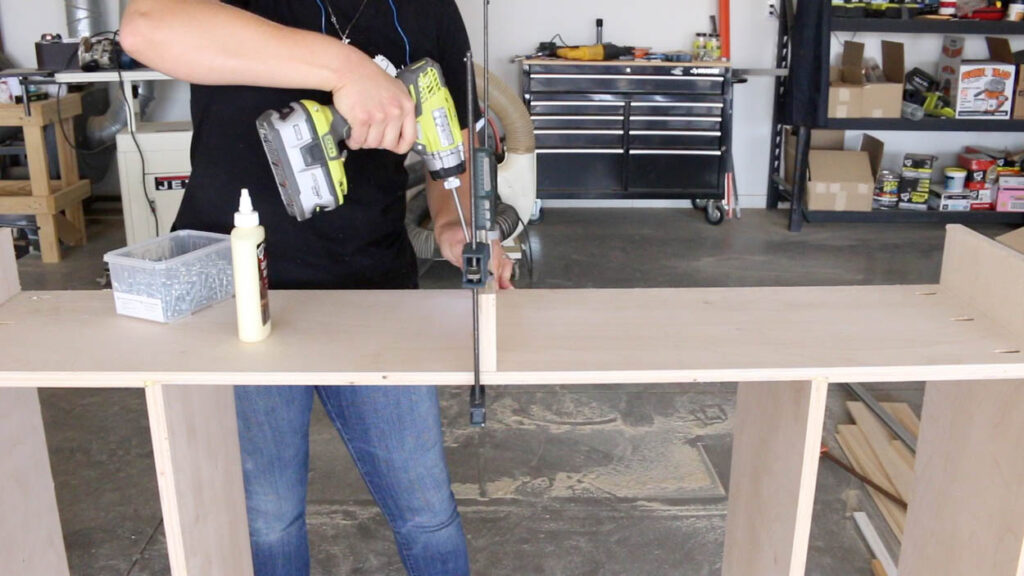
Step 2: Assemble the Frame
Secure all pieces using 1 1/4″ pocket screws to form the main structure.
Step 3: Add Center Support
Attach the center foot support to the bottom with wood glue and pocket screws for added stability.
Step 4: Install Upper Moulding

Cut moulding to size and attach using wood glue and 1 1/4″ brad nails.
Step 5: Attach Lower Spacer Board
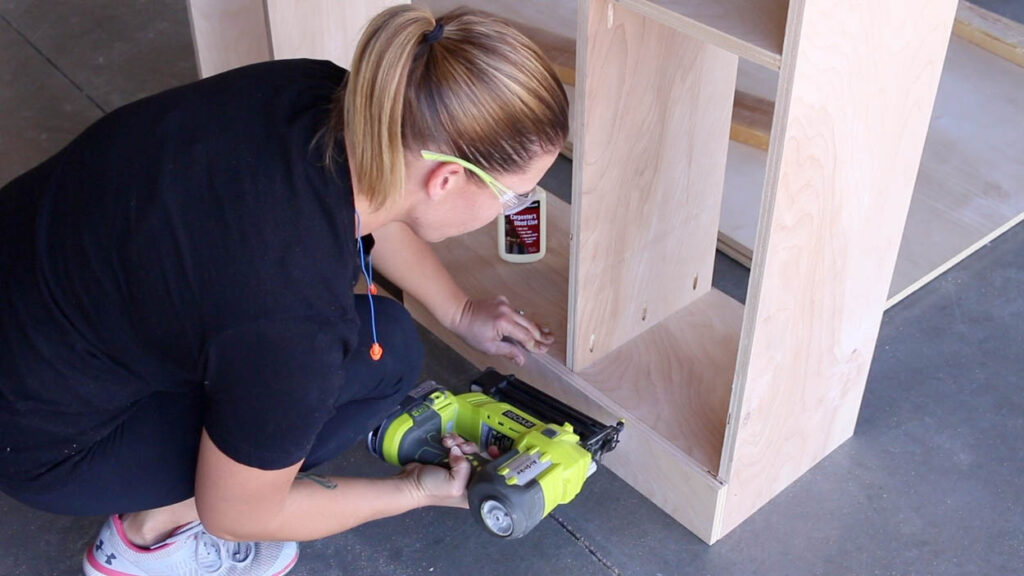
Cut a 3/4″ plywood strip to match your base moulding height and attach it to the bottom.
Step 6: Install Base Moulding
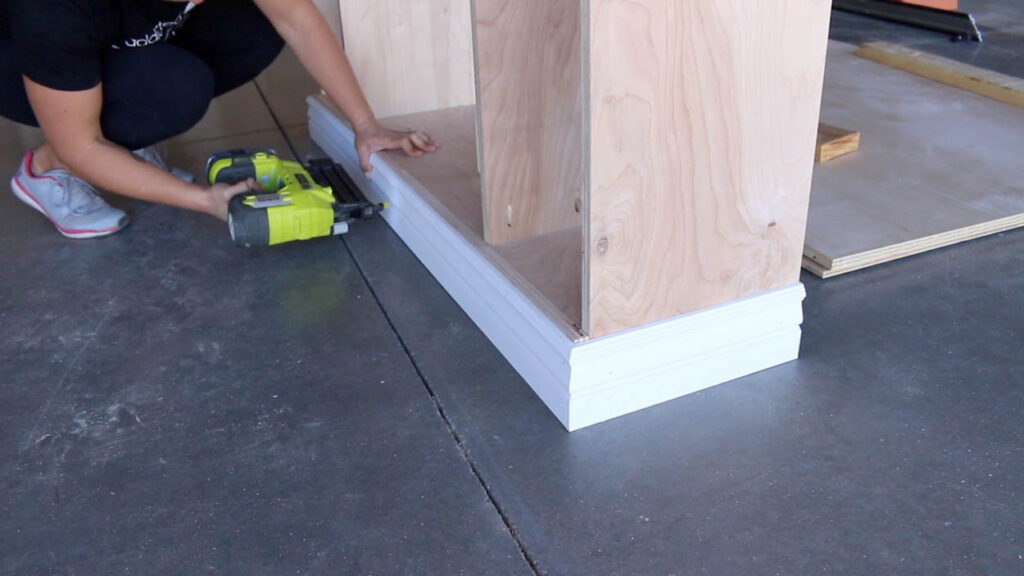
Cut moulding with 45° mitered corners and attach with glue and brad nails.
Step 7: Apply Edge Banding
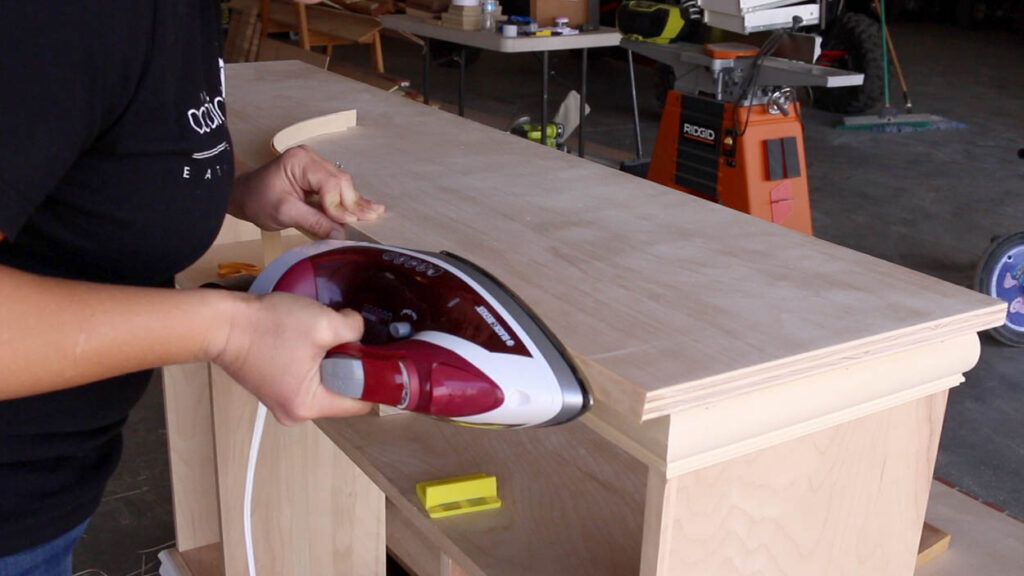
Cover all exposed plywood edges with veneer edge banding. Trim and sand smooth.
Step 8: Attach the Top
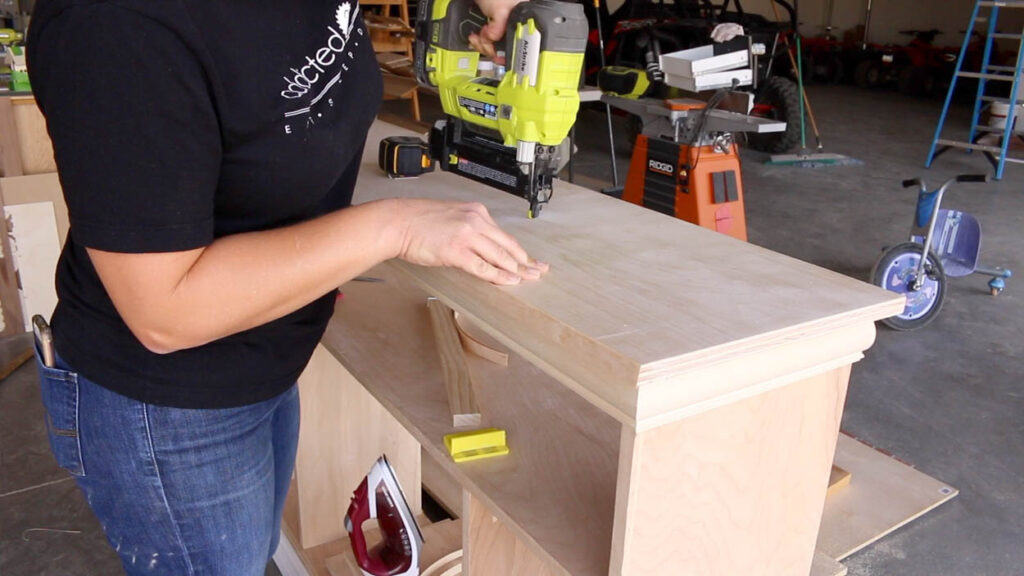
Center the top with even overhang on the sides and front. Glue and nail into place.
Step 9: Add Trim to Doors & Drawer Front
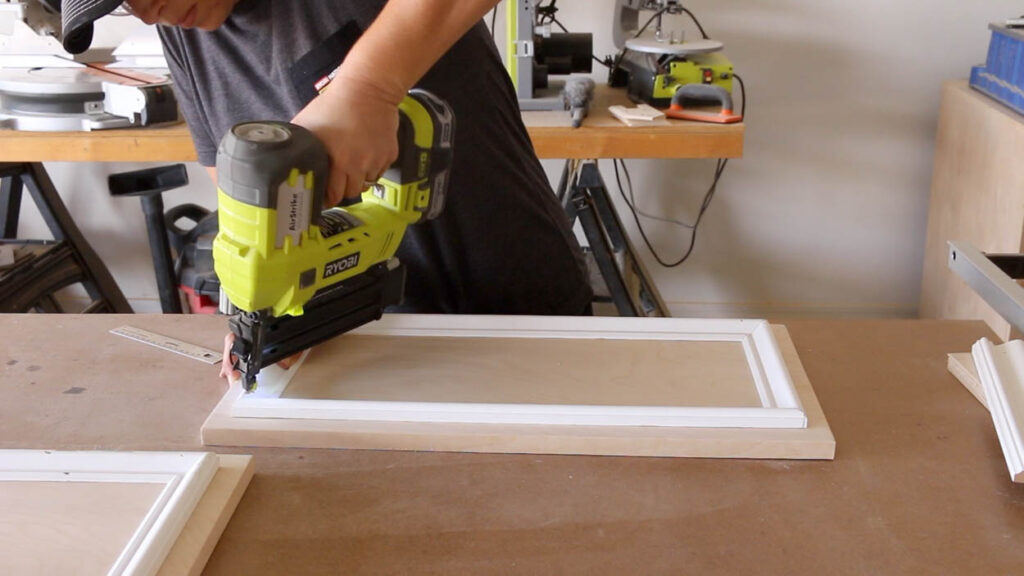
Attach trim moulding with a 1″ inset on all sides for a clean, finished look.
Step 10: Fill Nail Holes
Use wood filler to fill all nail holes. Once dry, sand with 220-grit sandpaper.
Step 11: Paint the Fireplace
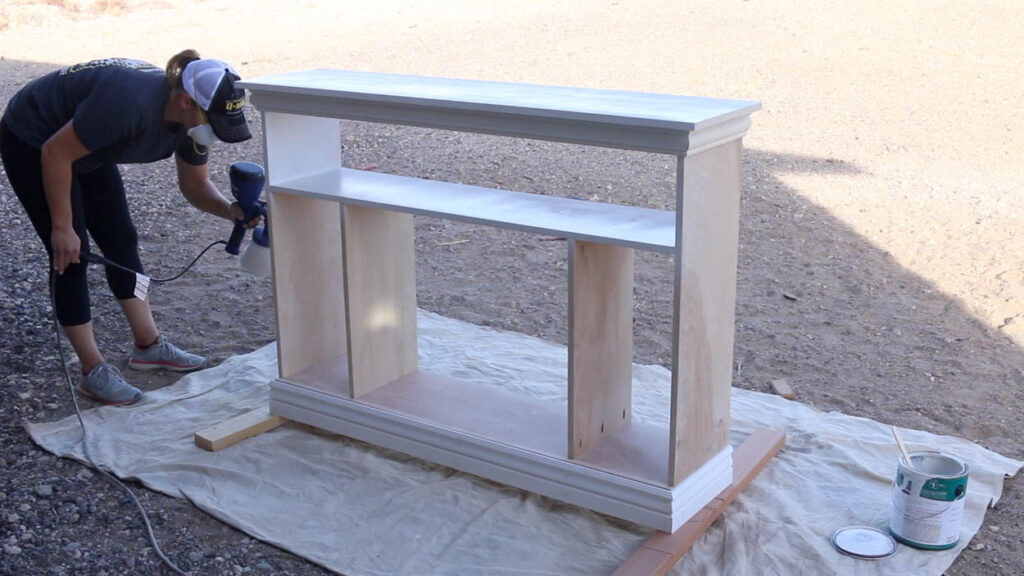
Paint all components using a sprayer or brush and roller for a smooth finish.
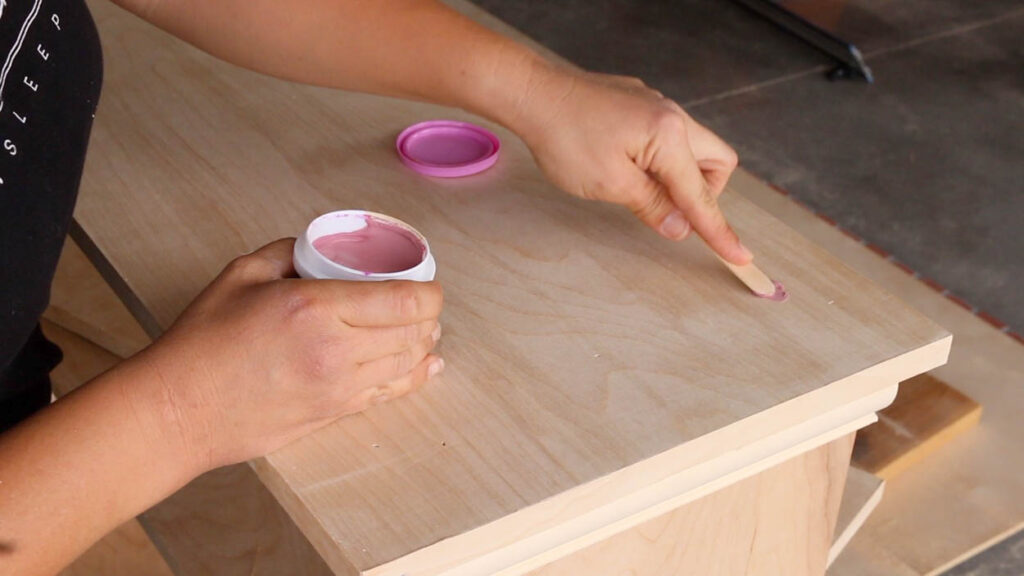
Step 12: Create the Faux Brick Backing
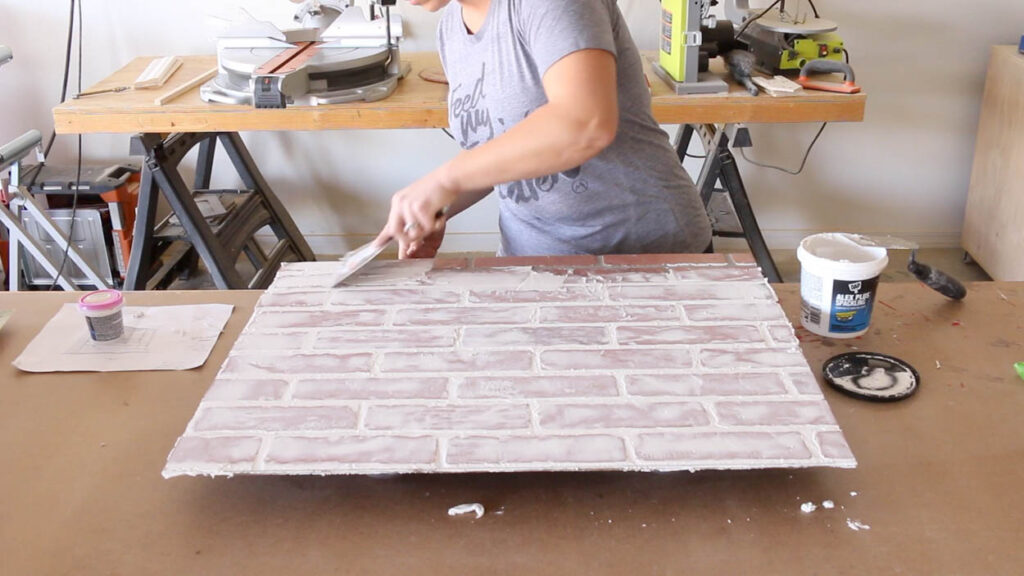
Cut faux brick paneling to size and apply a German schmear using spackling.
- Apply with a putty knife
- Wipe back to desired look
- Let dry completely
Step 13: Install the Brick Backing
Attach the faux brick panel using brad nails or narrow crown staples.
Step 14: Build the Drawer
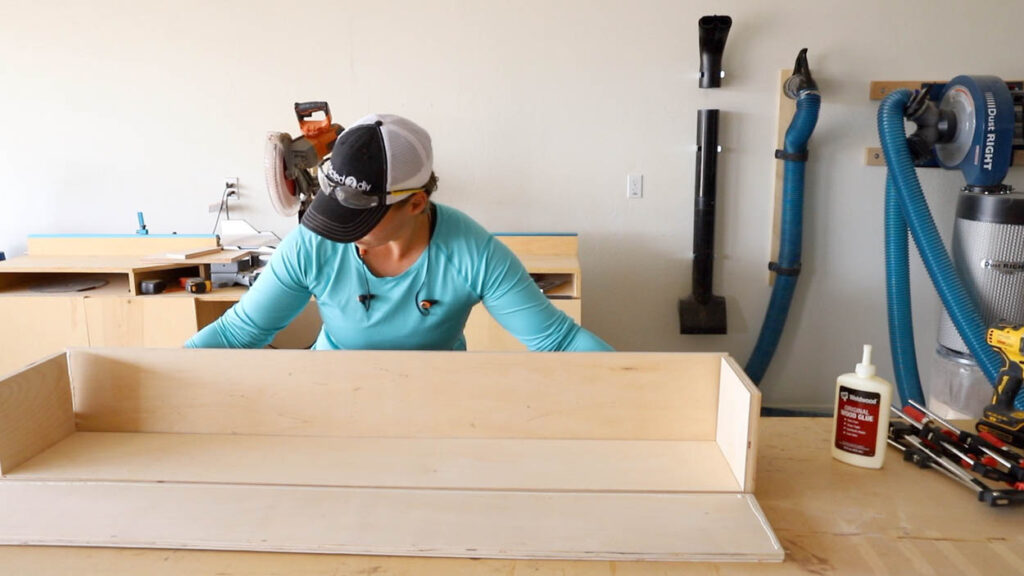
Assemble the drawer box using wood glue and clamp until secure.
Step 15: Secure Drawer Assembly
Reinforce with pocket screws and attach the drawer bottom using brad nails.
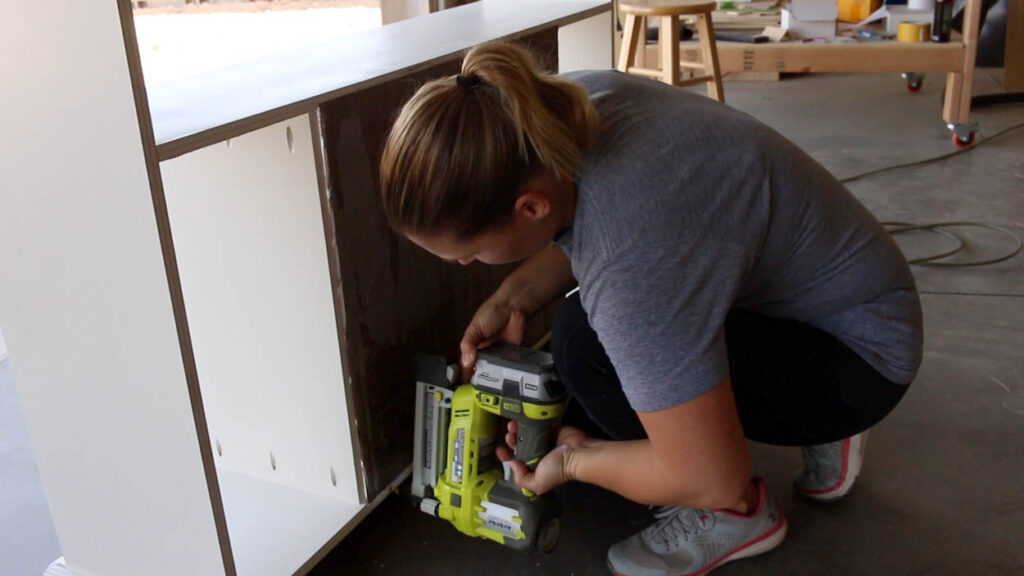
Step 16: Install Cabinet Doors
Attach doors using euro hinges, leaving a 1/8″ gap above the base moulding.
Step 17: Install Drawer Slides

Mount slides centered in the opening and attach corresponding hardware to the drawer.
Step 18: Attach Drawer Front
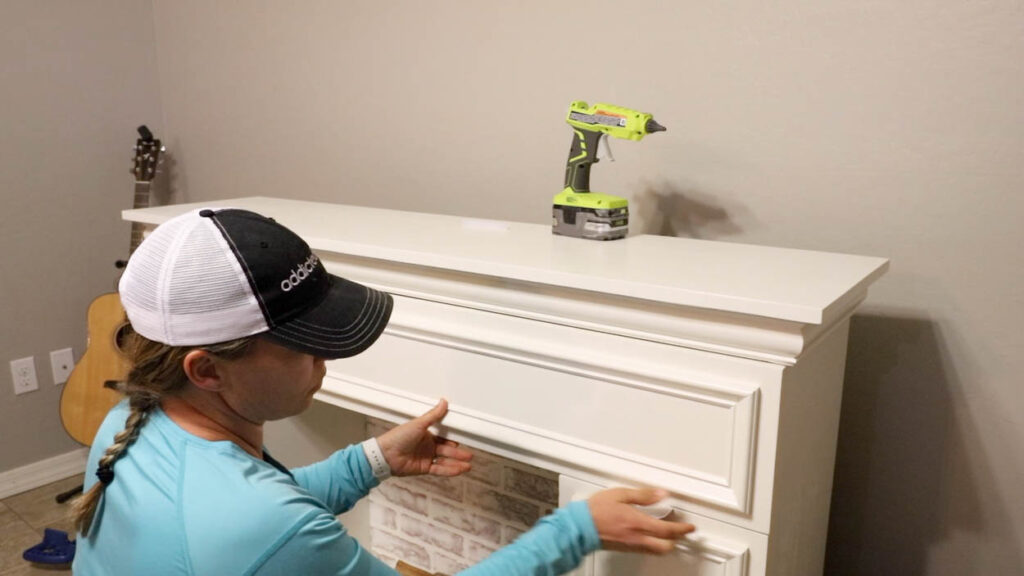
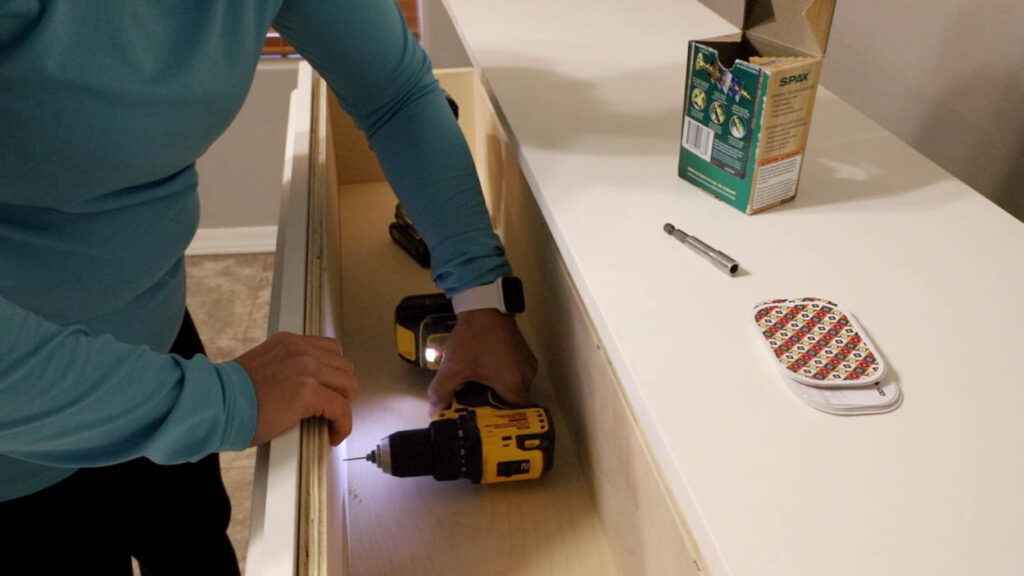
Temporarily attach with hot glue, align using spacers, then secure permanently with screws from inside.
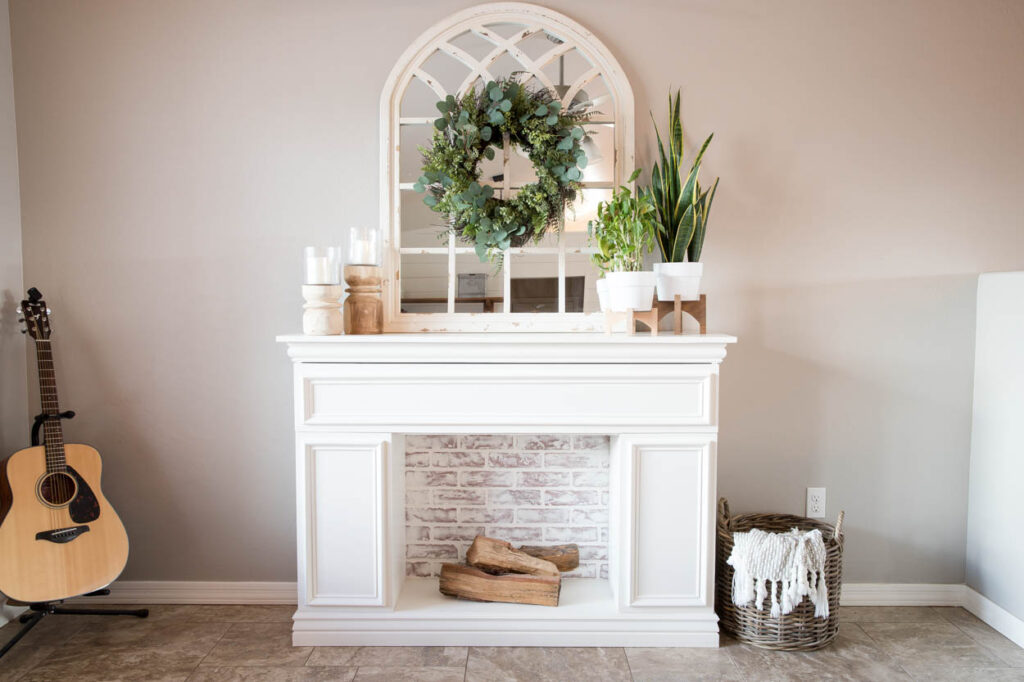
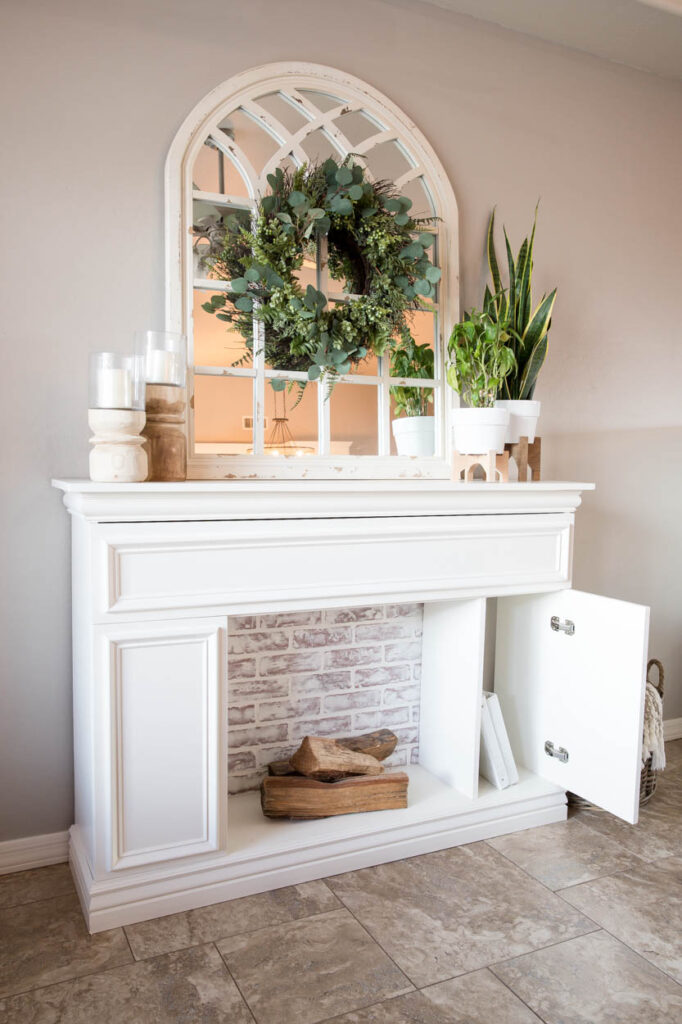
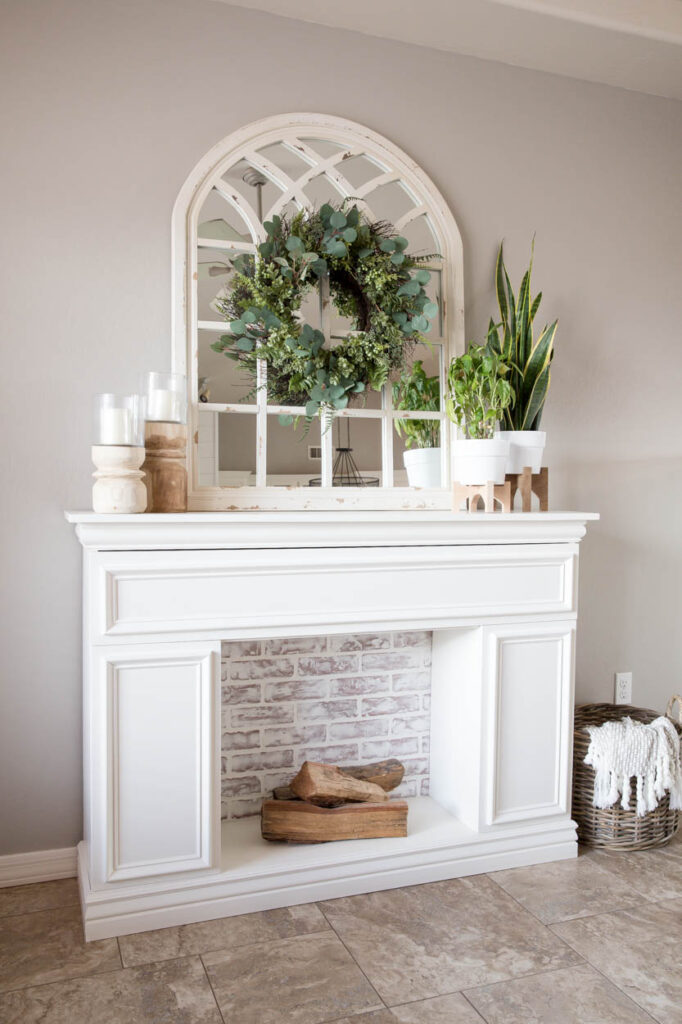
Finished Faux Fireplace with Storage
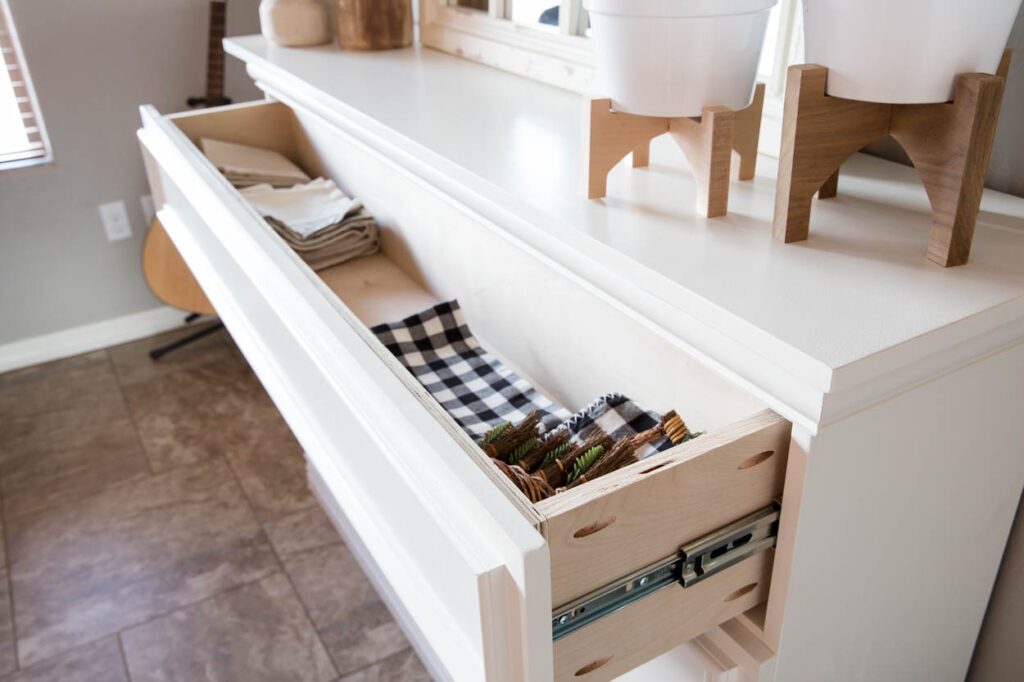
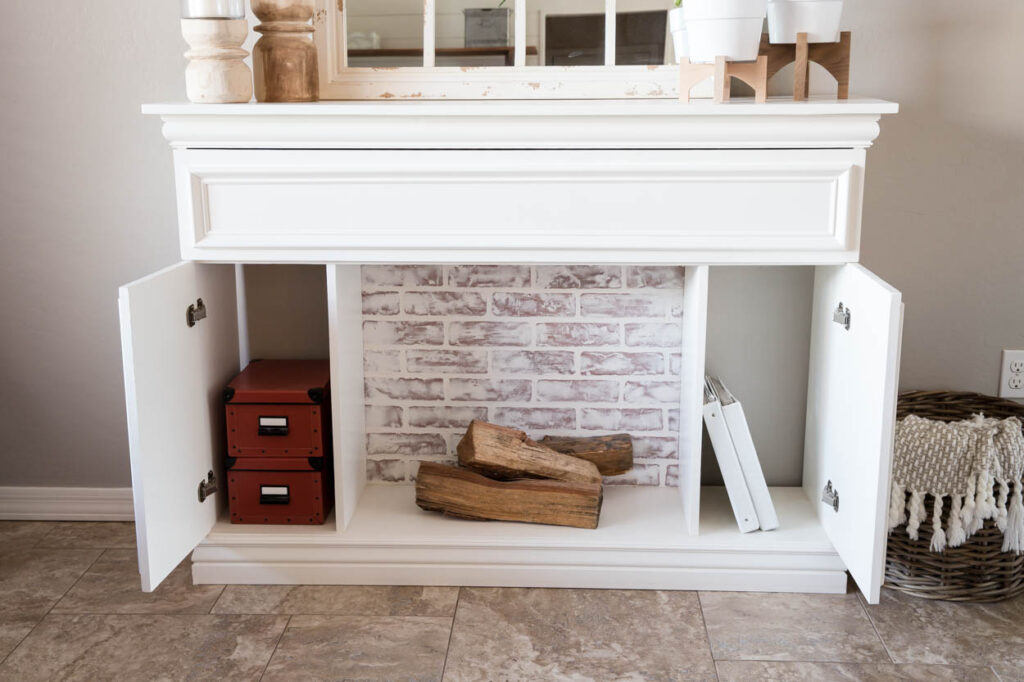
This DIY faux fireplace combines style and function in one build:
- Spacious drawer for linens, movies, or seasonal décor
- Cabinets for books, storage bins, or electronics
- Faux brick backing adds texture and depth
- Perfect for decorating—especially during the holidays
It’s a statement piece that completely transforms a room without requiring major renovations.
Final Thoughts
A faux fireplace is one of those projects that delivers a huge visual impact with relatively simple materials. Whether you’re adding warmth to a living room or creating a seasonal focal point, this build is a great way to elevate your space.
And the best part? You can customize the size, finish, and storage to fit exactly what you need.