EufyMake E1 UV Printer Review: Is It Worth It?
Why Tools Like This Can Be A Great Fit In Your Creative Space
If you’re someone who loves to create — whether that’s building furniture, making home décor, running a small handmade business, or just finding a better and faster way to bring your ideas to life — you already know that the right tool can completely change what’s possible in your space.
Over the years I’ve added a lot of tools to my workshop: saws, sanders, a Cricut, and eventually lasers. Each one opened up a new creative lane I didn’t have before. But every now and then a tool comes along that genuinely feels like a game changer — not just an upgrade, but a whole new capability.
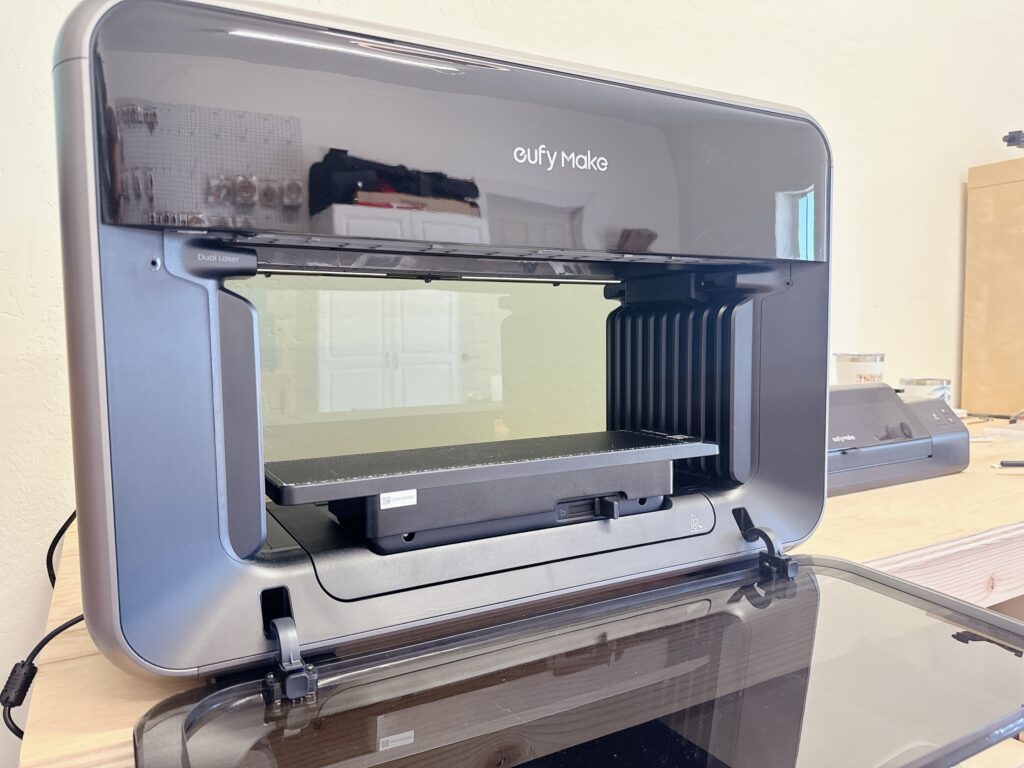
The EufyMake E1 UV Printer is one of those tools.
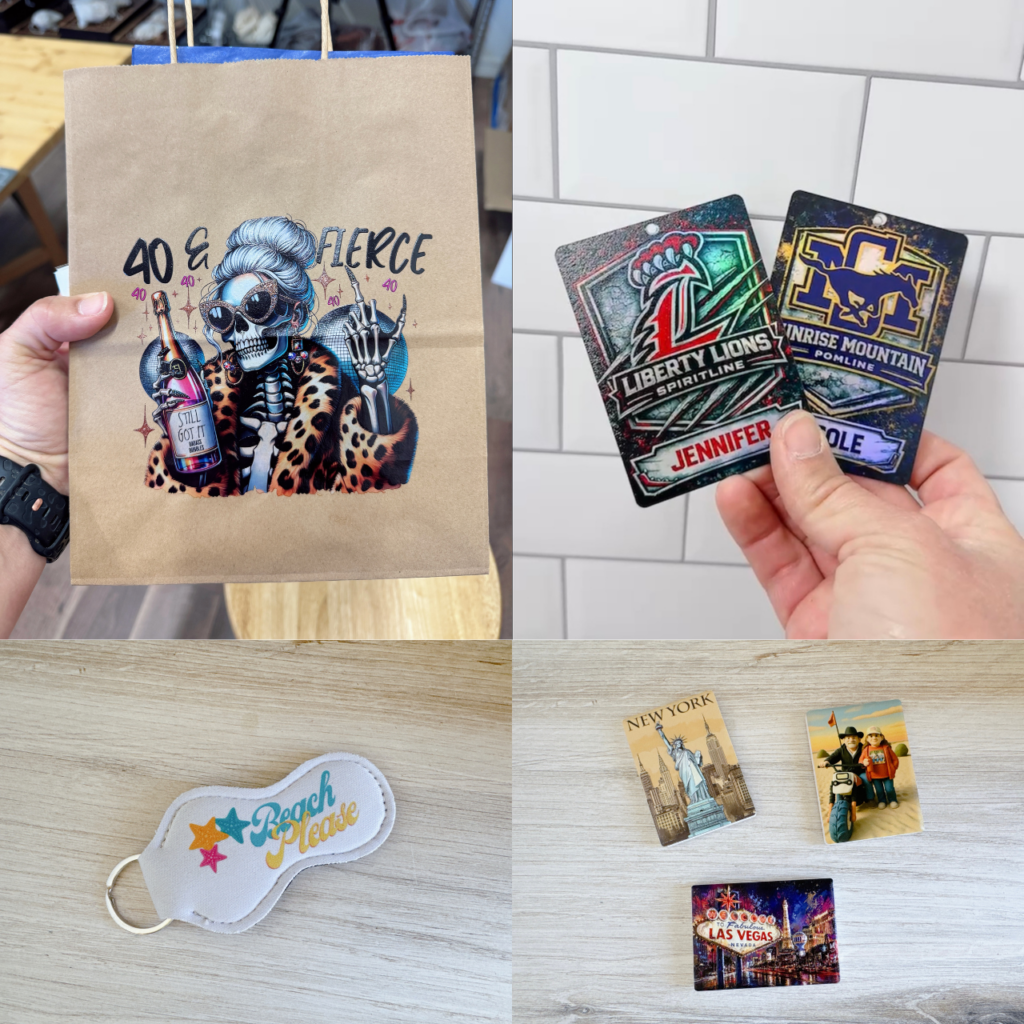
For DIYers and crafters, it means being able to put full-color designs on the things you’re already making — wood signs, ornaments, home décor pieces — without hand-painting a single thing. For hobbyists, it’s a way to take your projects from handmade to polished and professional with very little extra effort. And for small business owners, it’s an affordable entry point into a type of printing that used to require a massive equipment investment to even consider.
I’ve had the EufyMake E1 in my workshop for a few months now, and I want to walk you through everything — what it does, how it works, what I love about it, and what you should know before you buy. Whether you’re deep into the maker world or just starting to build out your creative space, I think you’re going to want to keep reading.
Watch My YouTube Video Review
I’ve put together a YouTube video review of the machine that shows it in action as well as breaking down all of my thoughts on the machine and my experience.
What Is UV Printing?
Before diving into the machine itself, it helps to understand what makes UV printing different. Unlike a standard inkjet printer, a UV printer uses ultraviolet light to instantly cure the ink as it’s being applied. That means the moment your print is done, the ink is completely dry and ready to touch — no waiting around.
This also opens up a huge range of printable surfaces: wood (raw or finished), acrylic, glass, metal, ceramics, leatherette, neoprene, and more.
What Can You Print With the EufyMake E1?
The short answer: a lot. I’ve personally printed on pint glasses, coffee mugs, metal tumblers, ceramic magnets, wood, acrylic, paper bags, and even neoprene. Some of my favorites have been ornaments, bag tags, and acrylic signs.
The machine comes with two flatbed attachments — a mini and a standard — both included with purchase. Additional accessories like a rotary attachment (for tumblers and glasses), direct-to-film (DTF) supplies, and a laminator are also available.
EufyMake also has a wide range of items that you can purchase with the machine to print on, such as blank canvas, magnets, coasters, tumblers, etc.
Software & Ease of Use
The EufyMake E1 uses the EufyMake Studio app, available on both your phone and computer. The machine runs completely wireless, so you can start a print from your laptop and monitor progress from your phone — it even sends a notification when your print is done.
The learning curve is minimal. In fact, part of the initial setup process has you print your very first item on a ceramic magnet, so you’re up and running within about 30 minutes of unboxing.
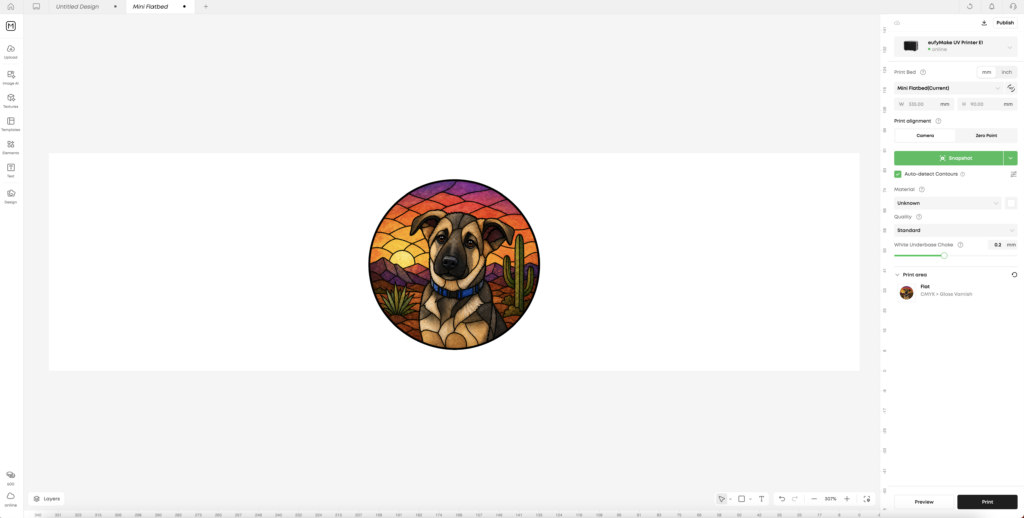
A few standout software features worth mentioning:
- Camera alignment — a built-in camera makes it easy to position your design exactly where you want it, taking much of the guesswork out of placement.
- Auto-detection of print bed — swap in the rotary attachment or a different flatbed and the software instantly recognizes it.
- AI design tools — you can convert a photo into a cartoon-style image or create a raised texture effect right inside the app.
- Ink usage estimates — recent firmware updates now give you a print time estimate and ink usage preview before you even start. After printing, you get a full breakdown by ink color so you can calculate the exact cost per piece or just get an estimate on how much ink you will be using and have left to use in your cartridges.
Print Quality & Ink Control
You have a lot of control over how your prints come out. The software lets you customize:
- How many layers of white ink to lay down (important for dark surfaces, so your colors pop)
- How many layers of CMYK color
- How many layers of gloss finish
If you’re printing on a white surface, you can skip the white ink entirely. If you’re printing on something dark, stacking a few white layers first makes a significant difference.
One tip: stock up on white ink. It’s the one you’ll go through fastest, especially if you’re doing textured or layered designs.
Direct-to-Film (DTF) Printing
One of my favorite features is DTF printing. Instead of printing directly onto an object, you print onto a special adhesive film, run it through the EufyMake laminator, and apply it as a permanent transfer sticker.
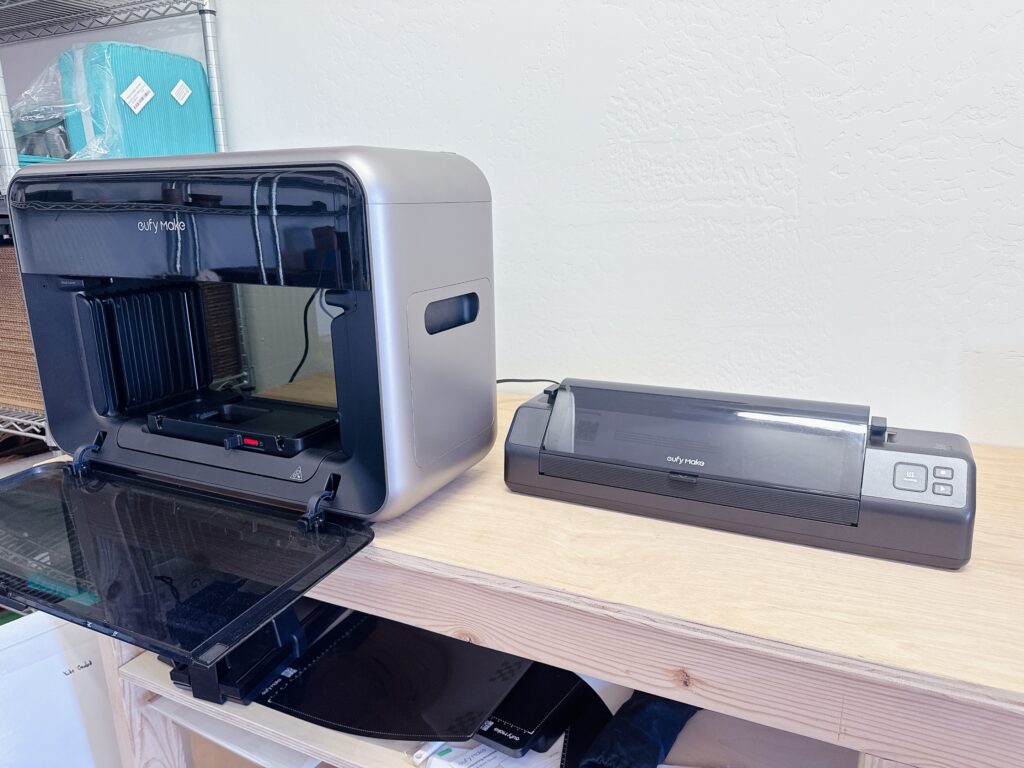
This is especially useful for:
- Items with handles (like coffee mugs) where the rotary attachment can’t center a design perfectly
- Oversized items that don’t fit inside the machine
- Anything where precise placement matters
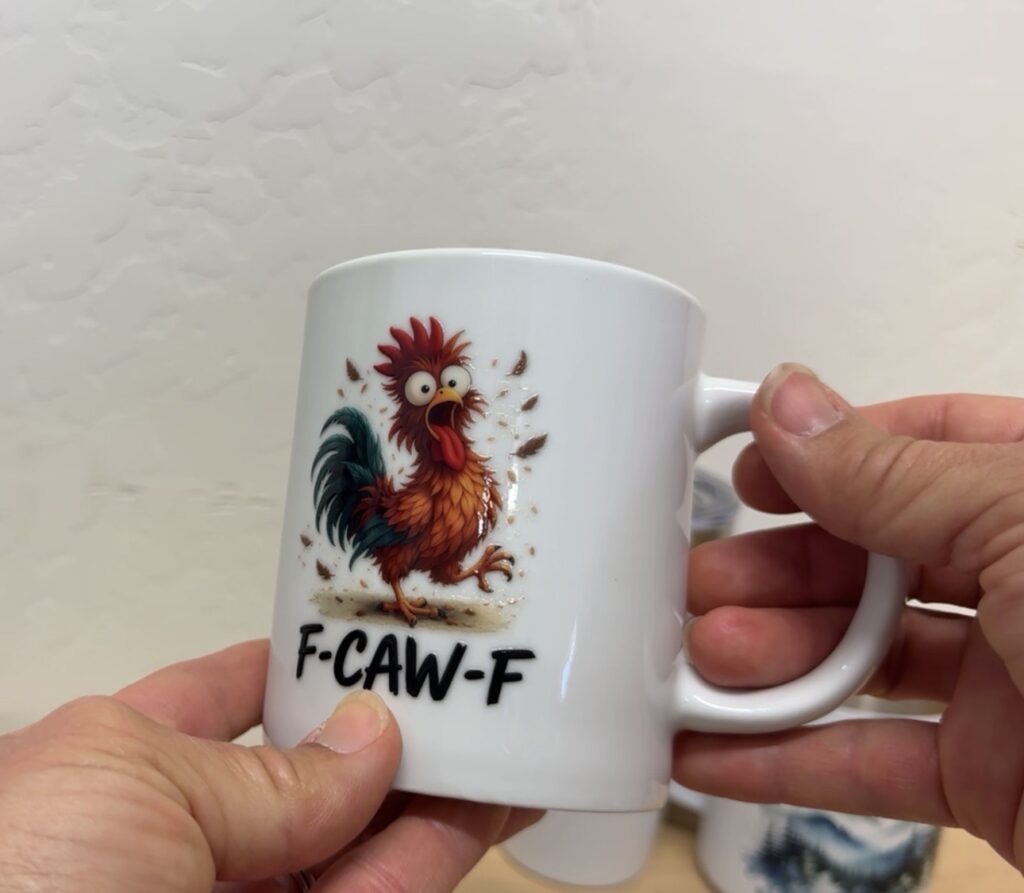
One heads up: DTF transfers are not dishwasher safe, so hand wash only for anything you apply them to.
Pairs Perfectly With a Laser Cutter
If you already own a laser, the two work together beautifully. My favorite workflow is print then cut — I’ll lay a full sheet of wood or acrylic flat in the machine, print the entire design, then take it to my laser to cut it out. It’s a massive time savings compared to hand-painting, and the results are far more consistent.
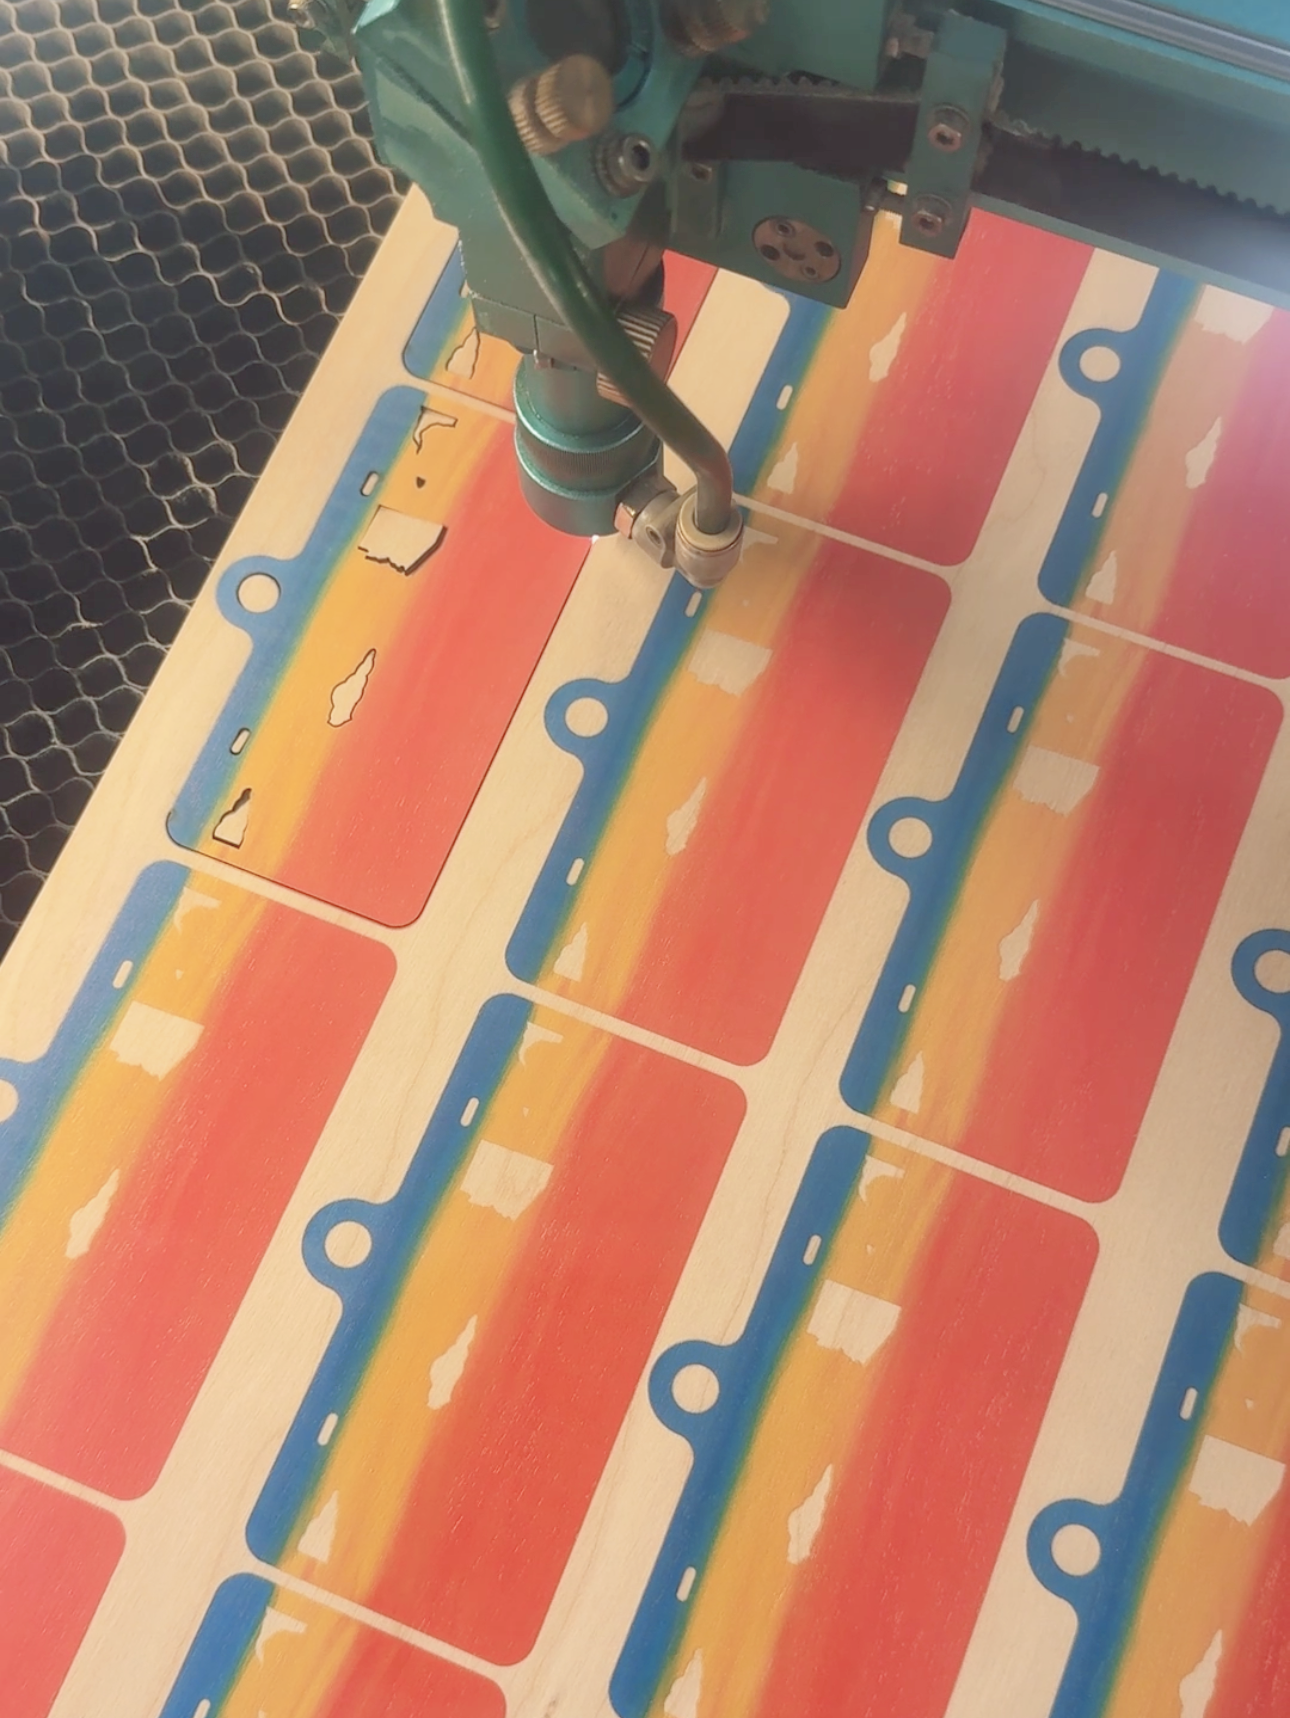
I design a lot of my artwork in Procreate on my iPad, export as PNG, and upload directly to EufyMake Studio. No painting required.
Maintenance: Easier Than You’d Expect
Maintenance was honestly my biggest concern before buying a UV printer. I’d heard horror stories about clogged print heads and constant babysitting. I’m happy to report that hasn’t been my experience at all.
The E1 runs its own automatic cleaning cycles and has a moisture preservation mode — when the machine sits idle, it pulls ink out of the lines and keeps the print head moisturized to prevent clogs. I went a full month without using mine (while waiting for a replacement cleaning cartridge), and it printed perfectly as soon as I started it back up again.
A few things to keep on hand:
- Extra cleaning cartridges — when the cleaning cartridge fills up, the machine pauses until you swap in a new one. Always have a spare.
- Extra ink cartridges — especially white and gloss. Each cartridge holds 100ml and the software shows you when you’re running low.
- Scraper and filter — these have a 3-month suggested replacement schedule if you’re using the machine daily. But use your own judgement. If you only use the machine once a week or so, replacing the filter and scraper can be stretched out further.
Climate Requirements
This is one practical consideration worth planning for. The machine needs to be in a climate-controlled space — ideally below 85°F and above 20% humidity for the inks to stay stable. I’m in Arizona, so (lack of) humidity is my challenge. The machine will alert you if conditions are off, but I’d recommend having a small humidifier on hand if you’re in a dry climate.
Is It Right for You?
The EufyMake E1 runs around $2,500 depending on the accessories you add. Here’s the honest take:
It’s a great fit if you’re:
- A hobbyist or crafter who wants to expand what you can make
- A small business owner exploring UV printing before committing to a production-level machine
- Looking for something compact that fits on a workbench without taking over your whole space
Keep in mind:
- This is a single print head machine — not a high-volume production printer. Prints can take 30–40 minutes. For comparison, production UV printers can run tens of thousands of dollars.
- It’s an entry-level machine in the best sense — you can absolutely run real production volume on it, just with longer run times.
For anyone who’s been on the fence about UV printing, the E1 is a low-risk way to find out if it belongs in your business. You can gauge client interest, prove out the concept, and actually generate revenue while you figure out whether you want to scale up.
Final Thoughts
I’ve genuinely loved adding the EufyMake E1 to my workshop. It’s opened up a whole new category of products I can offer and cut my production time significantly compared to hand-painting. The software is intuitive, maintenance has been low-stress, and the print quality consistently impresses me.
If you have questions about specific materials or want to see how it handles something in particular, drop a comment below — I’m happy to test things out and report back!
Disclosure: this post contains affiliate links. Should you purchase from these links, I will receive a small commission at no extra cost to you.