DIY Kitchen Island with Butcher Block Top
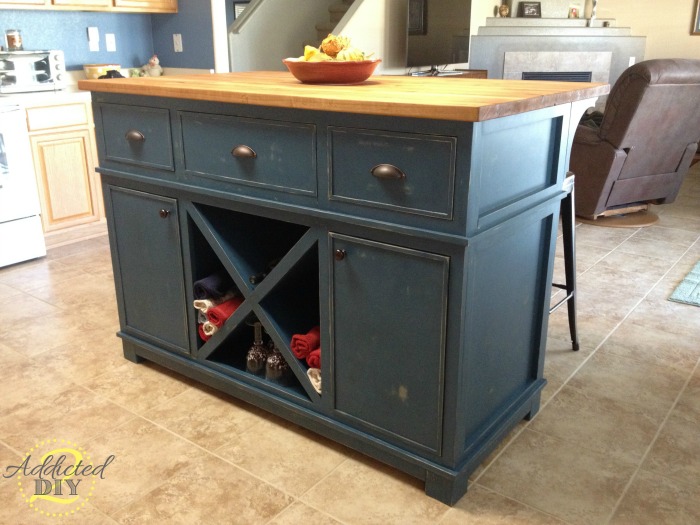
Learn how to build a DIY kitchen island with drawers, cabinet storage, decorative X sides, and a handmade butcher block top. This large kitchen island adds extra prep space, seating, and storage, making it a beautiful and functional addition to any kitchen.
For years, my mom wanted a kitchen island, and when she finally decided it was time to add one, she asked me to build it for her. We looked through several plans and she fell in love with the Shepard Kitchen Island plan from Ana White. This was the biggest project I had tackled at the time and only my second solo build, so it was definitely a challenge — but one I’m so glad I took on.
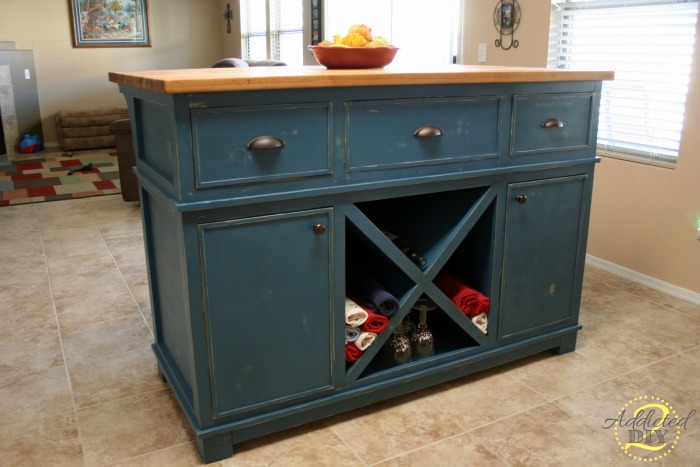
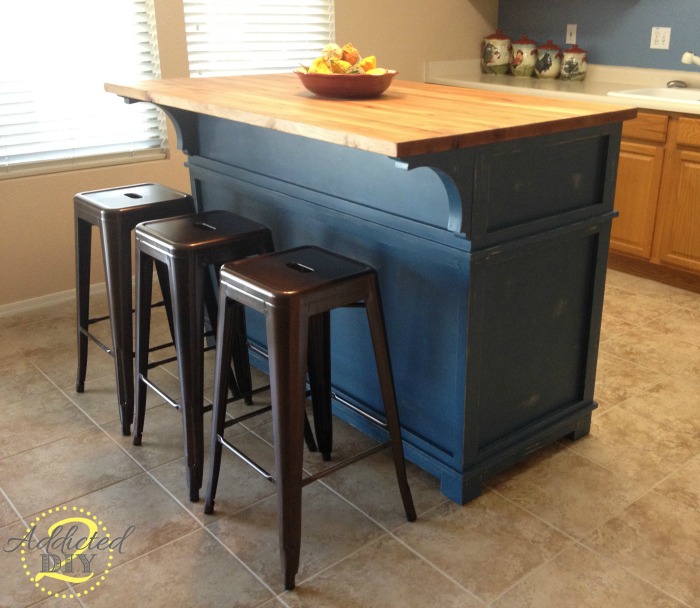
The finished island measures 36 inches wide x 60 inches long x 42 inches high, making it the perfect height for food prep, entertaining, and gathering around with family and friends. It also has plenty of storage with drawers, cabinet space, and decorative side cubbies that can be used for wine bottles or kitchen towels.
Back in 2013 when I built this project, it came in at around $600. Obviously that number will likely be different based on current lumber prices and the hardware you choose. One of the biggest ways I saved money was by building the butcher block top myself, which cut the overall cost significantly.
Supplies and Materials
For the base, I used 3/4-inch maple veneer plywood and select pine for the trim pieces. The back of the island was made from 1/4-inch plywood, and the corbels came from Home Depot. I also used pocket hole screws, wood glue, brad nails, cabinet hardware, door stops for the inset doors, paint, antiquing glaze, and a protective topcoat.
For the butcher block top, I built it from alder and I finished the wood with Howard Butcher Block Conditioner.
Tools Used
I used a Kreg Jig for drilling pocket holes, a Kreg Rip-Cut for cutting down plywood, a brad nailer, clamps, a chisel, a hammer, and my standard saws and measuring tools.
Step 1: Cut the Plywood Pieces for the Island Base
I had Lowe’s cut the 3/4-inch plywood down for me before bringing it home, which saved a lot of time. Just keep in mind that store cuts are usually rough cuts and may be off slightly, so always measure everything yourself before final assembly.
Be sure to save your plywood scraps because those can be used later for the cabinet doors and drawer fronts.
Step 2: Cut the 1/4-Inch Plywood Backing
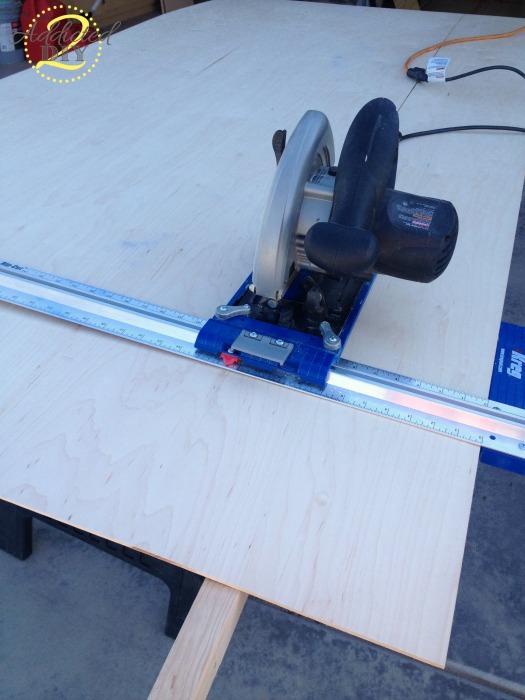
I used my Kreg Rip-Cut to trim down the 1/4-inch plywood that would be used for the back of the island. This made it easy to get straight, clean cuts for the large panel.
Step 3: Build the Main Island Box
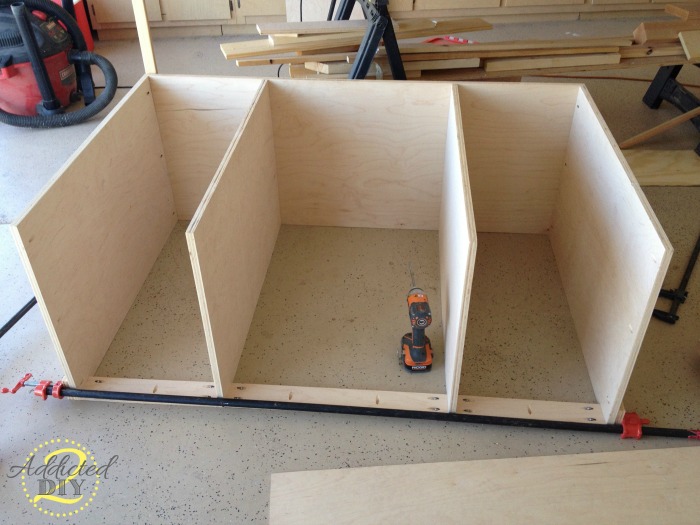
The base of this kitchen island is essentially a large plywood box. I drilled 3/4-inch pocket holes with my Kreg Jig, then assembled the box using wood glue and 1 1/4-inch pocket hole screws.
At this stage, the build starts to really come together and you can see the island taking shape.
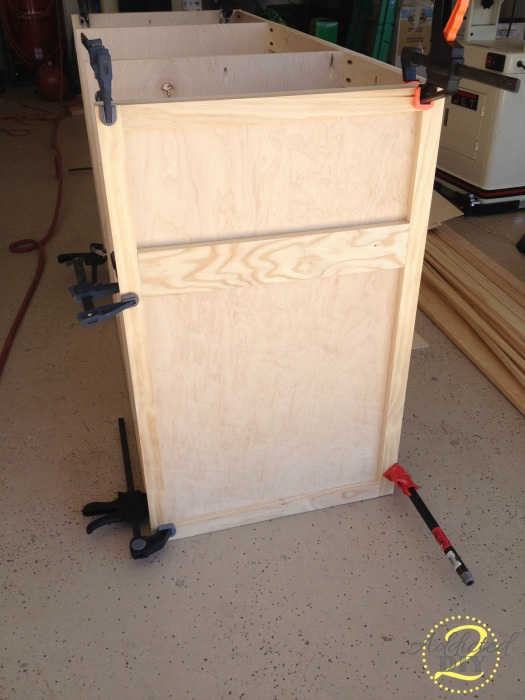
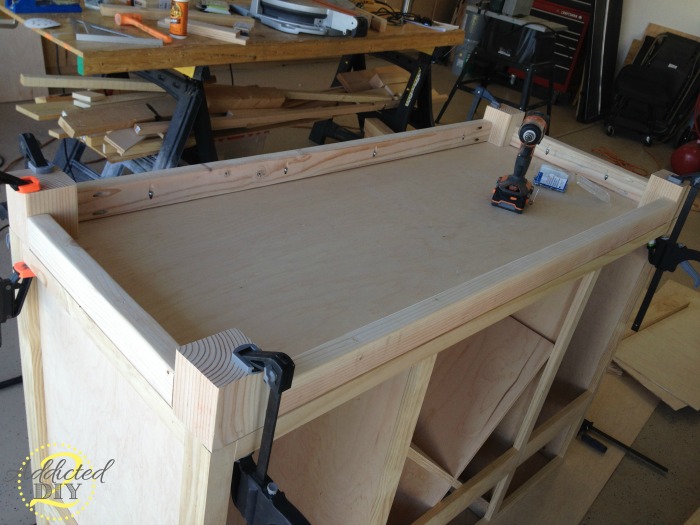
Step 4: Attach the Plywood Back
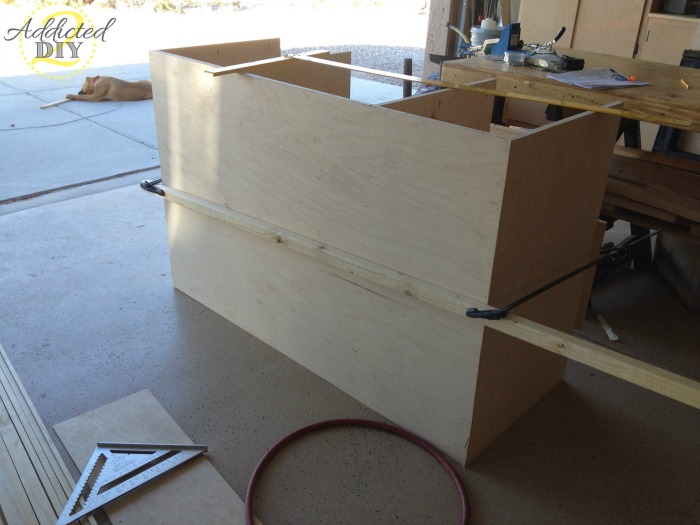
Once the box was assembled, I attached the 1/4-inch plywood backing using wood glue and 5/8-inch brad nails.
To make sure the backing stayed snug against the cabinet and drawer inserts while I worked, I clamped a 2×3 across the back before nailing it in place.
Step 5: Build and Attach the Face Frames
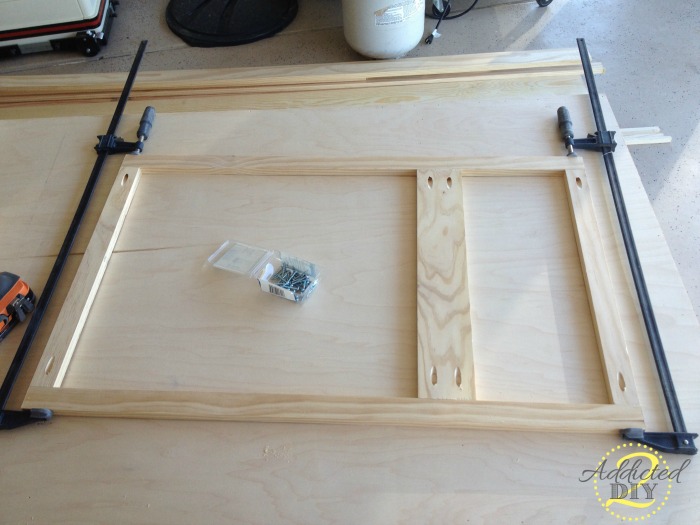
To give the island a finished furniture-style look, I built trim frames for the sides, back, and front of the island using my Kreg Jig and pocket screws. Once assembled, I attached each frame to the island base with glue and brad nails.
This step adds so much character and really transforms the plain plywood box into a custom-looking piece.
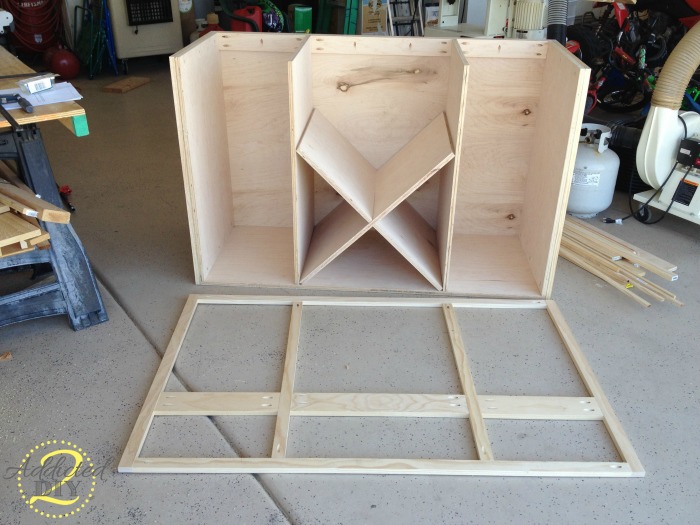
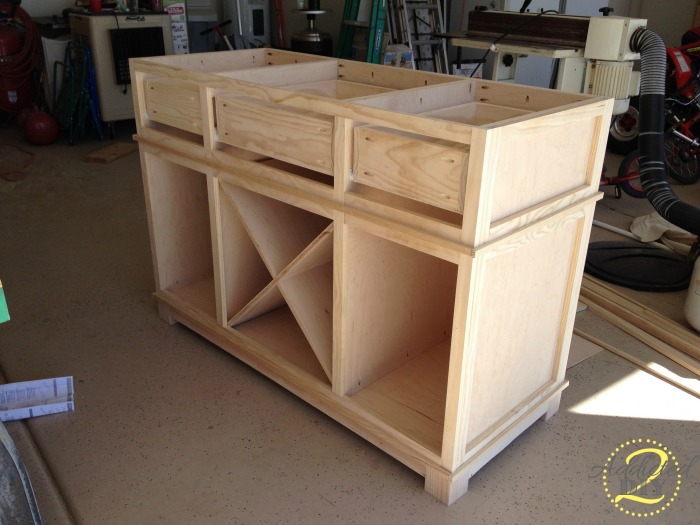
Step 6: Make the Decorative X Detail
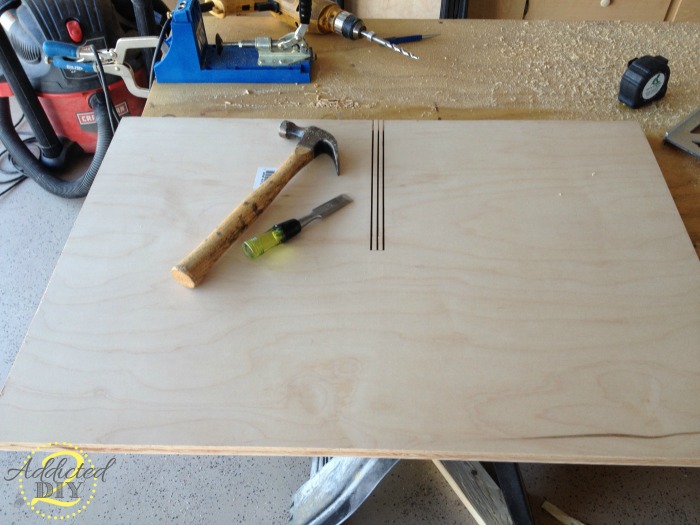
One of my favorite features of this kitchen island is the decorative X on the side.
To make it, I first found the center point of each board and marked where the notches needed to be cut. I cut both sides of each slot, made a cut down the center, and then used a 3/4-inch chisel and hammer to remove the waste and clean up the notch.

After repeating this process on the second board, I slid the two pieces together to create the X shape and fit it into the center opening.
Step 7: Build the Front Frame and Attach the Legs
The front frame was built the same way as the side and back frames, then attached with glue and 1 1/4-inch brad nails.
After that, I carefully flipped the island over so I could attach the legs and the front and side aprons. Be careful during this step, especially if your decorative X piece is not secured yet.
Step 8: Build the Drawers to Fit Your Openings
This is one of the biggest lessons I learned with this project: build your drawers and doors to fit your actual openings, not just the plan measurements.
Because plywood store cuts can be slightly off, one of my pieces ended up being 1/8 inch shorter than expected. That meant I had to make small adjustments, including making one drawer and cabinet door slightly smaller than the other.
Taking the time to measure each opening before building the drawers will save you frustration later.
Step 9: Make the Cabinet Doors and Drawer Fronts
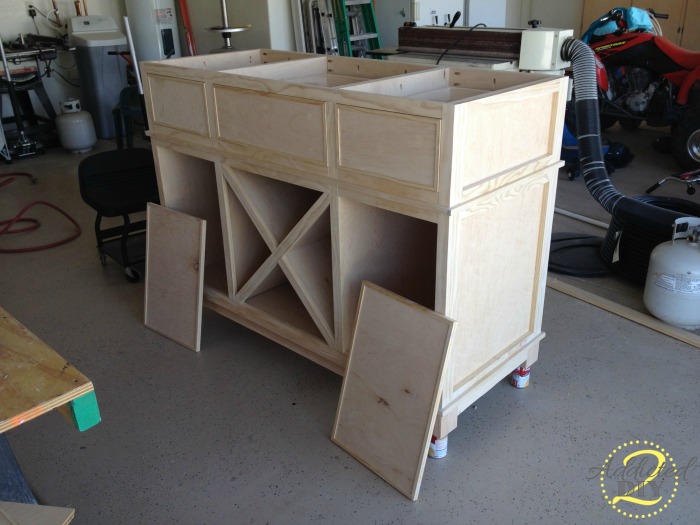
I used the leftover plywood pieces to make the doors and drawer fronts. Then I trimmed them out with 1×1/2-inch boardsto give them more detail and dimension.
I offset the trim by about 1/8 inch, which helped create a nice inset look and added definition to the doors and drawer fronts. Since the plywood layers were close to that thickness, I simply lined the trim up visually and attached it with glue and nails.
I also used trim pieces around the decorative X section, which helped secure it permanently in place.
Step 10: Paint the Kitchen Island

My mom chose Valspar Paint + Primer in Deep Twilight Blue, and it was such a beautiful color for this island.
If you have a paint sprayer, I highly recommend using one for this project. There are a lot of tight spaces, and spraying will make the job much faster and easier. I hand-painted this build, and while it turned out great, it definitely took longer.
I painted the corbels separately and attached them afterward with the included screws.
Step 11: Distress and Seal the Finish
After the paint dried, I lightly sanded the island and used an antiquing glaze to give it a distressed finish and a little extra character.
Once I was happy with the look, I sealed everything with Minwax Polycrylic spray. I was a little unsure about using a spray sealer at first, but it actually went on very smoothly and worked great for this piece.
Step 12: Finish the Butcher Block Top
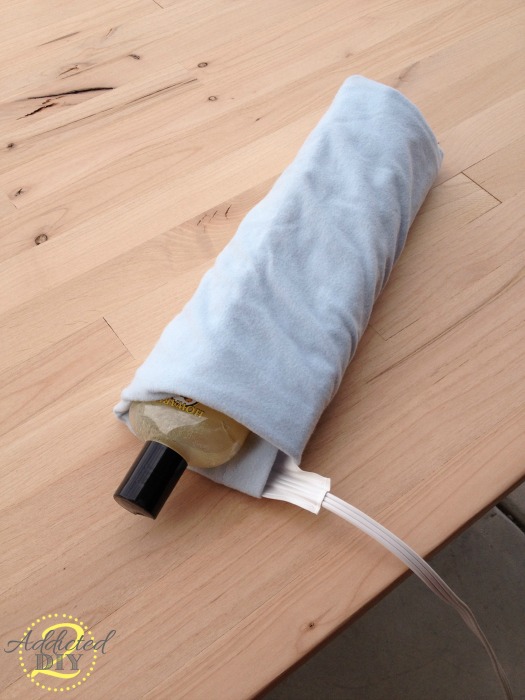
If your butcher block top is unfinished, you’ll want to protect it before installing it.
I used Howard Butcher Block Conditioner, which contains beeswax and mineral oil. I had heard from several people that conditioner was a better option than using mineral oil alone. Since it applies best while warm, I kept it softened by wrapping it in a heating pad between coats.
I applied three coats, letting each coat soak in for about 20 minutes and buffing between coats.
Step 13: Attach the Top and Install the Hardware
Once the butcher block top was finished, I attached it to the base using 1 1/4-inch pocket hole screws.
After that, I installed the cabinet and drawer hardware. Since these are inset cabinet doors, make sure you also purchase door stops to go with your hardware.
Step 14: Style the Island and Put It to Use
My mom found bar stools at Target that paired perfectly with the island hardware and overall style. The side X detail was originally designed for wine storage, but since she isn’t much of a wine drinker, she uses it to hold kitchen towels instead — which I think is such a clever alternative.
What I Would Do Differently
If I were building this kitchen island again, I would double check every plywood dimension after the store cuts were made and before assembling anything. Even a small difference can affect the fit of drawers and doors later on.
I would also strongly consider spraying the paint instead of brushing it by hand, especially for a large build with lots of tight corners and detailed trim.
Final Thoughts on This DIY Kitchen Island
This DIY kitchen island was easily one of the most rewarding builds I had taken on at the time. It added so much function and beauty to my mom’s kitchen, and it was a great reminder that large furniture-style builds are completely doable with some patience and planning.
If you’ve been thinking about adding a kitchen island to your home, this project is such a great way to add storage, work surface, seating, and custom style all in one piece.
Have you ever built a DIY kitchen island or is one on your project wish list?