How to Install Laminate Flooring Over Concrete (Step-by-Step DIY Guide)
This post was originally published in 2016 and has been updated with improved instructions, tips, and current best practices.
Hey there everyone!
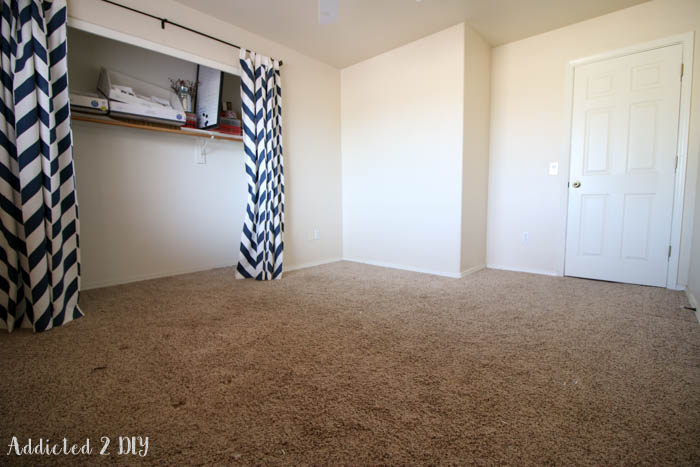
I’ve been working on finishing up my office/craft room makeover, and today I’m sharing the flooring we chose and how we installed it.
As part of this project, I knew new paint and flooring needed to happen before building the Murphy bed. With how large that bed was going to be, it truly felt like a now or never situation. So, after painting the room and installing new baseboards, we moved on to replacing the carpet with laminate flooring.
Why We Chose Laminate Flooring
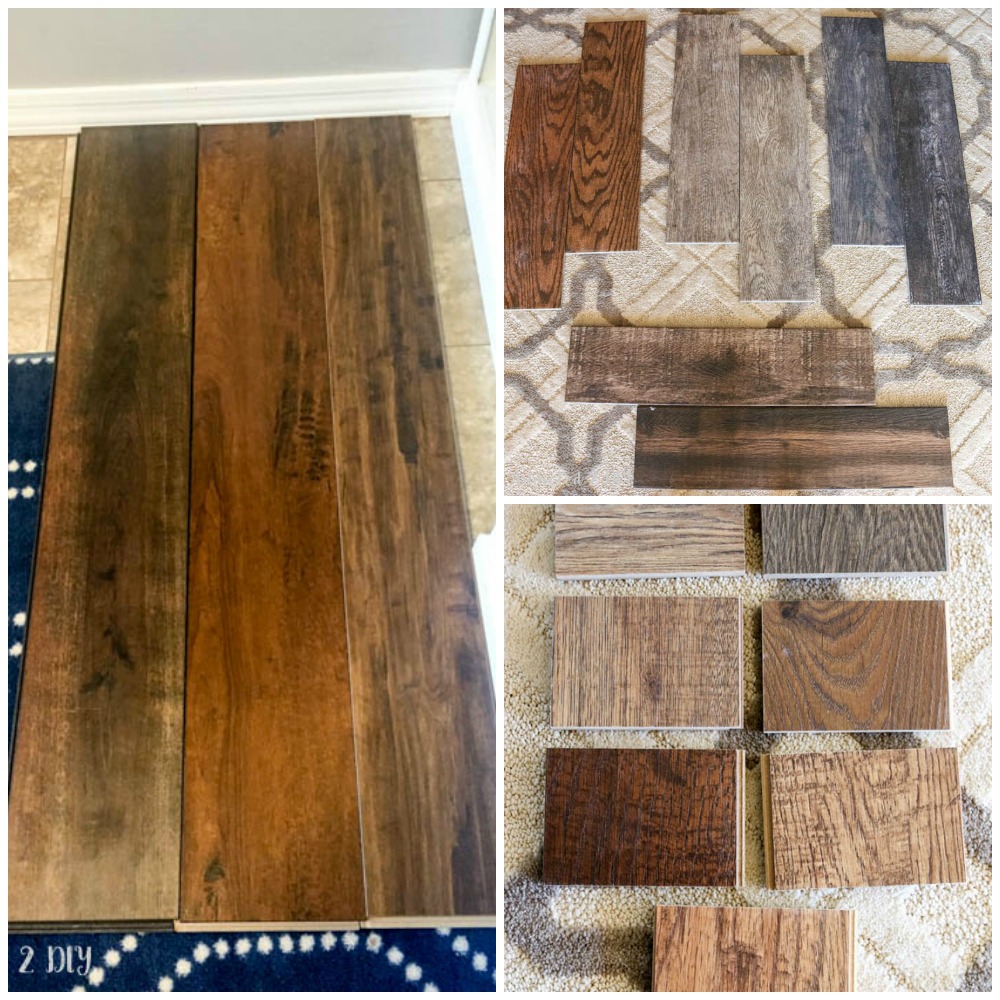
If you follow me on Instagram, you might remember when I was asking for opinions on flooring options. At the time, we went back and forth between laminate flooring and wood-look tile.
We ultimately chose laminate because it:
- Is more DIY-friendly and faster to install
- Feels warmer and softer underfoot
- Offers a realistic wood look at a lower cost
- Can be wet mopped (depending on the product)
We ended up choosing AquaGuard laminate flooring in the color Cocoa from Floor & Decor. At the time, we hadn’t heard much about this brand, but it had a high wear rating and checked all the boxes for what we needed.
Even now, I still love how well this color transitions with the existing tile in the rest of our home.
Materials & Tools
Materials
- AquaGuard Laminate Flooring (Cocoa)
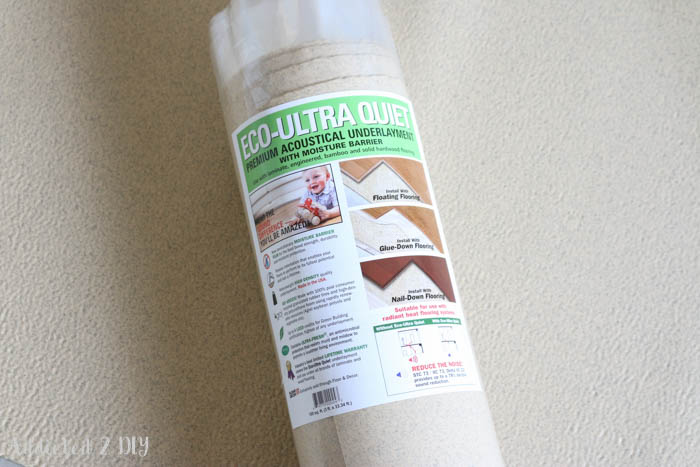
- Eco-Ultra Quiet Underlayment (necessary moisture barrier for installation over concrete floors)
- 3/16″ spacers or plastic shims
Tools
- Tape measure
- Utility knife
- Laminate Flooring Cutter
- Laminate flooring installation kit
- Table saw or compact circular saw for trimming width of flooring (if needed)
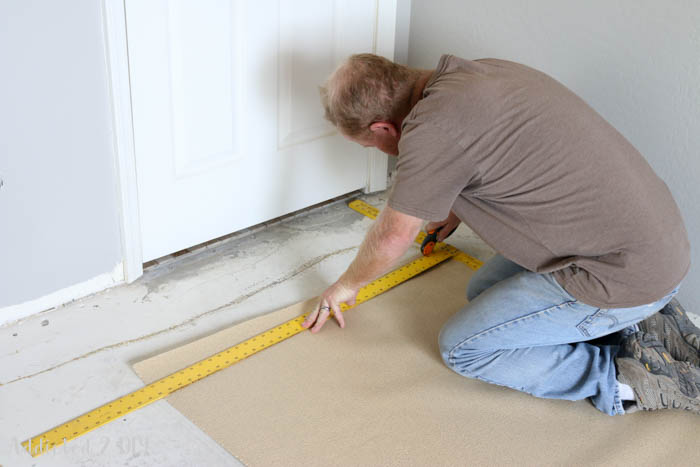
Step 1: Prepare the Subfloor
Because we installed this flooring over a concrete foundation, proper prep was essential.
Before starting, make sure your subfloor is:
- Clean
- Dry
- Level
A moisture barrier is especially important when installing over concrete to prevent long-term damage.
Step 2: Install the Underlayment
We chose the Eco-Ultra Quiet underlayment, which includes a built-in moisture barrier.
At the time, it was slightly more expensive, but after testing the sound difference in-store (yes, we were those people bouncing golf balls on displays 😄), it was an easy decision.
Installation was straightforward:
- Roll out the first row
- Peel the adhesive strip
- Stick it directly to the floor
- Overlap the next row and seal it
This creates a continuous moisture barrier across the entire floor.
Step 3: Plan Your Layout
We installed the flooring from left to right across the room, which worked best for our layout.
Before you begin:
- Measure your space
- Plan your plank placement
- Avoid ending with very narrow pieces along the wall
Taking a few minutes here makes the installation go much smoother.
Step 4: Install the First Row
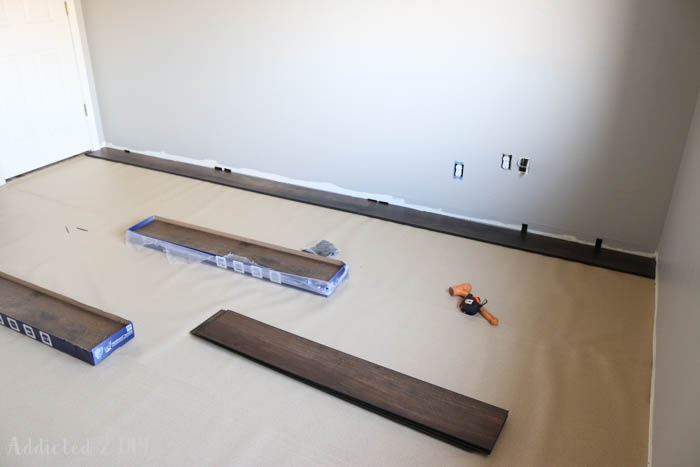
This is the most important step of the entire process.
To start:
- Place 3/16″ spacers along the wall to allow for expansion
- Lay your first row of planks
- Make sure everything is straight and aligned
The laminate we used fit slightly underneath the drywall, which gave it a little extra room for movement.
Step 5: Click and Lock the Flooring
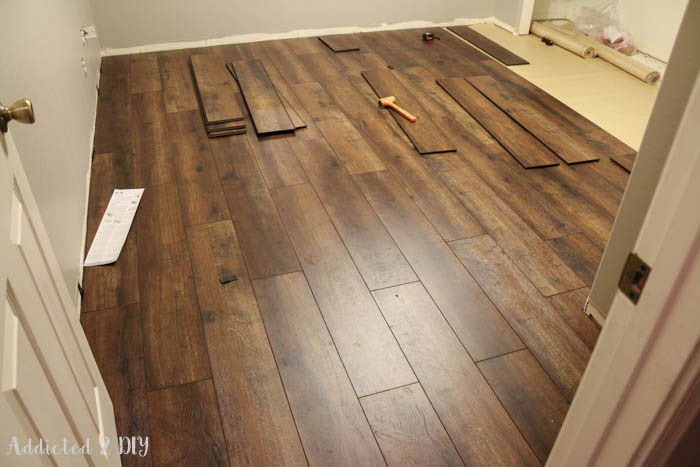
The flooring uses a tongue-and-groove click system, making it a great option for DIY installation.
To install each plank:
- Angle it into the previous row
- Press down to lock it into place
- Use a tapping block if needed
I’ll be honest—this is where we hit a bit of a learning curve.
During the first couple of rows, we broke a few tongues, which immediately had my husband convinced we’d bought terrible flooring and should return it all. 😅
After a little trial and error (and some patience), we realized it just required a lighter touch and a bit more finesse. Once we got the hang of it, the rest of the installation went smoothly.
Step 6: Cut Around Obstacles
The most challenging part of the install was cutting around the closet and tighter areas.
Helpful tips:
- Measure carefully before cutting
- Use the right saw for clean edges
- Take your time to minimize waste
With a little patience, we were able to complete these sections with minimal issues.
Step 7: Finish the Floor
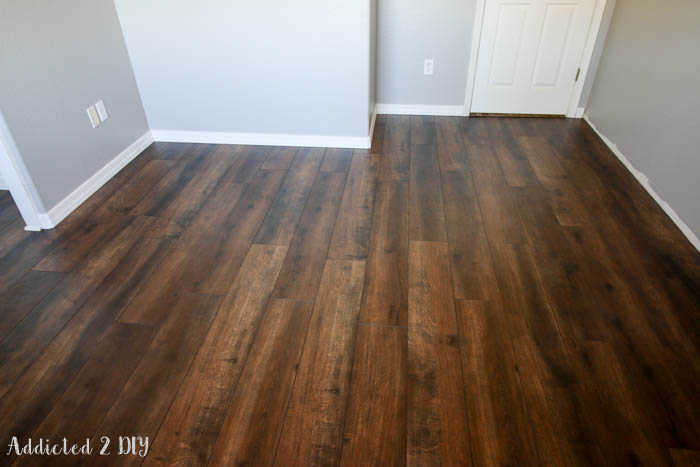
Once all the planks were installed:
- Remove spacers
- Install baseboards or trim
- Clean the floor
And just like that, the transformation was complete!
Final Thoughts
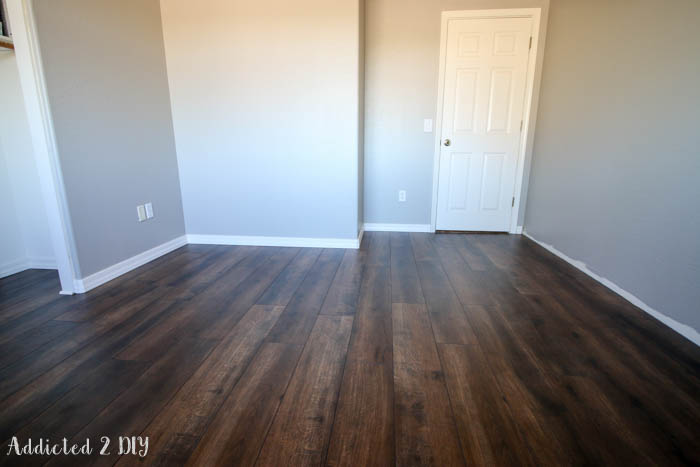
At the time, I lost count of how many times I said, “I’m so glad we chose this flooring.”
It completely transformed the room. The color is rich, warm, and has that beautiful aged barn wood look that fits perfectly with the style I was going for.
Even now, I still think it was the perfect choice for this space—and it’s held up incredibly well over time. In fact, we loved it so much that we seriously considered installing it in the other bedrooms as well.
What We Learned
If you’re planning to install laminate flooring, here are a few key takeaways:
- Take your time with the first row—it sets the tone for everything
- Always use spacers to allow for expansion
- Handle planks carefully to avoid damaging the locking system
- Invest in quality underlayment for better sound and durability
- Don’t automatically go with the cheapest option—you’ll see and feel the difference
What’s Next
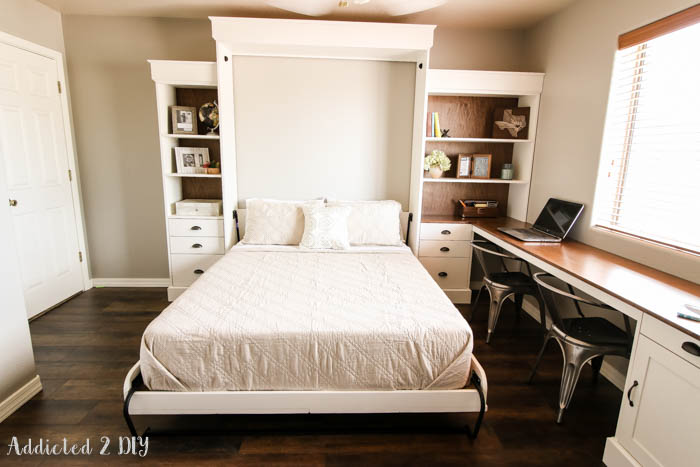
Next up in this space is the Murphy bed build, which is definitely one of the biggest projects I’ve tackled.
Disclosure
This post contains some affiliate links. Should you purchase anything from one of these links, I may receive a small commission at no extra cost to you.