PB Teen Inspired Double Bed
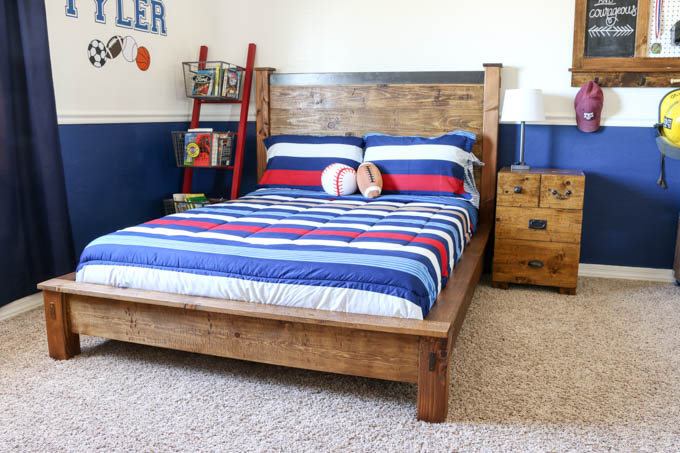
If you want a bed that looks like it came straight from the Pottery Barn Teen catalog but costs a fraction of the price, this build is for you. I made this knockoff PB Teen Emerson double bed for my oldest son’s room back in 2015 along with several other furniture pieces in there. Believe it or not, even at 20 years old and nearly 6′ 2″ tall, he still sleeps in this bed. One of the great things about building your own furniture is that, if you do it right, it can last for many years to come. In this case, over a decade.
This post includes free printable plans with a full shopping list and cut list. Download them before you start.
What You’ll Need
Download the free printable plans — they include your complete shopping list and cut list so you’re not guessing at the lumber yard.
Tools used:
- Kreg Pocket Hole Jig
- Brad nailer
- Drill
- Clamps
- Circular saw or miter saw
Key materials:
- 4×4 lumber (legs)
- 3/4″ plywood (headboard and footboard backing)
- 1×4 and 1×6 boards (headboard facing)
- 2×2 lumber (interior mattress support rails)
- 1×3 boards (mattress slats)
- Bed rail brackets (500 lb capacity, set of 4 — about $15 on Amazon)
- 2″ x 3″ roof flashing (for the metal cap detail)
- Wood Glue
- Elmer’s ProBond adhesive (or other construction adhesive)
- Elmer’s color-change wood filler (or other wood filler)
- Minwax stain in Provincial
- Rustoleum oil rubbed bronze spray paint
- 1 1/4″ pocket screws, brad nails, and 2″ construction screws
- 3/4″ lag bolts and 4 1/2″ x 4 1/2″ square post caps
Step-by-Step Instructions
Step 1: Build the Headboard Backing
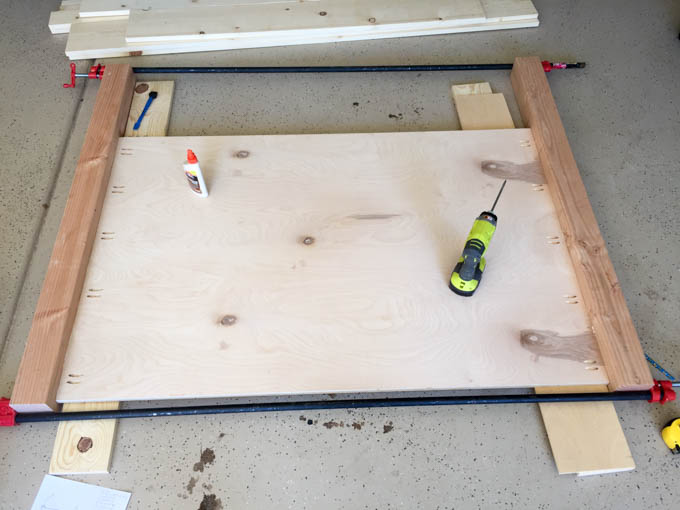
Drill pocket holes into each side of the 3/4″ plywood headboard backing using a Kreg pocket hole jig. The backing needs to sit 1″ inset from the back of the 4×4 legs and 1″ below the top of the legs.
Pro tip: Set scrap pieces of 1×6 board and 1/4″ plywood on the floor and rest the plywood on top of them to position it correctly before attaching. Glue each side, clamp, and secure with 1 1/4″ pocket screws.
Step 2: Face the Headboard
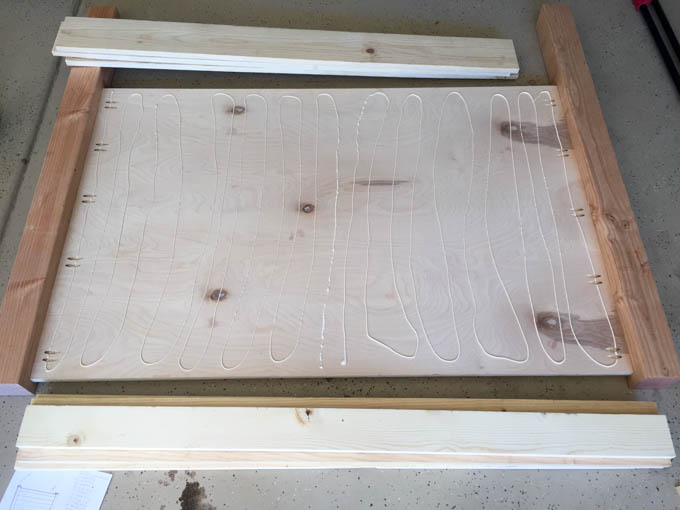
Apply a generous amount of wood glue to the plywood backing. Start with a 1×4 board flush with the top, then continue down with 1×6 boards. Nail everything in place with 1 1/4″ brad nails.
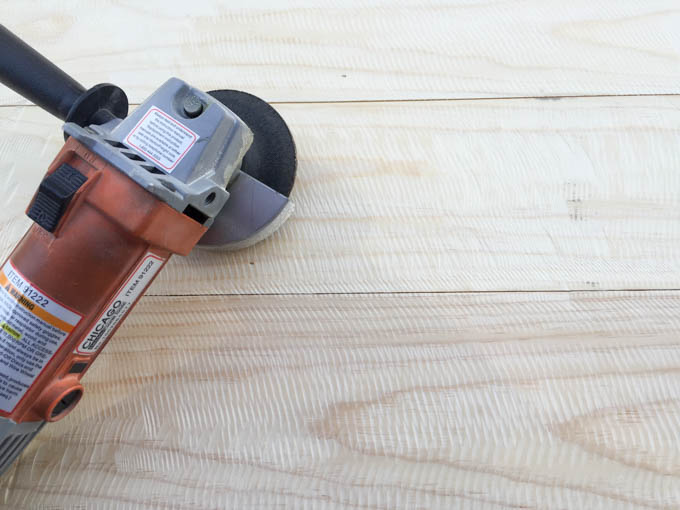
Want the rustic sawmark look? Add distressing to your headboard boards, bed rails, and top rails before assembly. I have a full tutorial on how to do that.
Step 3: Build the Footboard
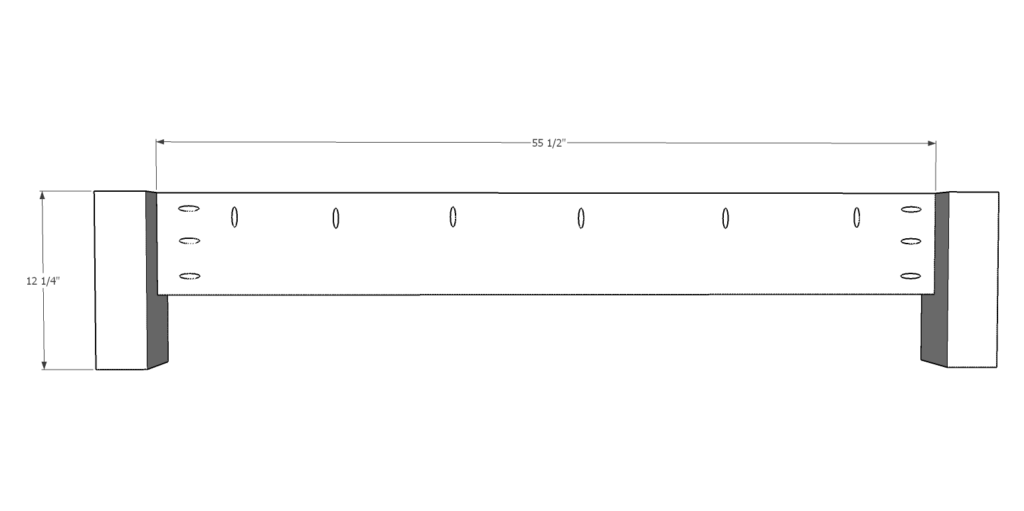
Use the same method as the headboard. The footboard backing sits 1″ inset from the front of the 4×4 legs. Glue, clamp, and attach with 1 1/4″ pocket screws. Before moving on, drill pocket holes into the top of the footboard — you’ll need them in a later step.
Step 4: Prepare the Side Rails
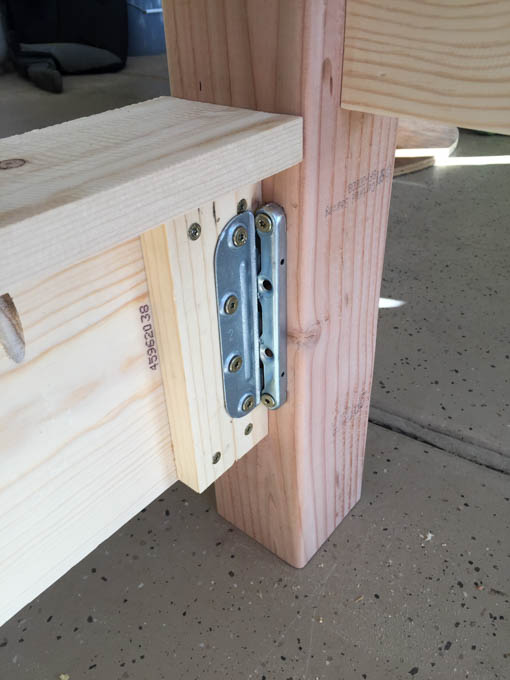
The side rails attach with hardware brackets rather than being glued permanently, so the bed can be disassembled for moving. To reinforce the bracket connection, glue and screw 1×3 furring strips to each end of the side rails using wood glue and 1 1/4″ construction screws. Then drill 3/4″ pocket holes into the tops of each side rail.
Step 5: Install the Bed Rail Brackets
The bed rail brackets I used hold up to 500 pounds and come in a set of four — a solid, affordable solution. Attach them with 2″ construction screws, and make sure every bracket goes in at the exact same position on each leg. Consistent placement is what keeps your rails level.
Step 6: Attach the Rail and Footboard Tops
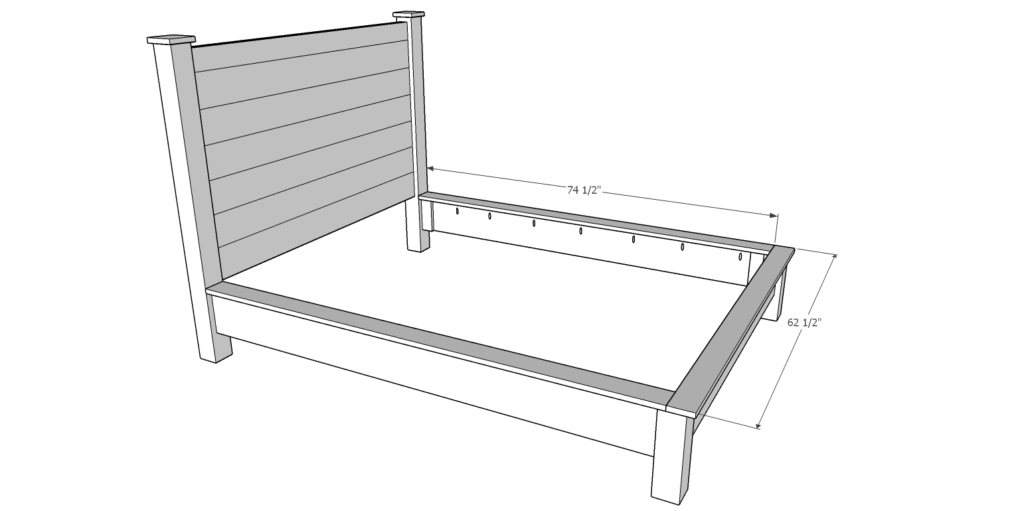
Use wood glue and 1 1/4″ pocket screws to attach the top boards to the bed rails and footboard.
Step 7: Add Interior Mattress Support Rails
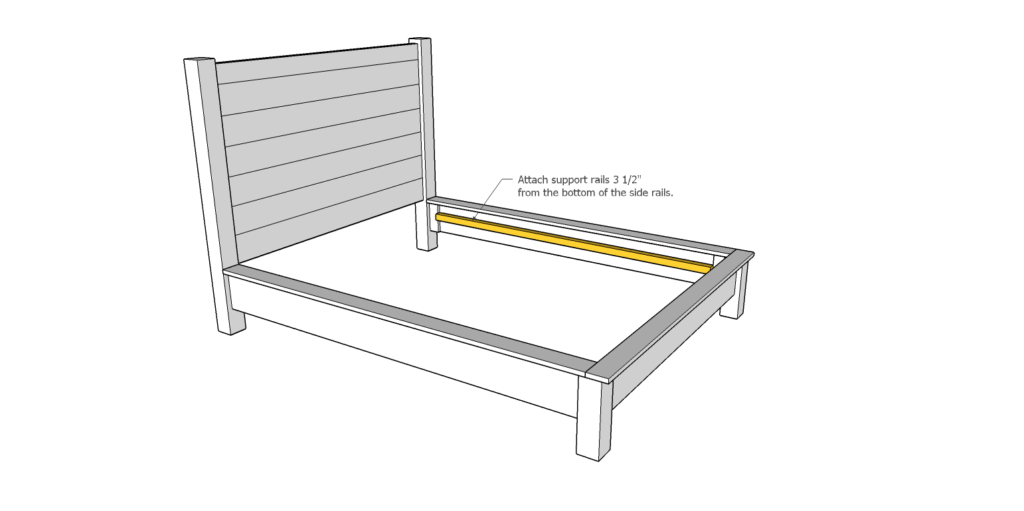
The mattress for this bed is 10″ thick and I wanted it to sit about 6″ above the top of the rails, so I positioned the 2×2 interior support rails 3 1/2″ up from the bottom of the side rails. Attach with wood glue and 2″ construction screws.
Step 8: Add the Decorative Details
This is what takes the build from “nice bed” to “is that from PB Teen?” territory:
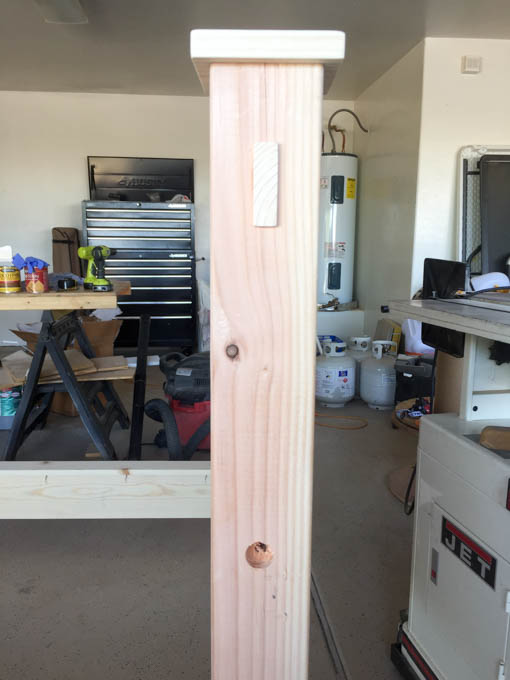
- Drill 1″ holes into the sides of the headboard legs and screw in 3/4″ lag bolts
- Add 4 1/2″ x 4 1/2″ square post caps to the tops of each leg
- For the mortise-and-tenon look: cut 1×3 boards into 1/8″ thick strips and glue and nail them to the front and back of each leg, positioned about 2 1/2″ down from the top
Step 9: Fill, Sand, and Stain
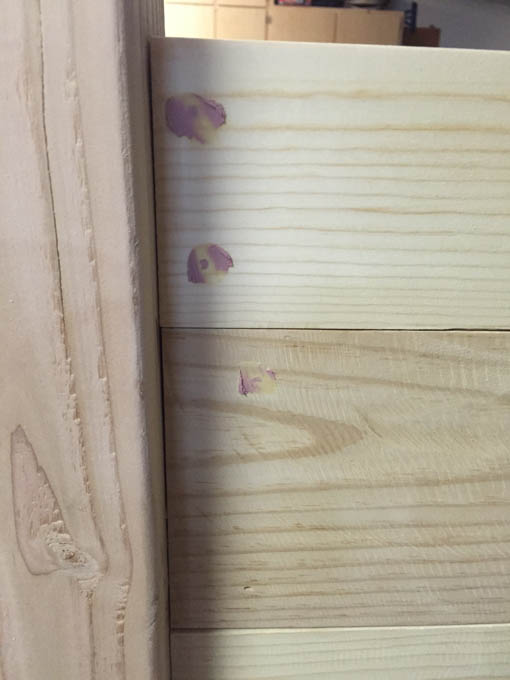
Fill all nail holes with wood filler. I used Elmer’s color-change wood filler, which turns from pink to white when it’s fully dry — no more guessing whether you need to wait longer. Once dry, sand the entire bed with 220-grit sandpaper and apply one coat of Minwax stain in Provincial. One coat keeps it from going too dark. Then I finished the entire bed with 3-4 coats of Minwax wipe on polyurethane.
Step 10: Add the Metal Cap Detail
The original Emerson bed has a metal-wrapped top on the headboard. Here’s how I replicated it:
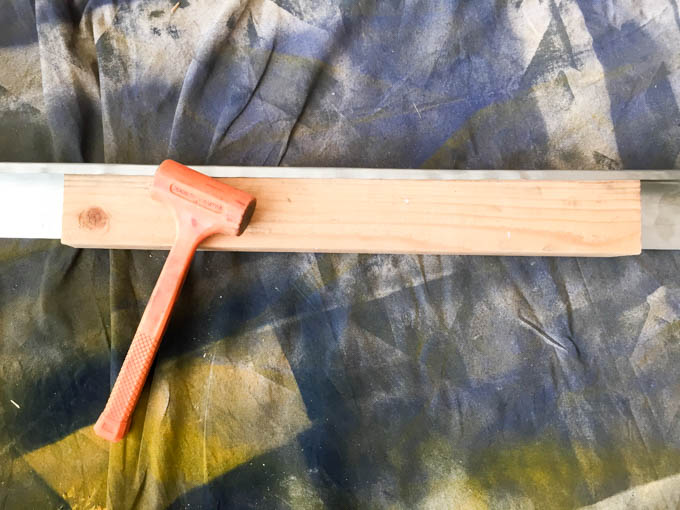
Option A (what I did): Purchase a 2″ x 3″ x 10′ piece of roof flashing. Cut it to fit over the top of the headboard. Use a 2×4 as a guide and pound the extra 1/2″ overhang down to wrap around the back. Spray paint with Rustoleum oil rubbed bronze.
Option B : Omit the metal top and add a 1×2 to the top of the headboard with brad nails and wood glue.
Step 11: Glue the Metal Cap in Place
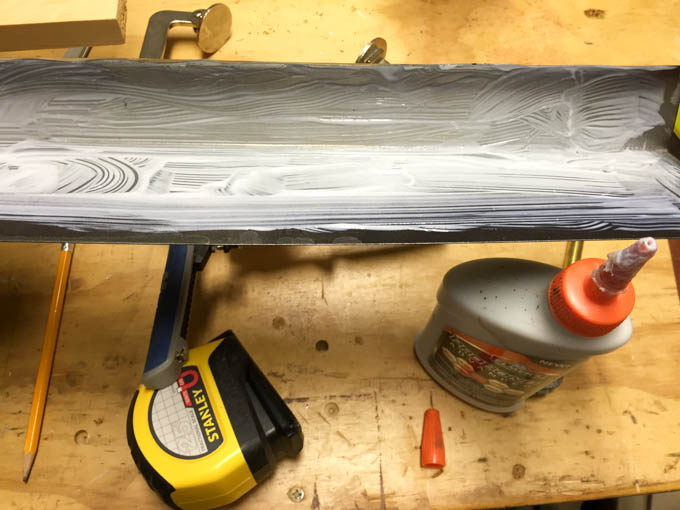
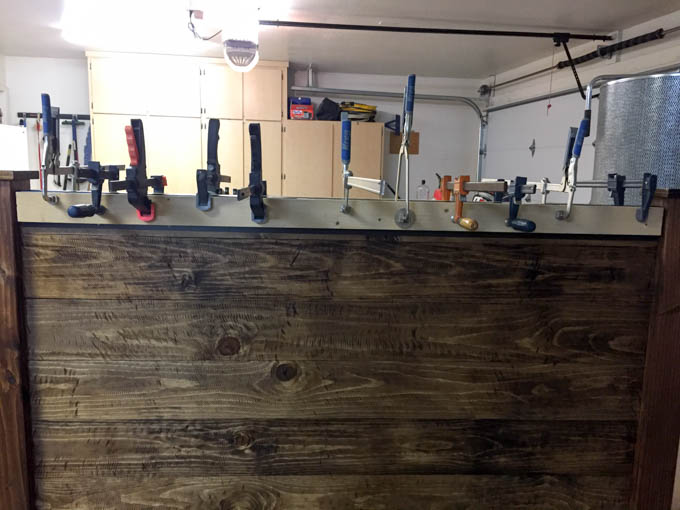
Brush Elmer’s ProBond adhesive onto the headboard top — it’s formulated for bonding porous and non-porous surfaces, so wood-to-metal is exactly what it’s designed for. Clamp with every clamp you own, using a flat board as a barrier between the clamps and the metal. Let it cure overnight. Wipe any squeeze-out immediately with a wet cloth.
Step 12: Nail and Touch Up the Metal
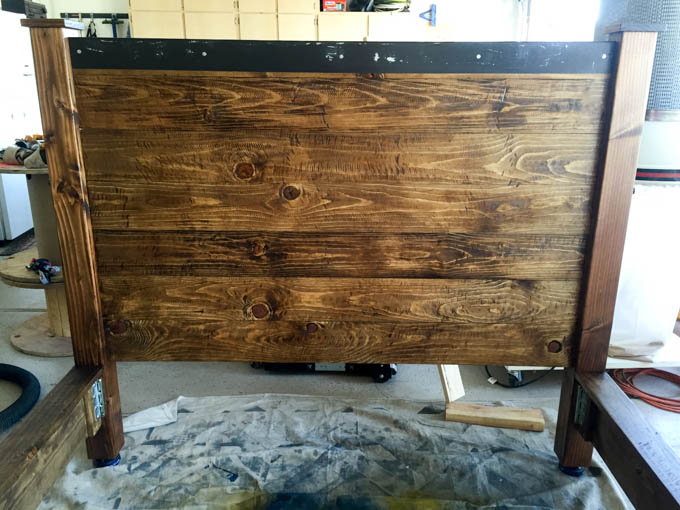
Here’s an honest moment: I pulled the clamps the next morning and found the spray paint had stuck to my clamping boards and peeled. The metal itself was glued on perfectly flat — the finish just needed more time to cure than I gave it. Lesson learned.
To both add authenticity and nail down the metal, I drilled pilot holes through the flashing and pounded in 1/2″ roof nails. The back edge wasn’t lying flat, so I nailed that down too. I masked off the wood and did a touch-up with spray paint over the nails and any peeled spots.
Step 13: Install the Mattress Slats
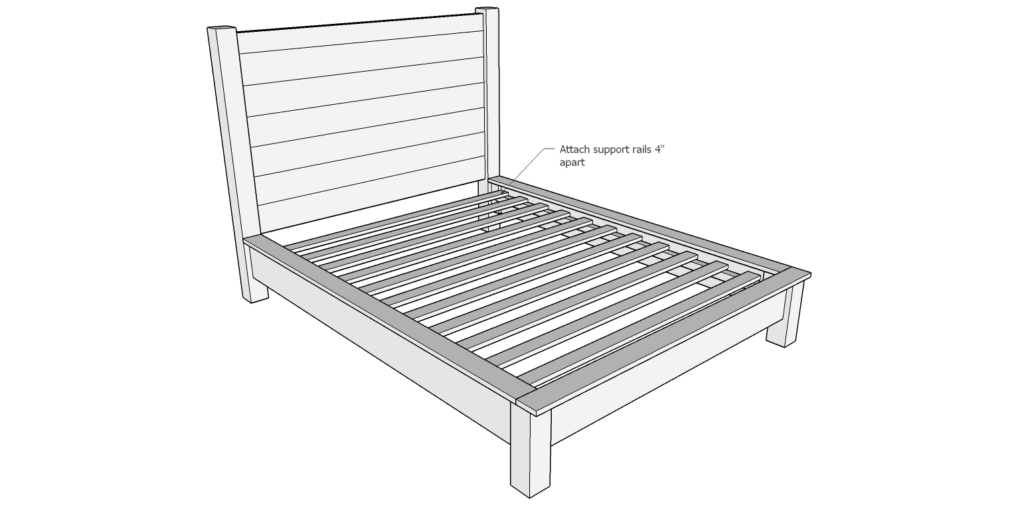
Once the bed is assembled in the room, cut 1×3 boards to approximately 58 3/4″ and drop them into the frame across the 2×2 support rails.
NOTE: The diagram states to install the slats about 4″ apart. I would add a few extras and make them a bit closer together. The original method I used worked great for my son for a while, but as he grew, a couple of the bed slats failed and I needed to add more. Screw them in with 2″ screws. Drill pilot holes before driving the screws — self-tapping screws work, but pilot holes are cheap insurance against splitting.
Drop in the mattress and you’re done.
Finished Results
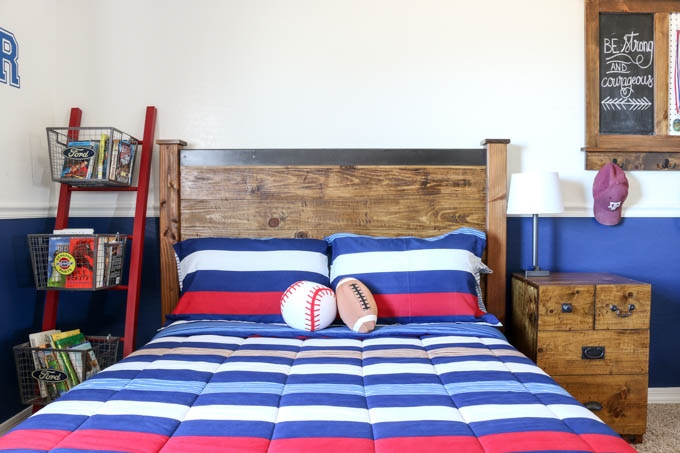
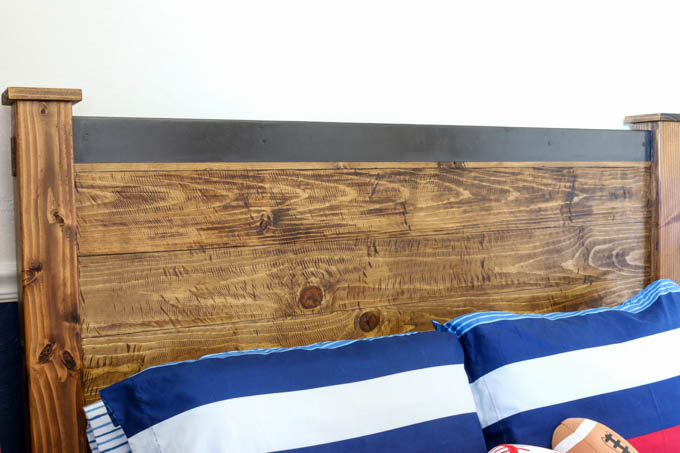
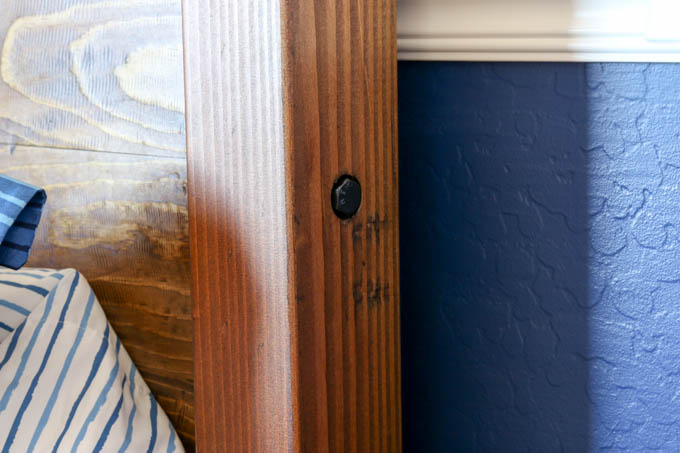
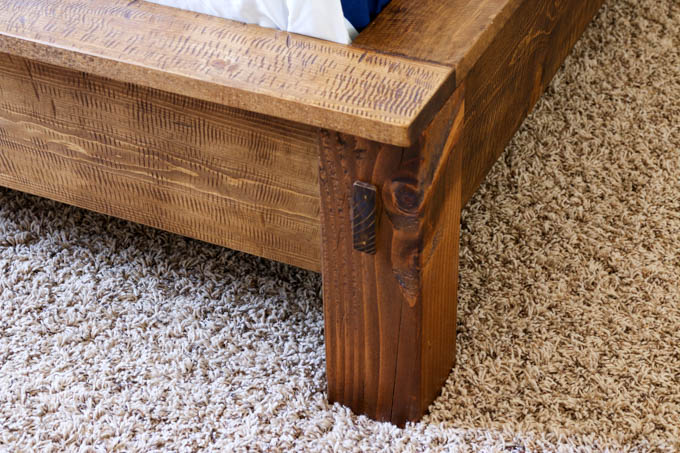
This bed costs a fraction of what the retail version sells for, and the details — the lag bolts, the post caps, the mortise-and-tenon strips, the metal cap — make it look like the real thing.
My son couldn’t wait to see his bed after school the day I finished it. And like I said, 11 years later and it’s still the same bed he’s sleeping in.
Frequently Asked Questions
What size is this bed?
This is a standard double (full) size bed frame.
Can this frame be disassembled?
Yes — that’s exactly why the side rails attach with brackets instead of being glued. It can be taken apart to move it through doorways or to a new room.
What if I don’t want the metal cap detail?
Option B in Step 10 covers you: Omit the metal and add a 1×2 on top.
What stain color did you use?
Minwax Provincial, applied as a single coat to keep it light and warm.
How much weight can this bed hold?
The bed rail brackets are rated to 500 pounds, and the frame is built with solid lumber. It’s sturdy enough for everyday use.
Can I build this as a queen instead of a double?
Yes, but you’ll need to adjust the cut list dimensions. Download the plans and modify the side rail and slat lengths accordingly.
Do I need a box spring?
No — the 1×3 slats provide the mattress support you need.