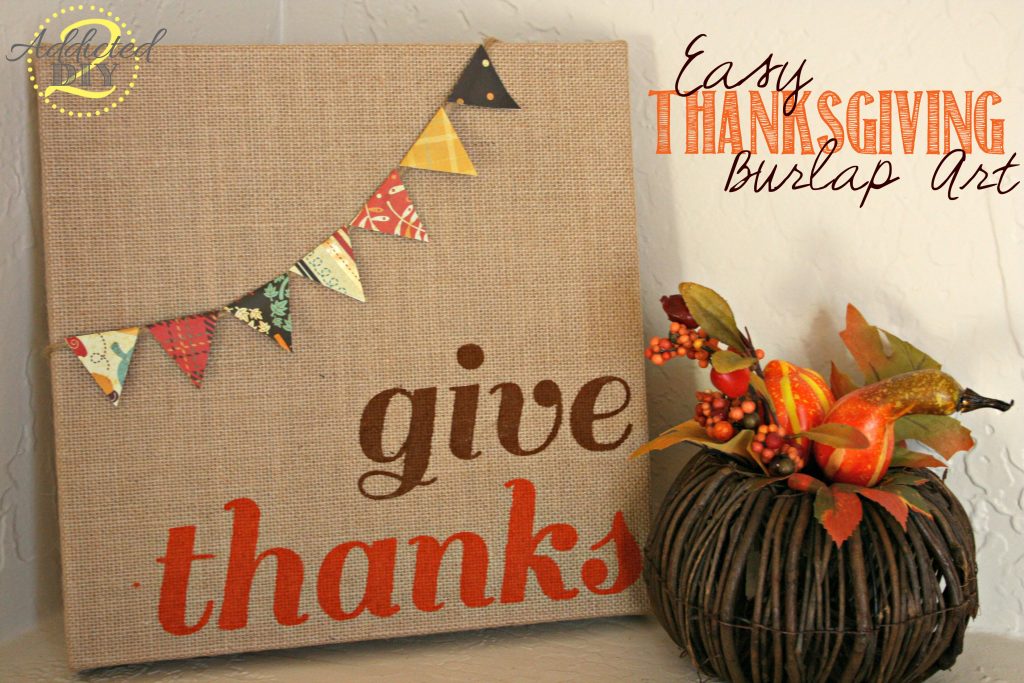
Hi Everyone. I’m still on a mission to stop neglecting fall and creating some fun and easy decorations. I whipped up this easy and inexpensive Thanksgiving burlap canvas art last night in no time flat. Quick and easy projects are definitely my favorite. Especially when they are also cheap!
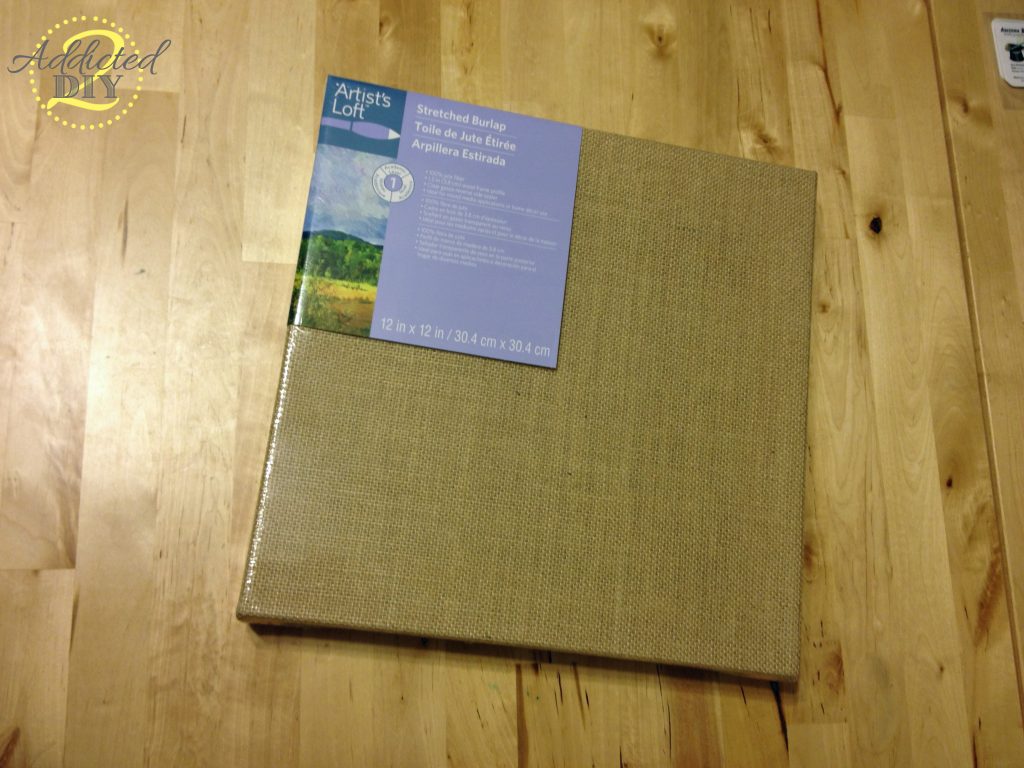 I started with a 12×12 stretched burlap canvas. They normally run for $10.99 at Michael’s, but I managed to score a couple today on clearance for only $2.99!
 I used a scrap piece of contact paper to cut out my words. I used the Sail font from Font Squirrel if you are curious. I unpeeled my contact paper and stuck it down on the burlap canvas, making sure to get out as many ripples and bubbles as I could.
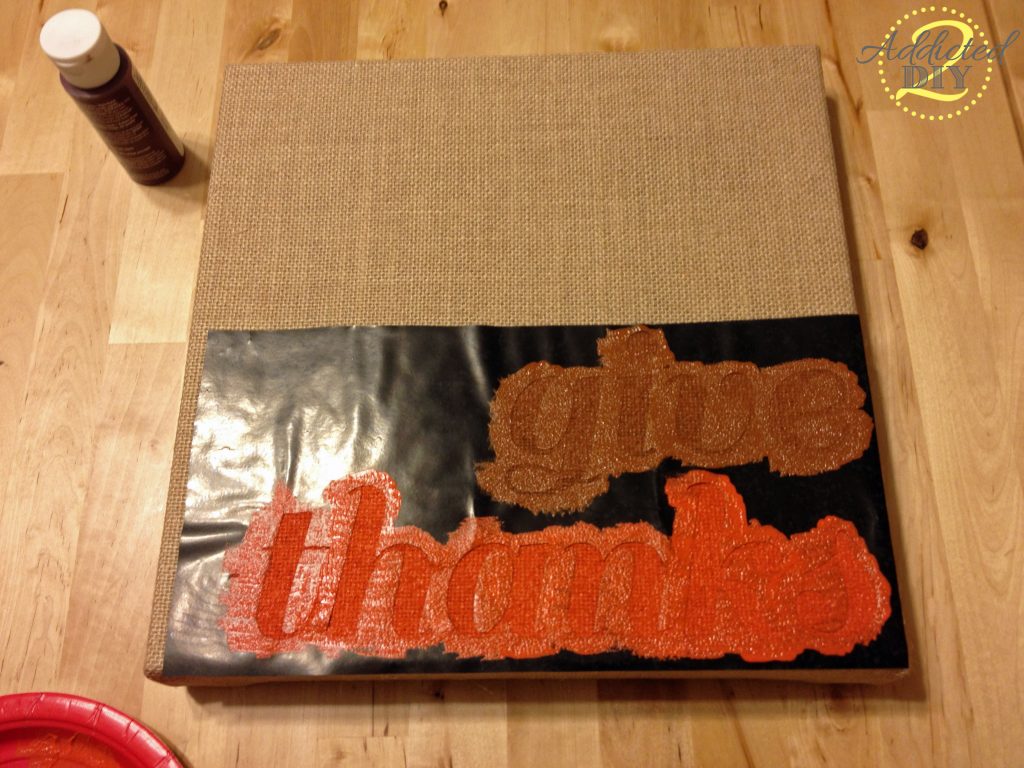 I used Martha Stewart satin paint in Adobo and Chesnut Brown. Using 1″ foam tip paint brushes, I just dabbed the paint on. I wouldn’t recommend brushing it, or your stand the risk of having the paint bleed underneath the stencil. Especially since things don’t stick to burlap very well.
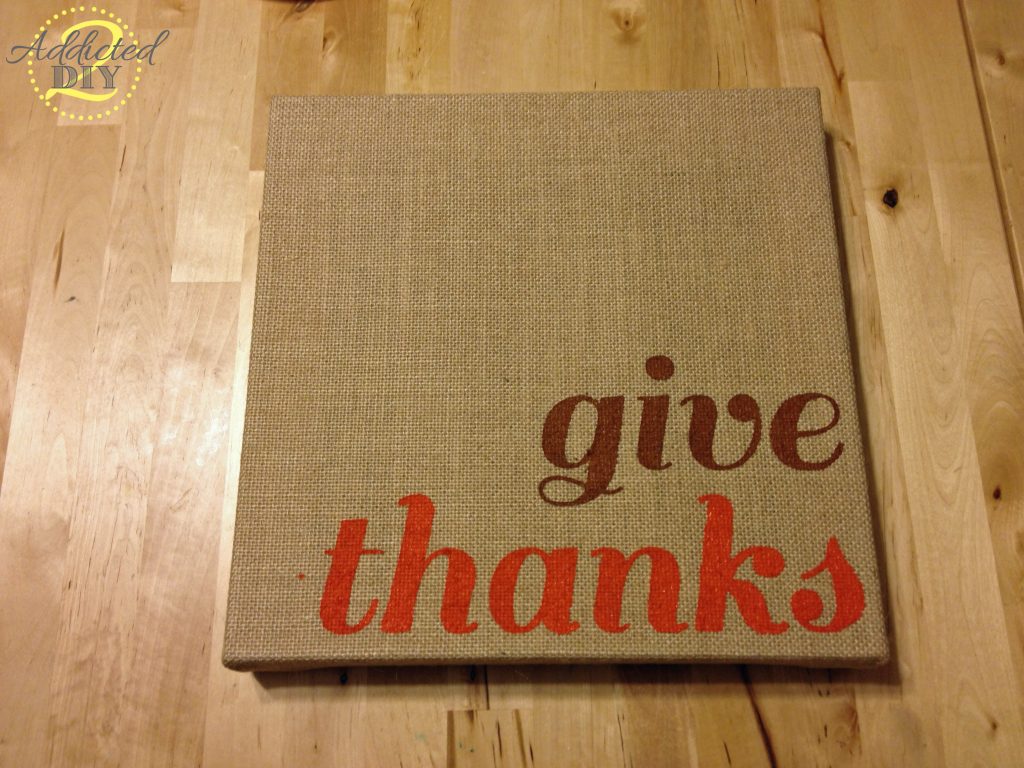 I peeled the stencil off and voila! You can stop here if you like, but I wanted to add some paper bunting to it.
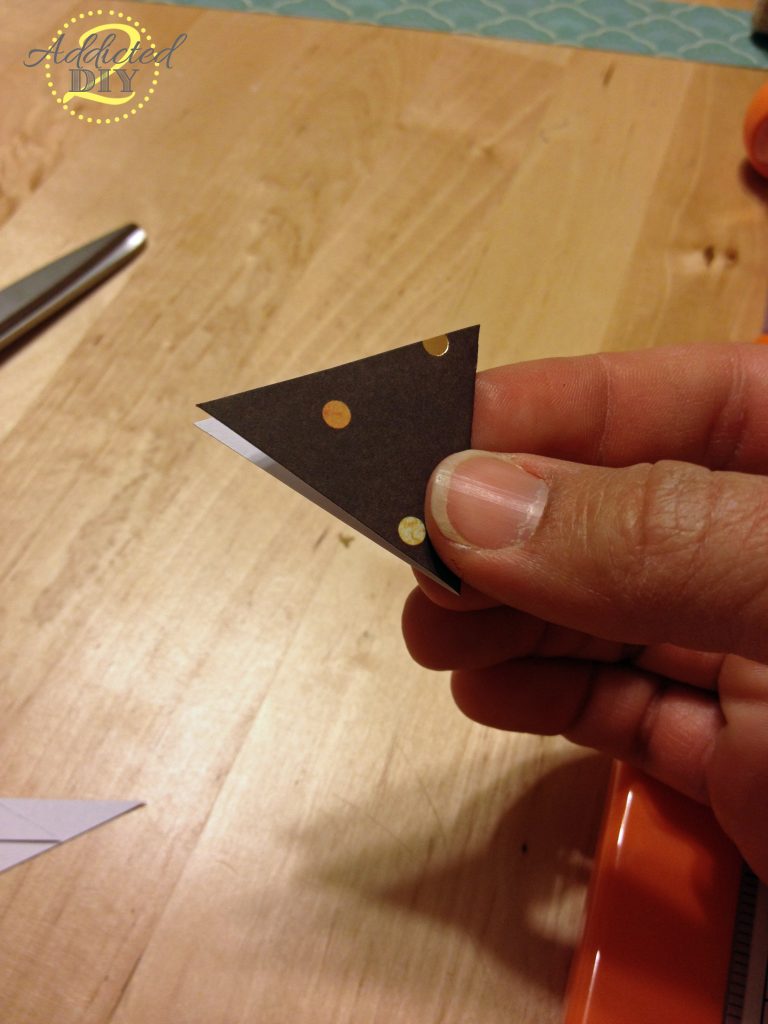 I had some thanksgiving scrapbook paper from a couple of years ago that I knew would be perfect for this. I cut 1 1/2″ x 3″ strips of different patterned paper and then folded them in half. I then cut my triangles for the bunting.
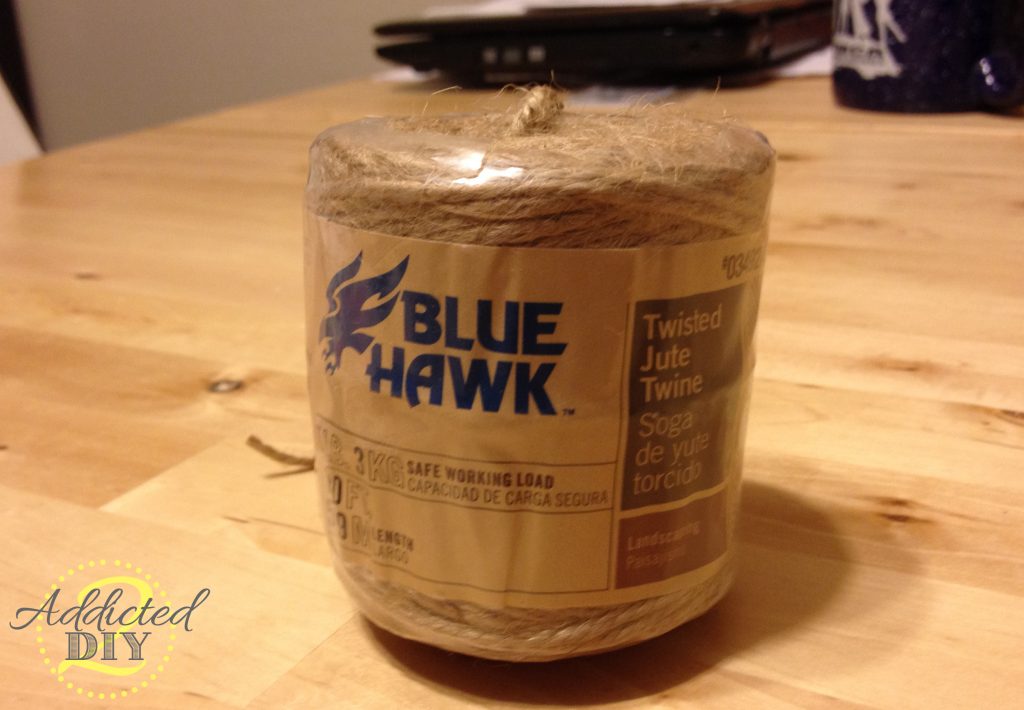
I had some jute twine in my craft closet and cut a piece at my desired length.
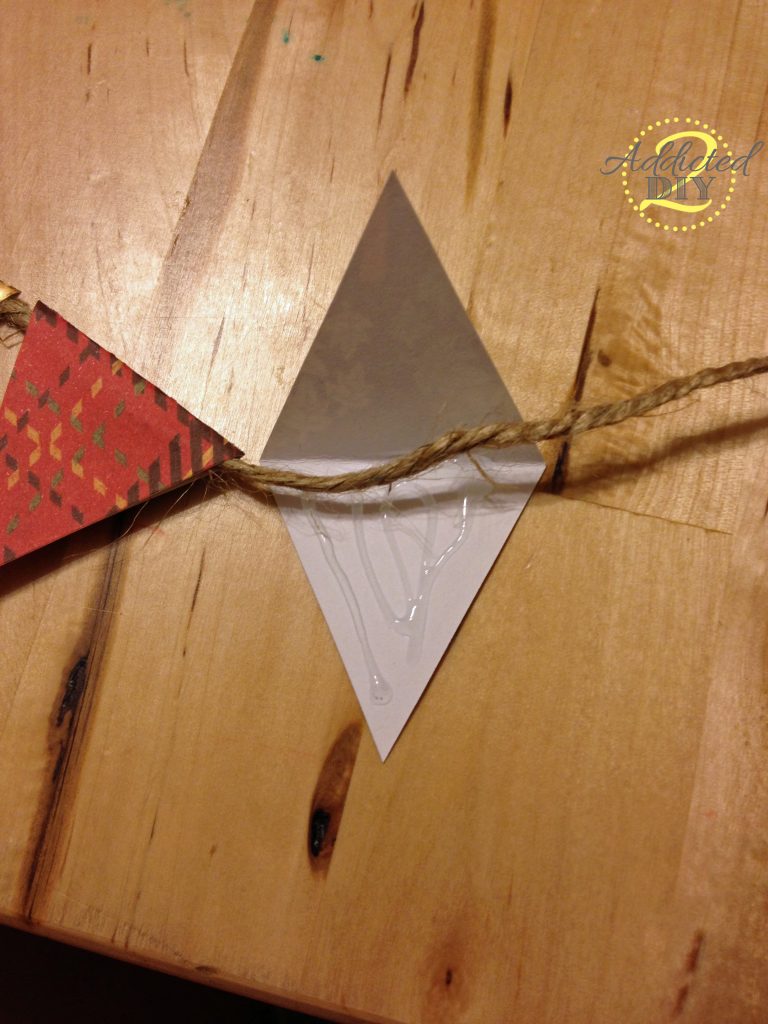 I glued and folded the paper over the twine and then set it on top of the canvas so I could figure out the proper placement of the bunting.
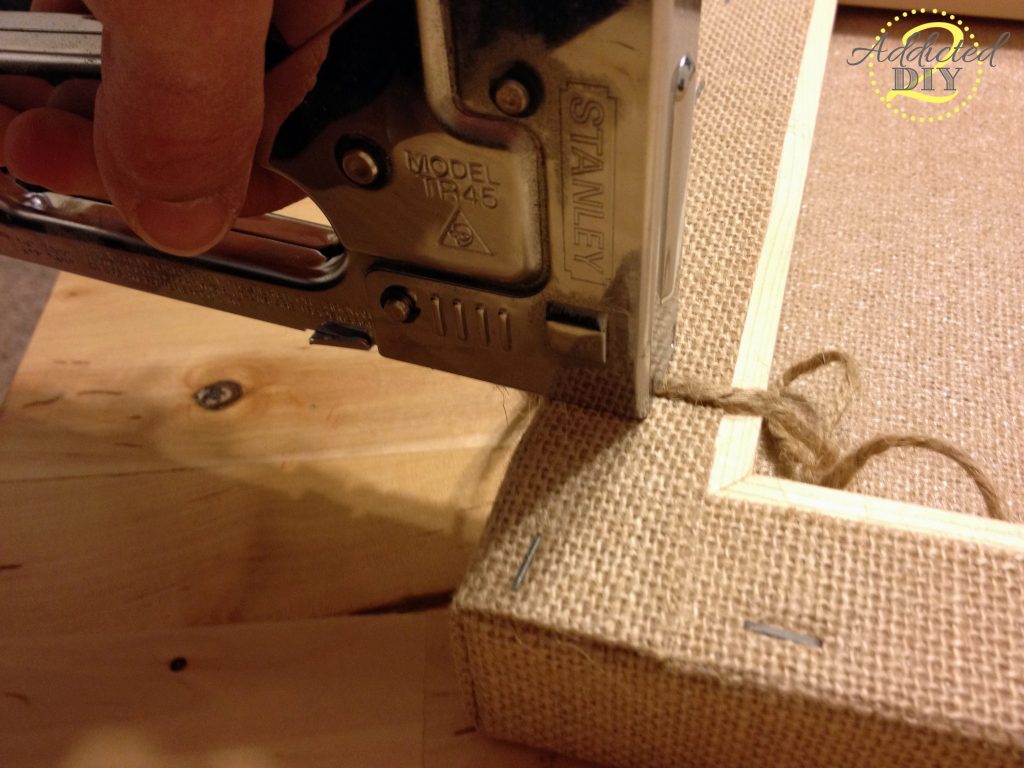 Once I had everything in place, I carefully flipped over the canvas and used my staple gun to secure the twine.
And that’s it! I even surprised myself at how quickly I was finished with it. I hope that you give a project like this a try. It is so easy and quickly adds a great seasonal touch to your home.
Thanks for stopping by!
~Katie
You can find me at these parties:


THE NY MELROSE FAMILY WHIMSY WEDNESDAYS
This is just beautiful and so sweet! What a great craft! 🙂
Love this, Katie! Shared on google:)
Thanks!
I love this!! So much so that I am featuring it tonight at the Get Your DIY On Challenge- hope you can swing by to grab your button and bring along a furniture project!! 7pm EST!
~Krista from the happy housie
And I’m following you now across the board Katie!!
Thanks so much! I think I am doing the same, but if not, I certainly will be:)
Thank you so much!!!
Thank you for linking to Whimsy Wednesday! I wanted to let you know I featured you in this week roundup – Thanksgiving Give Thanks Printables & Decor! You can see your feature here > http://www.ohmy-creative.com/holiday-crafts/thanksgiving/thanksgiving-give-thanks-printables-decor/
Hope to see you back again this week!
Susan
I did see that! Thank you so much! I look forward to linking up again this week:)
Hi Katie
Thanks for linking up. Your burlap board will be featured on Thursday evening at http://imnotatrophywife.com Please link up this Thursday evening! Loved your tutorial! laura
Thanks so much! I’ll be sure to link up this Thursday!
What size letters did you use??
They were cut at 2 1/2″
I LOVE this! So cute and seems simple enough I could try it. I hate to sound like a goober, but how did you get the lettering onto the contact paper? Did you run it through your printer? Thanks.
I cit it out with my die cutting machine. If you don’t have one, you could always purchase stencils or vinyl letters and use the negative of the vinyl letters