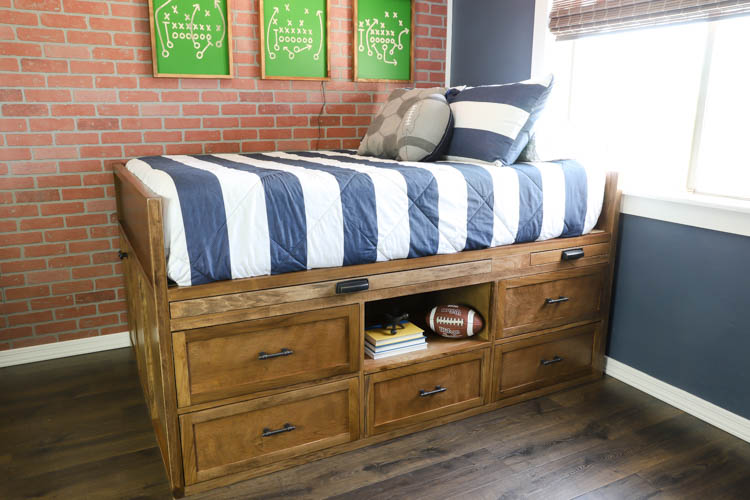
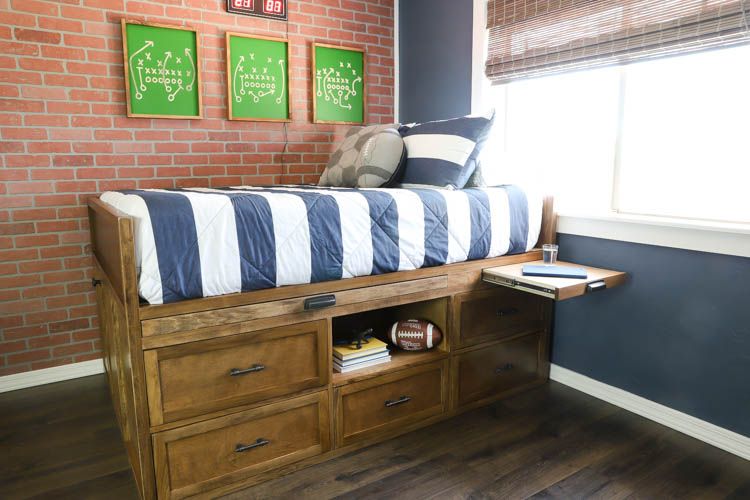
How to Build a DIY Captain’s Bed with Storage
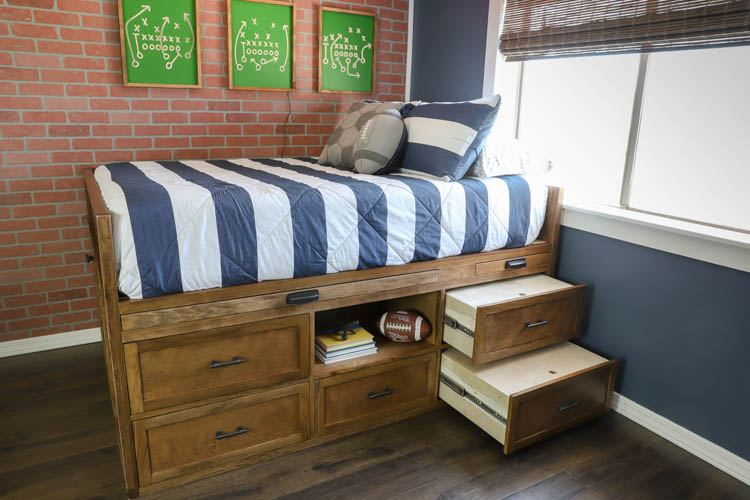
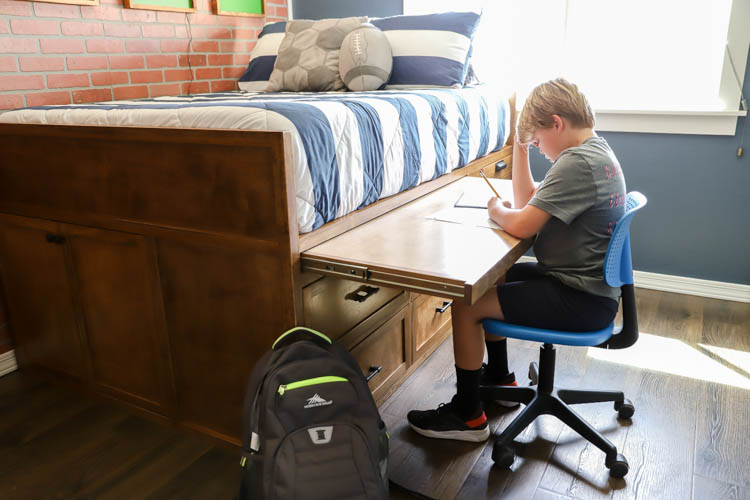
This full-size DIY captain’s bed packs in more storage than most bedroom dressers — visible drawers you can reach, a hidden compartment your kids will obsess over, a built-in desk, a nightstand, pegboard wall storage, and step-drawers to climb up. Here’s exactly how I built it, step by step.
In this guide:
- What you’ll need (materials & tools)
- 11 step-by-step build instructions
- Tips for finishing and final assembly
- Where to get the printable plans (full-size & twin)
This post was originally published in 2018 and has been updated for 2026 with better formatting and easier to follow instructions. 8 years later and my son is still sleeping on this very bed, though his secret hiding space is now just a place he throws all of his extra stuff when he “cleans” his room.
Why we designed this storage bed
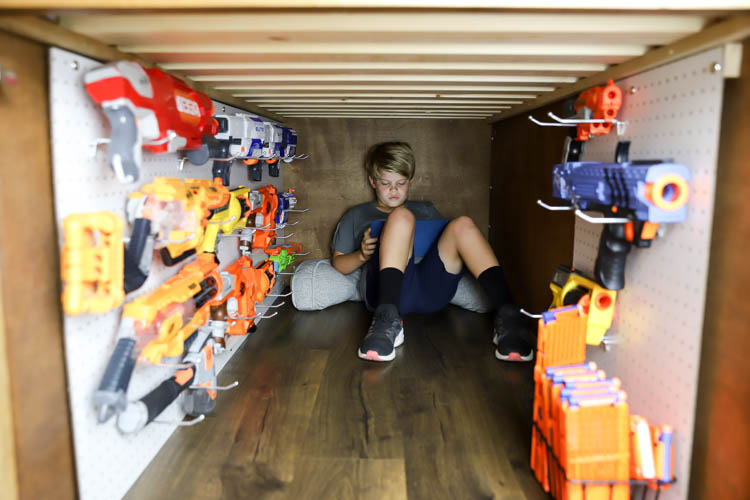
My kids have never made anything easy for me — and I love them for it. When my youngest wanted a new bed, we spent months sketching ideas and hunting for inspiration. His requirements? Lots of storage, something cool, and — his words — “a secret hiding spot.” The final design has all of it: eight storage drawers (two of which double as steps), a desk, a nightstand, a hidden compartment, and a pegboard wall for hanging gear. It’s a lot, but the build is totally doable in stages.
I partnered with Rockler Woodworking and Hardware on this project, and their tools and hardware made several of the trickier steps much more manageable.
Watch the YouTube Video
Get the printable plans
Both versions include a full cut list, materials list, and detailed assembly steps — no guesswork needed.
→ Full-size captain’s bed plans→ Twin-size plans→ Matching dresser plans
What you’ll need
Wood & materials
- Poplar (or dimensional pine from a home center) for 1×2s and 2×2s
- ½” plywood (drawer boxes) and ¼” plywood (drawer bottoms)
- ¾” plywood (support panels, headboard, footboard)
- 1×4 pine (mattress slats)
- ¾” square dowel (cleats)
- Pegboard + 1×2 spacer strip
- Wood glue, pocket screws (1¼” and 2½”), 1″ brad nails, 2″ wood screws
Hardware
- 100 lb, 18″ side-mount drawer slides (standard drawers, desk, nightstand)
- 220 lb heavy-duty drawer slides (step-drawers)
- Concealed hinges + magnetic catches (cabinet doors)
- Drawer and door pulls of your choice
Tools
- Table saw and circular saw
- Miter saw
- Pocket hole jig (Kreg R3 works great for large panels)
- Router with ¼” dado bit and ⅛” roundover bit
- Tongue-and-groove router bit set (Rockler)
- Brad nailer, paint sprayer (optional but helpful)
- Bar clamps (24″ to 8′)
Finishing
- Varathane Special Walnut stain (or paint of your choice)
- Satin polycrylic (3–4 coats)
- Wood filler (for pocket holes you want to hide)
How to build a DIY captain’s bed with storage: 11 steps
Note: Build and finish all components before bringing them indoors for final assembly. This bed is too large to move once assembled.
STEP 1
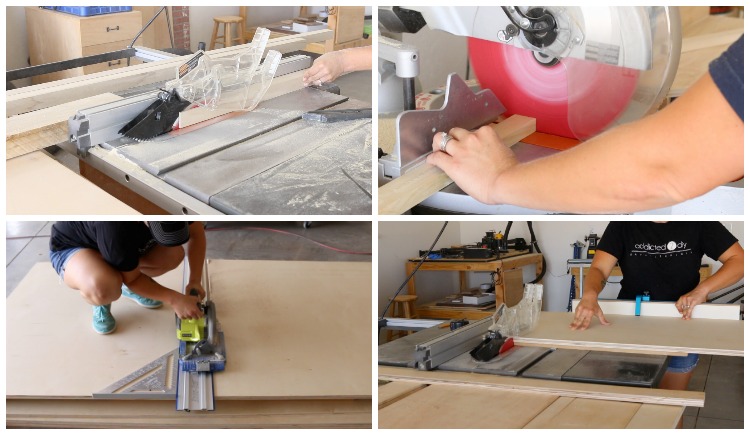
Mill or purchase your lumber
I milled poplar down into 1×2s and 2×2s using a table saw, but purchasing dimensional pine from a home center works just as well. Use a circular saw to break down large plywood sheets into manageable pieces, then make final cuts on the table saw.
STEP 2
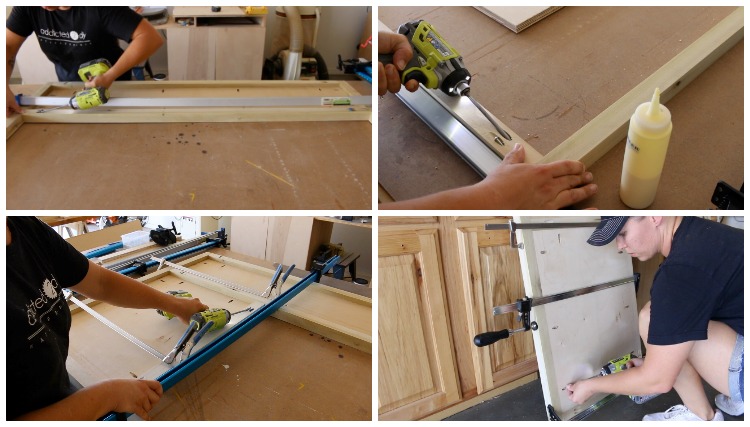
Build the headboard and footboard
Drill 1½” pocket holes into the 2×2s and ¾” pocket holes into the plywood panels. Assemble with wood glue and 1¼” and 2½” pocket screws.
STEP 3
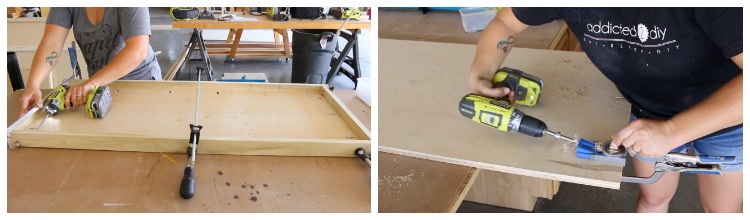
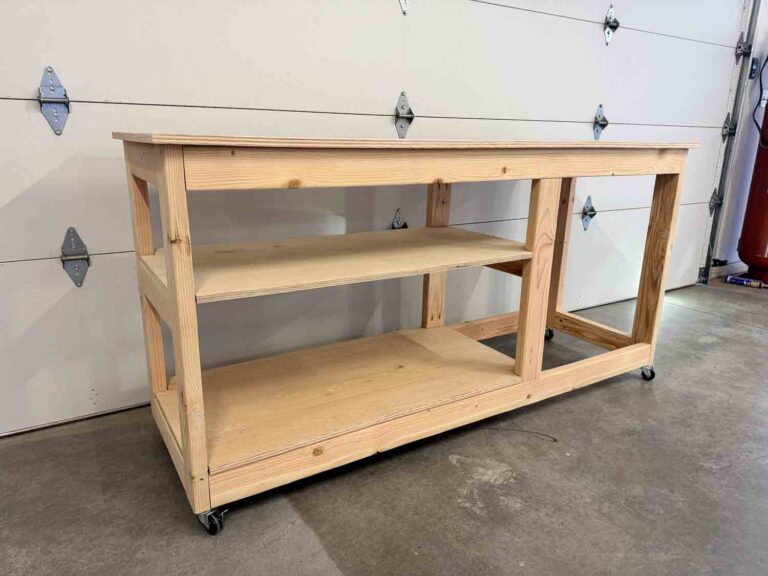
Build the desk, nightstand, and support panels
Rip poplar to 2″ wide strips for the desk and nightstand frames — this exact width is necessary for the drawer slides to fit their openings correctly. (If using a standard 1×3, rip it down.) For the large support panels, use a Kreg R3 pocket hole jig; its compact size makes drilling into oversized plywood easy.
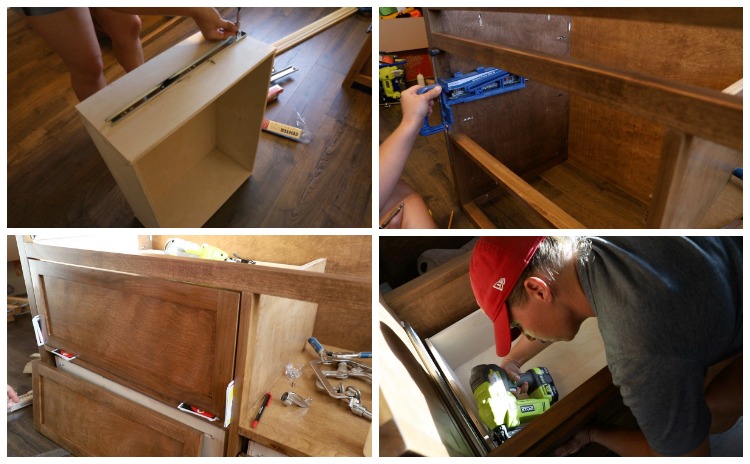
STEP 4
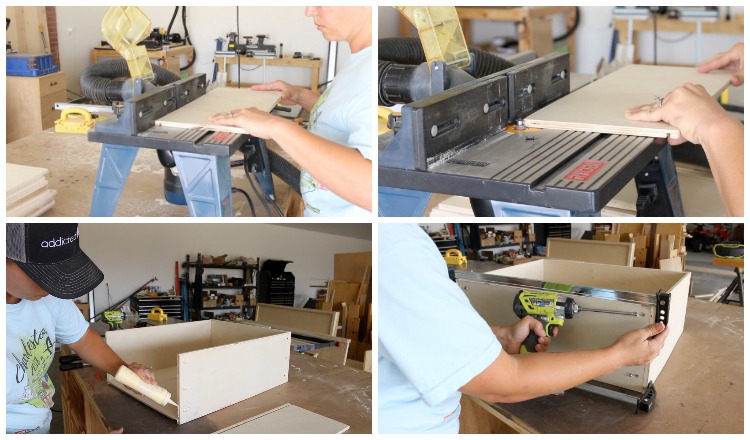
Build the drawer boxes
Rip ½” plywood into 8½” wide strips, then cut to length on the miter saw. Rout a ¼” dado groove in each piece to accept the plywood bottom panel. Round the top edges with a ⅛” roundover bit (or sand them) to prevent splintering. Glue the sides, insert the bottom panel, and fasten with 1″ pocket screws.
STEP 5
Build the step-drawers (optional)
Two drawers double as steps for climbing into bed. This must be decided before building — the step-drawers need ¾” clearance on each side to fit the heavy-duty slides, and this affects the opening dimensions. Cut ¾” square dowels to use as cleats, glue them inside the drawer box, and cut a ½” plywood tread to fit. Drill a finger hole in the tread so it lifts out easily, keeping the drawer usable for storage. Round and sand all edges.
STEP 6
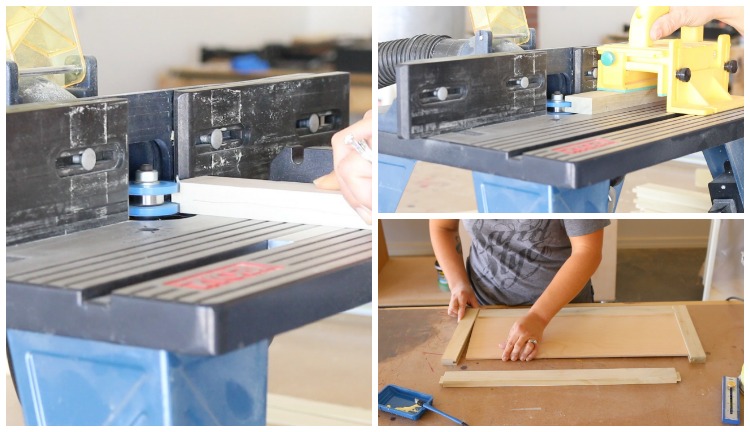
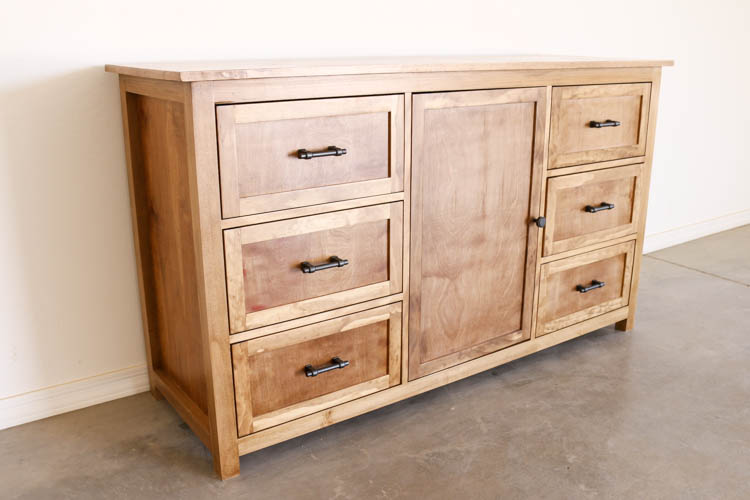
Build the drawer faces and cabinet doors
I used tongue-and-groove joinery for the frame-and-panel drawer faces and doors — Rockler’s tongue-and-groove router bit set made this fast and clean. Pocket joinery also works, but you’ll still need to cut a dado groove in the rails and stiles to hold the plywood center panel.
STEP 7
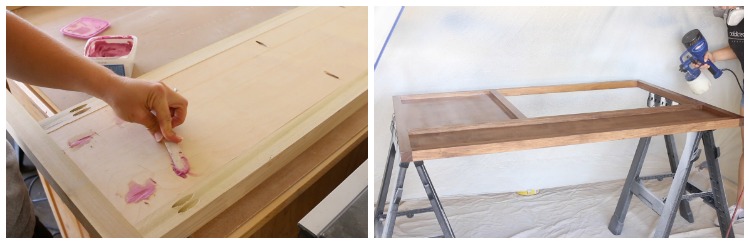
Stain or paint all components
Fill any pocket holes you want hidden with wood filler, sand smooth, then apply your finish to each component before assembly — you won’t be able to reach every surface once it’s together. I used Varathane Special Walnut stain followed by 3–4 coats of satin polycrylic applied with a paint sprayer.
STEP 8
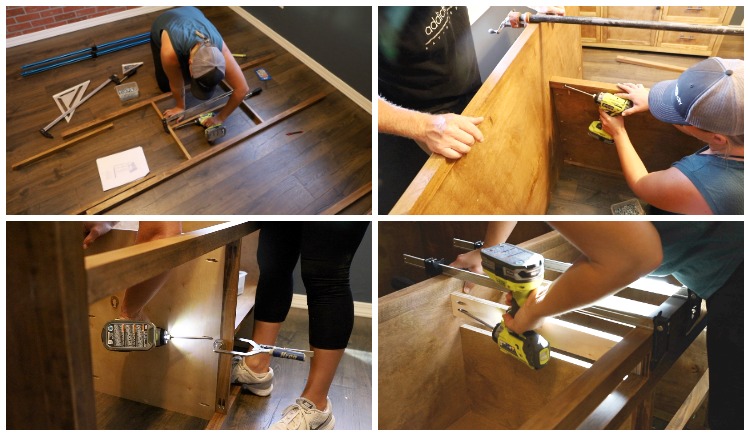
Assemble the bed in its final location
Bring all pieces and your bar clamps (24″ to 8′) into the room. Do not glue components during assembly unless you never plan to disassemble the bed. One important note: when attaching the center support panel’s top 2×2 to the headboard plywood, use 1¼” pocket screws — not 2½”. The longer screws will blow straight through the plywood.
STEP 9
Install the drawers
Mount 100 lb, 18″ side-mount slides for the standard drawers, desk, and nightstand. Use 220 lb heavy-duty slides for the step-drawers. Once slides are in, center each drawer face within its frame opening — stacked playing cards make perfect even spacers. Secure faces temporarily by reaching inside the drawer and tacking 1″ brad nails through the box corners into the face frame. Final tightening happens when you install the hardware.
STEP 10
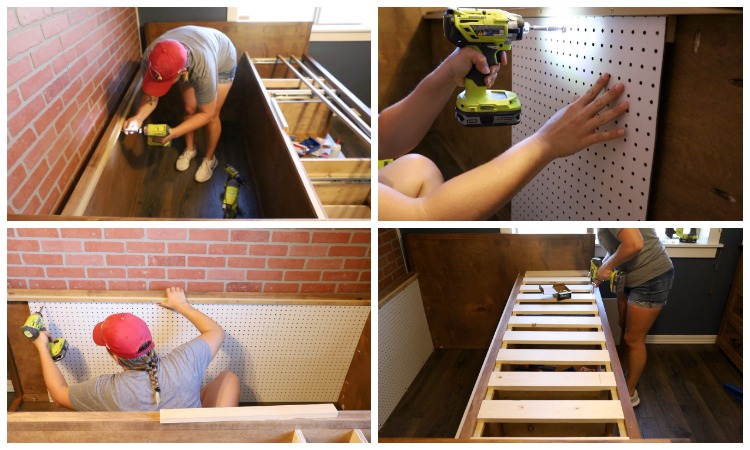
Install the pegboard and mattress slats
Attach ¾” square dowel cleats to the 2×2s, positioning them ¾” below the top so the 1×4 slats sit flush. Secure with 2″ wood screws. For pegboard: nail a 1×2 spacer strip to the top of the panel just under the 2×2s, then screw the pegboard through it with 1″ screws and washers. Space mattress slats approximately 3″ apart; drill pilot holes through each slat into the cleats and fasten with 1¼” screws.
STEP 11
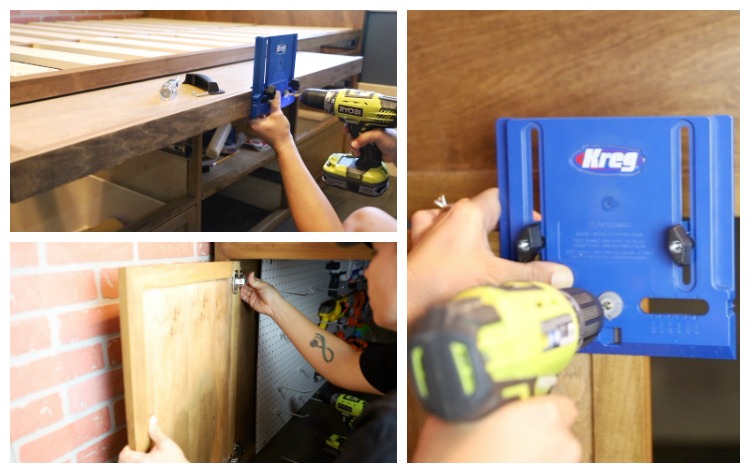
Install hinges, hardware, and magnetic catches
Hang the cabinet doors with concealed hinges and install magnetic catches at the center of each door frame. Install all drawer and door pulls. Step back and admire your work.
Frequently asked questions
Can I build this with basic tools?
Yes, with some adjustments. A table saw is very helpful for ripping lumber to width, but a quality circular saw with a straight-edge guide can substitute for most cuts. The pocket hole jig is essential — the Kreg R3 is affordable and beginner-friendly.
Is there a twin-size version?
Yes — the twin-size plans are available separately and follow the same build process with adjusted dimensions.
Can I paint it instead of staining?
Absolutely. If painting, poplar is still a great choice — it takes paint very cleanly. Follow the same finishing sequence: fill holes, prime, paint, then seal with polycrylic.
How much does it cost to build?
Material costs vary by region and lumber prices, but you can expect to spend significantly less than a comparable retail storage bed. The printable plans include a complete materials list to help you price it out before you start.