My husband and I have wanted to make a bottle cap table for a couple of years now. We started saving beer bottle caps and recruited our friends to save for us as well. We weren’t sure what we would build or when, but we kept saving anyway. When the dinette table in our toy hauler needed to be replaced, I told my husband it was the perfect time to put those bottle caps to use! When we started laying out our bottle caps, our 7 year old started to think our friends had drinking problems. I had to remind him that we collected these bottle caps over a few years, not one weekend:)
We took note of the measurements of the old table and took the folding legs off to use on the new one. You can build any size table you want, just make sure you have enough bottle caps saved up. We had tons and thought we would have enough to make at least two tables. We quickly found out that we really had just enough for this table.
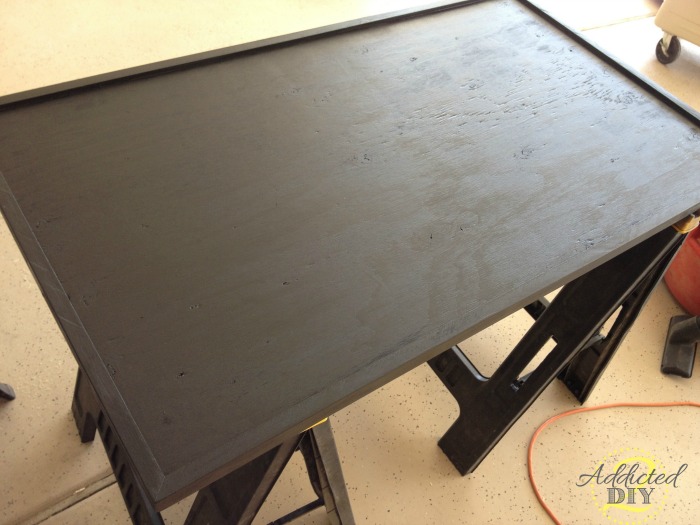
We bought a 24 x 48″ piece of plywood at 1/2″ thick. We ripped down a 1×2 on the table saw to make it 1″ high. This created a ledge that was just slightly higher than the bottle caps to hold in the bar top resin. We glued and brad nailed the wood trim to the side of the plywood and then painted the entire table black.
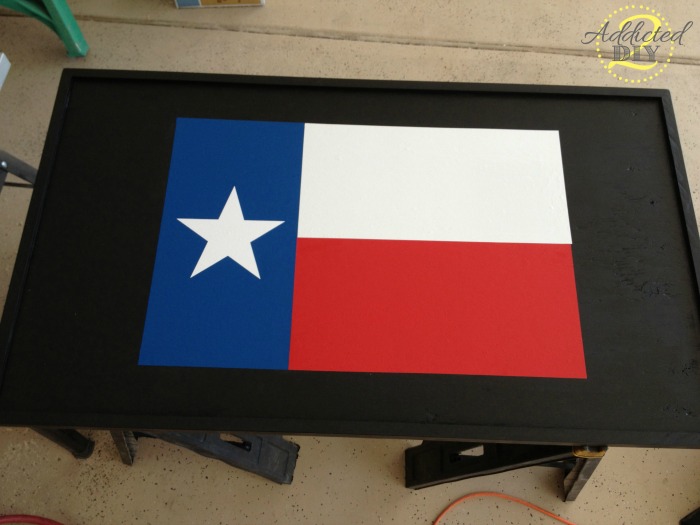
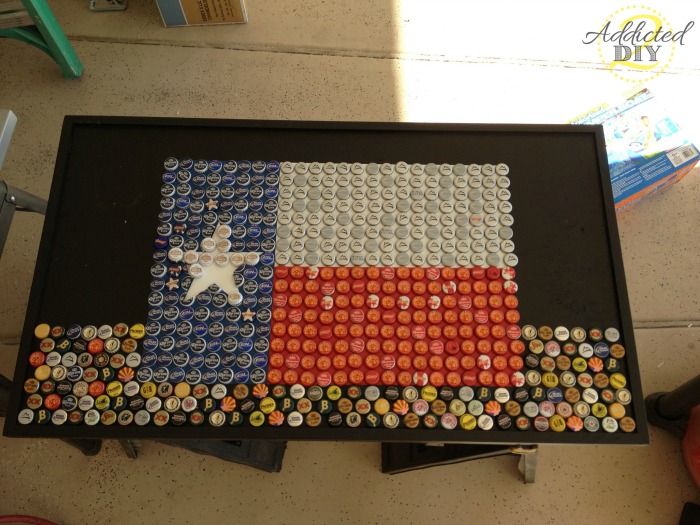
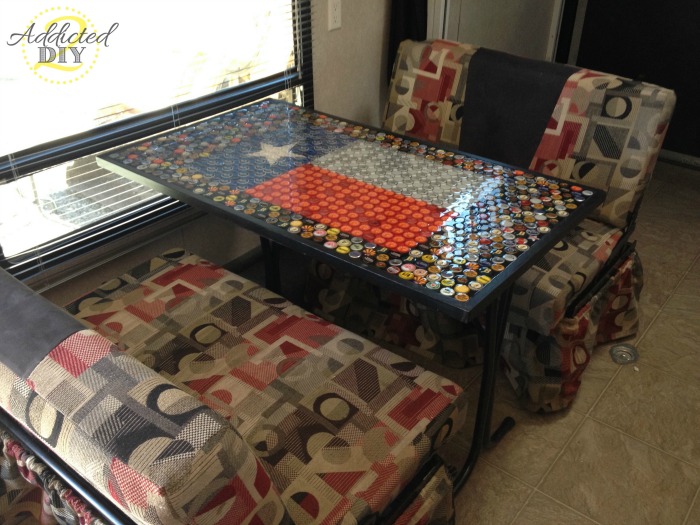
There are so many different options you can go with for a design but our choice came fairly quickly. We chose to make the Texas state flag. We tried to make the Arizona flag, but it was WAAAAY too difficult to get the bottle caps just right for the size of table we were making. Plus Texas is near and dear to our hearts. My husband is from Houston, he proposed to me at his grandparent’s farm in Fredericksburg, and much of his family still lives there. I cut the flag out of vinyl as a base for all of the bottle caps and to be my guide for placement.
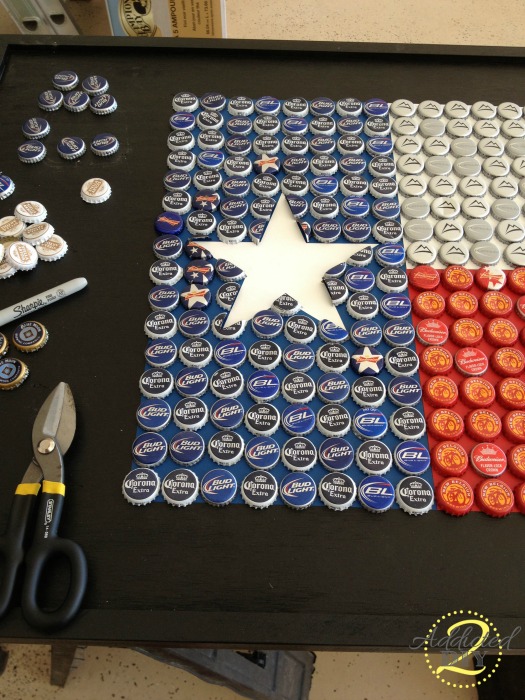
I sorted the bottle caps by color and placed them on the vinyl. For the star, I used tin snips to cut the bottle caps to create an outline. Then I marked and cut the white bottle caps to fill it in. My poor husband had to drink quite a few Stellas in order to fill in the star. It was awful for him (insert sarcasm font).
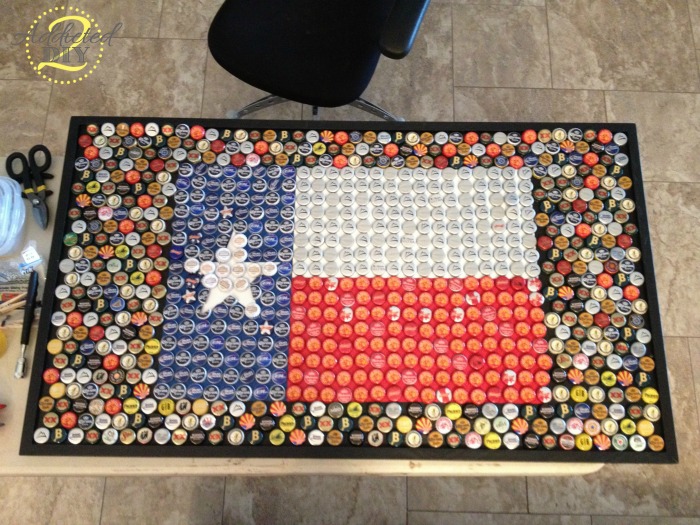
Once the flag was done, we filled in the remaining part of the table with random bottle caps. Last year I discovered that Oak Creek Brewery (a local brewery) had Arizona flag bottle caps. I bought several 6-packs of that last year to add to our collection. Since we couldn’t make the Arizona flag, I still wanted to have AZ represented on the table.
Once we managed to squeeze all of the bottle caps onto the table, we started gluing them down. This task was tedious, but it is absolutely necessary if you don’t want your bottle caps to float up when you pour on the resin. We used hot glue guns, but found that it didn’t hold all that well and we had several caps float up when the resin was poured. Next time I would probably use caulking or liquid nails to glue the caps down. Some of our bottle caps wouldn’t quite fit, so I had to trim a little off of them with tin snips. We used used about 3 – 32 oz boxes of resin for this big of a table. It’s a two part system that you have to mix together very well and then pour over the surface.
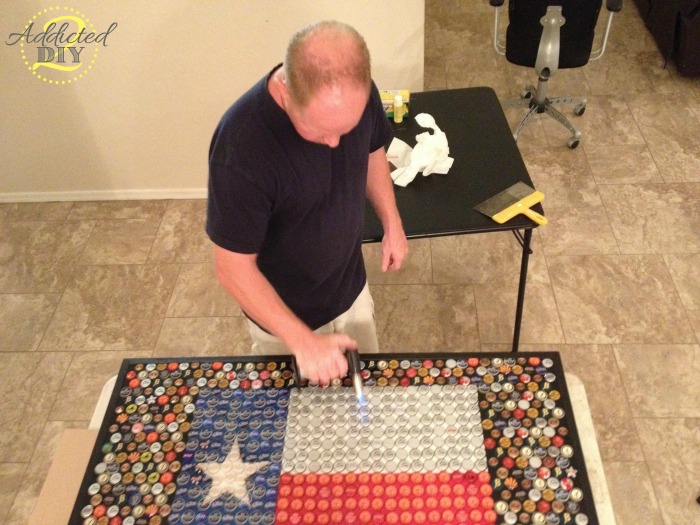
Working with the resin is a very quick process, so I wasn’t able to take any pictures for fear that it would set up too quickly. I had to take a popsicle stick and push down the bottle caps while my husband used my kitchen torch to pop the bubbles. It’s crazy how well that works. The bubbles will keep appearing for a while, so you just have to stay on top of them and torch them out. They stop showing up once the resin starts to set.
We let the resin dry for 48 hours before we sealed the sides and underside of the wood and attached the table legs.
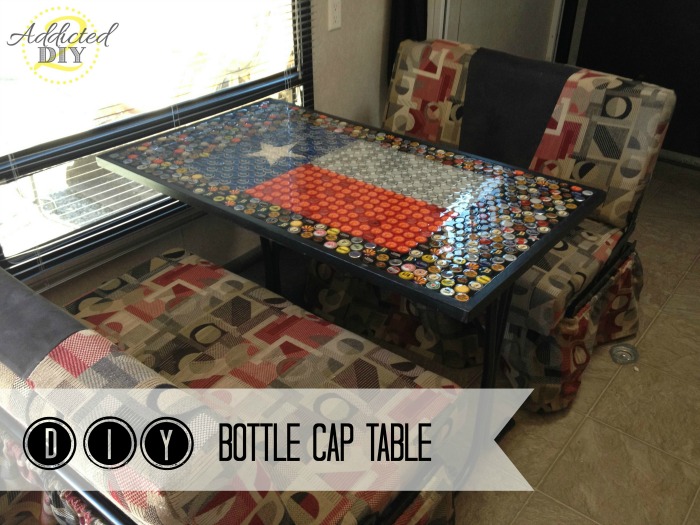
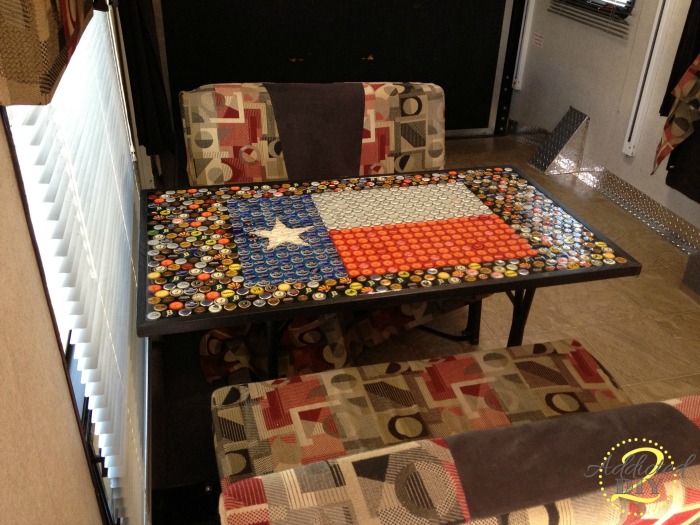
Here it is all set up in our trailer.
We love how it turned out! It was pretty nerve-wracking during the resin pouring, but it ended up being easier than we thought. We used it for the first time on our camping trip last weekend and loved it. The resin cleans nicely and holds up well, even with our puppy jumping all over it thinking it was her personal bridge to get from one side of the table to the other.
If you have a bunch of bottle caps stashed a way for a project like this, I hope that this will give you the courage to finally make your project. The resin looks very intimidating, but it actually was quite easy.
I’d love to hear what you think and please feel free to share and “like” this post!
~Katie
This post contains affiliate links for your convenience. Please read my disclosure policy for more information.

I Love this table. I want to try wine corks to make one. I think this will help me. Great job.
Dawn, I will definitely help you out if you want:)
I sooo want to do a bottle cork table as well. Please post all details when you do yours. Thank you! Bottle cap/flag table is brilliant!
Love this! I would like to do one using pennies. 🙂
Your table looks great…. Thanks for the good tutorial. I’ve been saving up bottle caps for a couple years now to make my table. My plan is to do the Golden Gate Bridge with the water and sky. It might be a little challenging but I’m liking the idea of what you did, using the tin snips in more detailed areas. I’ll post pics when I’m finished.
Thanks
Oh wow! That would be gorgeous! I’d definitely love to see pictures of that! The tin snips definitely made the project look cleaner and less abstract.
Oh I love this project! Of course we just used all our bottle caps to make Father’s Day artwork. We better get to drinking, huh? 😉
~ Ashley
Ashey @ 3 Little Greenwoods recently posted…Blogging Make your Head Hurt? Buy this e-book!
Lol! It took us a while to collect them and the table took way more than we expected. We love it though!
These are great instructions, and I love the final result! I’ve used the Envirotex Lite resin for projects back in college, but just for creating a surface above an image, no bottlecaps or 3D things in it, so gluing them down is what I’ve found in my research. I’ve always loved the bottlecap table/bar idea, and when I met my boyfriend 12 years ago, and discovered his love of beer, I started saving the bottle caps! Over 12 years, I’ve been able to see his tastes change from Becks (when we first met), to Stella and now the higher alcohol craft brews (Dogfish Head, Lagunitas, Three Floyds, etc) and I have to say, the bottle caps are quite lovely! He intersperses these with various Summit brews (different colors for each type) and whenever I go out of town, I’ll buy him something local from where I’m visiting, so we have a few funky, special ones.
We bought our house 7 years ago, and it has a bar in the family room downstairs, and I’m thinking we have plenty of caps now. I’ve just started laying out the pattern (circles/arches) and like the way it’s looking, and I’ll start gluing now that I’ve established the look. He suggested random, but as a graphic designer turned data analyst, I have a hard time with randomness in certain things, such as a bar top I will be looking at for years to come. I would likely hate a certain combination of random caps and obsess about it, so pattern is the way to go for me! I hope to get everything glued down by this weekend, and then pour the resin next weekend. I have a cat and a kitten though, so this step will be very interesting…their litterboxes are at the bottom of the stairs, near the family room (which doesn’t have a door)!
I would love to see the finished bar top! I bet it will look amazing. I’m sure the cat and kitten will make it a challenge. I hope they don’t step in it!
Hi!
Thank you for the tutorial! I am in the process of making a bottle cap table as a house warming gift for my brother! I would like to do the same concept but on top of a wine barrel. I was wondering if you could explain the concept of this “kitchen torch” with the resin. Not to be silly but I’m not sure what that is!
I appreciate any advice that you have and look forward to hearing from you!
Oh, I love that idea! You’re making me want to do that for my house;)
I’m not sure if you are asking about the kitchen torch or the resin, so I’ll just explain both:) The kitchen torch is just that. It’s a small torch that chefs usually use for things like creme brulee. The resin is a two part bar top resin that you mix and it dries to a clear, hard finish after about 24-48 hours. When the resin is mixed and poured, it starts to form bubbles. I have no clue why, but it just seems to do that. The kitchen torch literally works like magic on these bubbles. When you have finished pouring the resin, just run the flame over the bubbles and they pop instantly. You don’t have to hold it too close or for any longer than a second. It takes a little bit to get rid of all of the bubbles, because those suckers just reappear, but not too long. This table was big, so it took longer than a wine barrel would. I’ll make sure to update my post with links to both the resin and kitchen torch, so you can easily find them:)
Hi!
Could you possibly post an up close shot of the star? I’m creating this at the moment and want to decide if I like the abstract look or the tin shear look better. Thanks!!
I’ll see if I have a closeup picture to send you. Sorry, just saw this!
Unfortunately, I don’t have a shot of the star up close and I’m not able to get a picture of the table at the moment. My post did include a closeup of the blue bottle caps sheared to fit the star exactly, if that helps.
Approximately how many bottle caps did that take?
Hmm. That’s a great question. It took a lot more than we thought it would, that’s for sure. We had several bags full and used a lot of them.
How much resin do you think I would need for a 8×2 table with bottle caps? Awesome tutoral.
It’s so hard to know, but now that I know more and there are more companies selling two part epoxy resin, I would buy a gallon kit and use that. MAS Epoxy and Totalboat epoxy are both great brands and I’ve personally used the two-part epoxy from both companies.