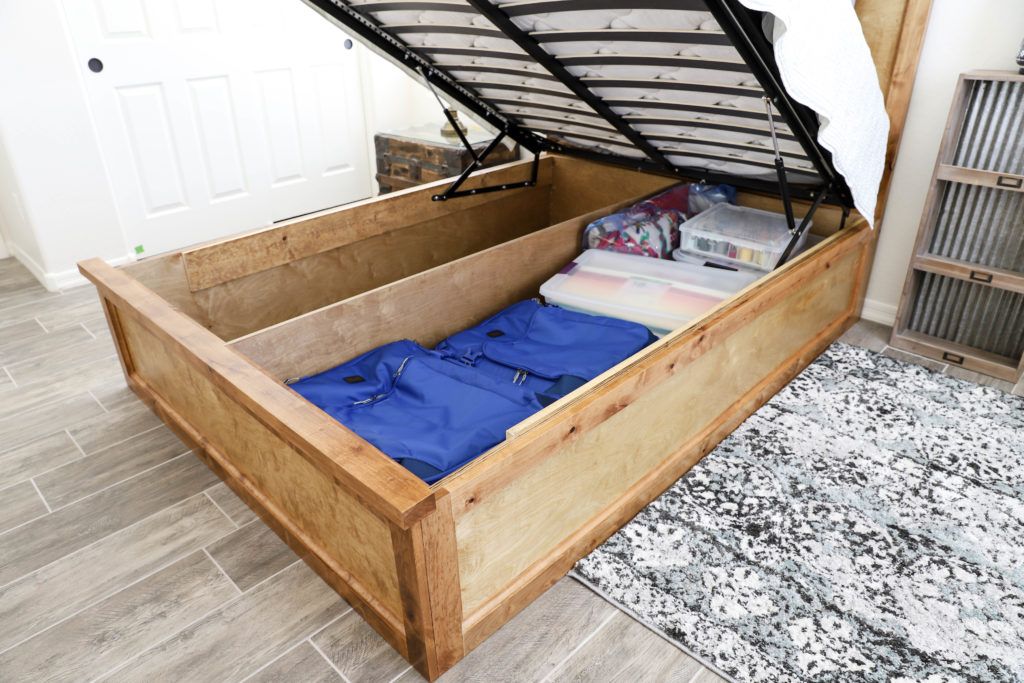
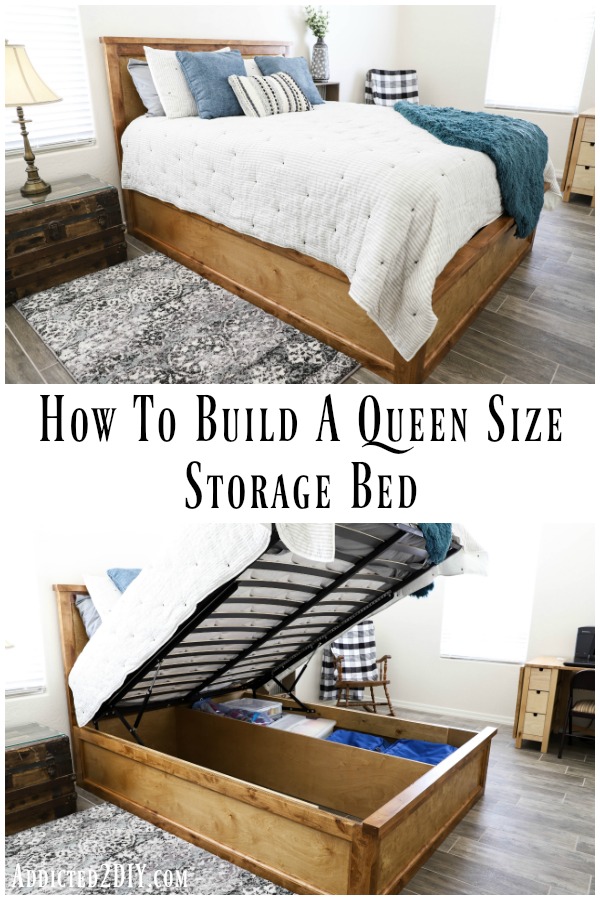
Learn how to maximize on space and organization by building this queen size storage bed with platform lift hardware. The platform lift allows you to easily store totes, luggage, and more!
Are you in the need for a little more storage and organization in your life? I’m pretty sure we can all raise our hands on that one. Recently, my mom downsized and had a new house built. To go along with her new house, she wanted to also update her furniture. She asked if I could build a new bed for her guest room and I knew that with downsizing, she’d also benefit from having a little extra storage space. I built this queen size storage bed for her using hardware my friends at Rockler kindly sent over and the result is amazing! This isn’t your average storage bed, though. It can hold everything from totes to blankets, even luggage!
Follow along as I take you through the steps of building this bed and also share with you some modifications I made to it along the way. I’ve put together PRINTABLE PLANS that give you the materials list as well as the step by step tutorial. This tutorial does not include instructions on how to build the metal bed frame, but you can find them in the downloadable hardware instructions. I’ll give you a tip, pay no attention to the written instructions for the bed frame. Just look at the pictures:)
How To Build A Storage Bed Video
I know everyone doesn’t like to read step by step tutorials. To make it easy, I put together a video to accompany the step by step project tutorial for you.
Prepping The Wood To Build The Bed
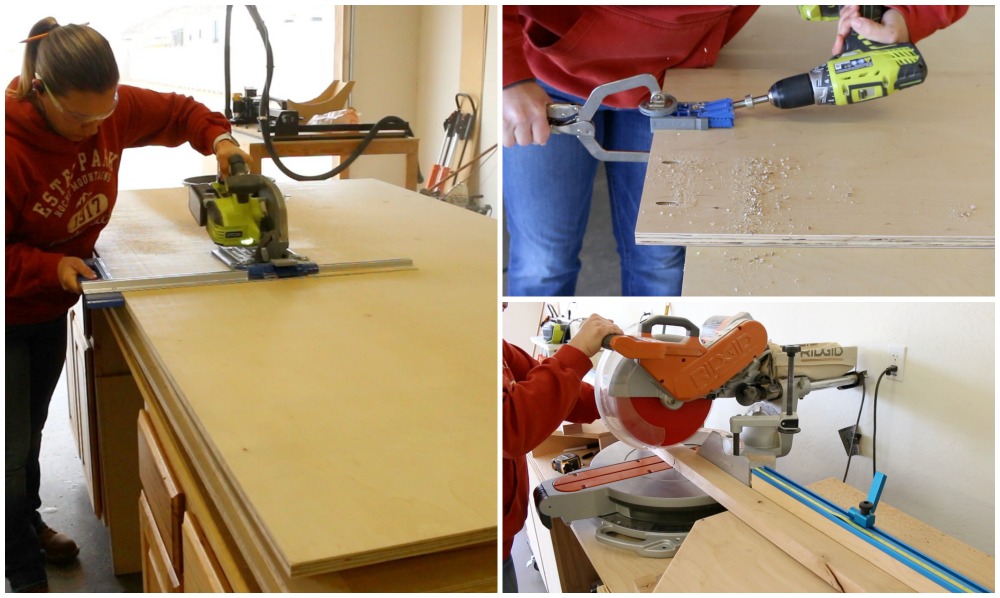
Before I got started with the building of the bed, I needed to cut down my materials. To cut the plywood down into manageable sizes before moving on to my table saw, I used my Kreg Rip-Cut . I predrilled pocket holes in the larger plywood panels with my R3 jig, and also cut down the dimensional lumber on my miter saw. I milled down knotty alder to build this project, but I’ve drawn up the plans to use dimensional lumber you can purchase at your local home improvement store.
Building The Sideboards and Headboard
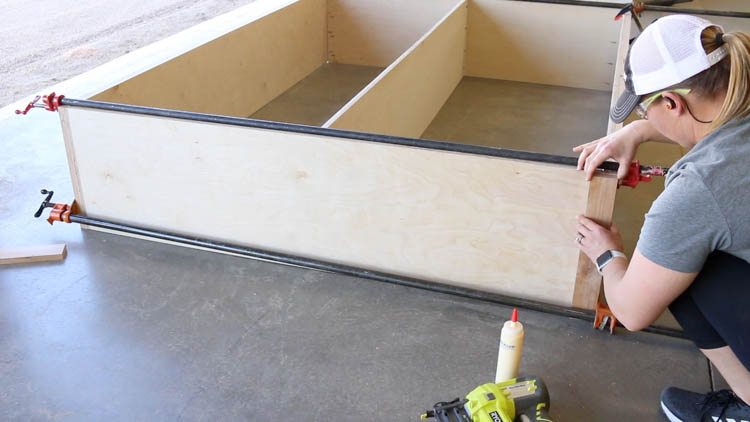
Once all of my wood was cut down to size, it was time to build the sideboards and headboard. I used wood glue and 1 1/4″ brad nails to add the trim to the sideboard pieces. Next, I moved on to building the headboard. I drilled 1 1/2″ pocket holes into the horizontal pieces of the headboard frame, then attached them to the vertical posts using 2 1/2″ pocket screws and wood glue. Once the frame was built, I moved on to attaching the face panel. The panel sits flush with the back edge of the frame, so I put some wood underneath the panel to raise it to that level, then attached it with 1 1/4″ pocket screws.
Adding Trim To The Footboard
The vertical trim pieces on the footboard overlap the trim on the sideboards. I needed to dry fit the entire bed platform to determine exactly where the vertical trim pieces on the footboard would go. I attached them with wood glue and 1 1/4″ brad nails, then measured and cut to fit the horizontal trim pieces.
Attaching Cove Moulding And Filling Holes
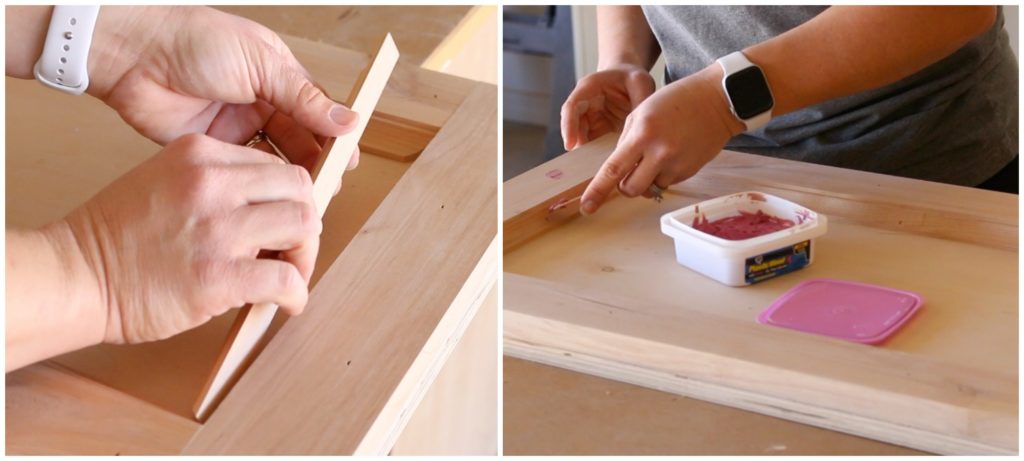
To give the bed a little more of a finished look, I decided to add cove moulding to the inside edges of the trim. Given that I was using knotty alder and not pine, I made my own moulding. If using pine for this project, you can easily find sticks of cove moulding at your local Home Depot.
Once all of the moulding was added. I filled all of the nail holes, then sanded everything down to prep for stain.
How To Attach The Top Board To The Headboard And Footboard
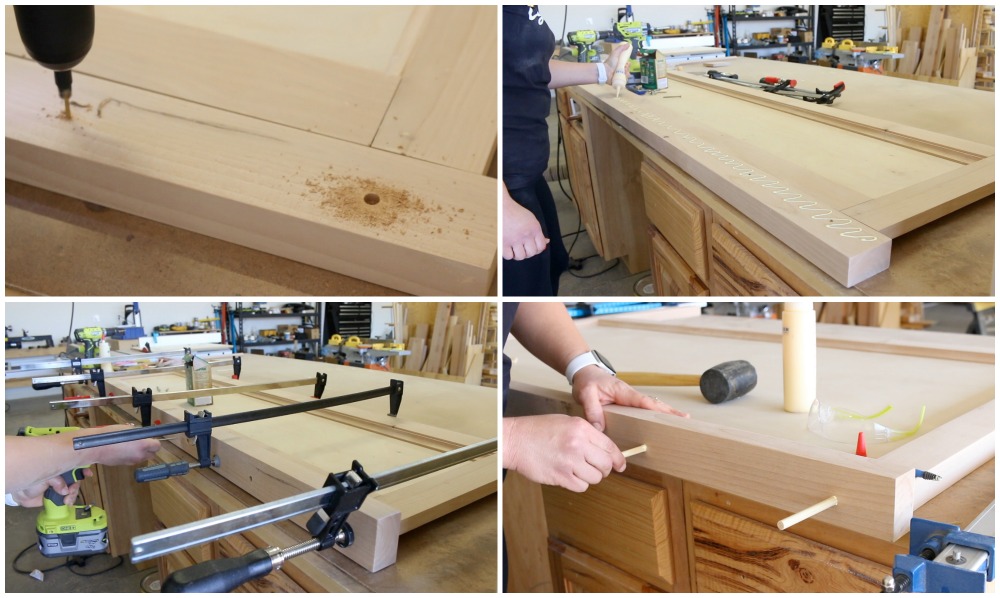
I attached a 2×3 to the top of the headboard and footboard, again to add more detail and dimension to the project. To attach them, I used a countersink drill bit to drill the pilot holes for the screws. I then flipped the 2×3 over and added glue where it would meet with the top of the headboard and footboard. I clamped it in place and attached it with 2 1/2″ wood screws, then plugged the holes with 1/4″ dowels to hide the screws. Once the glue was dry, I sawed off the ends and sanded them smooth.
Paint Or Stain?
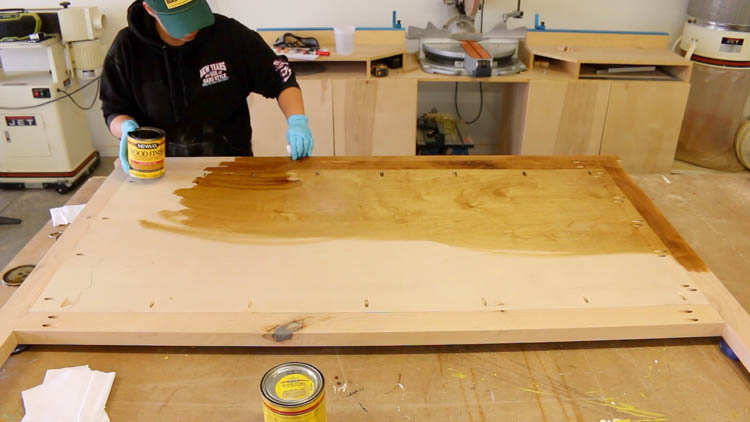
For this project, I stained it in a golden oak stain. The warm tones look beautiful with the knotty alder. I applied three coats of polyurethane once the stain was dry. This storage bed would also look absolutely gorgeous painted white or a light grey. Possibly even distressed paint.
How To Assemble The Bed
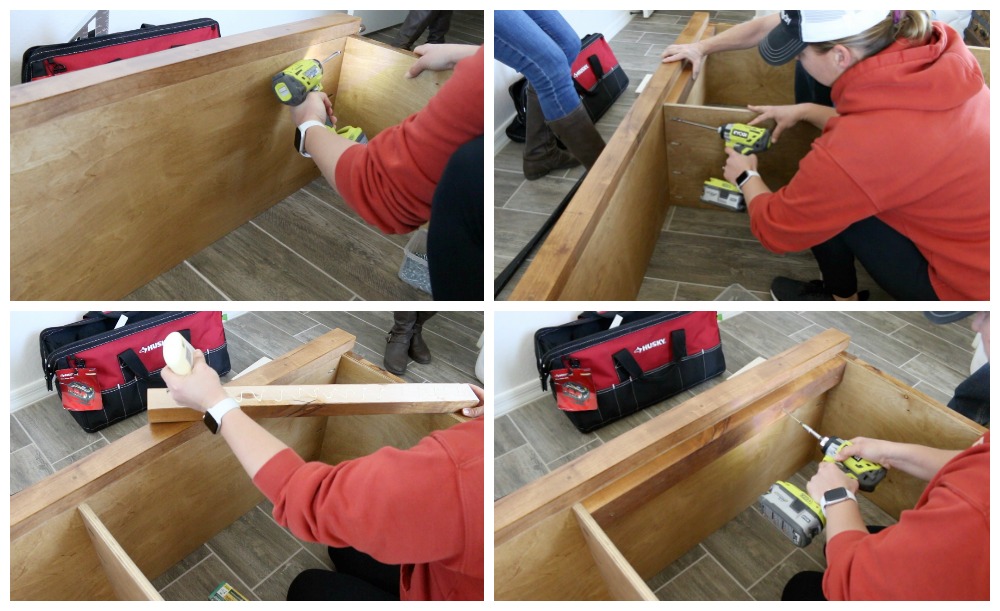
The bed was assembled in place, so we took all of the pieces to my mom’s house. I assembled platform frame first, attaching the head and foot pieces with 1 1/4″ pocket screws. I attached the center divider, next. To attach the cleats to the foot of the bed, I used wood glue and 2 1/2″ wood screws.
Attach The Headboard
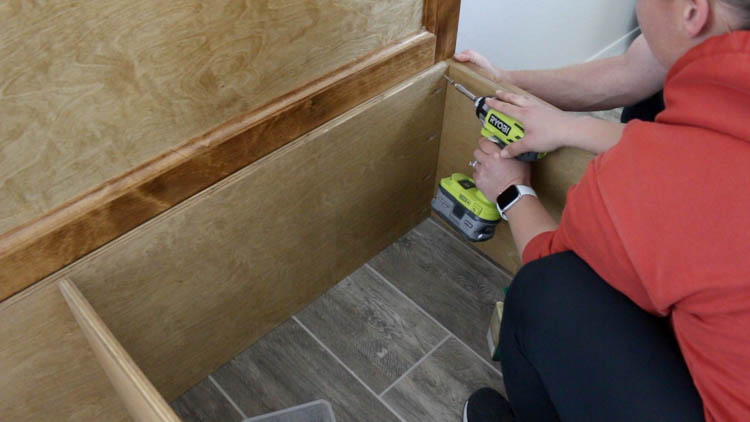
The headboard is attached from the inside of the pedestal. I attached it using 1 1/4″ screws, but 2″ screws would work great for this.
Attaching The Lift Mechanism
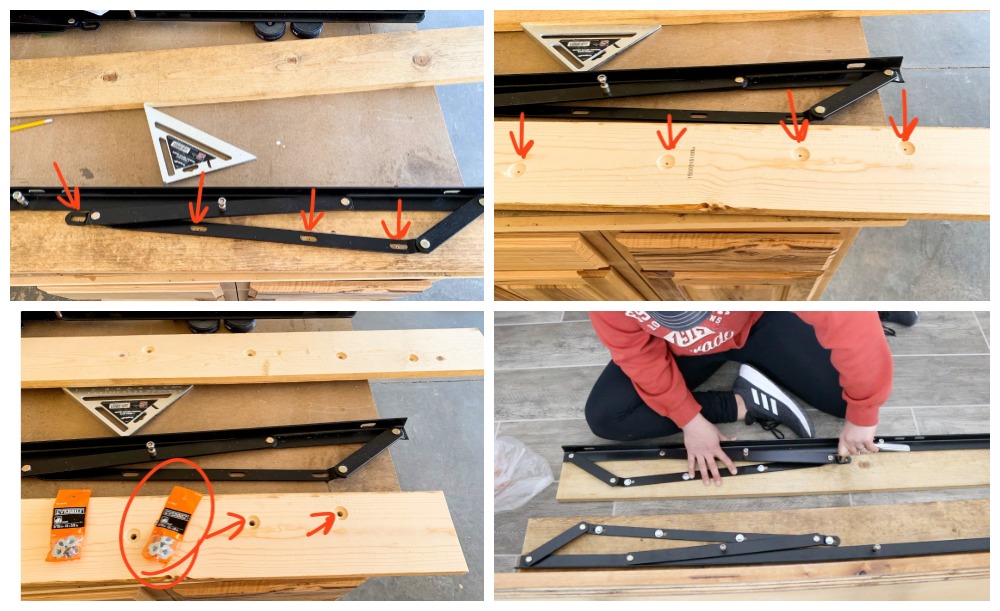
To attach the lift mechanism to the bed, I followed the recommendations on the hardware instructions. I used the hardware as a guide to drill pilot holes into the cleats. Next, I flipped the cleats over and used a 1″ forstner drill bit to bore a hole 1/8″ deep. I used a 25/64″ drill bit to drill larger holes where I’d drilled pilot holes. I inserted the tee nuts then attached the lift mechanisms.
Installing The Lift Mechanism and Cleats
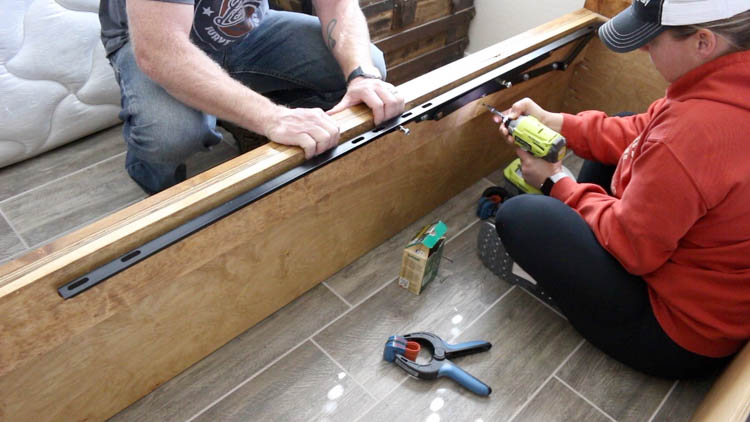
I used 1 1/4″ wood screws to install the cleats to the inside face of the platform sideboards. The cleats are installed flush with the top of the sideboard.
How To Modify The Bed Hardware

The instructions for the actual bed hardware are not very good. They require quite a bit of guesswork and we ended up having to modify the hardware a bit. The cleats bring the lift mechanisms in too far so that they do not line up with the holes in the metal bed frame. We ran to Home Depot and bought a punched angle brace that we attached to each of the lift arms.
The angle brace attaches to the bed frame, so we used the holes in the brace as a guide to drill holes into the bed frame using a 25/64″ drill bit. The hardware comes with nuts and bolts to attach the bed frame to the lift mechanism. I used this hardware to attach the frame to the brace.
Installing The Gas Struts and Handles
I attached the gas struts to the lift mechanism, then attached the handles to the foot of the bed frame. One handle also goes at the head of the bed frame to support the mattress when the platform is lifted.
Queen Size Storage Bed With Platform Lift
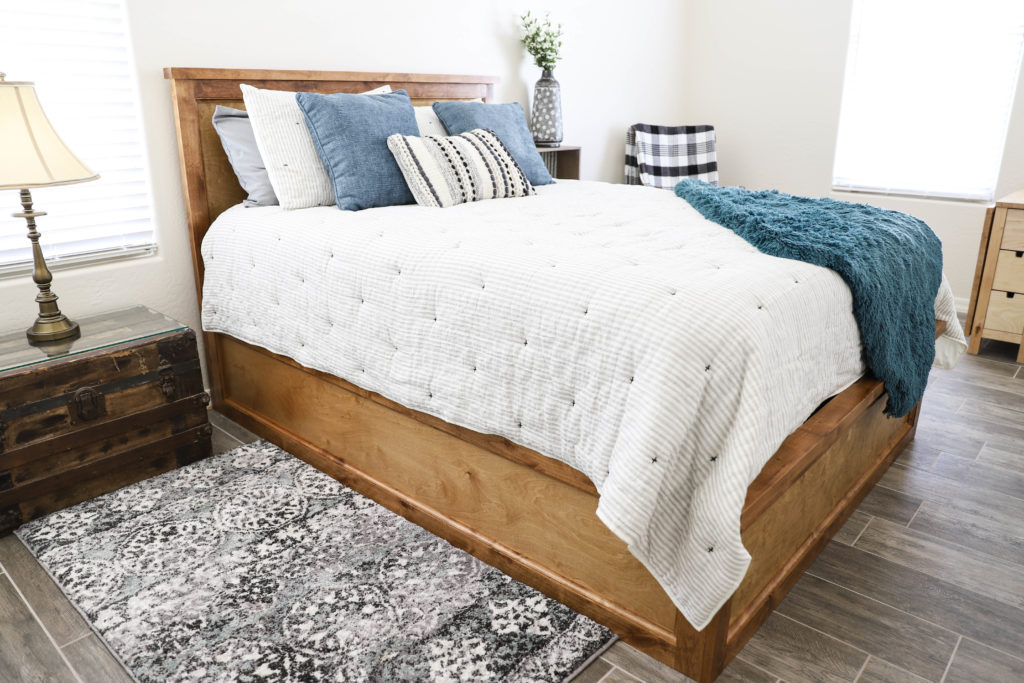
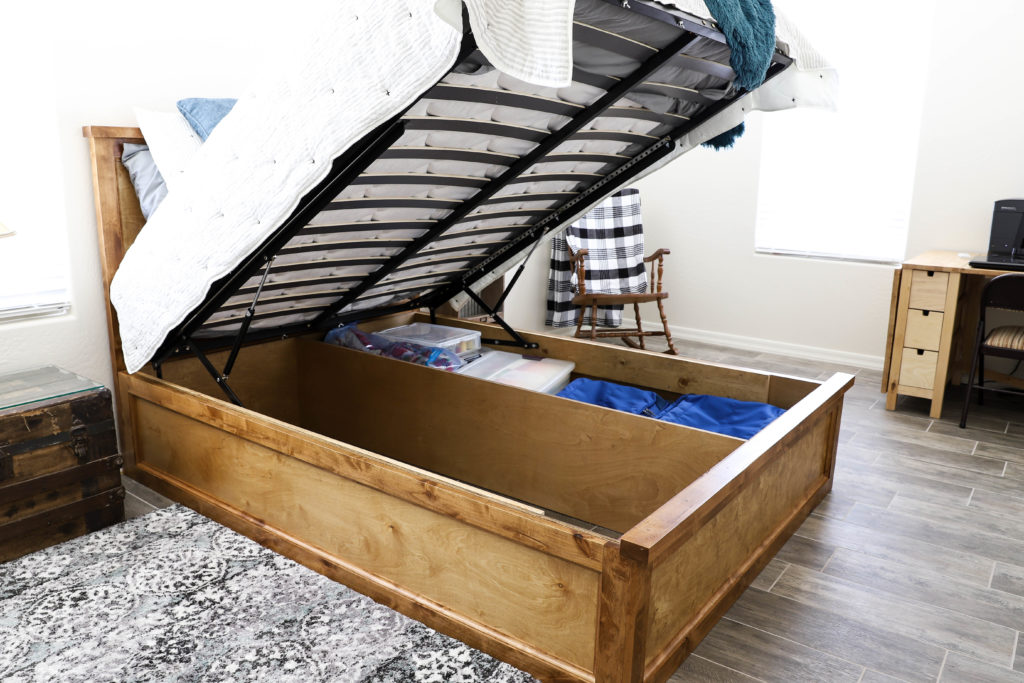
There is so much to love about this storage bed. It has tons of space to store blankets, totes, and even luggage! I’m a tad jealous that this is at my mom’s house and not for me! It’s a great addition to any guest room, but really it could be perfect for any bedroom.
If you’d like to build this bed yourself, make sure that you DOWNLOAD THE PRINTABLE PLANS! They include the materials needed, cut list, and detailed diagram instructions.
DISCLOSURE: I was provided product for this project. All opinions and ideas are 100% my own. This post contains affiliate links. Should you purchase a product from one of these links, I will receive a small commission at not extra charge to you.




I love the review you gave…so very honest! I imagine that was a bit hard to do since you made a video to show it all but we need good honest reviews like yours. I sure hope they resolve the instructions. This bed is simple, yet nice to look at and a great addition for storage. I don’t need any beds but I would consider revising this to a day bed for extra guests and storage. Love also that you added the extra bit of detail to finish it off. Nicely done and well done!
Thanks so much, Shirley! I always strive to give the best, most honest review of my experience. It was definitely tricky to shoot the video and capture everything, given that we were figuring out the modifications as we went, but I’m very happy with the results!
Where did you get the metal frame?
Hi Kristi, the bed hardware is from Rockler. I’ve linked to it in my tutorial:)
This is awesome! I’d love to know how much it cost in total.
It’s been a while, so I can’t say for sure how much the cost was. It all depends on what you use for lumber and where in the country you live. Lumber prices vary quite a bit. It was a few hundred dollars, but the hardware was also a large chunk of that.
How much did this project cost all together in the end?
I wish I would have written it all down. Unfortunately, I can’t tell you for certain. It was a few hundred dollars given the cost of the wood and the hardware.
Continue your great work!! You are an inspiration
Wow. I really love this storage bed! At first I was thinking, I’d like drawers but I think this is even better. It is hidden storage and so accessable with the lift. Very cool. Pinning to see if my hubby will make it for me.
Scarlet recently posted…Tasty Mexican Salad Recipes You Need to Learn
I built one this week. Thanks for the plans the wife loves it 🙂 we had the same problem with the bed support. But all worked out great at the end thanks again 🙂
Glad to have been of help!
I am looking at building a bed similar to this. Thanks for the plans! Do you know where to buy just the metal frame like you have in these instructions?
The frame and hardware for this are from Rockler. I have linked to the hardware within my post tutorial.