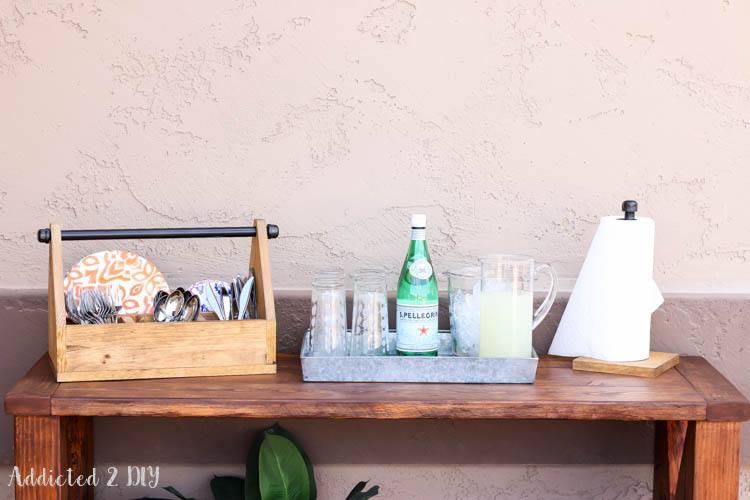
Hey there, friends! Springtime is upon us and we’ve had some gorgeous weather here in sunny Arizona. This is one of my favorite times of year. We often eat dinner out on the patio and love to host backyard BBQs. I have been wanting to make some improvements to our backyard living space and one of those projects was this rustic outdoor console table. It serves as a perfect place to set food out or as a drink station. Since we love to entertain, I thought a DIY dinnerware caddy would be a perfect addition to the table. I love the rustic industrial look, so I designed a dinnerware caddy and a paper towel holder around that. I’ve teamed up with The Home Depot and P&G to bring you these easy to follow tutorials that are perfect for getting your spring entertaining off to a great start! Also, I’m giving away a $75 Home Depot gift card as well as a P&G goodies to one lucky reader at the end of this post! You can also click here to get special offers from The Home Depot, including a $5 off a $50 purchase coupon! It’s like a combination of my two favorite things, saving money and Home Depot:)
For these projects, you’ll need:
(Dinnerware Caddy)
- 1 – 1×10 @ 6′ long
- 1 – 1×4 @ 6′ long
- Miter saw
- Orbital sander
- 220 grit sandpaper
- Nail gun
- 1 1/4″ brad nails
- wood glue
- Drill
- 1″ forstner bit
- 18″ threaded steel pipe 1/2″ diameter
- 2 – 1/2″ threaded pipe caps
- Dawn dish soap
- Bounty paper towels
(Paper Towel Holder)
- 1×8 piece of scrap wood
- 1/2″ steel pipe flange
- 1/2″ steel pipe @ 12″ long
- 1/2″ threaded pipe cap
- Dawn dish soap
- Bounty paper towels
Cut list:
- 2 – 1×10 @ 11″ long with tapered tops (see instructions)
- 1 – 1×10 @ 17″ long
- 3 – 1×4 @ 15 1/2″ long
- 2 – 1×4 @ 3 3/8″ long
- 1 – 1×8 cut square (approx 7 1/4″ x 7 1/4″)
All of these items can be purchased from The Home Depot.
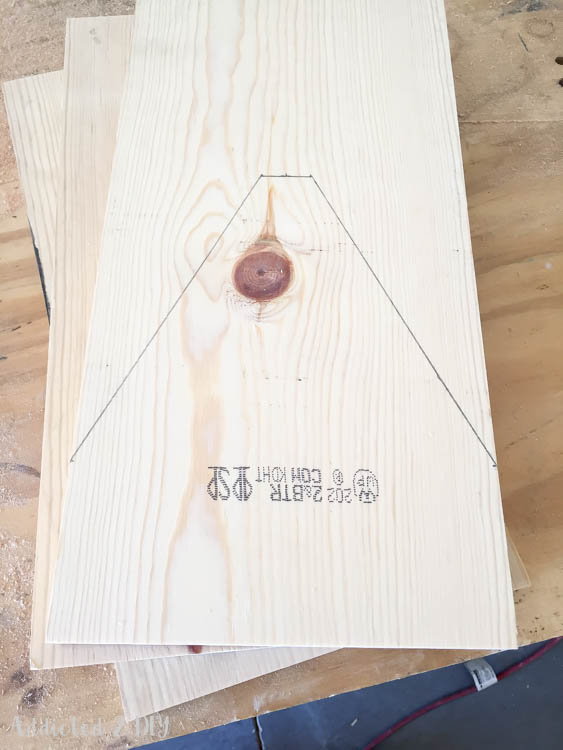
For the sides of the dinnerware caddy, I marked my 1×10 boards at 11″ for the length. On each side, I made a mark at 3 1/2″ to match the 1×4 sides. I wanted the squared off top of the sides to be 1 1/4″ wide, so I found the center of the board and marked the 1 1/4″ top from there. I cut each of the sides down on my miter saw following my pencil marks.
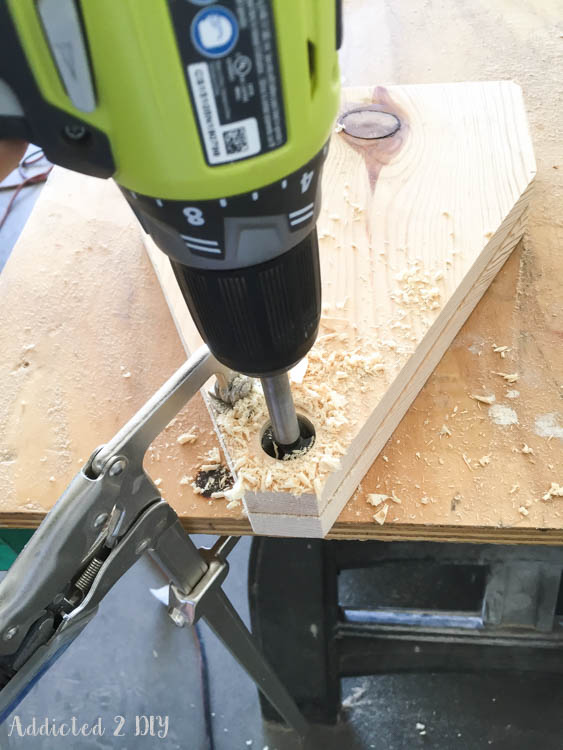
To hold the pipe handle, I drilled 1″ holes towards the top of the sides. I clamped the sides together and drilled straight through both of them. To prevent the wood from tearing out on the underside, you want to have a piece of wood underneath for the bit to drill into a little. In this case, I used my plywood workbench top. It’s been used and abused, so I wasn’t too worried about it leaving a mark behind.
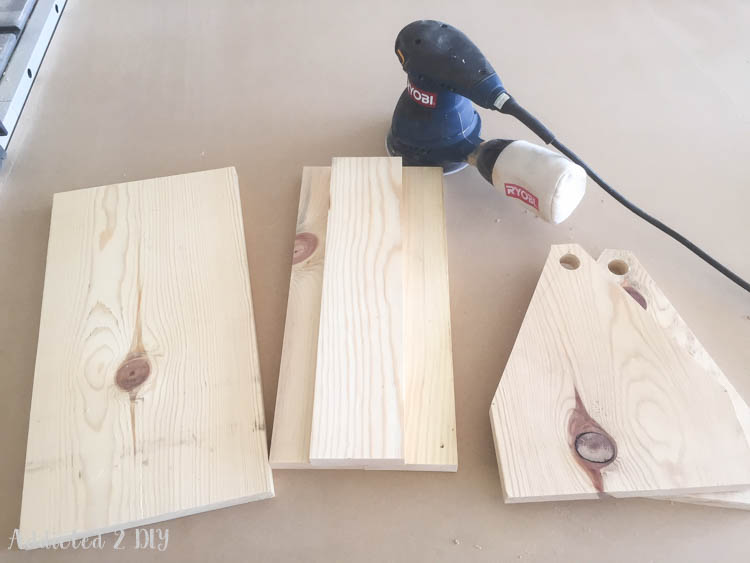
Once all of my pieces were cut, I sanded them down with 220 grit sandpaper.
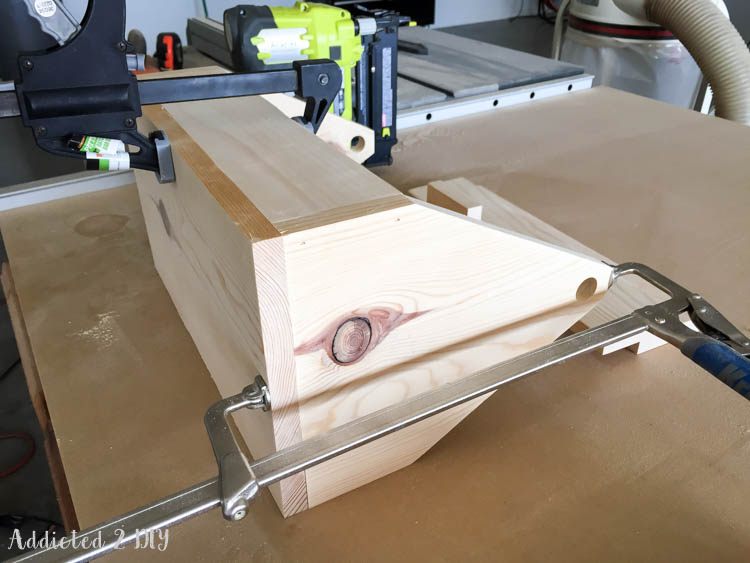
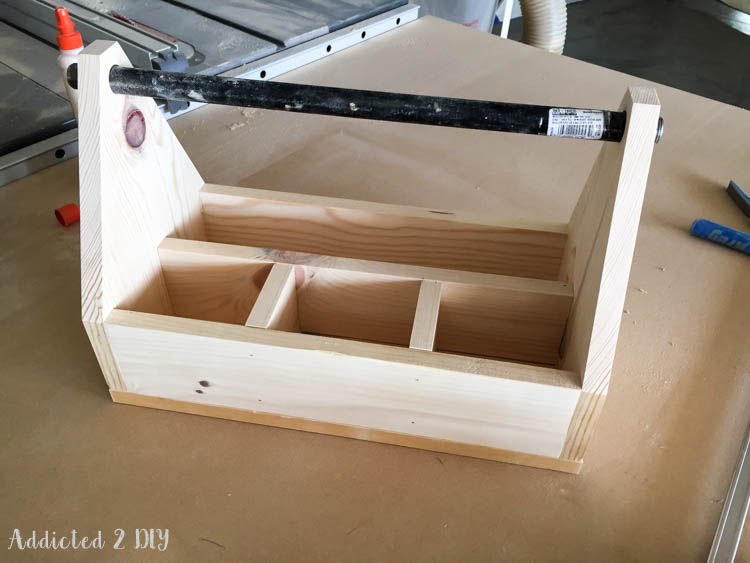
I began assembling the caddy using wood glue and 1 1/4″ brad nails.
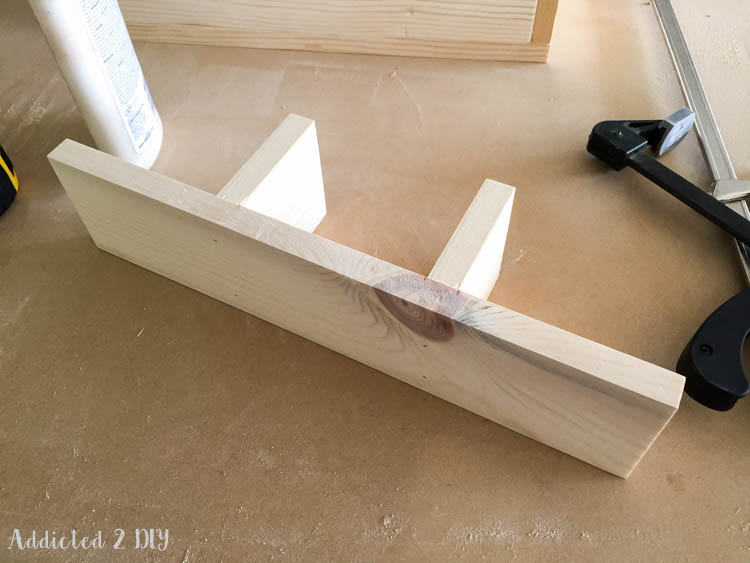
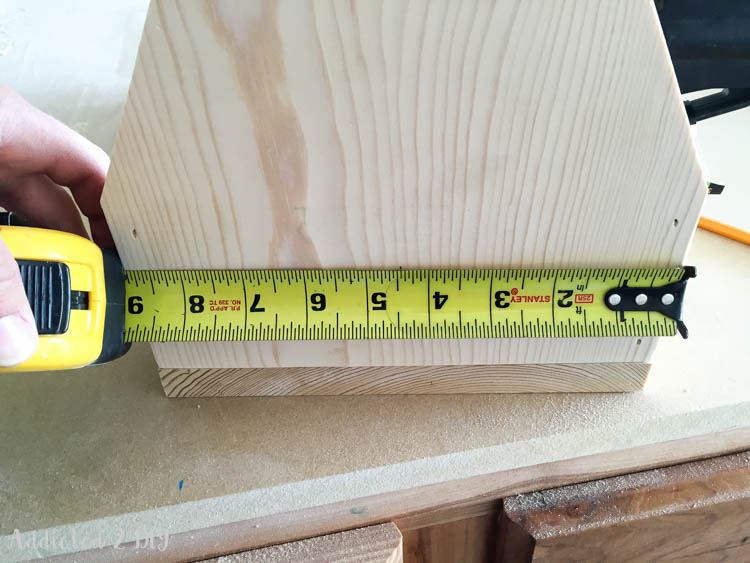
To nail the center divider into place, I found the center point of each side of the caddy and nailed 1 1/4″ brad nails through the sides and into the divider. I did the same to nail it from the bottom as well.
Once the caddy was finished, I finished it off with a coat of Minwax stain in Golden Oak.
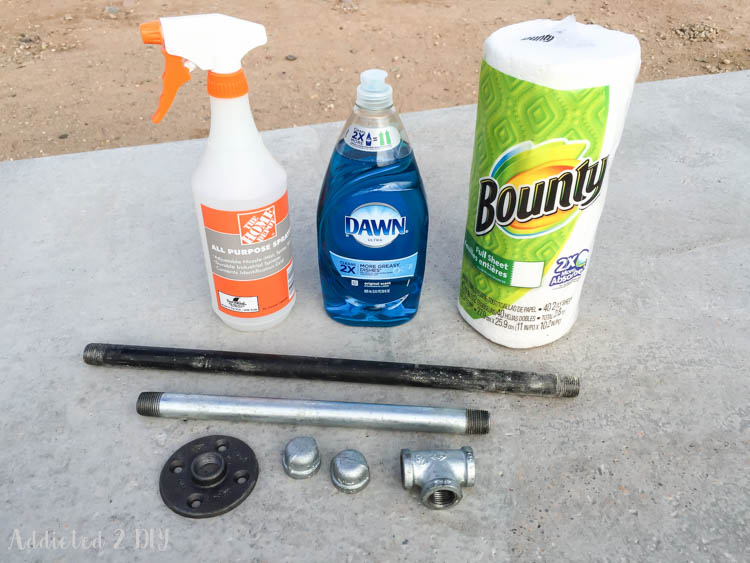
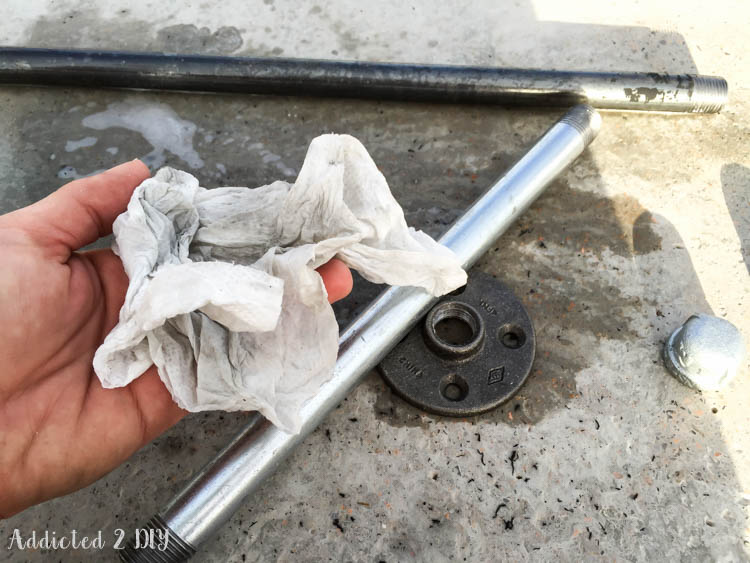
I sprayed all of the pipe and fittings, then scrubbed them down with the paper towel. You can see just how much grease and grime I got off of them. Once they were clean, I rinsed them off and dried them with more paper towels.
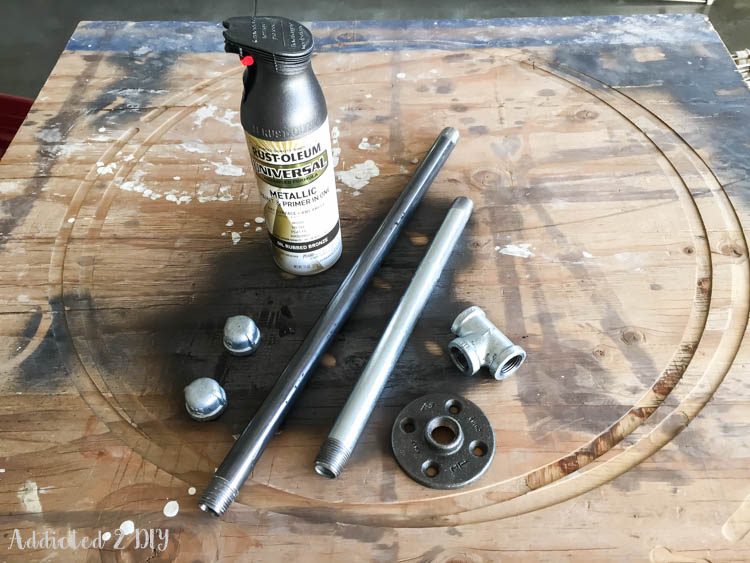
I spray painted all of the pieces in Oil-Rubbed Bronze and let them dry overnight. Ignore the T fitting in the picture. I didn’t end up using that for my paper towel holder. I didn’t like the idea of having to unscrew it every time I needed to change out paper towels. I’m far to lazy for that, so I grabbed another 1/2″ pipe cap and use that instead. #keepingitreal
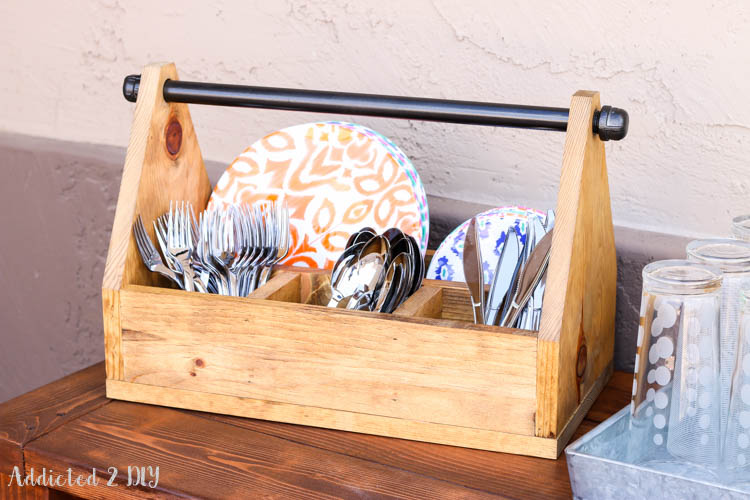
Once the stain was dry on the caddy, I added the pipe handle and screwed the caps on each end.
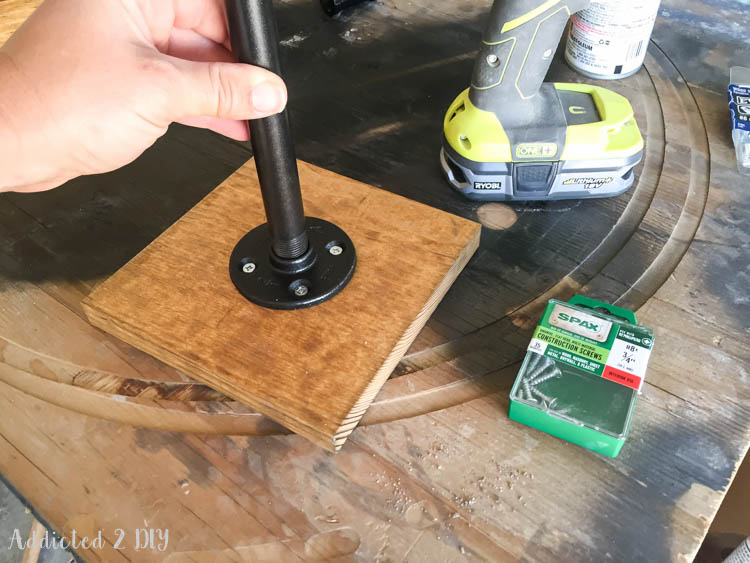
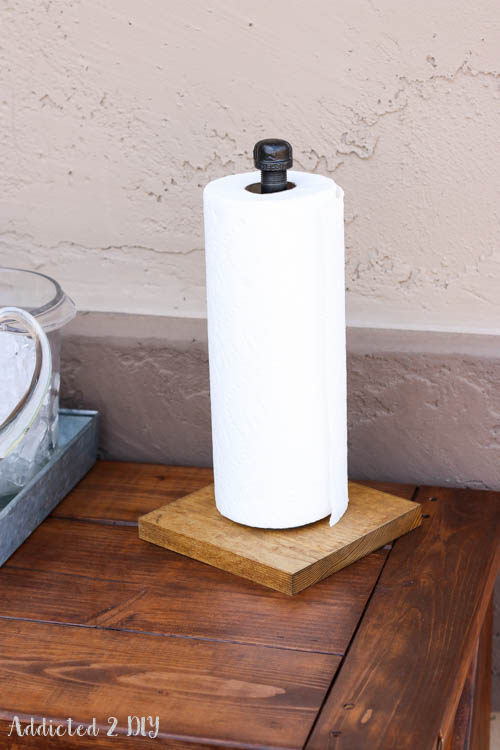
For the paper towel holder, I stained the square wood piece and then attached the pipe flange with 3/4″ screws. I screwed the 12″ piece of pipe into place and topped it off with the 1/2″ pipe cap.
We rarely use actual napkins in our house unless it’s for Christmas Eve brunch when I like to dress up the table a bit. I prefer the simplicity of paper towels, especially the Bounty select a size paper towels. Whenever we need napkins at dinnertime, I just tear off a few of those! I knew having a paper towel holder on hand for our outdoor BBQs would be a great addition to traditional napkins.
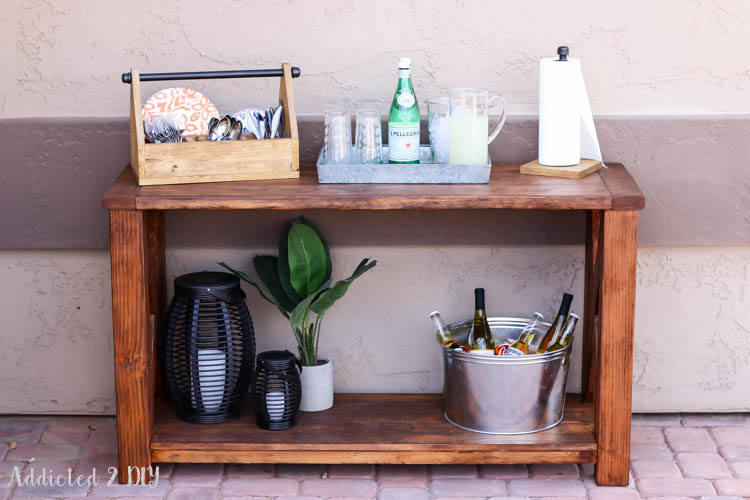
The dinnerware caddy is big enough to hold plenty of dinner and dessert plates as well as tons of silverware (or in this case, fancy plasticware). I hate the silverware caddies that never seem to have a space big enough for all of the spoons and forks to fit.
We have friends coming over in a few weeks for a BBQ and I can’t wait to have a pretty setup for everyone to grab their drinks and food! It feels so good to start updating our outdoor living space into a relaxing retreat that’s perfect for spending time with my family or entertaining with friends. Have you started any spring projects yet or anything planned? Are you ready for the giveaway? Just click here and take this quick and fun quiz! When you’re done, leave a comment below with the results you got and you’ll be entered to win the giveaway! Mine says I’m destined to create a shabby chic kitchen cabinet as a spring DIY. I think I might have to give that a shot! I can’t wait to hear what your results are! And don’t forget to get your coupons and special offers from The Home Depot!
(This giveaway is open to U.S. Residents 18 and over. Giveaway ends at midnight EST on May 8th)
DISCLOSURE: This post is sponsored by The Home Depot and P&G. All ideas and opinions are entirely my own. For more information, please read my full disclosure statement.
This is a sponsored conversation written by me on behalf of P&G, The Home Depot. The opinions and text are all mine.
Hey there, friends! Springtime is upon us and we’ve had some gorgeous weather here in sunny Arizona. This is one of my favorite times of year. We often eat dinner out on the patio and love to host backyard BBQs. I have been wanting to make some improvements to our backyard living space and one of those projects was this rustic outdoor console table. It serves as a perfect place to set food out or as a drink station. Since we love to entertain, I thought a DIY dinnerware caddy would be a perfect addition to the table. I love the rustic industrial look, so I designed a dinnerware caddy and a paper towel holder around that. I’ve teamed up with The Home Depot and P&G to bring you these easy to follow tutorials that are perfect for getting your spring entertaining off to a great start! Also, I’m giving away a $75 Home Depot gift card as well as a P&G goodies to one lucky reader at the end of this post! You can also click here to get special offers from The Home Depot, including a $5 off a $50 purchase coupon! It’s like a combination of my two favorite things, saving money and Home Depot:)
For these projects, you’ll need:
(Dinnerware Caddy)
- 1 – 1×10 @ 6′ long
- 1 – 1×4 @ 6′ long
- Miter saw
- Orbital sander
- 220 grit sandpaper
- Nail gun
- 1 1/4″ brad nails
- wood glue
- Drill
- 1″ forstner bit
- 18″ threaded steel pipe 1/2″ diameter
- 2 – 1/2″ threaded pipe caps
- Dawn dish soap
- Bounty paper towels
(Paper Towel Holder)
- 1×8 piece of scrap wood
- 1/2″ steel pipe flange
- 1/2″ steel pipe @ 12″ long
- 1/2″ threaded pipe cap
- Dawn dish soap
- Bounty paper towels
Cut list:
- 2 – 1×10 @ 11″ long with tapered tops (see instructions)
- 1 – 1×10 @ 17″ long
- 3 – 1×4 @ 15 1/2″ long
- 2 – 1×4 @ 3 3/8″ long
- 1 – 1×8 cut square (approx 7 1/4″ x 7 1/4″)
All of these items can be purchased from The Home Depot.
For the sides of the dinnerware caddy, I marked my 1×10 boards at 11″ for the length. On each side, I made a mark at 3 1/2″ to match the 1×4 sides. I wanted the squared off top of the sides to be 1 1/4″ wide, so I found the center of the board and marked the 1 1/4″ top from there. I cut each of the sides down on my miter saw following my pencil marks.
To hold the pipe handle, I drilled 1″ holes towards the top of the sides. I clamped the sides together and drilled straight through both of them. To prevent the wood from tearing out on the underside, you want to have a piece of wood underneath for the bit to drill into a little. In this case, I used my plywood workbench top. It’s been used and abused, so I wasn’t too worried about it leaving a mark behind.
Once all of my pieces were cut, I sanded them down with 220 grit sandpaper.
I began assembling the caddy using wood glue and 1 1/4″ brad nails.

To nail the center divider into place, I found the center point of each side of the caddy and nailed 1 1/4″ brad nails through the sides and into the divider. I did the same to nail it from the bottom as well.
Once the caddy was finished, I finished it off with a coat of Minwax stain in Golden Oak.

I sprayed all of the pipe and fittings, then scrubbed them down with the paper towel. You can see just how much grease and grime I got off of them. Once they were clean, I rinsed them off and dried them with more paper towels.
I spray painted all of the pieces in Oil-Rubbed Bronze and let them dry overnight. Ignore the T fitting in the picture. I didn’t end up using that for my paper towel holder. I didn’t like the idea of having to unscrew it every time I needed to change out paper towels. I’m far to lazy for that, so I grabbed another 1/2″ pipe cap and use that instead. #keepingitreal
Once the stain was dry on the caddy, I added the pipe handle and screwed the caps on each end.
For the paper towel holder, I stained the square wood piece and then attached the pipe flange with 3/4″ screws. I screwed the 12″ piece of pipe into place and topped it off with the 1/2″ pipe cap.
We rarely use actual napkins in our house unless it’s for Christmas Eve brunch when I like to dress up the table a bit. I prefer the simplicity of paper towels, especially the Bounty select a size paper towels. Whenever we need napkins at dinnertime, I just tear off a few of those! I knew having a paper towel holder on hand for our outdoor BBQs would be a great addition to traditional napkins.
The dinnerware caddy is big enough to hold plenty of dinner and dessert plates as well as tons of silverware (or in this case, fancy plasticware). I hate the silverware caddies that never seem to have a space big enough for all of the spoons and forks to fit.
We have friends coming over in a few weeks for a BBQ and I can’t wait to have a pretty setup for everyone to grab their drinks and food! It feels so good to start updating our outdoor living space into a relaxing retreat that’s perfect for spending time with my family or entertaining with friends. Have you started any spring projects yet or anything planned? Are you ready for the giveaway? Just click here and take this quick and fun quiz! When you’re done, leave a comment below with the results you got and you’ll be entered to win the giveaway! Mine says I’m destined to create a shabby chic kitchen cabinet as a spring DIY. I think I might have to give that a shot! I can’t wait to hear what your results are! And don’t forget to get your coupons and special offers from The Home Depot!
(This giveaway is open to U.S. Residents 18 and over. Giveaway ends at midnight EST on May 8th)
DISCLOSURE: This post is sponsored by The Home Depot and P&G. All ideas and opinions are entirely my own. For more information, please read my full disclosure statement.


Painted mason jars!
LOVE painted mason jars! I’ve got a great tutorial for Patriotic Mason Jar Lanterns that are perfect for summer! http://addicted2diy.com/2014/06/02/patriotic-mason-jar-lanterns/
I love this project! The quiz said I’m gonna tackle a laundry room redo 🙂
I know that’s definitely on my list! It’s almost like you’re being challenged to complete the project when you get the results:)
Laundry room redo! Funny, that is actually on my to-do list. Looks like maybe I should move it higher on my list.
Meagan recently posted…First Quarter Review 2016
Lol! It’s glaring at me on my to-do list as well:)
I took the quiz and it told me to make a one-of-a-kind accent wall.
That sounds fun!
I got laundry room re-do!!! Funny. I just told my husband I needed to re paint the whole room. Aaaannnnnndddd…… Maybe tear out a wall or two!!!! LOL. Thanks for the giveaway. Love your site. Take care.
Haha! If your husband is like mine, I’m sure he was THRILLED to hear your plans;)
Oh he was!!! He just shakes his head, rolls his eyes, and sighs. He knows he has no control. Resistance is futile. LOL. I had a question for you. I want to make a towel rack and use pipe. Is there something I need to “seal” the pipe with so as to not discolor towels? I loved your suggestion to use Dawn to clean it. Love that soap. Not sure if I had to do something after cleaning. Thanks so much. Take care and happy building!!!!
I always spray paint mine to make everything a uniform color. If you don’t want to change the color, you can always use a clear coat spray paint.
This was fun and going to try it again with different combination. As a diy lady, we always have many projects going on in our head at once! First time, painted mason jars and second the shabby chic kitchen cabinet. I prefer the second.
Thanks!
Laundry room redo. True.
I took the quiz and it said to make painted mason jar vases
Laundry Room Redo. Not what I need to do right now, though!
I scored the laundry room redo, which is accurate because we have that project planned this summer.
My result is Painted Mason Jars. It fits because I’ve been in love with mason jars lately.
My results are: Painted Mason Jar Vases.
My results said I should do the painted mason jar vases project.
It suggested I do a painted mason jars project which I think is a great idea!
This is awesome! It looks really sturdy and well equipped to carry even heavy, ceramic dishes. Nice work! Thanks so much for the walk through!
Thank you Morgan! I’ve even had a reader build one and use it as an electronics station. Definitely a ton of possibilities!