From the moment we moved into our house nearly 4 years ago, my husband has been talking about putting stone on our kitchen island. It was one of those projects that we planned to get to after other, higher priority projects were finished. Of course, we just kept adding more and more projects to that list, so it was starting to look like we would never get to this project. A few months ago, the opportunity to work with AirStone came about and I was pretty much jumping for joy! I was so excited to tell my husband that we’d finally be able to make over our kitchen island! To give you a little info, AirStone is a faux stone veneer made up of 80% recycled materials. It looks and feels just like real stone, but it’s super light and easy to work with.
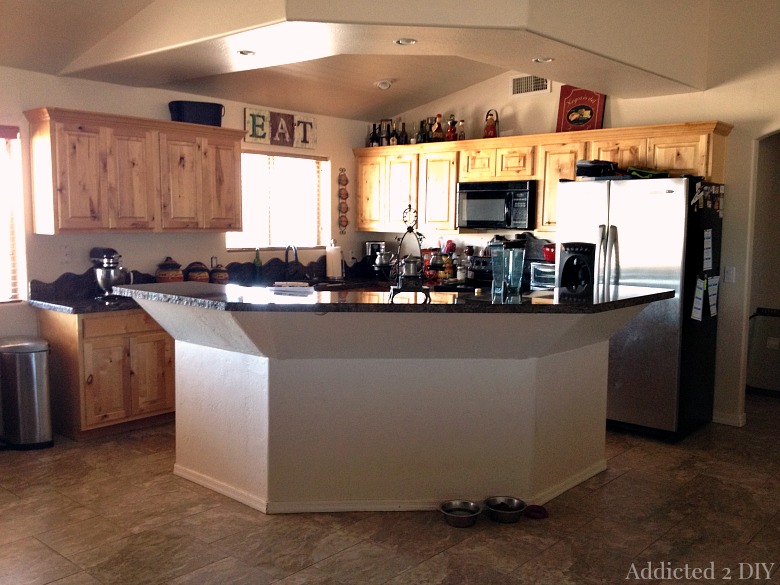
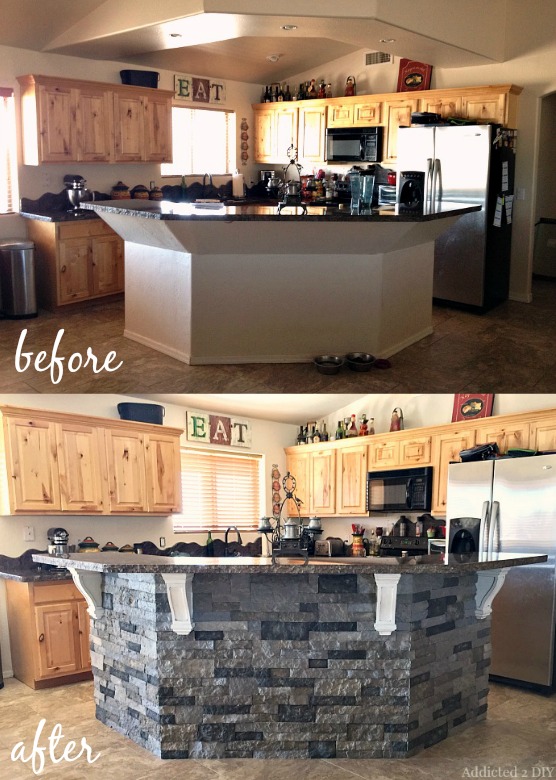
Here is the before of our kitchen island. It was pretty boring and the weird angled part just wasn’t working for us. We knew that before we put the stone on, that part had to go.
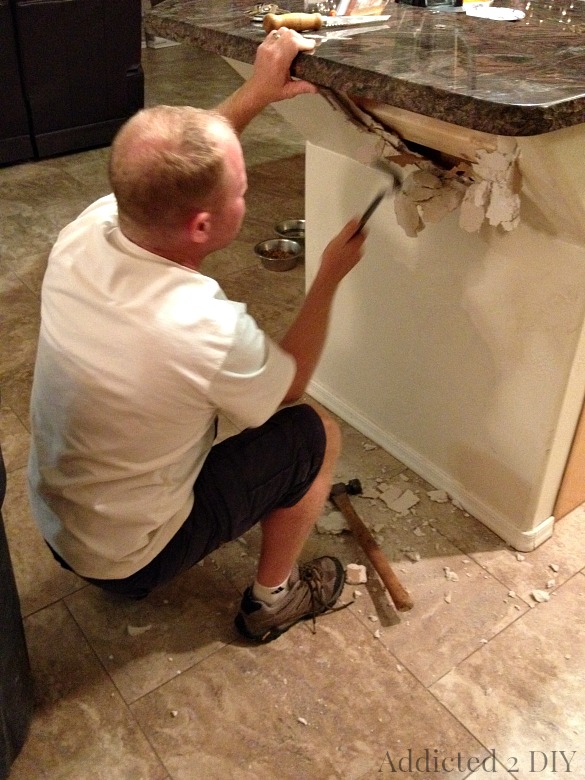
We tore out all of the drywall for this top portion of the island to expose the frame that was supporting the upper granite countertop. My husband chose to do this during our boys’ bedtime one evening, which then made them want to help. Because what kid wouldn’t want to swing a hammer into a wall instead of going to bed? We also ripped out the baseboards so the stone would go straight down to the floor.
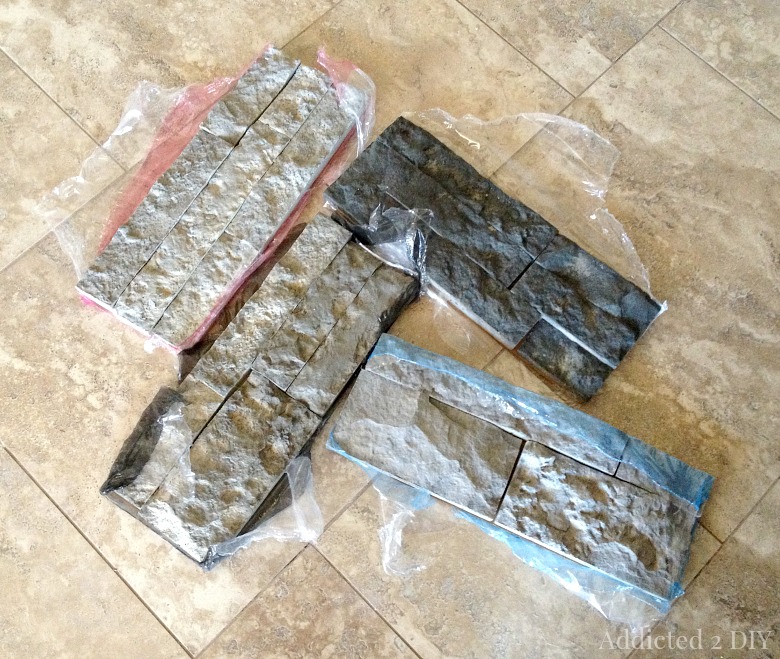
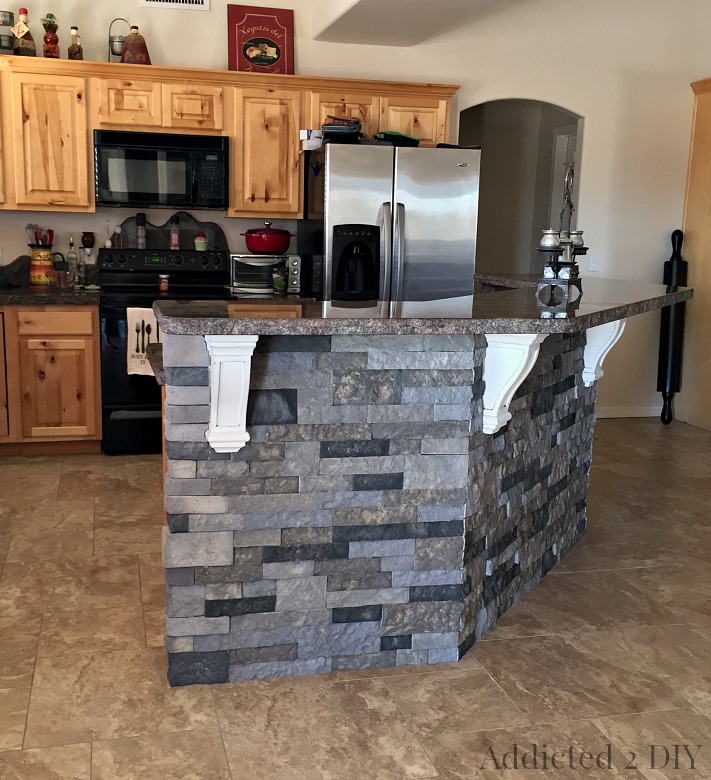
AirStone comes in three different colors. We chose Spring Creek, which is a combination of greys. There are four different color/texture variations in each box of AirStone. Other than it being a lot lighter than real stone, I was really surprised by how real it felt when I picked up the first piece.
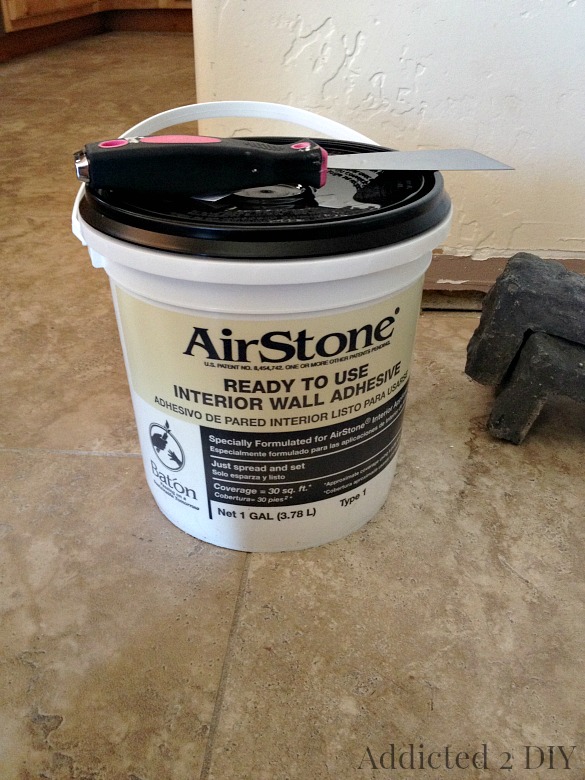
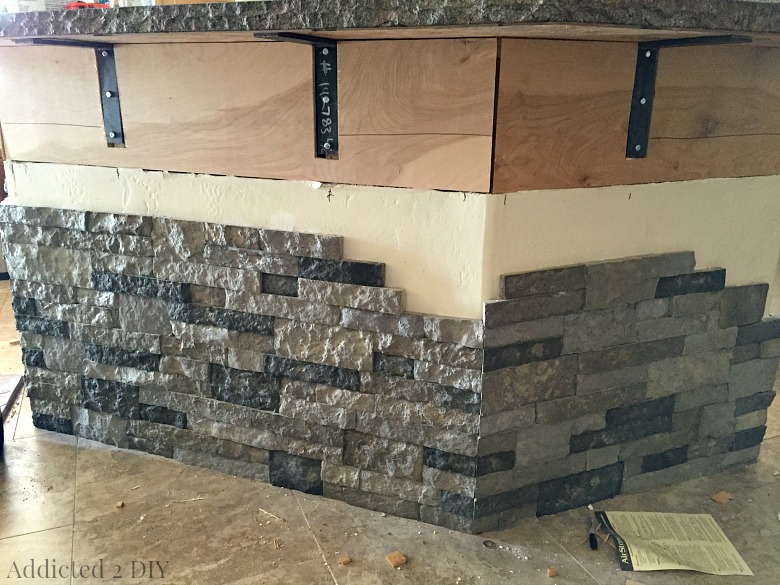
To apply the stone to walls, I bought several buckets of AirStone’s interior wall adhesive from Lowes. There really aren’t a lot of materials needed for this type of application, which I loved. All I needed was adhesive, a putty knife, and a saw. For most applications, a hacksaw with a concrete blade would suffice. Unfortunately for us, we had weird angles in our kitchen island, and cutting them at the 26 degree angle needed to have our corners meet just right would have taken forever and a day. We bought a concrete blade for our 10″ miter saw and used that instead (make sure you wear a proper dust mask if you’re doing this).
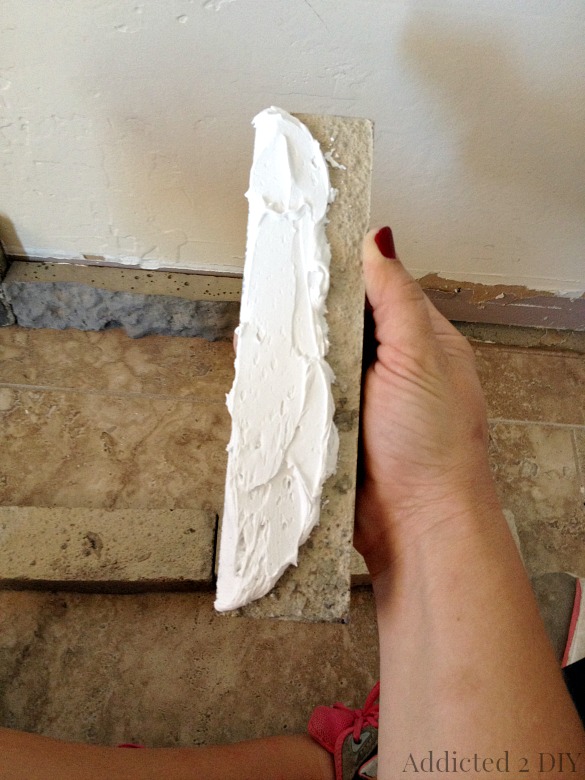
I was really nervous about placing the first few stones, but it was so easy! You just apply a good amount of adhesive to the lower portion of the stone and then press it to the wall. The instructions say to compare the adhesive application to frosting a cupcake rather than buttering toast. Given that I used to have my own cake decorating business, it was an analogy I easily understood
There are various sizes of stone as well, so it’s basically just mixing colors and sizes to get a natural look. Since we ripped out drywall, and 2x4s that supported our counter top, we had to have special braces made to keep it from falling down. We also used plywood to cover the exposed 2×4 frame of the island.
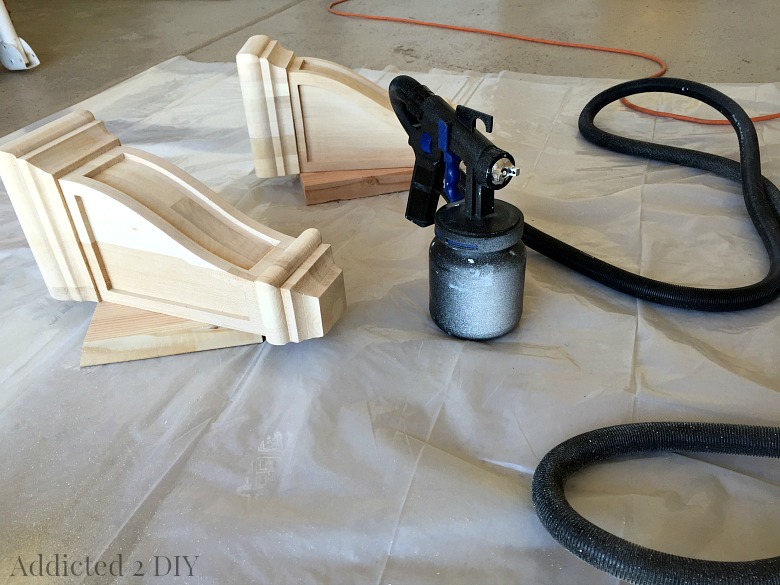
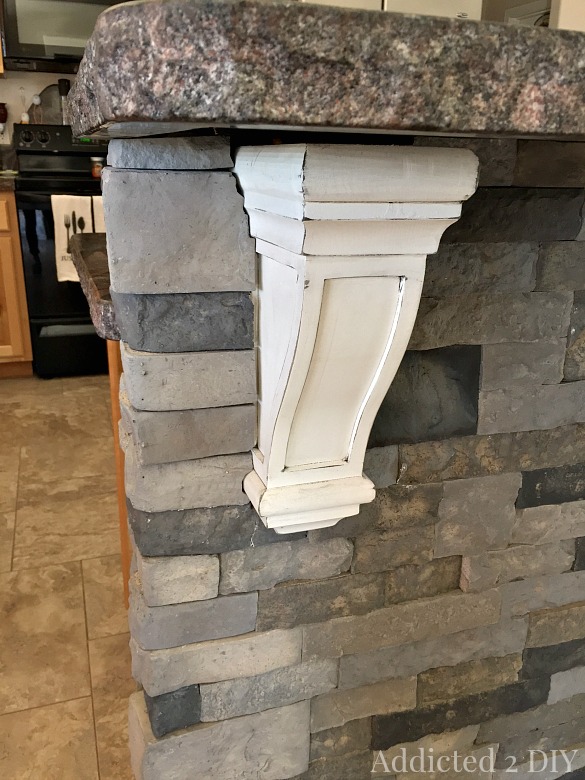
Since we have dark grey granite with a natural edge, we decided that we needed big, chunky corbels to give a little contrast. We thought about making our own, but my husband and I couldn’t agree on a design that we liked, so I went to Home Depot and found these. I used my HomeRight Finish Max Pro and painted them the color of our interior trim (Swiss Coffee).
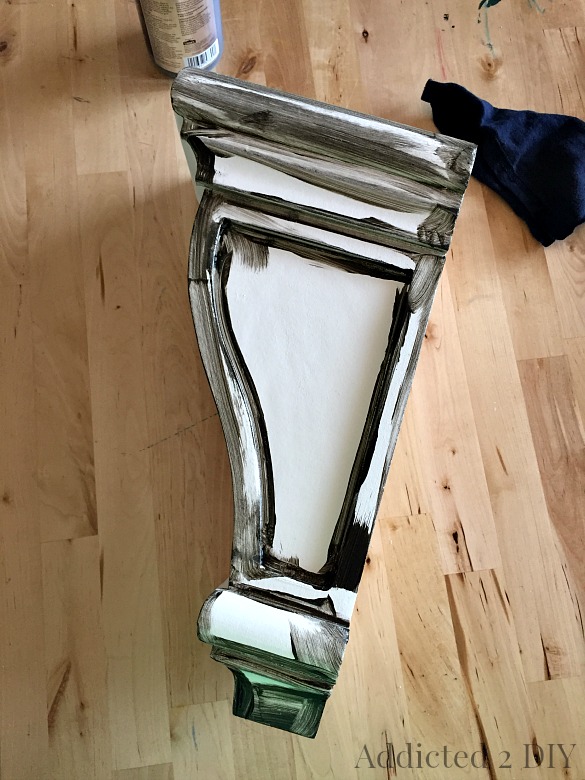
I took a poll on Facebook about whether or not to distress the corbels or leave them be. The overwhelming response was to distress them. I sanded the edges a bit and used Valspar antiquing glaze to distress them.
The corbels have some curves and steps to them, so we had to also use our grinder to notch out the stone around them.
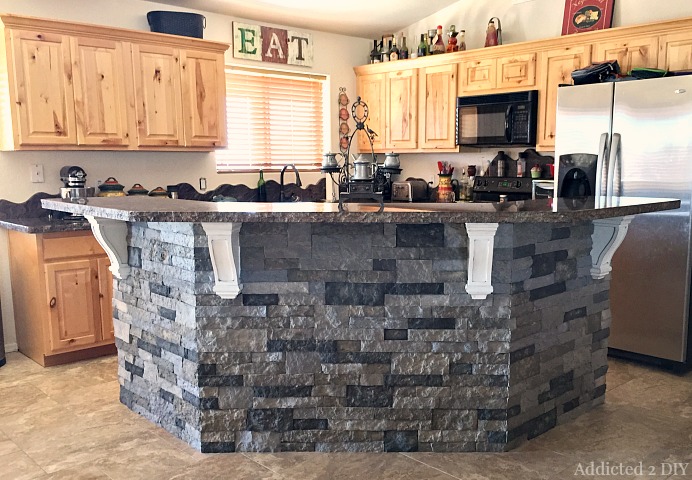
We were so happy when the last stone was finally set in place. The number of cuts we had to make definitely made the project a bit trickier and much more time consuming, but the end result is well worth the effort.
We absolutely love the look of our “new” kitchen island and we are so happy with the quality of the AirStone. Our friends and family seem to like it too, because my husband still can’t believe how many likes and comments we got when he posted a picture of the finished island on Facebook. I can’t wait to get started on the rest of our kitchen makeover. Painting our kitchen cabinets is next on my big project list.
If you’ve ever wanted to add decorative stone to your house, I highly recommend using AirStone. Not only is it more affordable than real stone, but it’s also easier to work with and much lighter than the real thing. It’s sold at most Lowes stores, which makes it so convenient. There are so many places that this stone can be used, and it can also be used outside. Someday, we’d love to add it to our BBQ island.
DISCLOSURE: I was provided product from AirStone for this post; however, all opinions of this product are 100% my own. Bottom line: I love it!

Wow, such a difference! What color are you going to paint the cabinets?
Im going to paint them a white color. I haven’t decided on an exact shade yet, but I’m going to play around with a few samples and see what I like:)
That angle sticking out really was odd wasn’t it? The stone looks amazing and of course getting rid of the strange angle makes a huge difference. That AirStone looks great! What colour doors are you going for? I would love black on mine I think, but my kitchen is very small so I’m not sure if the black would be too much!
Angela xx
Thank you! I’m painting them white, but haven’t picked a shade yet. If we had light or white colored granite, I would totally do a dark color, but it just won’t work with the color we have.
We are about to start the same project, except we have to widen the bar area where the stones will go over. I have a question about yours. Ours has cabinet doors on one side where the stove is which we intend to leave (don’t want to loose cabinet space nor close in the gas range). So we will be doing three sides but how did you deal with the corner where the cabinet side starts? We were looking at faux stone panels but if you cut the “stone”, you would basically get an edge that looks like concete. Ewww. Where did you purchase your airstone from? The color is almost exactly what we were thinking.
Rachel recently posted…Simple Bracelet Tutorial
This is sold at Lowes. The stone comes in flat edge, 90 degree corners and natural edge. The AirStone website has a calculator that helps you determine how many boxes of each type of stone are needed. For your cabinet doors, I would definitely go with the natural edge so you dont have to see an ugly concrete edge from cut stone.
Love the look! I can totally see it with white cabinets. Maybe even more stone on the backsplash? Good luck on the rest of your remodel!!
I don’t know photography but think the way it was taken…..the counter seems like it’s over powering the kitchen….it looks huge but love the interior of the counter and NKBA guidelines is you must have the island spaced 3.5′ away.
This post literally makes me want to run to home depot to do this
And my husband has his own building so i have 3 corbels sitting outside my door from extra material.
This project is definitely happening this week
THANKS FOR SHARING YOUR EXPERIENCE I LOVE IT!
Lol! It really makes such a huge difference!
What angle did you need to cut the stone for the required angles? 26% Looks pretty similar to a couple angles we have on the bar we are putting dry stack man made rocks on. Thanks, Joy
I want to say we probably used 30 degree angles. I would recommend purchasing an inexpensive angle finder (digital is better) to help you determine the proper angles for your bar.
Hello!
Bar looks Great! We did the same kind/color stone as well. Looking for some bar stools and trying to decide what color will look best with this color ?
What kind/color stools did u use ?
Thank you.
I still haven’t bought bar stools yet, though I did find some on Amazon that I really love. They were out of stock when I attempted to buy them. I am planning to go with black, though. https://www.amazon.com/dp/B076CZP173/ref=twister_B073W9HQDG?_encoding=UTF8&th=1