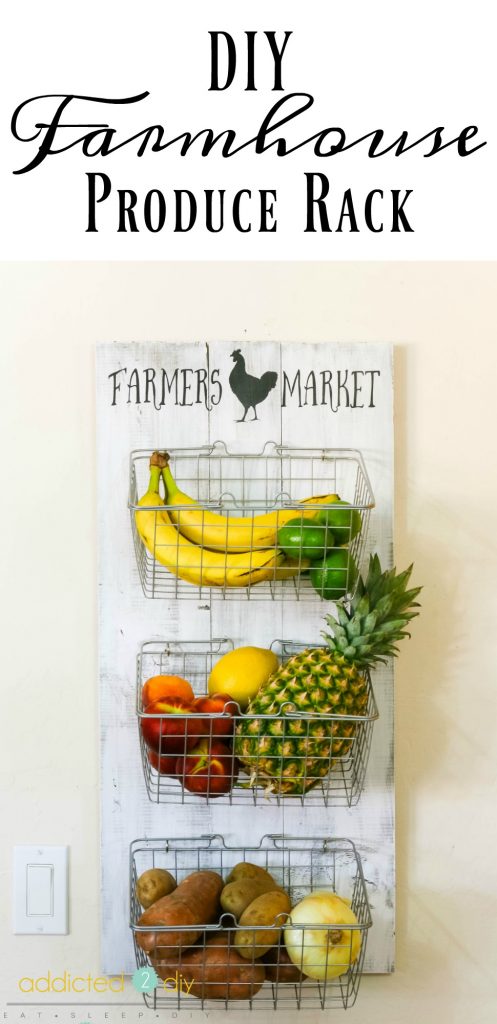
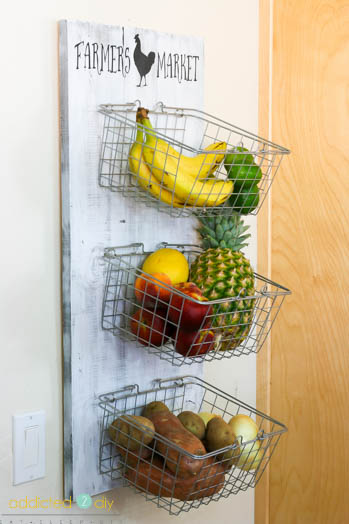
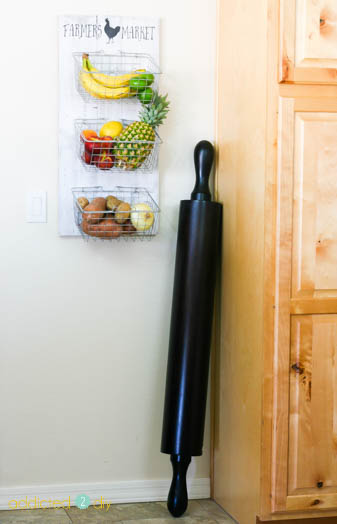
Hey guys! Raise your hand if your kitchen counters are being taken over by your fresh produce because you’re lacking a place to store it. I can tell you that I dealt with this problem constantly! The clutter was starting to really get to me and I decided that I needed to do something about it. I happened to have some super cute wire baskets from the Dollar Spot at Target and they ended up being the perfect size for holding fruits and veggies.
Here’s what you’ll need for this project:
- 1 – 1×6 @ 6′ long (or dig through your scrap pile)
- 1 – 1×4 @ 8′ long (again, check your scrap pile)
- 2 – 5 gallon paint sticks
- miter saw
- narrow crown stapler (or brad nailer)
- 3/4″ narrow crown staples (or 3/4″ brad nails)
- wood glue
- finish of choice (paint/stain/or both)
- adhesive vinyl or chalkboard vinyl
- wire baskets
- 6 – screw eyes
- drywall anchors and screws
- D-ring picture hangers
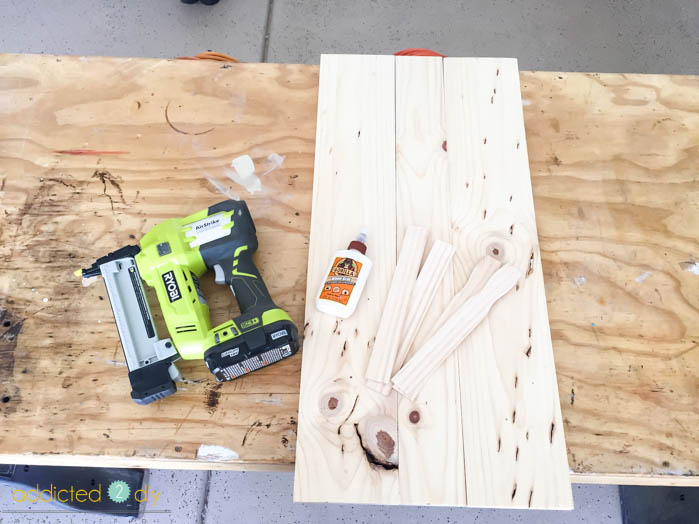
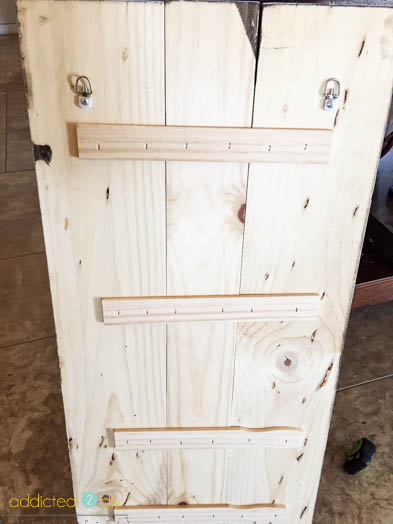
To build the backing for the produce rack, I cut 2 – 1×6 pieces and 1 – 1×2 piece at 31″ long. Cut the 5 gallon paint sticks in half.
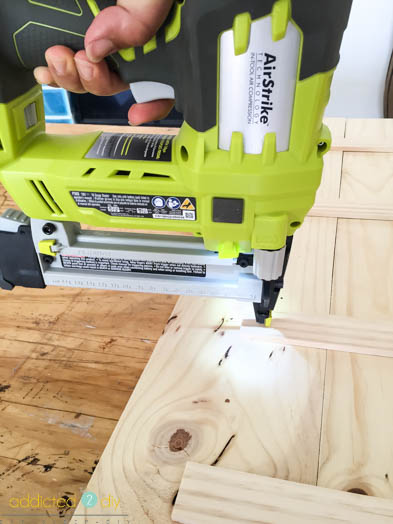
Glue the paint sticks down to the boards and then nail into place with your narrow crown stapler or brad nailer.
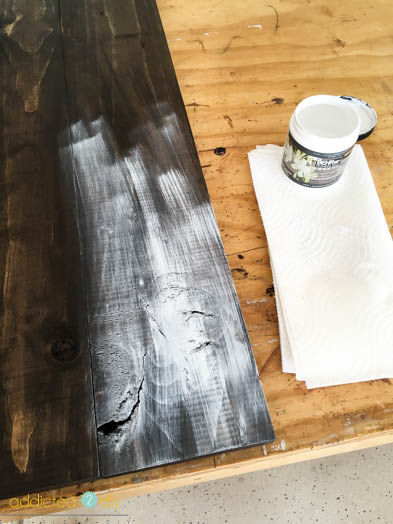
This can be finished however you like. I’ve made some stained in Minwax Golden Oak and they look amazing. For this one, I stained it in Minwax Espresso stain and then dry brushed it with white paint. To dry brush is super easy. Just barely dip your paint brush into the paint, dab it onto a paper towel and then lightly brush it onto your project. Keep layering on your paint until your happy with how it looks.
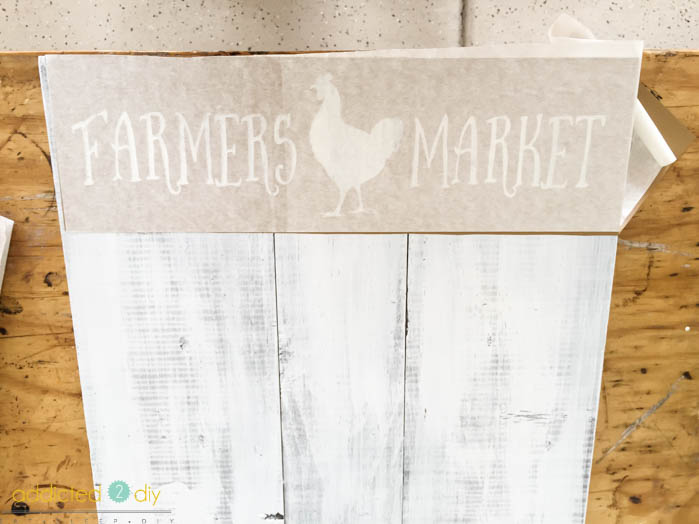
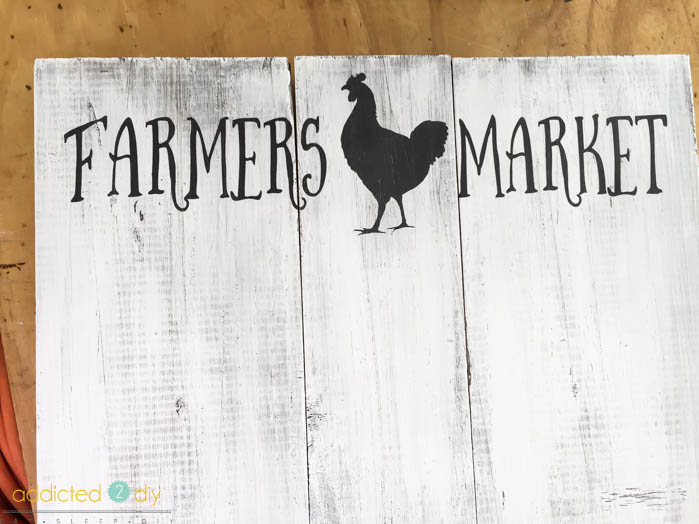
I wanted to add a cute little farmer’s market stencil to the top, so I made one with my Silhouette Design Studio. Another great idea is to use chalkboard vinyl and stick it to the top. Then you can label it however you like!
Once I painted on my stencil, I sanded it down a bit, just to give it a distressed look.
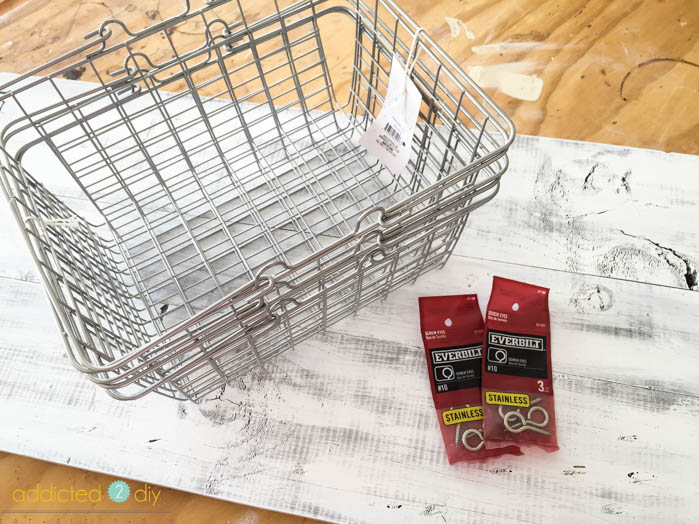
I gathered up three of the baskets and my screw eyes to begin assembling the racks.
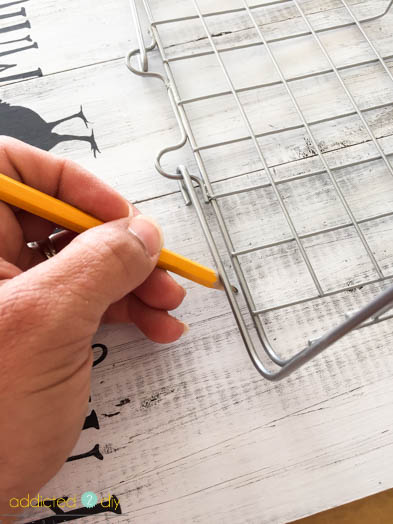
I evenly spaced the baskets onto the front of the wood and then marked where I wanted the screw eyes to go.
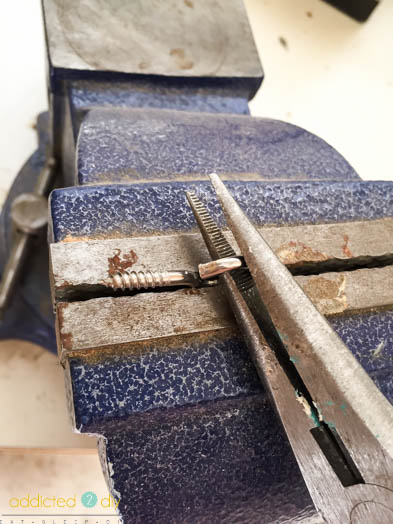
To open up the screw eyes, I clamped them into my vise and opened up the screw eyes with needle-nose pliers.
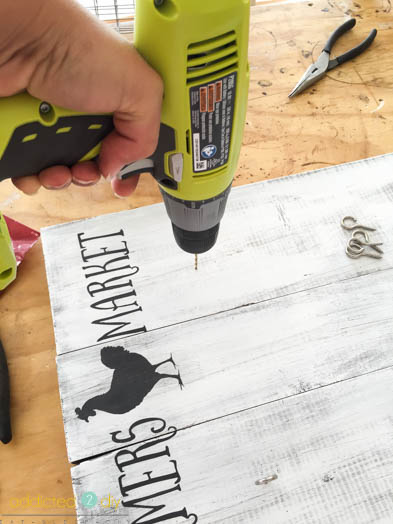
I pre-drilled the holes for the screw eyes at my pencil marks and screwed them into place.
On the back, I added D-ring picture hangers and then added drywall anchors and screws to the wall.
I love, love, love how useful this produce rack has been! Plus it has a pretty farmhouse style to it, which is the look I’m working to achieve in my house. The baskets actually hold a TON of fruits and veggies and I often use one of them to hold bread, tortillas, etc. This can also be used in a bathroom to hold toiletries, a craft room to hold crafting supplies, and some people have said they want to use it to hold snacks for their kids. So many great ideas! My favorite part is that my kitchen counter is not cluttered with fruit and veggies anymore.

I love this!! What an awesome idea! We really do need a system for our veggies too! I have to now go find some baskets!! Pinned and will be sharing it on FB!
Love this rack. What a great way to store your fresh fruits and vegetables without taking up valuable counter space. I know you can’t keep this stuff too long at room temp though. It would even be a cute station for dropping gloves, hats, etc. You’ve done a great job, and thank you for being professional enough to tell us you’re using anchors, etc. in the walls.
Oh, I love that idea! There really are endless possibilities with how to use this.
Where are these baskets from!? I can’t find the right ones anywhere!
They were from Target. You may be able to find similar baskets at Walmart or Save-on-Crafts.com.
Here is a link to some similar sized baskets from Walmart. They come in different colors, but you can always spray paint them any color you like! https://www.walmart.com/ip/Mainstays-Wire-Basket-Available-in-Multiple-Colors-Pack-of-6/54807348
That is really cute! Love the baskets, and the stencil at the top!
Thank you, Florence!
Hello, I loveeee this so much!! I already bought my baskets in HomeGoods & I was wondering how or where can I get that stencil? Is there any way you can email it to me so I can print it out & somehow stencil it on my wood? Thank you so much for sharing this!!
Of course! I will email the stencil to you:)
Love this! Could you please email me the stencil too, then I’ll figure it out from there.
Thank you
Hi Sandy,
I’ll send the file, now:) Thanks!
I’m so glad I found tour post! May I lease have the stencil as well? I’ve been looking for an hour now online trying to find one. Thanks!
Hi Allison, I just emailed it to you!
Hi Katie!
Can’t say thank you enough for this terrific idea! I finished one up today, and I’m giving it to my son & daughter-in-love. I sent her a photo, and she loves it!
I’ll post a photo on my FB blog page:
http://www.facebook.com/journeyswithjuju
Thank you, Juju
I’m so glad she loves it! It really is such a great way to store just about anything and everything!
Hi! Would you be willing to email me the stencil as well please?
Hi Michelle,
I’ll email that to you right now!
Such a cute idea, can’t wait to start this project. Would you be able to email me a copy of the stencil you used?
Hi Jayme,
I will email you the stencil file. Thank you!
Hi, I am in the middle of doing this project right now for my daughter. Can you possibly email me the stencil as well, I am not able to figure it out on my own!! Thanks …love this !!
Hi Robin,
I just sent you the file via dropbox. Please note that the file is for personal use only. I would love to see your finished project!
I Love this! Would you be able to send me the stencil to this as well? 🙂 or could you tell me the font you used?
i’m in the process of making this as well and im in love with font! im just having a hard time finding something similar to it 🙂 Thank you!
So sorry for the delay! I will get that emailed over to you.
What kind of dry wall anchors did you use?
Hi Julie, I used the plastic, screw in drywall anchors.
I love this idea! All I have left is to complete the stencil. Off the top of your head do you remember how tall the letters were? I’m running into making them too tall where they are hard to read. thank you for sharing!!
Letters are about 2″ tall and not at all hard to read:)
I’d love to have the file as well. I have a cricut and I’m new to the cricut. You said you used a silhouette, will that mean I won’t be able to use the file? Sorry I’m new at this but trying! I appreciate any help!
Hi Amanda, I will email the file to you via dropbox. Thanks for asking!
As for the file, I’ll be sending you the PDF version of it. You can convert it to an SVG file and it should work on your Cricut.
Love this farm house storage idea! … Could you send it to my email as well?
Hi Lori,
I just emailed you the dropbox link for the file:)
Want to do this diy for our first home, such s great idea!! Can you send me a copy of stencil as well?
Hi Kelsea,
I just sent it over via Dropbox:)
Would it be possible to get the letters too?
New at diy.
Hi David,
I’ve emailed the files to you. Thank you!