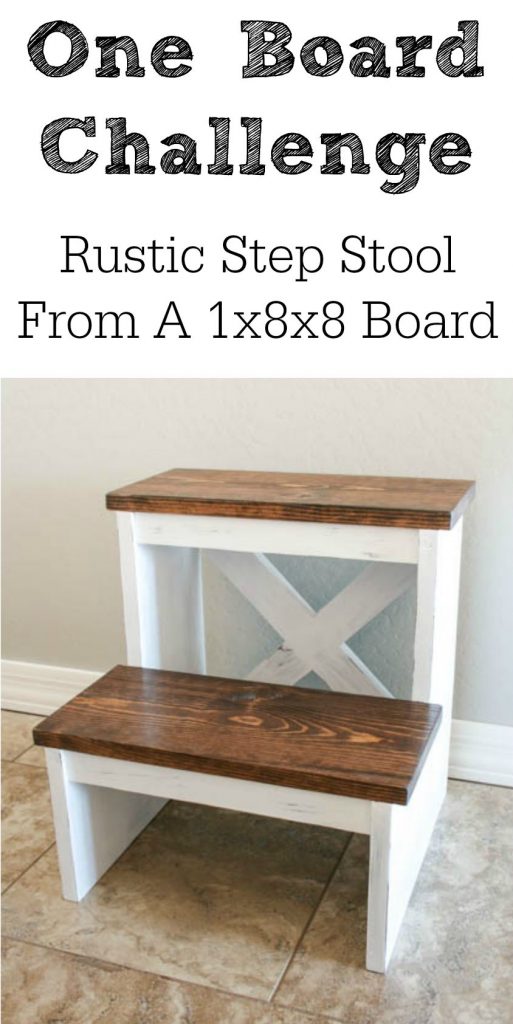
 Hey everyone! I’ve teamed up with 16 other super talented bloggers in a fun blog hop challenge. We were challenged to create something amazing from a 1x8x8′ board. We could use any species of wood, and elements such as hardware were allowed to be used, but that’s it. Talk about a challenge!
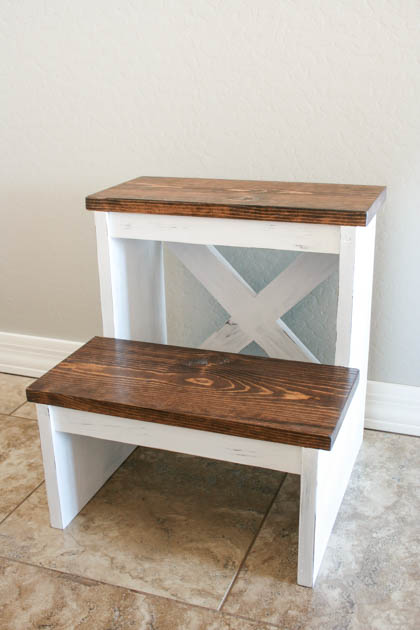
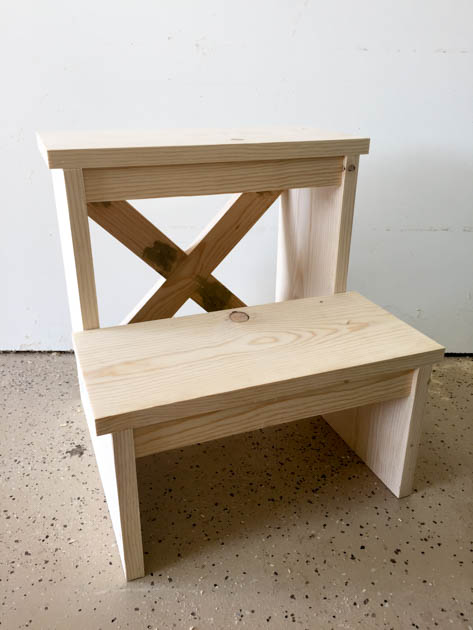
I was pretty stumped for a while, but necessity finally allowed inspiration to strike and I came up with a plan. My husband had surgery on his shoulder for a torn rotator cuff one week ago today. To say I was stressed out about leaving him to go to Atlanta would be an understatement. He assured me he and the boys would be fine, but my youngest still needs help reaching some things in the kitchen. A step stool that he could easily move around was the perfect solution and I’m sure it makes my oldest a lot happier that he doesn’t have to help him with everything all of the time. I’ve also included the free printable plans for this simple project.
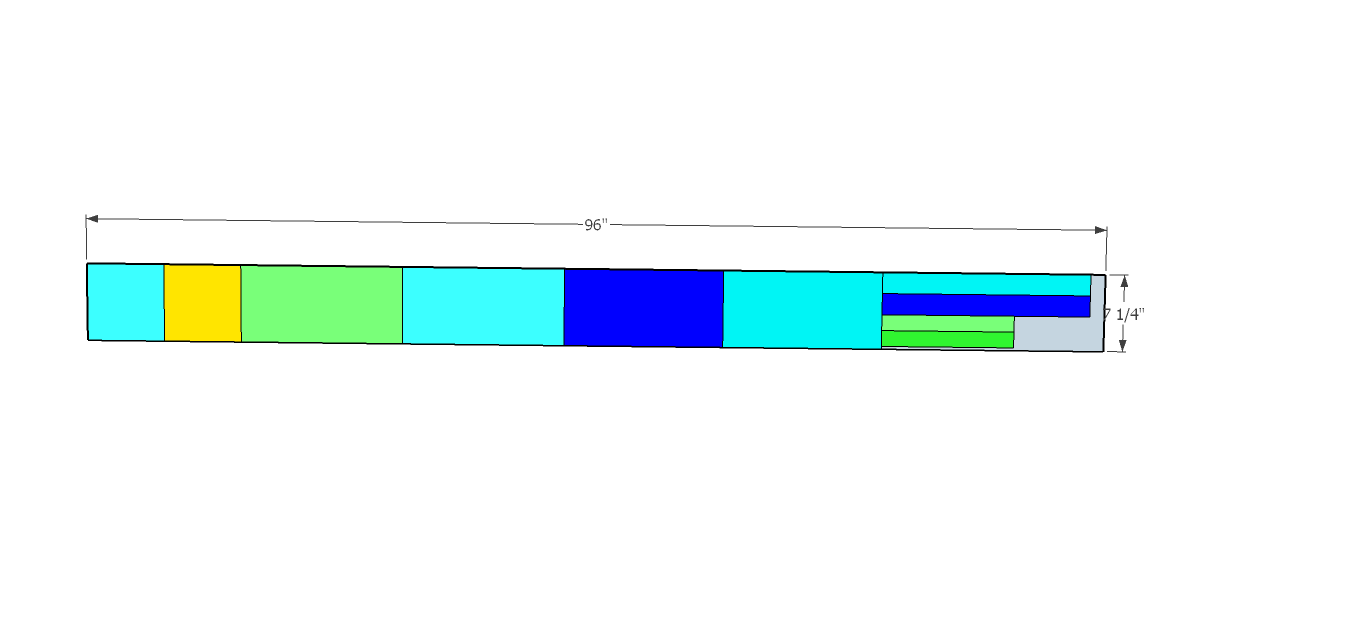
You can see from the picture above that I used just about the entire 8′ of board to make this step stool. Some pieces were ripped down on my table saw, and others were just cut with my miter saw.
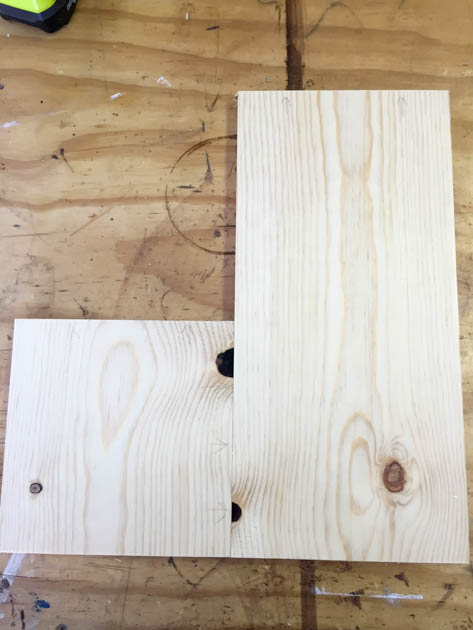
I cut my side pieces first and drilled pocket holes in them. I like to draw little arrows on the wood with a pencil notating where my pocket holes are going. It helps me to not forget any.
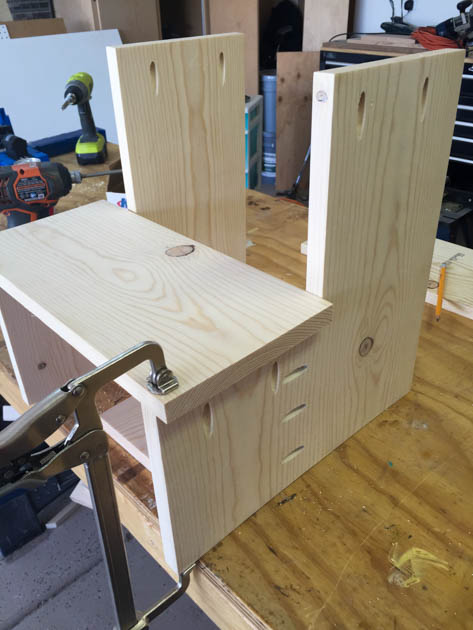
I assembled the sides and attached the steps using wood glue and 1 1/4″ pocket screws. You’ll probably notice my mistake of drilling my pocket holes on the wrong side for this side piece. Luckily my plan was to paint this step stool, so it’s easy to hide with wood filler. Proof that nobody’s perfect.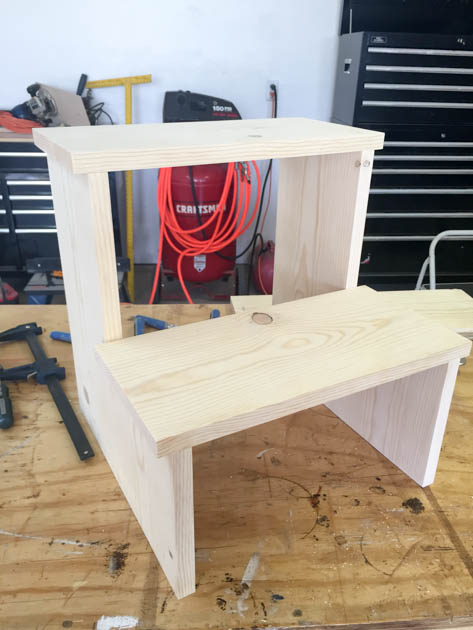
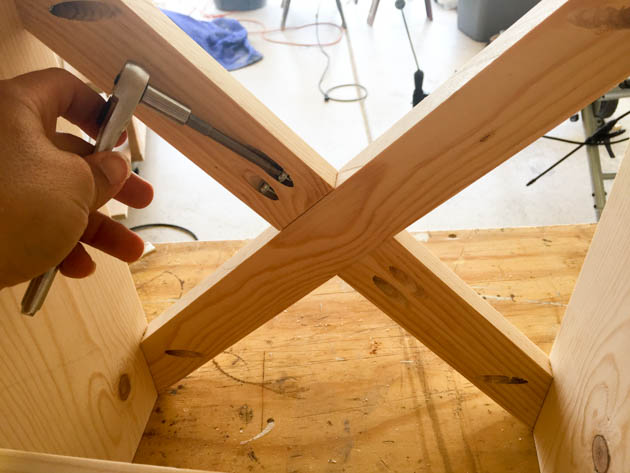 Once the sides and steps were assembled, I ripped down the pieces for the X back. To figured out where to make my cut lines for the middle of the X, I first attached my solid piece, then lined up the other piece where it would go and drew pencil lines. I attached it all with wood glue and 1 1/4″ pocket screws. It got a little tight to fit my impact driver to screw the middle screws in, but a ratchet made for a good substitute.
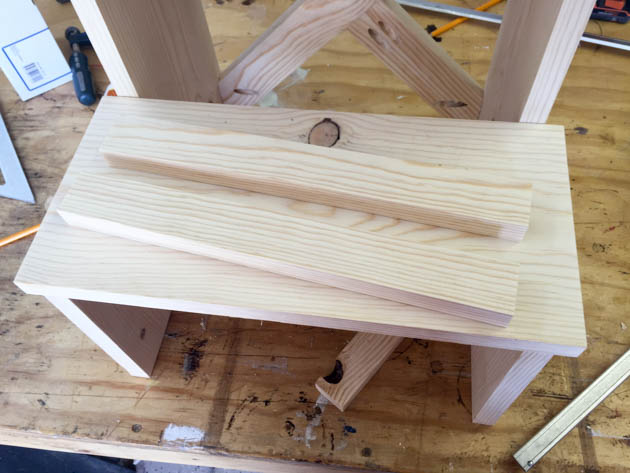
I ripped down my remaining piece of the board into two 1 1/2″ pieces and added them as trim and extra support for the stool.
Once the entire stool was done, I filled all of the pocket holes with wood filler, let it dry, and sanded everything down.
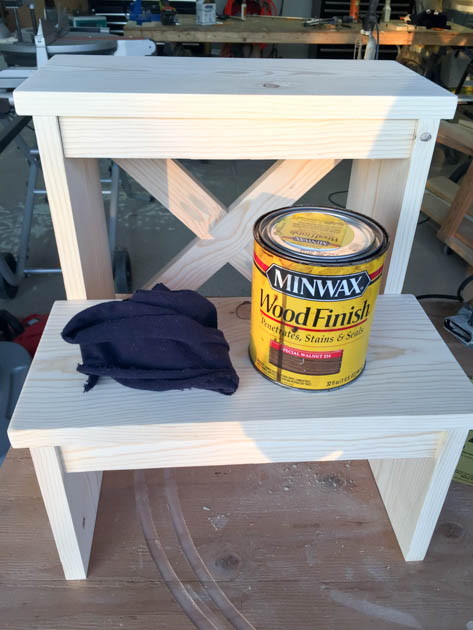
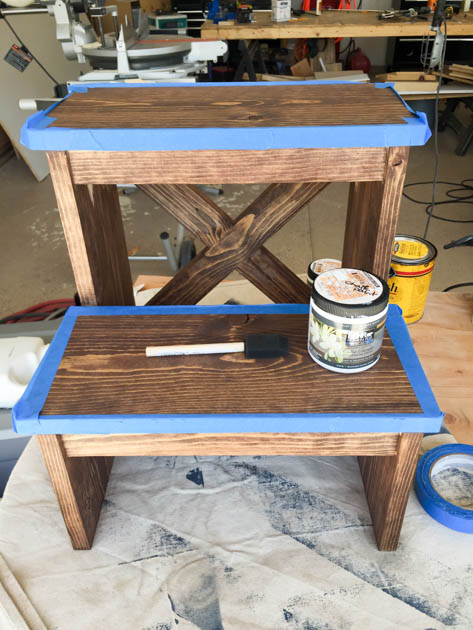
I wanted a two tone and distressed look for the finished stool, so I first stained it using Minwax stain in special walnut, then I taped off the steps and painted the body of the stool with homemade chalk paint (Behr White Dove).
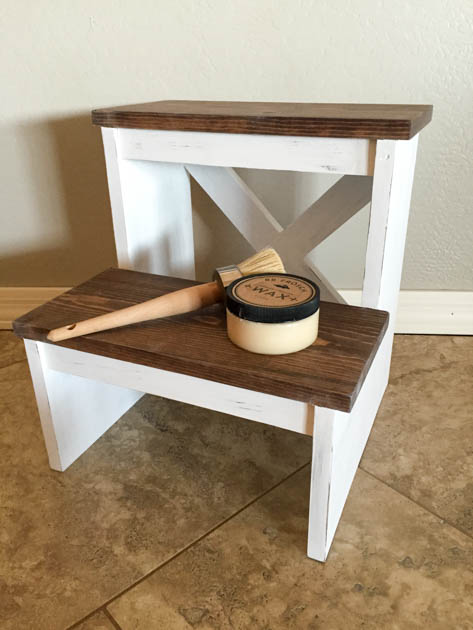
I sanded the stool down a bit to show some of the stain underneath and then gave it a coat of paste wax.
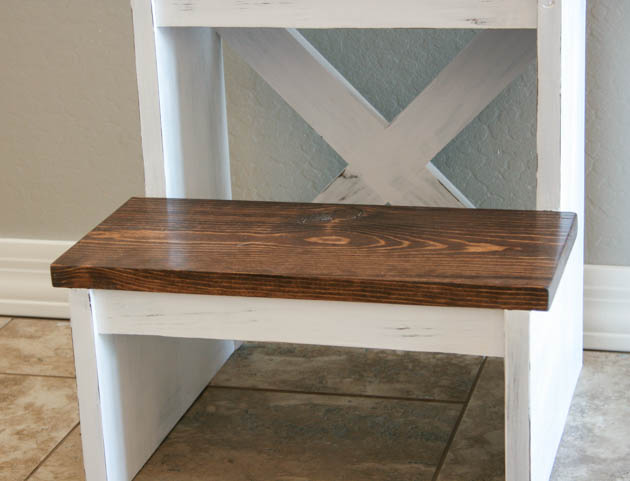
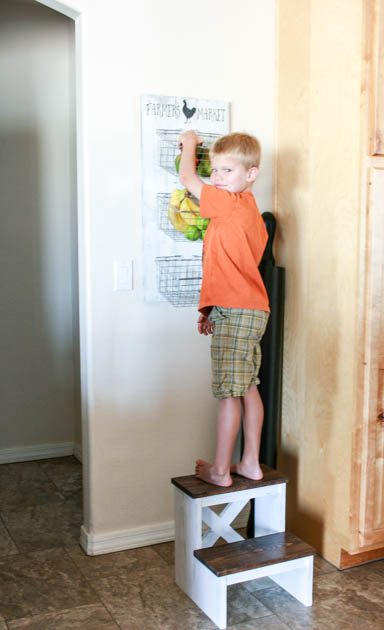
The stool was the perfect height for my 7 year old to reach fruit from the produce rack I built, the microwave, etc. He loves it and it’s sturdy enough to even hold an adult!
If you want to see more amazing One Board Challenge projects, make sure you visit the other bloggers in the blog hop! If you’d like to take on the challenge, just use he hashtag #oneboardchallenge. We’d love to see what our awesome readers come up with!
Here are all of the amazing bloggers participating:
Your stool came out great! Good job! I wish I was as handy with power tools as you are on your blog. Good luck with your challenge. Donna
Thank you Donna! I highly recommend trying them out sometime. I think you’d be surprised at how much you love using them:)
This is awesome Katie!! I love that you made it out of one board…and the paint/stain combo is perfect!!! Can’t wait to hop around and check out everyone else’s projects!!
Cara recently posted…Small DIY Bench
Thanks Cara!
Oh man – I’m so sorry to hear about your husband’s injury right before you leave! So stressful! I love that you came up with something so pretty and practical to help with the situation though! Amazing job, Katie! Have fun at Haven!
Alexis recently posted…DIY Maker Tattoos
Thanks Alexis! I was so happy to see how useful it was/is for my kids. Both of them use it now.
Nice job! Love it.
Sarah @ The Ugly Duckling House recently posted…Build It Blog Hop One Board Challenge: Modern Step Stool
Thank you Sarah!
Great job Katie! I love this.
(I’ve done that pocket hole on wrong side thing too, More than once!)
Pauline recently posted…Indoor Wood Planter | One Board Challenge
Thanks Pauline! Yes, I’ve been guilty off it a few times. Thank God for wood filler and paint!
What a neat idea for a challenge! Love the bench. Two-tone finishes are my favorite! I need to acquire a ratchet. I find myself in many situations where my driver is too big
Yes, it definitely helps! You can also purchase a right angle drill, but a ratchet is definitely cheaper:)
Love your stool Katie! I especially like the cross in the back. That took some creative thinking for sure!
Brittany aka Pretty Handy Girl recently posted…Faux Aged Metal Pulley
Love it Katie!! Such a cute design, love the x pattern in the back! I hope your husband was ok while you were gone!
Mindi recently posted…Floating Night Stand
Love the X back design. Great project!
Is there any way to print the directions out on a tablet?
I dont see a print button.. and my computers been sent in for repairs.
Hubby wants to make this at his shop… but he is not taking my tablet… lol
Thanks for all your AMAZING projects!!!
And… Thanks in advance!
Lynette
Lol! Do you have a wireless printer? If so, you should just be able to send it to print right from your tablet. I print from my iPad all of the time.
I’d love to see it when he’s done too! You can share it on Facebook or Instagram and tag me and/or use the hashtag #addicted2diy.
I really like that clamp that you used when holding down the step. I’ve looked everywhere for it but can’t find one. Can you please tell me where you got it or what brand and model it is? Thank you. BTW, I’ve made about 20 of these stools for friends and they love them.
That’s awesome! It’s a Kreg Auto Maxx clamp. Here’s the affiliate link for the clamps. There are various sizes. I use them a lot and love them!
http://www.amazon.com/gp/product/B00OCGUGX4/ref=as_li_tl?ie=UTF8&camp=1789&creative=9325&creativeASIN=B00OCGUGX4&linkCode=as2&tag=ad2di-20&linkId=LPXX3SW2KI2OXQF5
How did you make your chalk paint?
I used regular latex paint and BB Frosch chalk paint powder. You can order it online:)
I love this! I have a question though, would this still be structurally sound if I left off the X in the back?
I would then recommend maybe just adding a straight cross support across the back. I think it would be structually sound without the X, but maybe not for adults:)
I will definitely be making us one of these. We have a large step-ladder that is great, but it’s not exactly stylish. This will be perfect to just keep in the kitchen! Totally saving this for later!
Yes, this looks so much better than a stepladder! I’d love to see yours when you’re done!
Very nice work on the one board challenge rustic x back step stool! I love that it can be made from one board and you did a great job on the getting that rustic finish with stain and then chalk paint. You could also have made the x back by notching each board half way through where they cross, thus saving you having to pocket hole screw them together there. I also saw another step stool project where they attached drawer glide hardware on the bottom step so it could be pushed under the top step thus saving floor space when it is not being used.
I love this stool and I have a neighbor bringing me a board to do this! I was wondering if you have the measurements of the pieces you cut? Thank you
Hi Heather,
All of the measurements are included in the printable plans! I’d love for you to share a picture of your finished stepstool! I am always happy to feature a reader’s work on social media!
How do download the printable plans?
Here’s the link! https://drive.google.com/file/d/0B2Rczy5KrzR_ODlocGhxLXVGR28/view
¡Fantastico! Una excelente y practica idea para construir optimizando en forma completa una tabla de madera. Felicitaciones desde Chile.
I made one from your plans. Easy and turned out great! My four year old loves it. And loves to use it to get things out of the top cupboards now lol. Thanks for the instructions.
Thank you Brandy! I’m glad your 4 year old is getting some use out of it! It definitely helps them to feel more independent!
Hi! From Russia with love)) I fall in love with your stool, lost my sleep and now I am trying to make it by myself. It takes a long time, course I ve never done anything like this. I will be so proud when I finish it????) I am happy to find your blog))
Would be nice if there was some dimensions on the boards that you cut.
Hi Jose, the printable plans that I’ve linked to in the post include all of the measurements you will need to build this.
Why would you ruin it with paint. That wood did not deserve that! That’s like covering the Mona Lisa with finger paint.
LOL! I don’t think comparing painting a step stool to finger painting the Mona Lisa is exactly an equal comparison;)