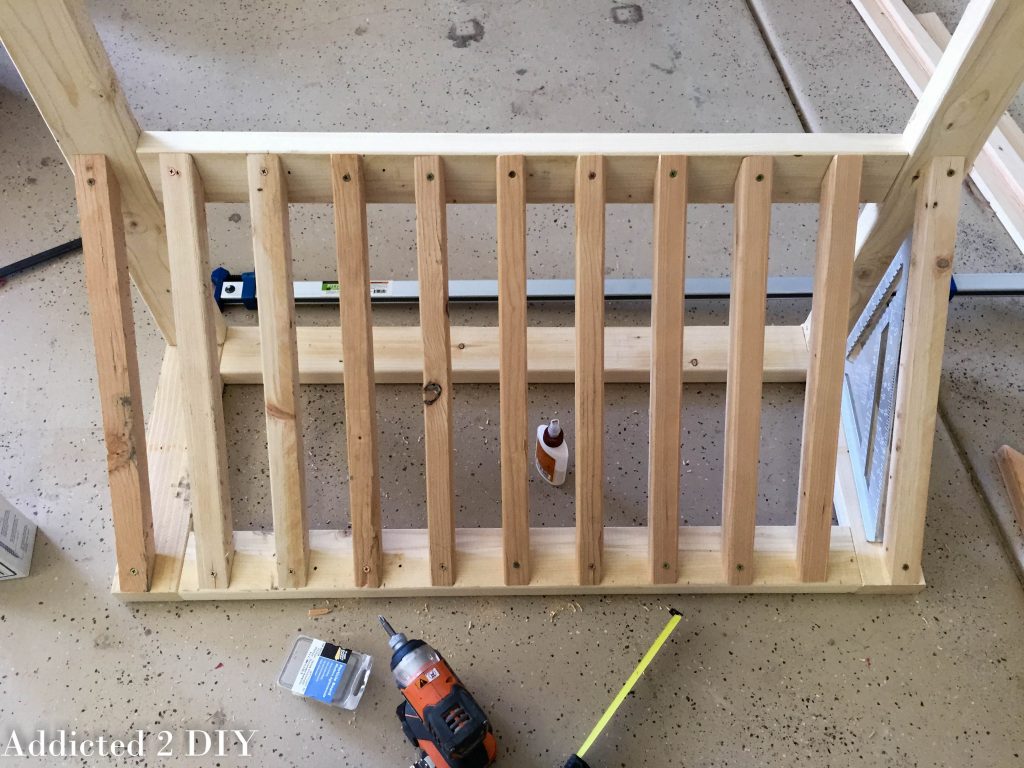
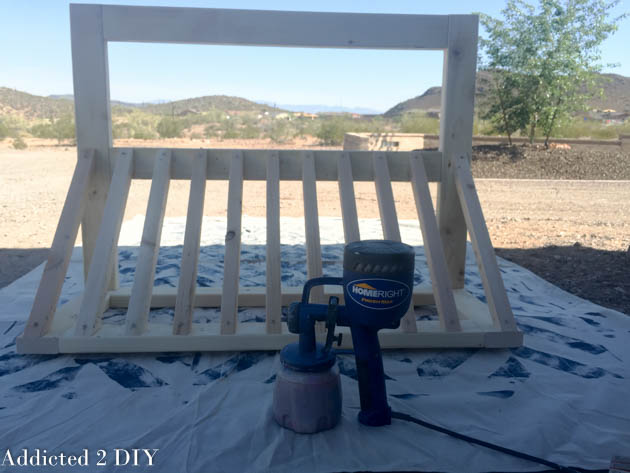
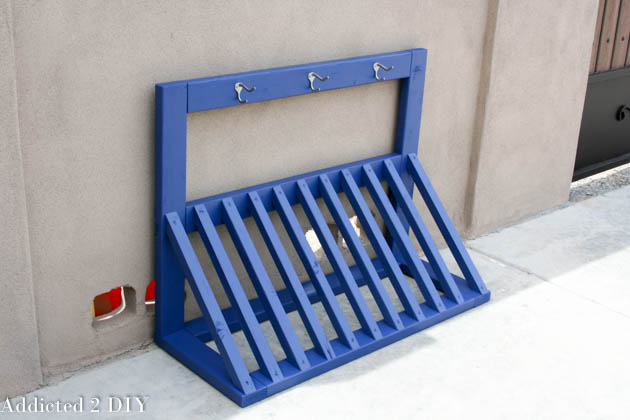
Step 1: Assemble the base. Drill 1 ½” pocket holes into 36” pieces. Using wood glue and 2 ½” pocket screws, clamp and attach to 17” side pieces. 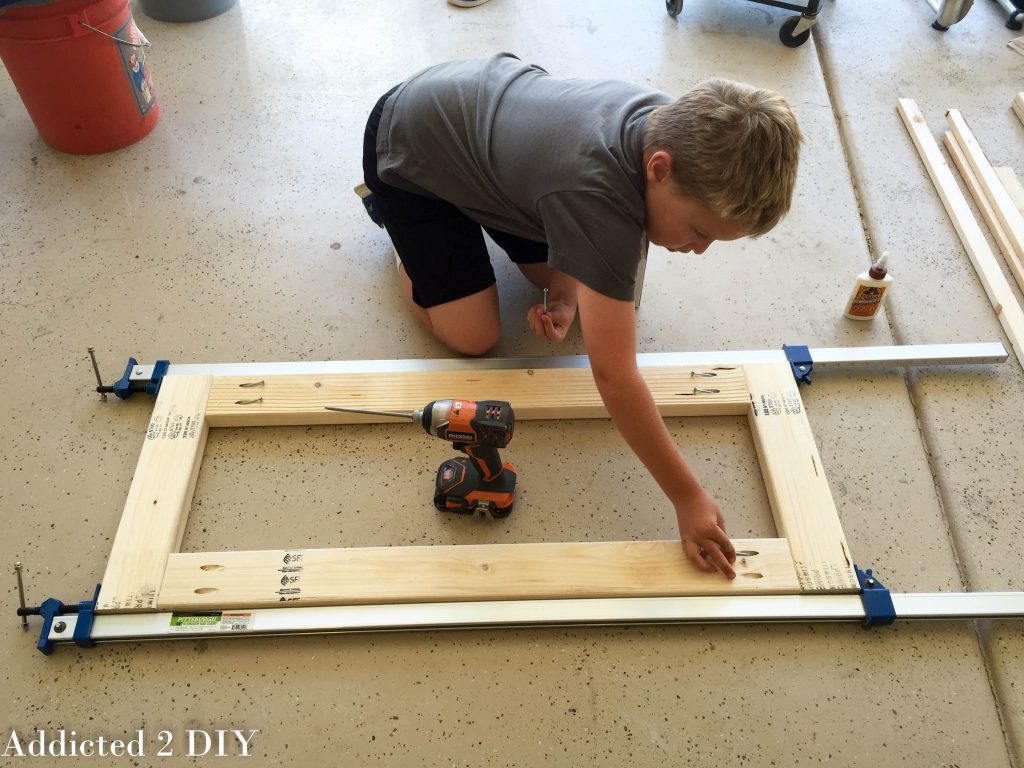
Sharing is caring!

Step 1: Assemble the base. Drill 1 ½” pocket holes into 36” pieces. Using wood glue and 2 ½” pocket screws, clamp and attach to 17” side pieces. 


Addicted 2 DIY is a participant in the Amazon Services LLC Associates Program, an affiliate advertising program designed to provide a means for sites to earn advertising fees by advertising and linking to amazon.com.
All images and text on this site are property of Addicted 2 DIY.
For online roundups, authors are welcome to use 1 image from a particular blog post with a direct and visible link back to my site.
You may not alter the images, remove watermarks, add text, or remove text from the images used. Images may not be printed, or used in a print publication without my expressed consent.

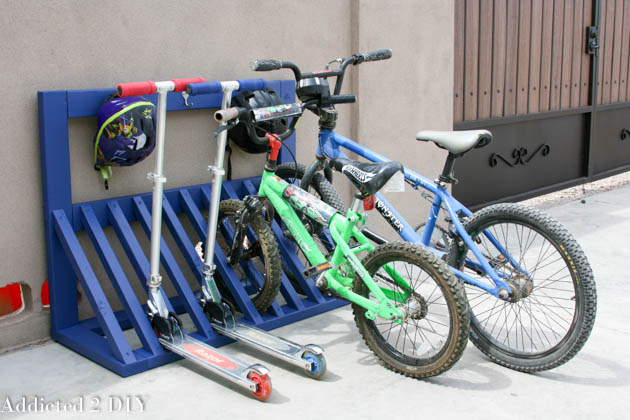
This is a the perfect storage solution for my kids bikes and helmets! Thanks so much for sharing and including your plans!
Katie @ little house of four recently posted…Trash to Treasure File Cabinet Take Two {Monthly DIY Challenge}
Thanks Katie! My boys were really excited about it, but I think I’m even more excited than them!
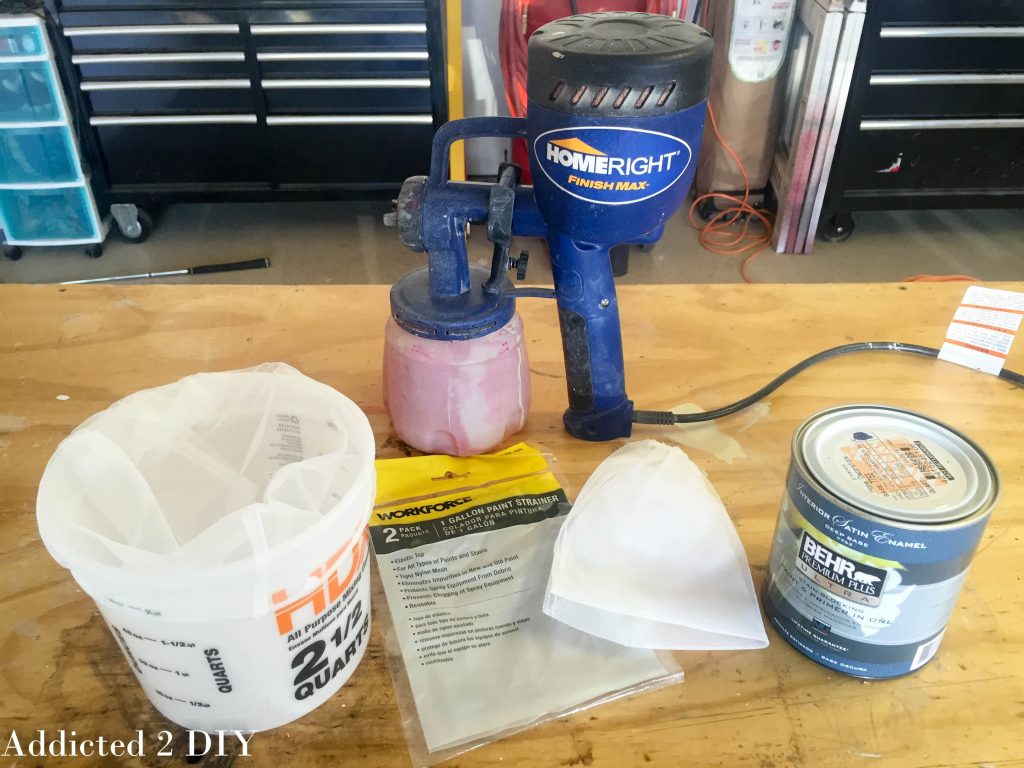
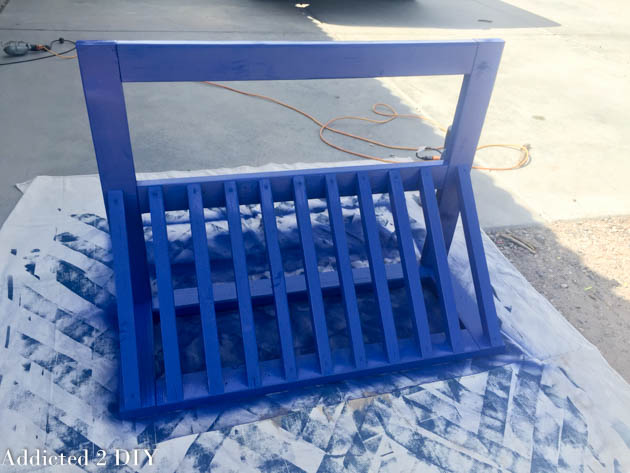
What a great idea for bike storage. I love that you included plans for your readers. Thanks for using the Finish Max Sprayer to paint it. It looks great.
I’d love to give this a try (with my new Kreg Jig from SNAP!) 🙂
Valerie@Occasionally Crafty recently posted…Stenciled Wall Chalkboard and Giveaway from Cutting Edge Stencils
You totally should!
YOU READ MY MIND. I’VE BEEN TRYING TO THINK HOW TO SOLVE THE BIKE PROBLEM (4 KIDS AND 2 PARENTS!) I ALSO HAPPEN TO HAVE AN OLD CRIB TO UPCYCLE. I’M GOING TO GO MEASURE AND SEE IF USE PART OF THE CRIB SLATS TO HOLD THE BIKES…. THANKS FOR THE INSPIRATION:) And the plans!
That would be an awesome upcycle! And you can definitely just adjust the length of the bike rack to hold more bikes/scooters.
I love this. A bike rack is on my plans to make tomorrow, but do you know if an adult bike will fit in this? I need one to store the kids bikes and mine and the hubbys bike.
Kati recently posted…Greek Style Green Omelette
I would assume it would. You can always do a dry fit before attaching the 45 degree pieces and see if maybe you need to make a few of them spaced a little wider
How long are the 45 degree pieces? I want to build this
Hi Suzin,
You can find the detailed cut list and measurements in the plans. Thank you!
YUP. DEFINITELY TRYING THIS ONE OUT. THANK YOU SO MUCH FOR THIS, MAN.
IN OUR NEIGHBORHOOD, I COULD SEE BIKE RACKS THAT SPELL OUT NAMES (LAST NAMES I GUESS) I MEAN INSTEAD OF DIAGONAL RACKS WHERE THE WHEELS GO, THEY HAVE LETTERS! HOW DO YOU SUPPOSE THOSE ARE MADE”?
CHEERS! AND AWESOME WORK!!
wITO SCHWARTZ recently posted…Awesome Mountain Bike Training Exercises
Never have seen a name rack. If you figure it out let me know..
Made this today! Very easy and fits little kid bikes wonderfully. I adjusted the spacing to 3 1/2 inches for the razor scooters because I wanted them to fit in farther. Also it didn’t fit my older girls bicycles but I adjusted a few measurements and made a bigger one for them. Thanks for the free plans!!
I’m so happy that you like it! Yes, it’s so easy to customize it to fit whatever you like!
What a great idea for bike storage. I love that you included plans for your readers. Thanks for using the Finish Max Sprayer to paint it. It looks great.
This is a decent project, I took the afternoon to build it as I had a little time and some left over wood. I followed the instructions right up to the spacing of the slots… which was a mistake. If you build this try a couple different spacings before you glue and screw your slot boards in permanently. 2.5 inch spacing is too wide to hold up many tire sizes.
Yes, you definitely want to play around with the spacing for it to be the best fit for the size of bikes you are using in it. Since I am putting scooters in it too, I needed the spacing to be a little wider.
Just getting into this whole DIY building scene… And those clamps are amazing. My whole life would be better… well, at least less frustrating, if I had a set of those. What are they called? Love the plans and will be using my scrap pile to make one of these this weekend for sure! Thank you!
They’re bar clamps. There are so many different kinds, but these were cheap ones from Harbor Freight.
**Warning** This bike rack will not fit larger kids bikes very well and adult bikes will not fit at all. I built this to exact measurements and the middle support beam is too low and prevents 20″ wheels to fit in all the way. If you move the middle support beam up enough to fit, the 2×2 “wheel holders” will no longer line up. Also, the 2 1/2″ between the 2x2s is too big of a gap. Reduce to 2″ or else the bikes will flop over and lean to the sides.
this bike rack is for kids and for for small cycle. for mountain and adult road bike it need to be bigger and even more stronger but for kids bike its wonderful.
jeff recently posted…Vilano Shadow Road Bike-Shimano STI Integrated Shifters Review
Built it. Does not work with adult bikes unless you want to back the bikes into the rack. Then it’s works okay for 4 or 5 adult bikes. The 45 degree pieces just need to be longer. Maybe go all the way to the top part. Great design for kids though!!
The cuts are missing. I went this weekend and got the supplies and just looked up the cut list and it’s missing??
Hi Gini,
I just sent you an email:)
Yes, what are the cuts to make this please?
Hi Terin,
You can find the cut list in the plans. Thank you!
This is great.
I made a rack based on this design, with my big Boy, (5.5 years old)
Since I have no pocket hole Jig, we used just simple board on board and screws.
which he loved – gave him more Power drill usage 😉
Thanks again, cool and effective design.
Glad you like it! It’s awesome when the kids get to help with projects. Start them young:)
What a great DIY idea. I had my kids try this last month and this went perfect. They really enjoyed creating this stand for their road bikes and loved to paint it in different colors as if they were doing graffiti on it. Thanks for sharing this with the world!
Josh Young recently posted…Best Cheap Recumbent Road Bike Reviews of 2016 – 3 Wheel Bicycles & Road Bike for Seniors Also Covered
Now instead of having a bunch of lumber laying around in my garage, I have a cheap bike rack that looks great. It’s the perfect alternative to those expensive commercial bike racks. Thanks for the great idea.
Why does your picture say free plans and yet they cost $4.99?
Hi Jessica,
Originally I had the plans available for free. I now charge a small fee for them. The image on pinterest that brought you to my site may have been an old one. I apologize for the confusion.
What angle do I need to cut 2×2 boards?
Hi Bethany,
All of the details for the angles and cut list can be found in the printable plans. Thanks for stopping by!
We wish we would have read these comments before spending so much money on the supplies and building it. It does not fit most bikes, not even kids. At least for us it didn’t.
Hi Angela,
I’m so sorry you had problems with it fitting bikes. I built it to fit smaller bikes (20″ and below) and it has worked great for us.
Use the wayback machine to find the plans before they started charging $5
I just ordered the plans, thank you so much! If I make the dimensions bigger to fit adult bikes, will it still hold up kiddo sized bikes? Do you know easy dimensions to do this? Thank you!
So sorry for the delayed response. If you make it taller and deeper, you should still be able to fit smaller bikes. I wouldn’t change the width between the angled pieces.
I just built this (or at least a version of it!) yesterday. I modified the HECK out of the plans so adult bikes would fit, but the plans were still very useful and worth the money. I also modified it to avoid dealing with pocket screws by just putting the boards on top of one another. I don’t care that the boards aren’t all flush.
I made it 4′ long and skipped the crossbar halfway down the back. I attached the diagonal pieces for in between the bikes directly to the top crossbar (so an angle other than 45 degrees was needed – it ended up being close to 30 degrees on the bottom and 60 degrees on the top. AND the diagonal pieces needed to be ~30″). I also increased the spacing between the diagonal pieces to fit adult bikes. I used fewer diagonal pieces and spaced them either 6″ or 6.5″ apart. There’s parking for 7 bikes.
When modifying plans like this, which I do ALL the time – it’s like modifying a recipe for me! – I measure and adjust as I go. So with this one, I built the frame and when it came time to put in the diagonal pieces, I put bikes in place to make sure the spacing was good.
Korine. I’m liking the way you think. Thanks !!
Was excited when we saw this. We really needed a bike rack, we’re a family of four, we each have a bike and our kids each have a scooter. The kids have 20” bikes which barely fit in. We had to use bungee cords to keep our adult bikes in. The base needs to be way longer to be effective and the spacing needs to be specific to your needs (bike tires and scooters). Pretty bad generic measurements, it’s a custom job no matter what. Nice idea but what a pain in the long run. Didn’t want to do a PVC built rack because it looks janky but kind of wish we did. Doesn’t look half bad, stained it the same color as the fence but the kids can’t pull their own bikes on or off since they’re all jammed so close together. I’d say it’s a great design for two kids bikes (16” or smaller) and 2 to 3 scooters (as long as you customize your spacing).