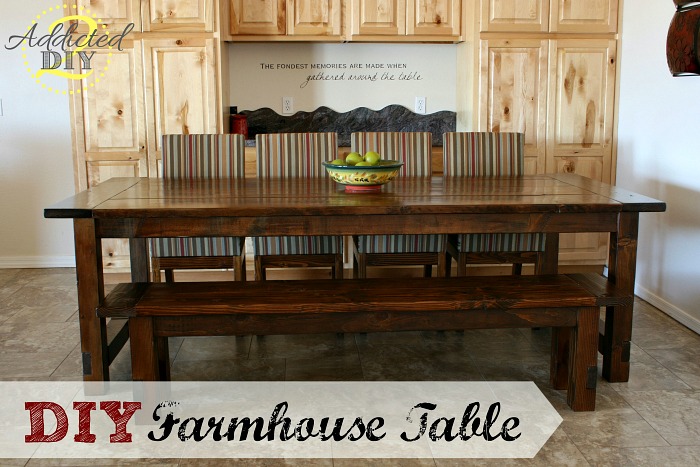
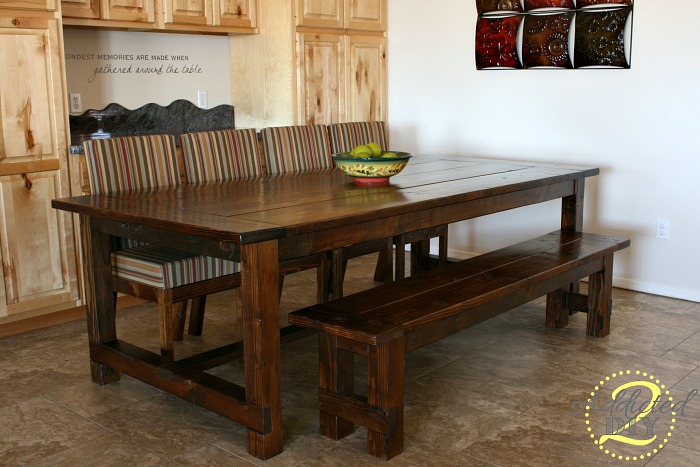
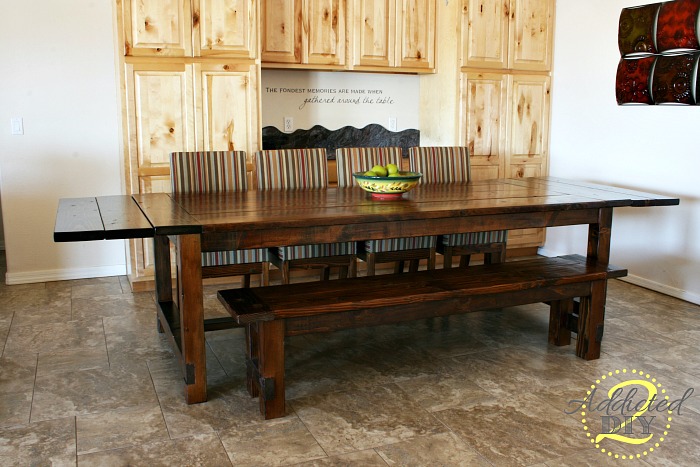
Hey there! I am so happy to share this farmhouse table build with you. With Thanksgiving rapidly approaching, this table is the perfect size to fit your whole family. My husband and I built this together earlier this year and we absolutely love it. We don’t have a formal dining room, so this baby gets used every day for every meal. We had a perfectly good table before, but it just wasn’t big enough for parties and holidays. We wanted to have something that could fit a crowd and this table certainly does that. We got the original inspiration from Ana White’s plans for a farmhouse table. Looking at the brag posts, we liked the idea of using wider planks of wood for the top and using 4×4 legs. We decided to follow the plans here for our table, bench, and table extensions. He posted a pdf file with a cut list for a 96″x45″ table, which is what we followed. When all is said and done, this table can fit up to 14 people! It is inspired from Restoration Hardware’s Farmhouse Salvaged Wood Extension Table. The only difference is that we didn’t use 100+ year old reclaimed wood, and ours only cost us about $300-$350 (give or take the cost of a few boxes of screws).
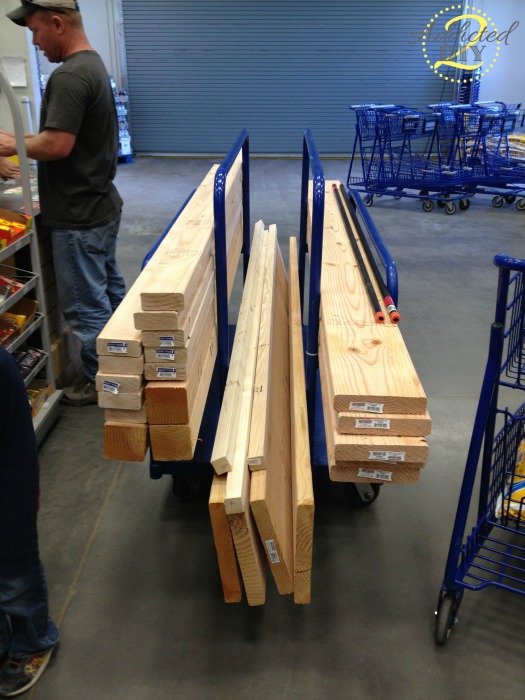
We bought all of our wood from Lowes. It was quite the ordeal and I had to ask them at one point to get the forklift and bring down stacks of wood in order for me to pick the straightest and best pieces of wood. They were very nice about it though:)
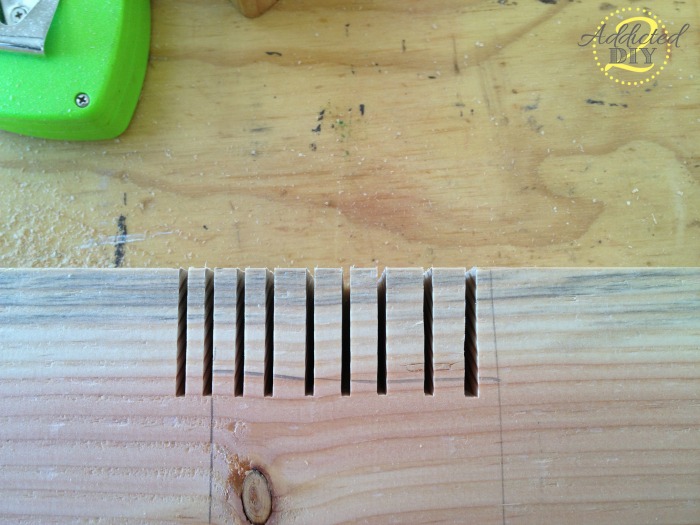
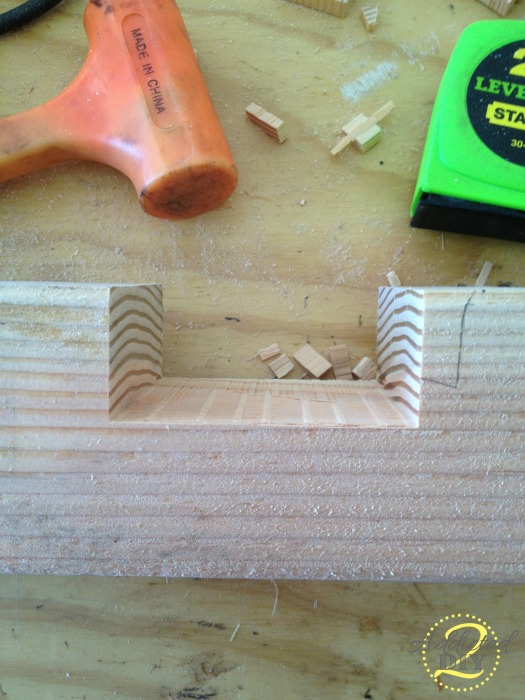
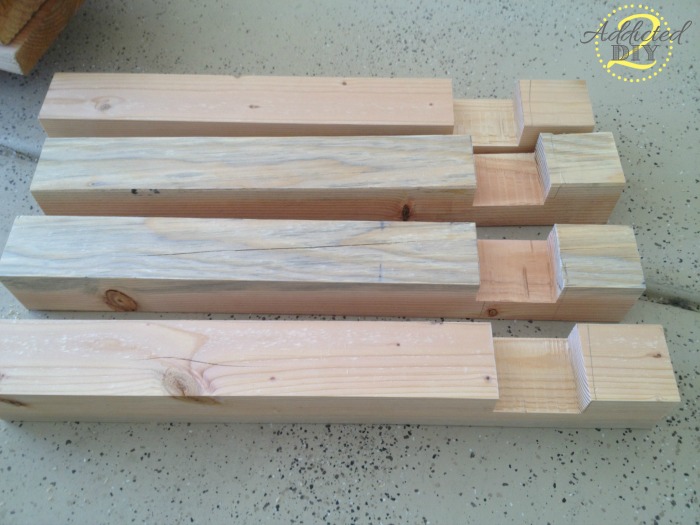
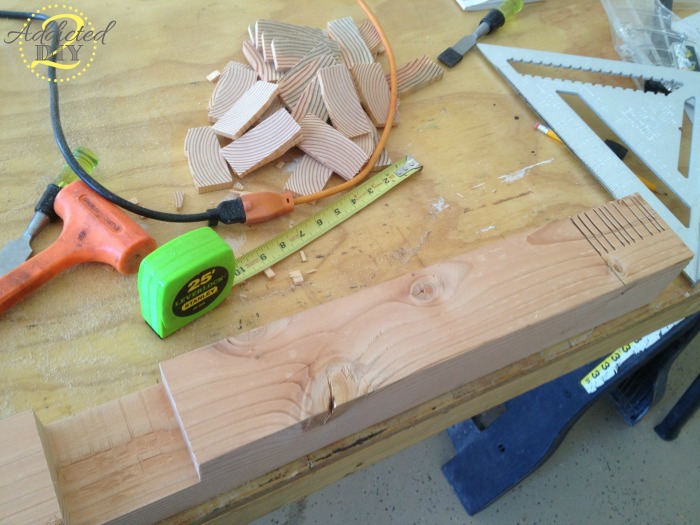
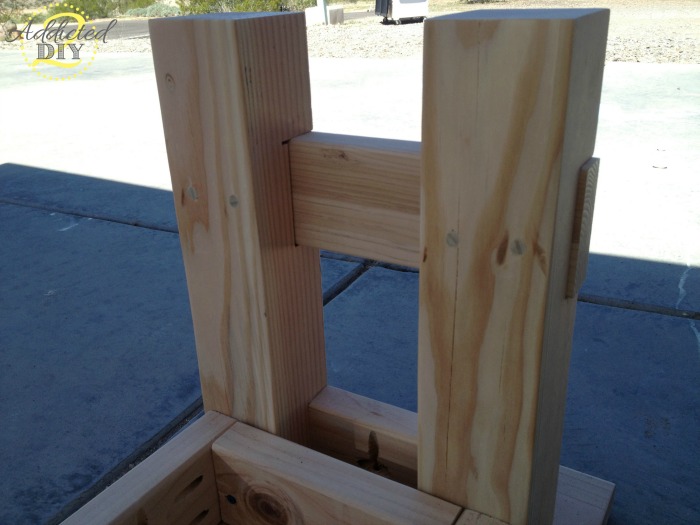
We bought a 12″ compound sliding miter saw just before starting this project, so we were able to make our own cuts this time. We made all of our cuts for the legs and notched them out. To notch them, we set the proper cut depth on our miter saw and made two cuts at the width needed to fit the 4x4s together. We then made several cuts in between.
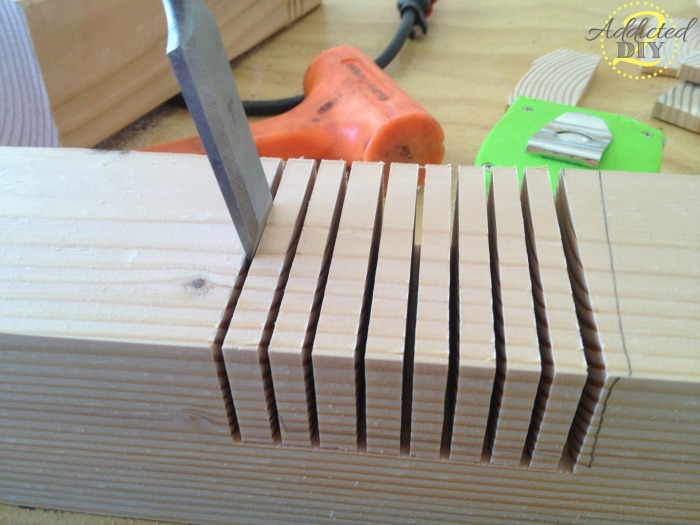
Using a chisel and hammer, we broke out the pieces of wood to begin the notch.
We then cleared the rest of the wood to form a nice smooth notch. It is recommended to use a chisel for this. It is much safer than the method we chose of running the wood side to side under the running saw blade to clear the remaining chips of wood. Like I said, it is not recommended, but this method worked best for us to get the smooth notches we wanted.
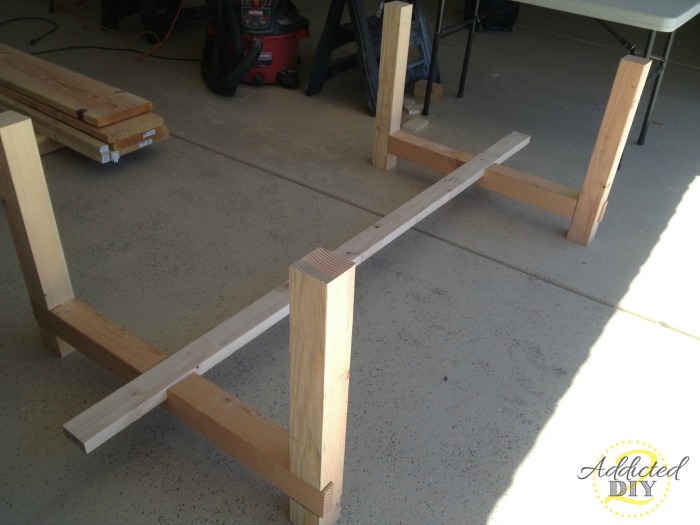
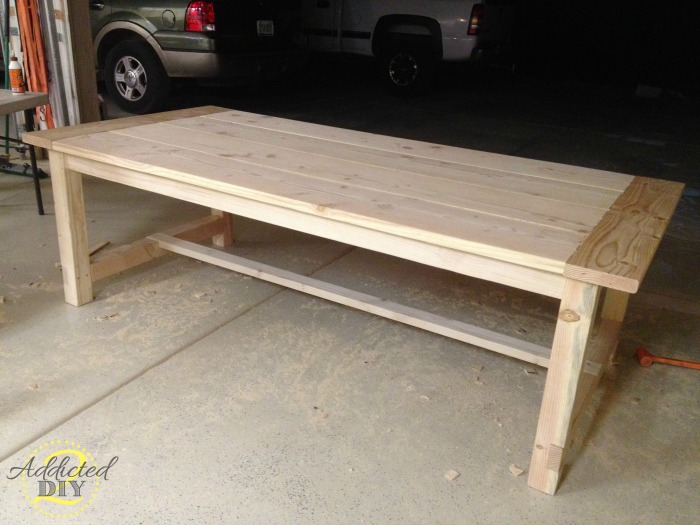
We dry fit all of the legs and cross beams together to make sure everything fit nicely.
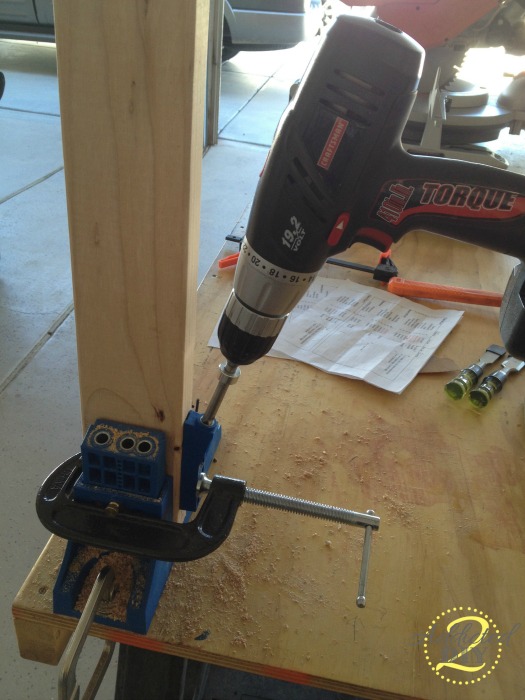
We used our Kreg Jig to pre-drill all of our holes and started attaching pieces together.
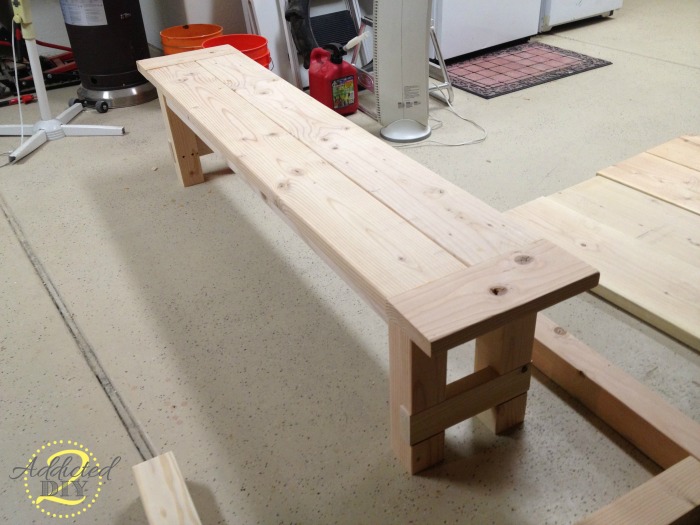
The bench was the first piece we finished. It made us feel like we had accomplished something.
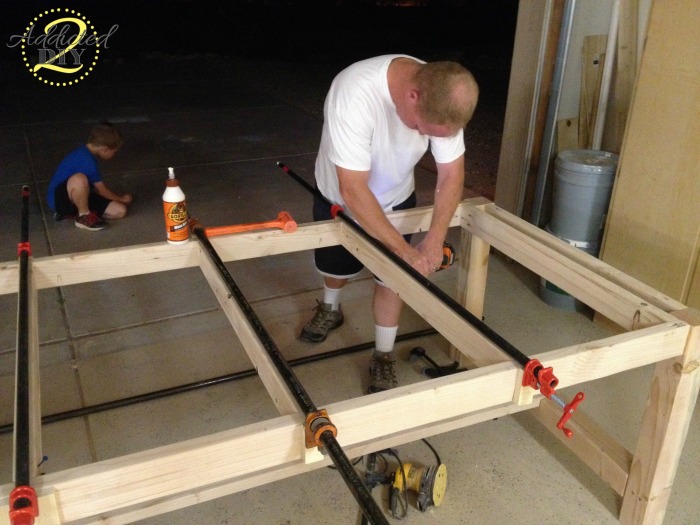
You’ll definitely need/want 6′ and 8′ bar clamps for this project. We have two of each and it sometimes felt like that wasn’t enough.
We built the table top using our biscuit jointer, pocket screws, and wood glue.
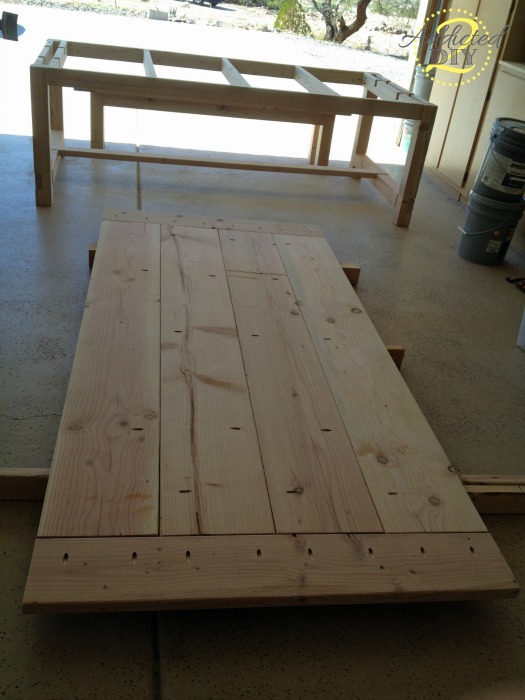
We dry fit the table top to the base and stood back to admire our work. We didn’t attach the table top because we knew we would need to carry it into the house in two pieces. I unfortunately didn’t take any pictures of us notching out the top of the base where the table extensions slide in.
The legs are attached together by countersunk screws. I filled the holes with glued in dowels and used a grinder to make them flush with the legs.
We built the extensions based on the plans listed above. One thing we did that we did that was not listed in the plans was to slide the 2×2 extension arms into their notches and then line up the tops with the tabletop. Once everything was lined up properly, we screwed the arms to the extension tops while they were attached to the table.
At this point, you can choose to distress the wood with whatever you like. Hammers, bolts, chains, etc. are all good choices. We opted to do very minimal distressing. The first step was to wipe on some wood condition. It opens the pores of the wood and allows it to take in the color of the stain so much better. If you don’t use it, you could end up with a blotchy finish. I used two coats of Minwax stain in Provencial. I then used 3 coats of Minwax Polycrylic. Finishing is my absolute least favorite part of woodworking, but it’s a necessary task.
After everything had dried for a good 24 hours, we carried the table inside in two pieces, clamped it, and screwed the tabletop to the base.
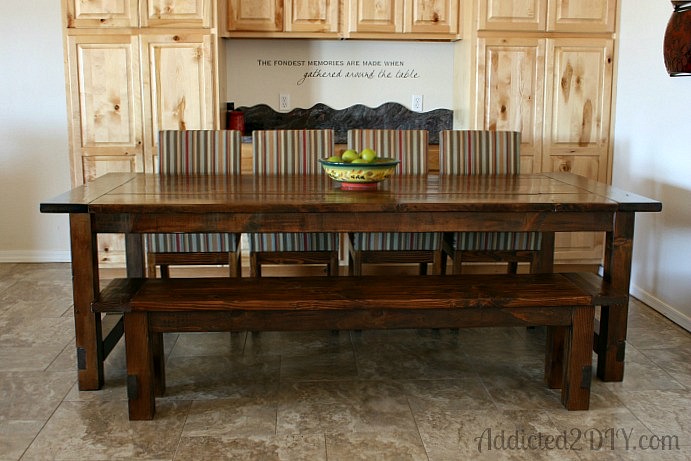
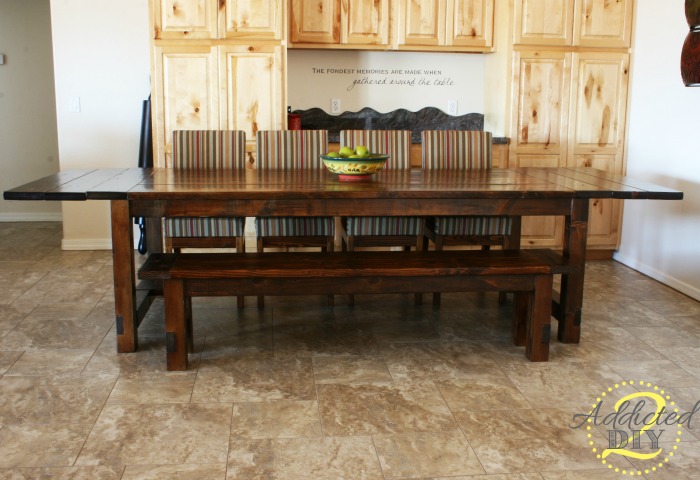
I am so in love with how this table turned out. It was a lot of hard work, but to know that we built a table together and saved a TON of money doing it, was a lot of fun. Plus this is a table that we can hopefully hand down through the generations. The finished table is about 8′ long and almost 4′ wide. Without the extensions, the table can seat 8-10 people.
With the table extensions, we can seat about 12-14 people. I’m so excited to host Christmas brunch this year. We won’t have to bring in our 6′ folding tables anymore. Everyone will fit nicely at this table.
One thing we did learn about this table is how important it is to make sure the wood is good and dry prior to building. The 2x12s for the tabletop were still somewhat wet when we put them together. After about 2 weeks, we noticed the wood shrinking. The breadboard ends started out being flush with the outside 2×12 planks. After a few weeks, they were sticking out by 1/4 inch on each side. There were also huge gaps between the other planks. I was heartbroken, but wasn’t going to give up on our tabletop and convinced my husband that we could just fix it. We ended up taking the table top off, taking it apart, sanding and refinishing it, then reattaching the pieces tight together again. We trimmed up the breadboard ends and made everything nice and flush again. It unfortunately is something you may run into when purchasing wood from a big box store. If you can, try to purchase the dryest wood possible, or purchase from a lumber yard that sells kiln dried wood. We haven’t had a problem since and the table is everyone’s favorite when they come over.
If you’re wondering where I got the chairs for the table, I built those too:) I’ll be sharing that post later this week!
As always, I would love to hear your comments and please feel free to share, like and pin this project.
~Katie

We had the same shrinkage problem with a dining room table. When we remodeled the kitchen in our home in Tennessee we used a formal dining room table for the island top (EVERYONE loved it – the realtors said it got more attention than any home improvement they had seen). So when we moved to florida we thought we would do a similar one for our island here. I found a great craigs list deal on a table stored in a carport. I stripped and refinished it, my husband took the skirt off and we mounted it same as last time. 3 months later it look awful! I didn’t think about all the humidity in a carport here! Live and learn… May try your table (top) this go around, love it!
I’m sorry to hear that. I kept thinking I was imagining it until I could almost stick my finger through the planks of wood! Next time I make one of these tables, I’m buying kiln dried lumber.
That looks amazing and I would like to build the same follow your instructions. Not all the images are appearing at my end for some reason. Are able to email all the pics that correspond with the post. I would be forever grateful.
Regards,
Simon
DIY Farmhouse Table with Extensions
That’s strange. I’ll try to figure that out.
could you send or repost the plans for the making the chairs to go with the farmhouse table. Thats so beautiful!
Hi Tari,
Here’s the link for my post on the chairs:) addicted2diy.com/2013/11/08/diy-upholstered-dining-chairs/
It is so beautiful! I am sure it was worth the effort to redo the top, wood will always shrink and expand with the weather. You did a great job!
Mindi recently posted…Wowza Weekend Link Party #42
Thanks so much!
It’s beautiful! You guys did a magnificent job!
Thank you!
Love how your table turned out. We had paid someone a pretty penny initially to make a farmhouse table for us and boy was is a disaster a few months later. Looked terrible and there were huge gaps. I was heartbroken as well.
We did not give up, but instead of taking that table apart, we built a new one ourselves. We bought 60 year old wood from an old schoolhouse for the tabletop and bench boards. The rest was purchased from Lowes for the table and bench frames. This time the table turned out much better, but even with that really old wood which had been in a warehouse, our table top still has a little bit of shrinkage where the breadboards meet the rest. It’s not enough to take the top apart and correct at this point, but still slightly annoying. I think your right on when you mentioned only buying kiln dry wood for your next furniture build. I wish more DIY blogs/sites would talk more about building with damp wood.
Thank you, Krystle. I’m so sorry your first table ended up being a disaster. The idea of using the wood from an old schoolhouse sounds awesome! It would have been easy to leave out the part about the wood shrinking on the tabletop, but I wanted to let people know that not all of my projects go exactly according to plan. I like the idea of full disclosure when you’re spending the time and money to tackle a project like this;)
Wood needs to be dry to build stuff for the house. Needs to be 6% to 8% moisture content at least. Typically furniture in your house is about 10% moisture content. Lumber at Lowes like you used is dried to 17% MC. I believe that it is stamped on the wood. So when you bring that into a house it will dry more and thats where your shrinkage hurts your build. Building furniture you need it kiln dried before hand so it will make your project come out perfectly. You can google kilns and you may find one in your area. I dry my own for my projects and use a moisture meter to check its condition. Good luck with your next build. bg
Just be aware that if you buy from a big box store, you are more than likely getting green wood that will shrink. If you go to a Parr lumber or local lumber yard you can pay a litttle extra and get kiln dried, I’m not going to get kiln dried 4×4’s as it’s $3.40 a liniar foot compared to $1.20 a liniar foot for green.
Yes, that was the mistake we made with this table. From now on, we purchase from a lumber yard for projects like this.
Very Nice woodworking.
Max Pro please!
About how long did it take you guys to make this table from start to finish? Thinking about making instead of buying to save money but do not want a forever long process since I am already remodeling my home :/
About how many hours/how long did it take you guys to finisht the table from start to finish? I am wanting to build one but if it takes a long time I might need to try and purchase something instead due to my long list of other projects :/ lol
It took us almost a week from start to finish. It was so worth it in the end though.
Love your table. I am wanting to build one for my wife’s and I 40th anniversary. A couple of things. What type of wood did you use and is there any way that you can show the notches for attaching the table top?
Thank you
Hi Katie! We just had (Canadian) Thanksgiving here last night and had to bring in an extra junky table to extend ours… I really would rather build a table like this – thanks for the awesome detailed tutorial. Would love to have a new table in place before the next big family event – Christmas!
krista @ the happy housie recently posted…Purging and Organizing Children’s School Work {Part One}
For ours, we don’t have much of a problem. If the extensions are in, then you definitely don’t have a problem:)
I’m not sure if you’re still following this string, if yes please send me the plans for the table. I don’t see anywhere how to assemble the extensions.
Thank you
Hi Rodney,
The link for the plans as well as the link for the site where we found the tutorial for the extensions is located in the first paragraph of my post. Here are the links:
http://tommyandellie.com/index.php/2012/01/13/new-and-improved-farmhouse-table-details/
http://www.ana-white.com/2009/12/plans-farmhouse-table-knock-off-of.html
How’s this table holding up? With your breadboards pocket screwed in, that is leaving a big possibility for cracking when the wood expands. Also, are the legs only connected by pocket screws? Looks like a nice table.
It’s holding up great! I’ve stood on the table to reach the light above it, its been used daily for the past three years, and it hasn’t show any sign of weakness. Definitely a little more “distressed” with my two boys using it every day, but that’s all:)
I am making this farmhouse table, but was wondering how you attached the stretchers with the legs….glue, or did you use the Kreg Jig?
Hi Barry. They are attached with wood glue and pocket holes.
You would want to use a hearty wood for that project, like cedar and then seal it with a weatherproof sealer. It will not completely stop the weather damage, but it will slow it down. Thanks for reading!
What do you use to attached the extensions when you’re using them?
Hi Jessie,
The extensions have 2×2 supports that slide into notched holes on each end of the table.
Looks awesome.
Normally breadboard ends are attached in a way that allows for the inevitable expansion and contraction. A table of this size will easily shrink by half an inch in the dry winter air and then re-expand in the humid summer. This is just a fact of solid wood…but yes…properly dried furniture grade wood will “move” less than something from the big box store. And you can’t stop it…that’s not the purpose of breadboards.
Eventually the screws will get pulled loose by this annual movement. The *correct* way to attach breadboards allows the wood to slide. The ends are just pinned on to hold them on the table, but no glue or screws are used.
For the table top, I’m torn whether to edge glue (with biscuits) in addition to the pocket screws. I am using kiln dried lumber, but I still expect expansion and contraction. Will the glue joints fail, such that the pocket screws alone would be better?
We used both and the joints did fail, but our lumber was wet. I would think a combination of the two would be fine.
Hi, I was wondering if I could get the plans for the Farm Table with extensions? I have tried going to the Tommy and Ellie blog but it appears to be down.
Thanks, Danica
Hi Danica,
My apologies for the delayed reply. Here is the link for the original plans from Ana White! http://www.ana-white.com/2009/12/plans-farmhouse-table-knock-off-of.html
My wife likes the look of this table, but without the stretcher that is bracing the lower legs. Do you think the legs would be strong enough without the stretcher? Or do you have a recommendation on how to mount the legs so that it is strong enough without the stretcher?
You can omit the stretcher and it should still be sturdy enough. You would just have to use caution when moving the table. Lift it, rather than drag it. If your concern is with the legs becoming wobbly, you can reinforce them with brackets such as these: http://www.rockler.com/surface-mount-corner-brackets-for-table-aprons
Thanks for the tip Danica, those brackets should work great!
I can’t get the material list to pull up, can you please share it again?
not bad for store-bought wood! impressed! i make tables like this – similar stretcher design – but using 200-yr old wood from Amish deconstructed barns from Ohio, PA, etc. seriously – some wood is hand-hewn before we had sawmills here in the US. the good thing is there is little shrink/swell issue as it is 200 yrs old, plus the warpage and other issues allow for slightly imperfect joints, but also require more woodworking skills to overcome the imperfections. .i also use a unique method of antique bolts for construction.
table i am making now – poplar, oak, and pine – 9′ x 4′, the wood alone was $2300…….
I cannot access the plans. Can you email me the pdf instructions. Please!! Thanks
Hi Ryan,
Here is the link to the plans: http://www.ana-white.com/2012/11/plans/farmhouse-table-updated-pocket-hole-plans
Could you please email your plans? The links on the site aren’t working… I can’t access plans or the cut list. This table looks amazing and I’m inspired to give it a try!
Hi Mollie,
Here is the link to the plans: http://www.ana-white.com/2012/11/plans/farmhouse-table-updated-pocket-hole-plans
Hi, my wife and I live this table. I was wondering if you could send me the plans please. I appreciate all of your help. My email is timgallagher75@gmail.com
Thank you,
Tim Gallagher
Hi Tim,
Here is the link to the plans! http://www.ana-white.com/2012/11/plans/farmhouse-table-updated-pocket-hole-plans
Could you please email me the plans and lumber list. I would greatly appreciate it. Thanks in advance!
Hi Stephen,
Here is the updated link: http://www.ana-white.com/2012/11/plans/farmhouse-table-updated-pocket-hole-plans