Happy Friday, everyone! Today, I’ve got a simple project for you that can have a big impact on your summertime outdoor entertaining. I’m partnering with HomeRight today to show you how to turn your fire pit into a coffee table AND I’ve got a giveaway at the end of this post that you will not want to miss!
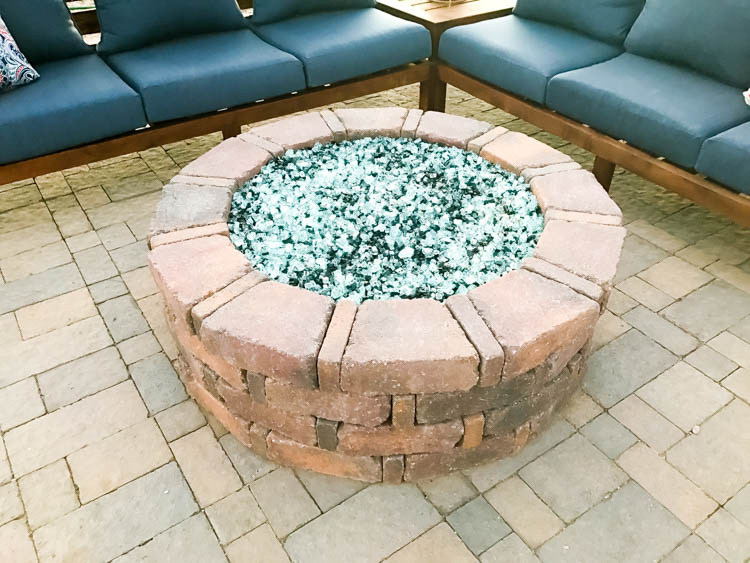
A few years ago, we added a very large paver extension to our long and narrow patio. It gave us a ton of space for outdoor entertaining, which prompted my husband to build this great propane fire pit for those cooler nights. Unfortunately, those cool nights are not upon us at the moment, and it feels a little weird to sit around an unlit fire pit in the dead of summer. I just built a gorgeous outdoor sectional sofa and I wanted to get a little more out of this space. It’s not like the fire pit can be moved, I decided to make it pull double-duty as a coffee table! I’ve included some affiliate links to products I used in this project. Should you purchase any of these products, I will receive a small commission at no extra cost to you.
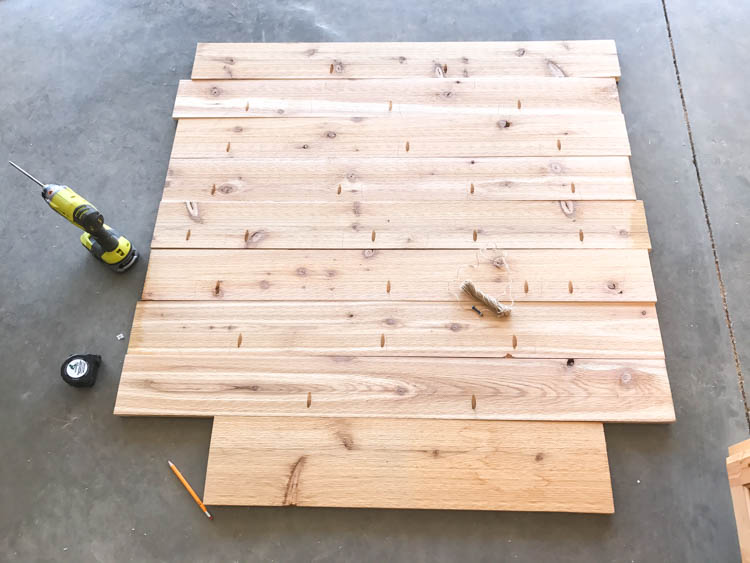
To get started, you’re going to want to measure the diameter of your fire pit. Ours is 47″ across, so I purchased 5 – 1x6x8′ cedar boards from Home Depot. I cut most of them in half and cut a smaller piece to finish off the circle. I laid all of the boards underside up and found the center of what would be the circle. I drove a screw partway into center and used string (23.5″ long between pencil and screw) tied to a pencil to draw the radius of my circle. This allowed me to mark where my pocket holes needed to be inside the circle.
I drilled 3/4″ pocket holes into the boards and attached them together with glue and 1 1/4″ blue kote pocket screws. These screws are specially designed for outdoor use to resist rust and corrosion.
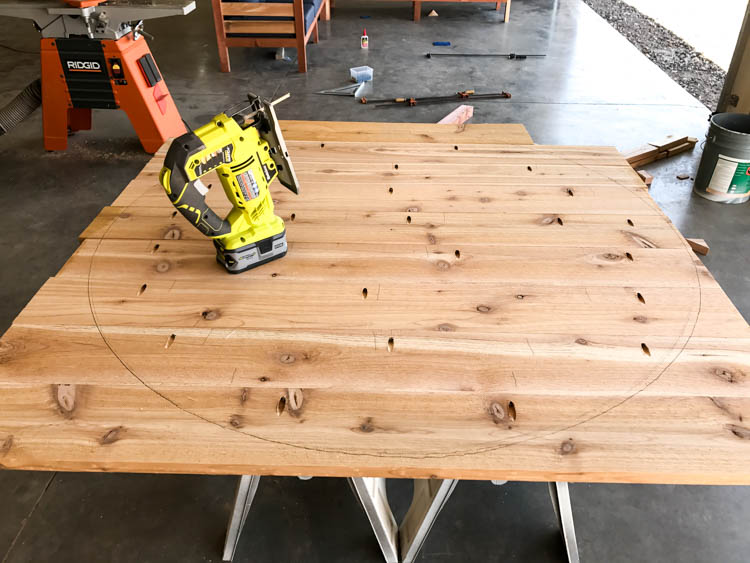
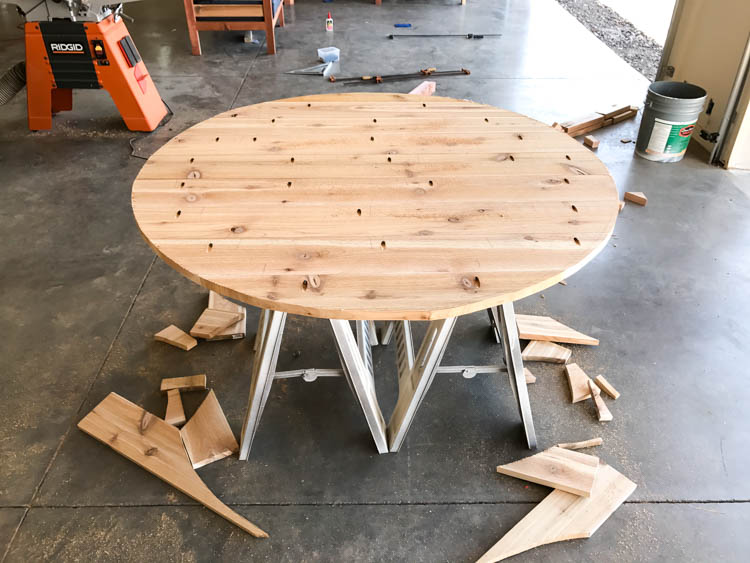
Once all of the boards were attached together, I drew my circle in darker and cut it out with my jigsaw.
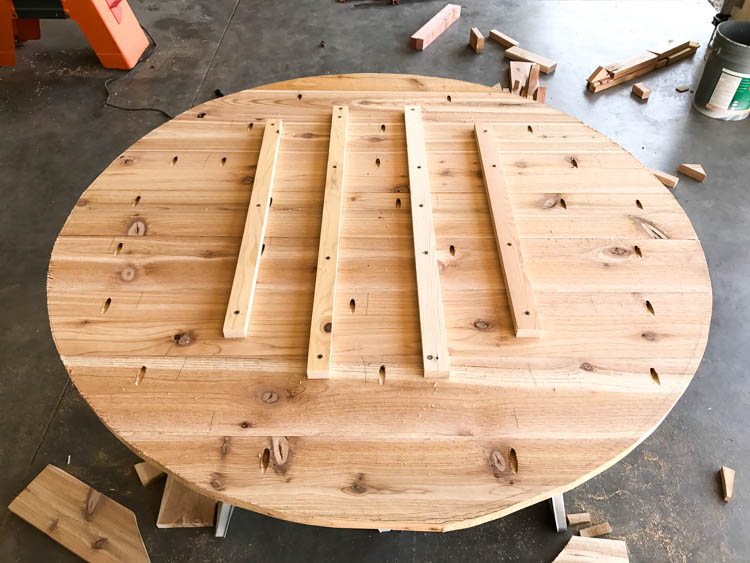
Because this cover is so large, it needed a little extra support on the bottom. The bricks making up our fire pit ring are 7″ deep, so I had to make sure to take into account the inside diameter of the fire pit as well. I cut four braces out of scrap wood and screwed them to the underside of the cover, making sure they were placed to fit inside the fire pit ring.
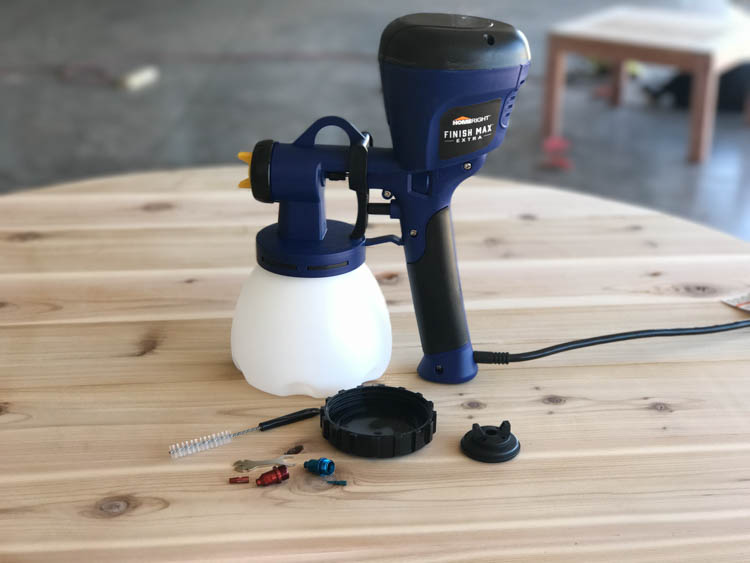
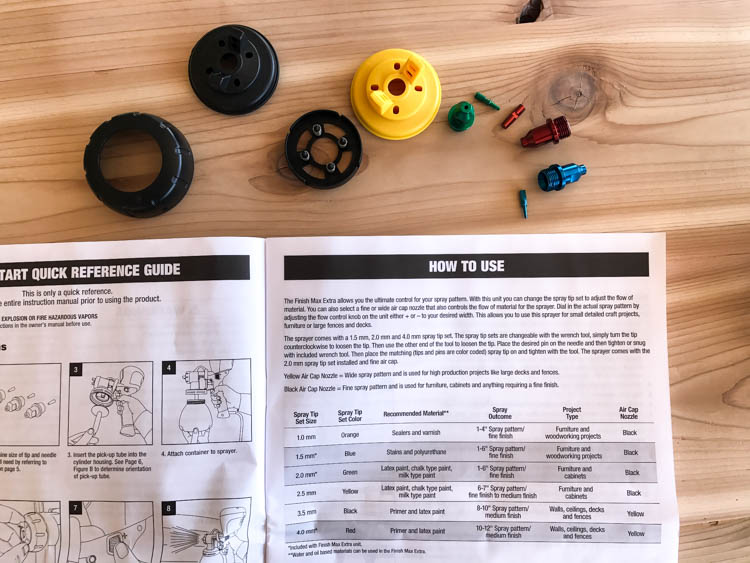
I flipped the cover over and sanded it down with 120, then 220 grit sandpaper. I grabbed my brand new Finish Max Extra to finish it off. I can’t even begin to explain how excited I am for this new sprayer from HomeRight. You’ll notice that right out of the box, it comes with a few extra items. There are three tips and two different nozzles, which allow you to change tips based on the product you are using.
The instruction manual includes a chart that helps you decide which tip is best for the product you are using. Why is this important? Because YOU DON’T HAVE TO THIN YOUR PAINT! Yes! They created new tips that would allow you to use paint without needing to dilute it! Since I was using stain, I needed to use the blue tip and black nozzle.
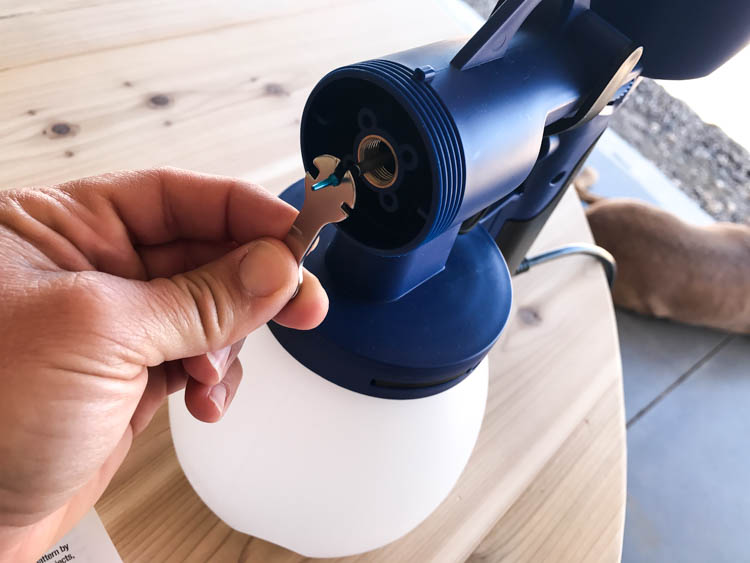
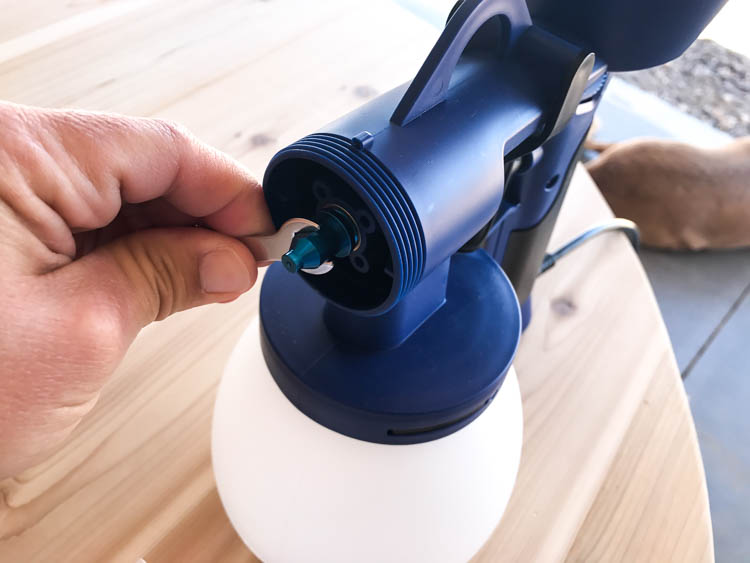
One more bonus that I absolutely love is that the Finish Max Extra also includes a tool to change out the tips. I can’t tell you how many times I have annoyed my husband when he can’t find his crescent wrenches and they’re all in my toolbox, instead of where they’re supposed to be;)
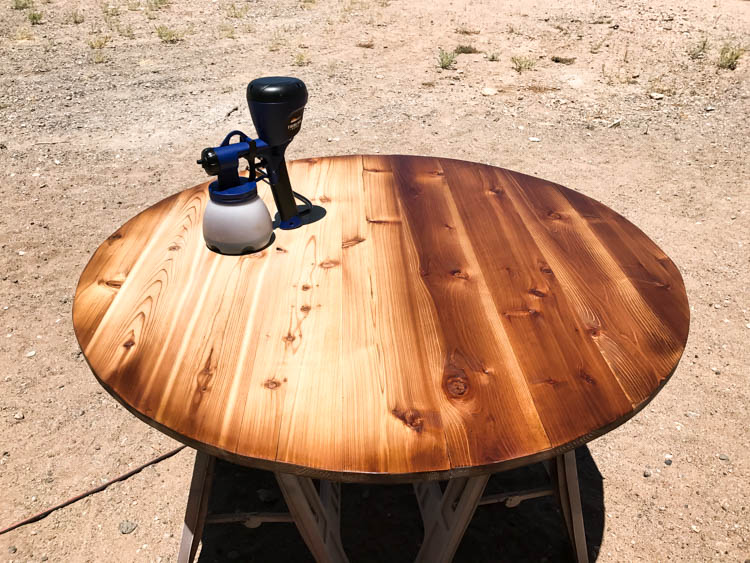
Since this is an outdoor project, I obviously wanted to not only make it look pretty, but also protect it from the elements. I stained it with Thompson’s WaterSeal Penetrating Timber Oil in Teak color. It is the same color I sprayed my outdoor sofa with and it’s such a rich, gorgeous color, but still lets that beautiful wood grain shine through.
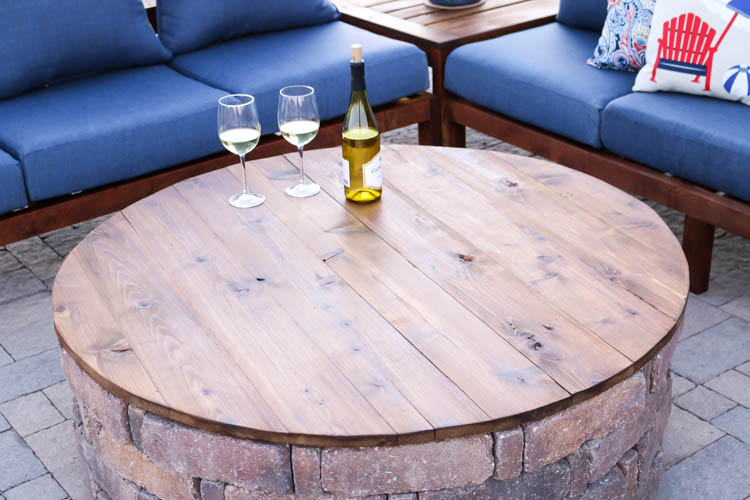
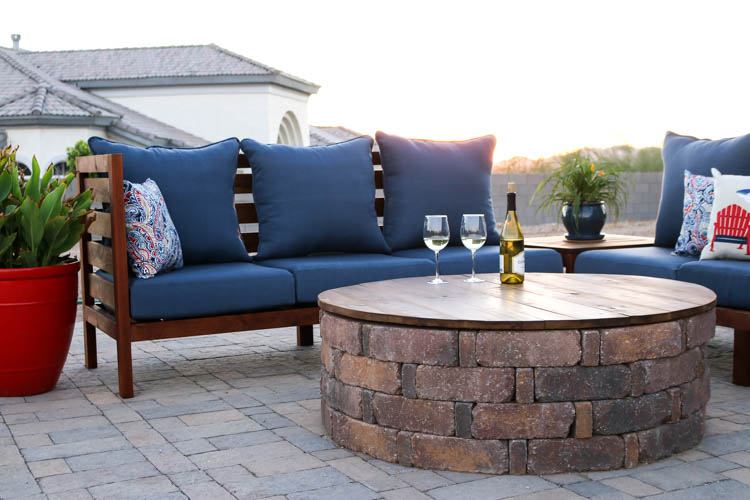
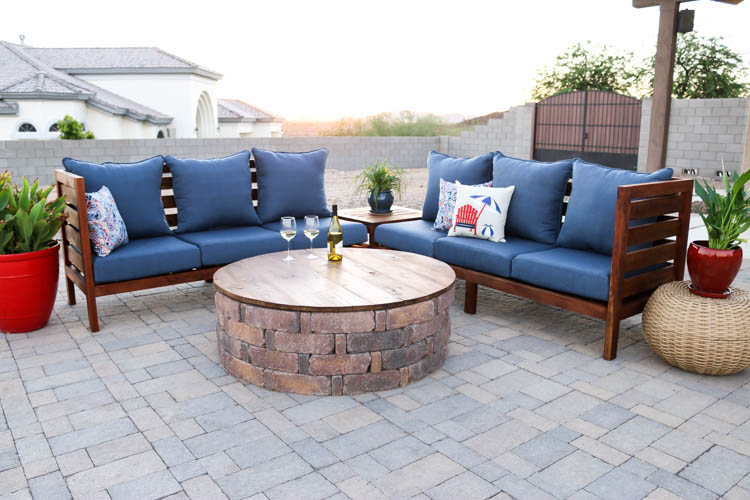
The cover fits perfectly over the fire pit and now we have plenty of space to entertain, set food, drinks, etc. While the cover is large, it is still light and very easy to remove when those cool nights are upon us again. I’m considering adding handles to it, but part of me just loves the look as it is. I can’t wait to host a BBQ and have this beautiful space for everyone to sit and relax.
Okay, are you guys ready for the awesome giveaway??? One very lucky reader will win the brand new HomeRight Finish Max Extra! Just follow the Rafflecopter instructions below. This giveaway is valid for U.S. Residents ages 18 and over. Void in Alaska and Hawaii. Winner will be chosen at random and will be notified via email. Should winner not respond within 48 hours, a new winner will be randomly selected and notified. Thanks and good luck!
DISCLOSURE: I was provided product and/or compensation for this post. All opinions and ideas are 100% my own. Please read my disclosure statement for more information.


What a great idea you had in making a dual purpose fire pit! It looks like the new and improved HomeRight Finish Max Extra made the job of staining so much quicker and easier! Your patio is so cozy and inviting, great job!
Thank you, Kaycee! Yes, it makes it much faster than the old method of using a brush. I can’t wait to use my Finish Max Extra with paint! I’m excited to not have to dilute it anymore:)
I love that you don’t have to thin
I am so happy to have found your inspirational ideas, and will be sure to check in regularly to see what’s new!
I can only think of a million things I could do with the HomeRight Finish Max Extra, but the first thing is to Win it!
I am smiling thinking of the look on my husbands face when he asks to borrow MY tools for a change 🙂
Simple and effective. Loved it! It’s also a good way to protect the fireplace, so even better.
This is actually a pretty good idea! I sometimes wonder why I didn’t come up with these kind of ideas before hahah Thanks a lot for sharing!
Love it! Just curious what you do with table top when you use fire pit? Thx😎
We just lean it against the wall, or put it in our shed:)