*This post is sponsored by The Home Depot. This post contains affiliate links. In purchasing an item from one of these links, I may receive a small commission at no extra cost to you.
Hey there, friends! Today is the big reveal day! I’m partnering with The Home Depot today to share the hardware I chose to finish off our Modern Farmhouse Kitchen Makeover and how to install it. It’s been a long haul to get to this point. If you remember, my plan was to remodel the kitchen back in the spring, but things went horribly wrong. Like, why did I ever decide to remodel the kitchen type of wrong.
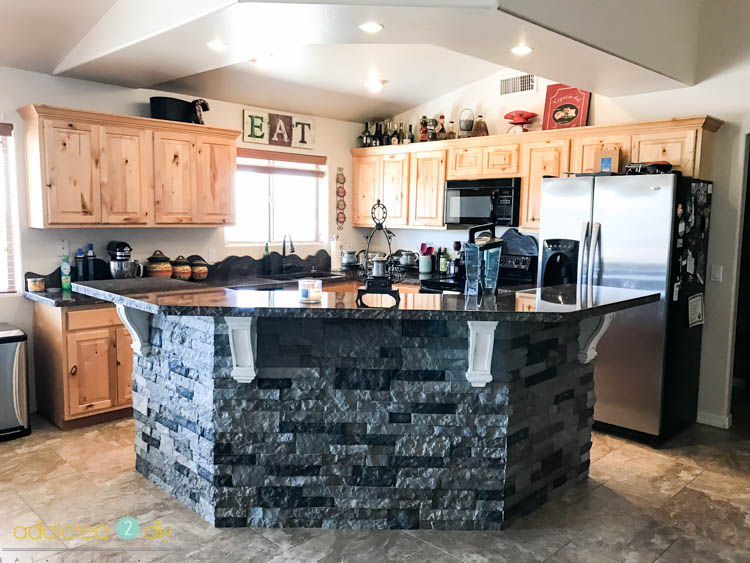
Here is what our kitchen looked like before we got started with things. The cabinets are knotty alder and, while they were in great shape, we just weren’t digging the color anymore. They seemed to just absorb all of the light and made the kitchen feel really closed in. It just wasn’t making me feel happy whenever I was in it, so I knew a change had to happen.
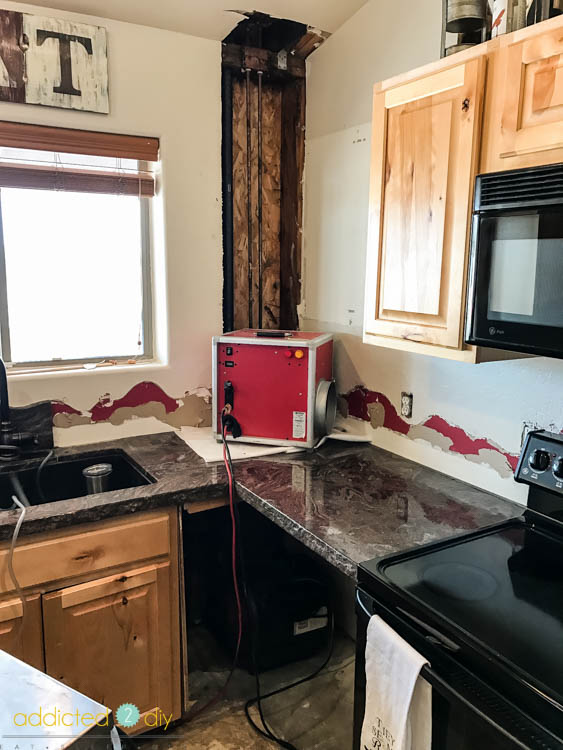
Unfortunately for us, the second we began the remodel, things came to a crashing halt. Apparently there was a roof leak we were unaware of. We found a ton of water damage within the walls, which resulted in a giant hole in our kitchen wall, cabinets destroyed, and just a huge mess. Honestly, as much as it was awful to have to discover that and go through the headache of repairs, had I not decided to remodel the kitchen, who knows how long it would have taken for us to discover the leak.
Once we got the repairs made, we took a step back for a bit on the remodeling to regroup. After a few months I got back at it and painted the cabinets, installed a tile backsplash and then painted the walls. The last step was the hardware.
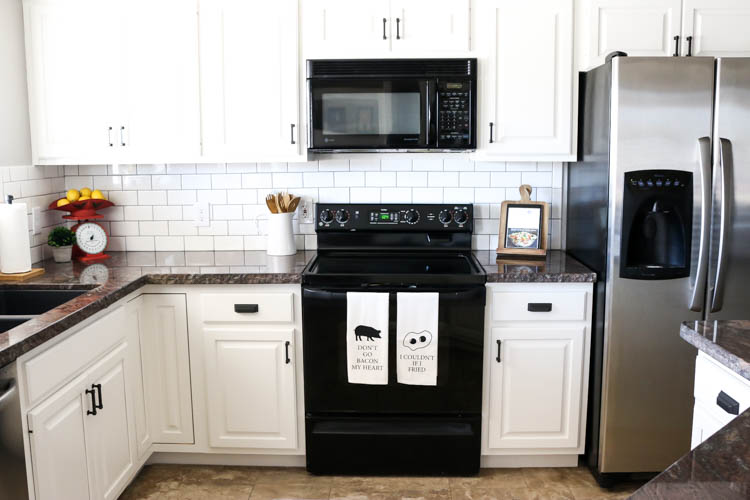
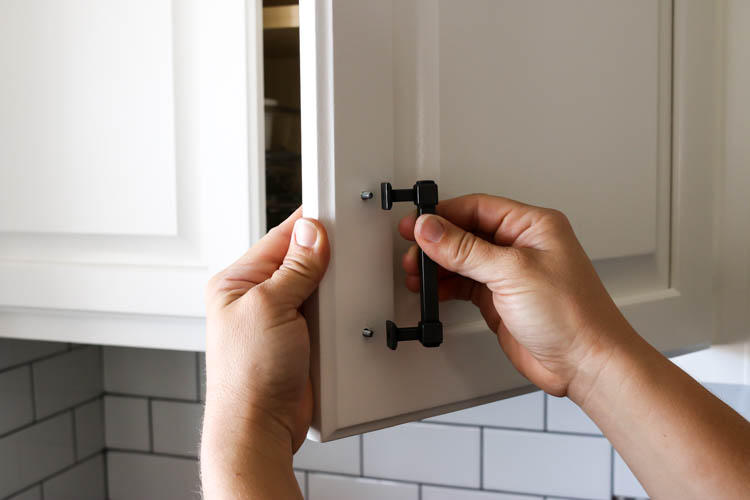
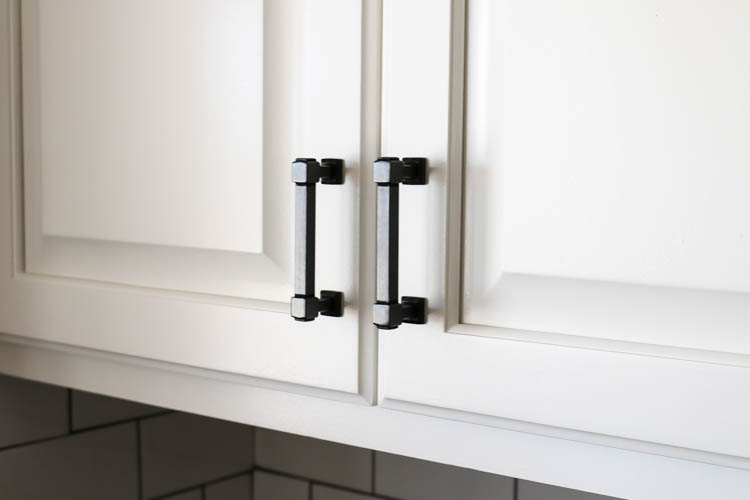
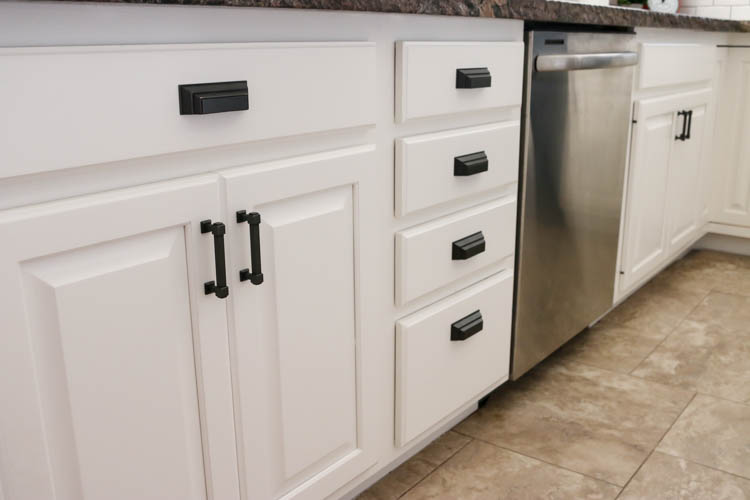
The hardware we chose is the Liberty Classic Square cabinet pulls and cup pulls in soft iron. I loved the color and finish, and I knew it would look perfect in our modern farmhouse kitchen.
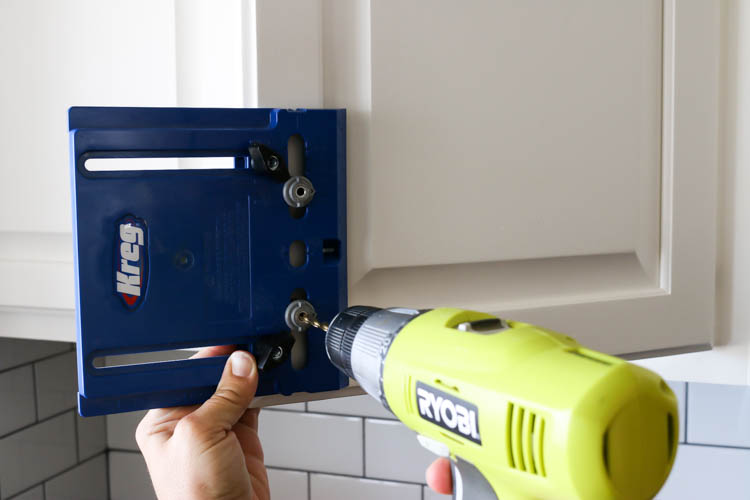
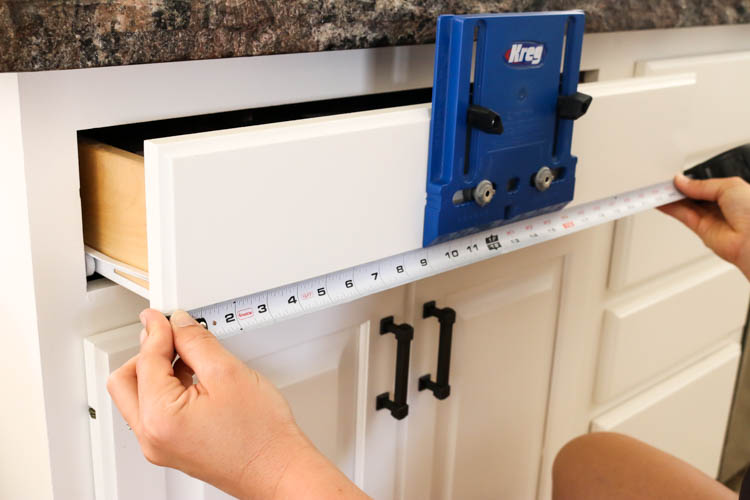
Installing it was unbelievably easy. I used my Kreg cabinet hardware jig, which helped me to get all of the hardware installed in about an hour. And we have A LOT of cabinet doors and drawers. I set the jig up for the door handles and quickly got all of them installed. The drawers take a little bit longer, but only because I had measure each one to find center.
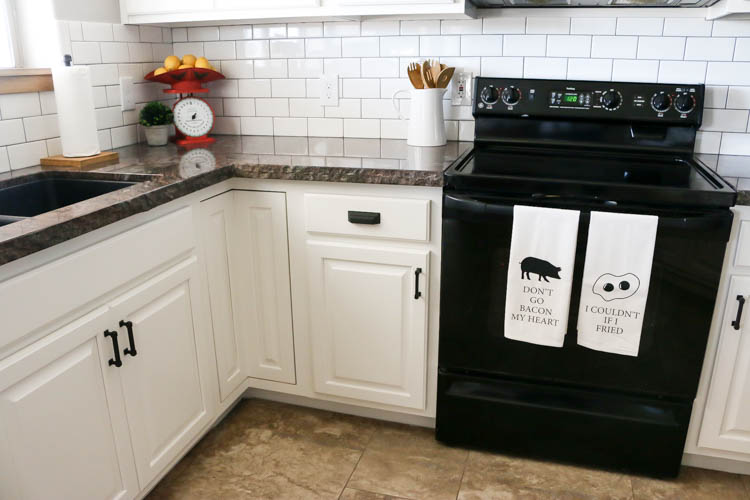
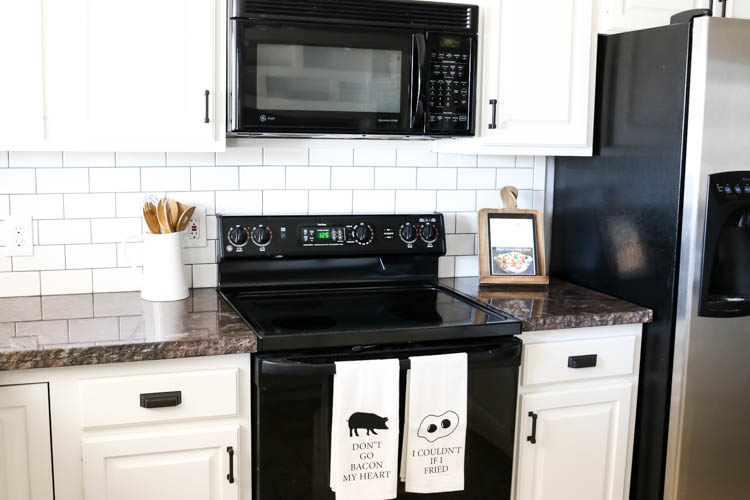
The dark color of the hardware against the white cabinets looks amazing. It’s the perfect amount of refinement, but still has a little bit of a rustic/industrial look to it, which is exactly what I wanted. Having never had any sort of hardware in our kitchen before, this was a huge update for us.
We aren’t clawing at the drawers anymore and sticky little fingers aren’t leaving prints all over the place.
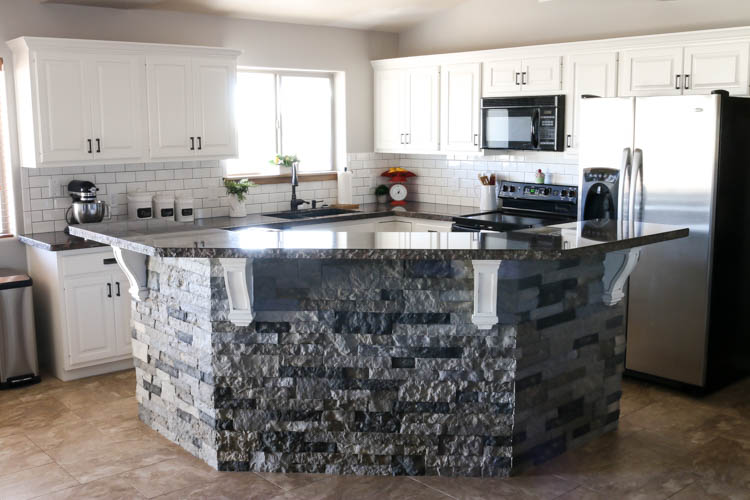
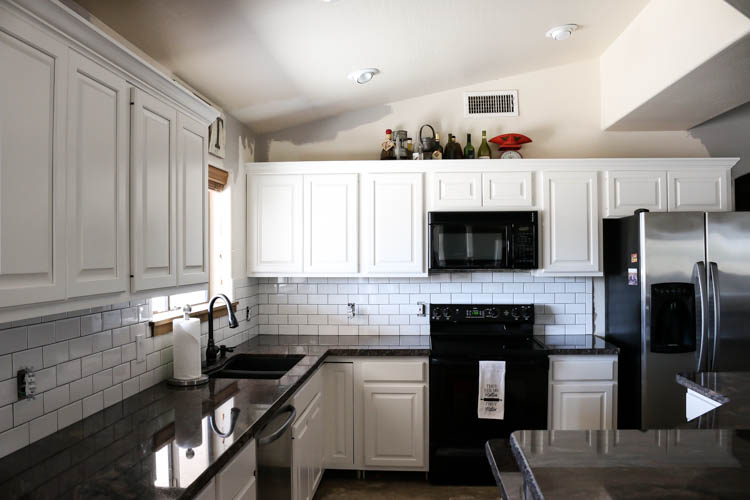
And, since this is the big reveal of the kitchen, here’s a look at what the rest of it looks like!
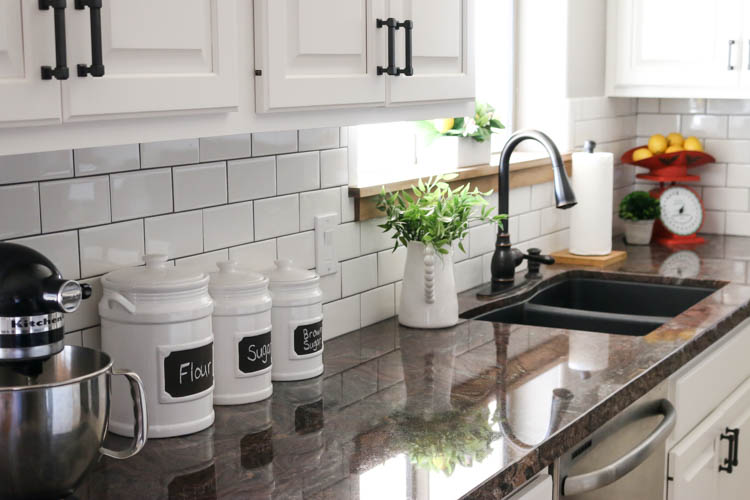
This vintage scale used to sit on top of the cabinets. Mostly because I never really knew where to put it. I bought it at an online auction a while back and the pop of red looks great against the white tile. Especially when it’s filled with lemons, or pumpkins for fall.
The window sill was a bit of a debate between my husband and I on whether to paint it white or stain it. In the end, my husband actually won the argument and I love the contrast against the white tile.
Since my dining room and kitchen are all one big room, I carried it over into there as well. Having both the kitchen and dining room FINALLY done feels like such a huge weight off of my shoulders. The house is so much brighter and the look is so much cleaner than before. Even when the house is messy;) Again, it’s a great big checkmark off of my very long “to do” list for our house and I’m looking forward to continuing on throughout the rest of the rooms! Don’t forget to pin and share this post for future inspiration with your own makeover projects!
DISCLOSURE: I acknowledge that The Home Depot is partnering with me to participate in the promotional program described above (the “Program). As a part of the Program, I am receiving compensation in the form of products and services, for the purpose of promoting The Home Depot. All expressed opinions and experiences are my own words. My post complies with the Word Of Mouth Marketing Association (WOMMA) Ethics Code and applicable Federal Trade Commission guidelines.



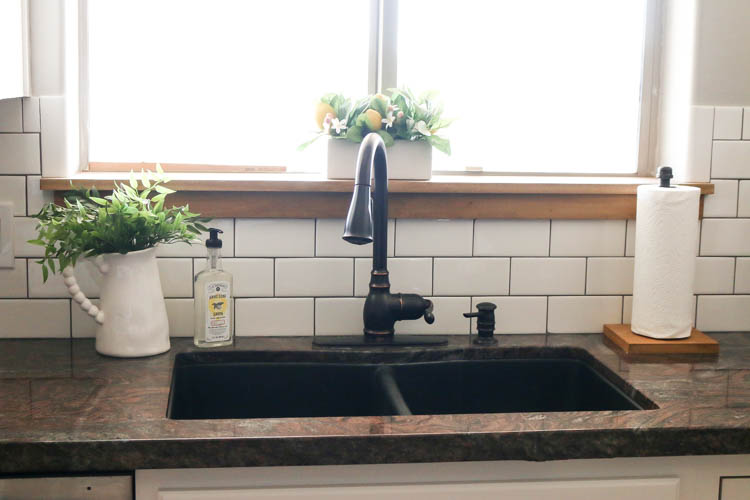

It turned out beautiful. I have to agree with your husband on the window sill. The pop of wood looks great against all of the white.
Thanks so much, Jamie!
Absolutely beautiful
Thanks so much, Norma!
What a beautiful job you have done on your kitchen and dinning room. I love how bright it is, and the hardware you chose is just the perfect finishing touch!!
Thank you, Kaycee!
Wow, how stunning is your kitchen? 1-10 with 10 being, I want this kitchen because it’s fabulous. I give it a 10.
Curious of the color of your grout on the tile, is it grey? or a specific grey? would love to repeat it in my kitchen. Where I had planned on the white subway tile, but the grout is our biggest debate!
thanks!
The grout is premixed Fusion Pro grout in Pewter. It’s definitely a big decision to choose the color. I loved the contrast of the dark grout against the white tile; however, the clean look of white grout also looks amazing.
I love your modern twist on a traditional farmhouse design and I love your use of colour that makes it different from a brown kitchen!
Love the stone on your island, can you give us the name?
The color is Spring Creek by Airstone.
Did you make the windowsill yourself? I love the way it turned out. Redoing my kitchen now and just can’t figure out how I’m going to do the windowsill
Yes! I cut poplar to fit and stained it. It’s been a great addition to the kitchen and the sill is big enough for me to put plants on.