Dig through your scrap wood pile and learn how to make a beautiful bandsaw box. This bandsaw box takes it up a notch with a wireless speaker built into it.
Throughout the course of my woodworking journey, I’ve been keeping a growing list of bucket-list items I’d like to learn to do. Things like wood turning, different joinery techniques, etc. A bandsaw box has been on that list for a while and I am so happy to say that I can officially check that box on my list!
A few weeks ago, my sweet friend Sam from DIY Huntress sent out an email to a bunch of makers asking if anyone would be interested in a fun challenge. The rules were simply to build a project using nothing but what you already have on hand. Scrap wood, hardware, etc. It’s called the #buildathome challenge, and I immediately signed up! There are a bunch of makers in on this challenge and I’m linking to all of them below!
The tricky thing was choosing what to build. So I “phoned it in” and put up a poll on my Instagram stories. Do I build a large project using my surplus of knotty alder and poplar scraps? Or, do I build a smaller project using my hardwood scraps? The overwhelming majority chose a smaller project with hardwood scraps. That got my wheels turning and I decided it was finally time to stop being intimidated and build my first bandsaw box! Since there are SO MANY different types of bandsaw boxes out there, I knew that mine had to have something really different. Luckily, I happened to have a wireless speaker kit lying around that I had ordered over a year ago! So let’s get started!
Watch: How To Build A Bandsaw Box With A Wireless Speaker
Step 1:
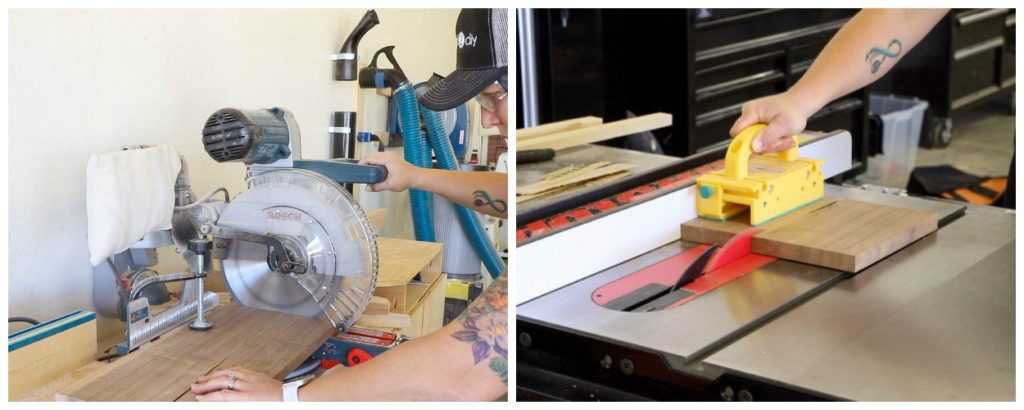
To get started, you’ll want to cut your wood down to size. I cut off a 9″ piece of walnut from a scrap board I had and then ripped two pieces from that down on my table saw at 4 1/4″ wide.
Step 2:
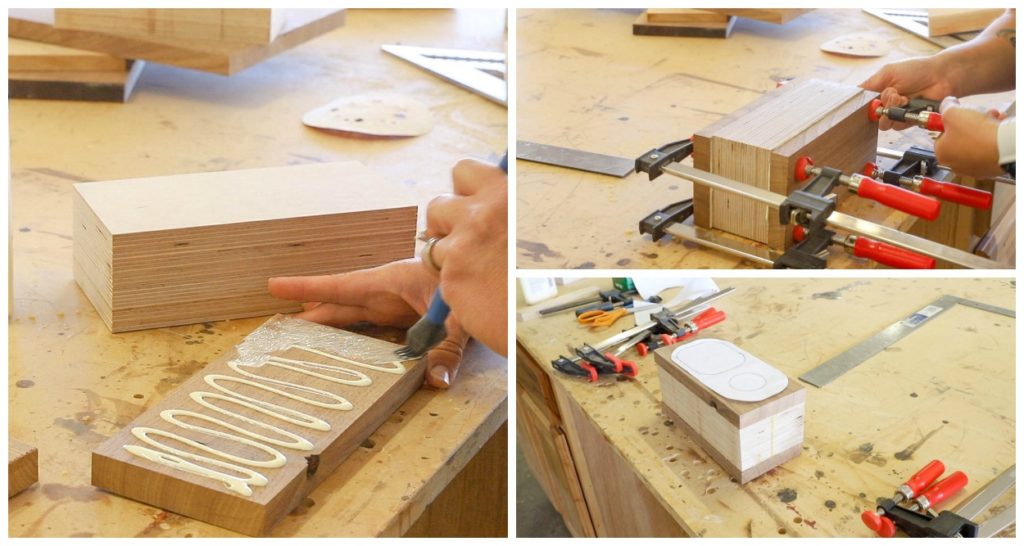
The middle of the bandsaw box is made of glued up layers of baltic birch plywood. I sandwiched the pieces of walnut around the plywood with glue and clamped it together to dry overnight.
Once the block was dry, I cut out my template and attached it to the wood with adhesive spray.
Step 3:
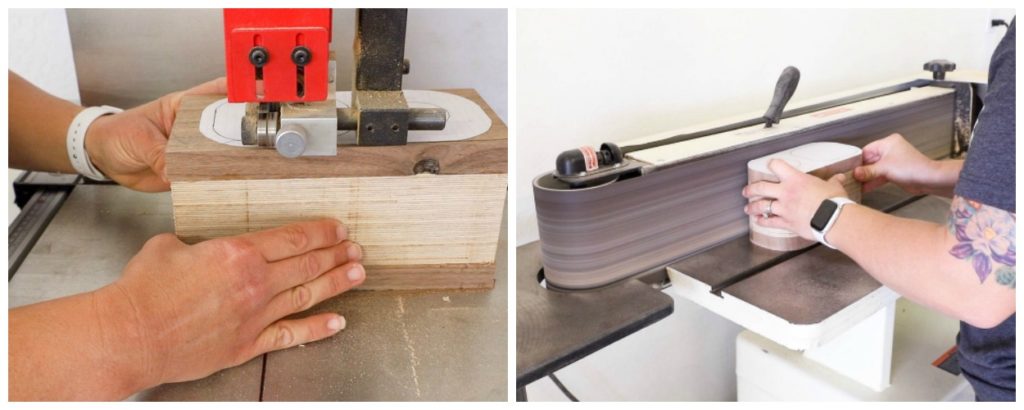
I took the wooden block over to my bandsaw, fitted with a 1/4″ blade, and cut out around the template.
Once I had the shape cut out, I took it over to my belt sander and sanded it down to smooth out the shape.
Step 4:
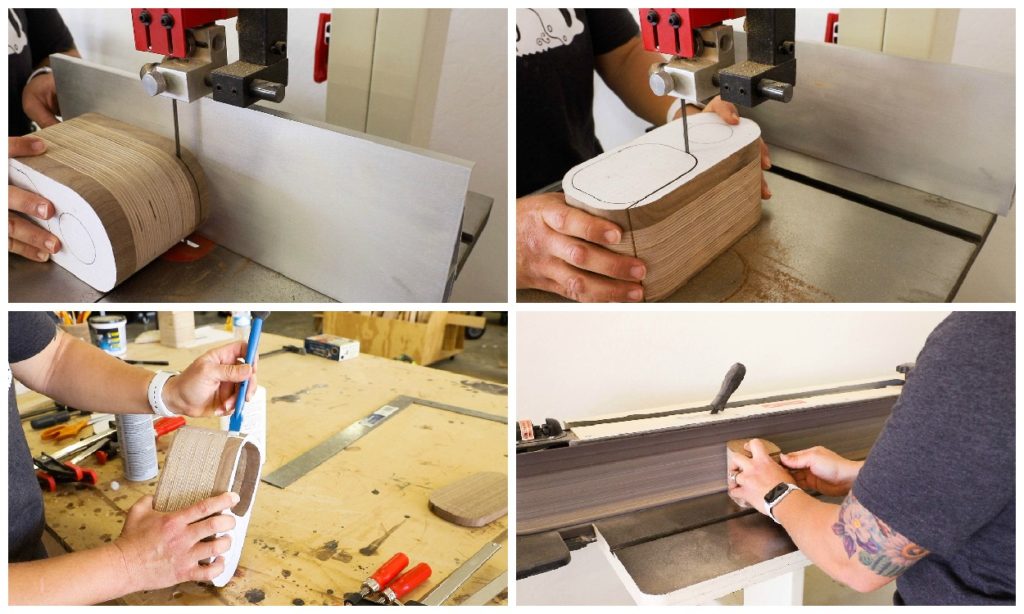
I took the wood back over to the bandsaw and set my fence up to cut 1/2″ off the back of the wood block. This will make up the solid back of the box.
I then lined up my template to the blade and started cutting out the inside portion of the box that will make up the drawer.
With the inner box cut out, I glued up the cut I made into the wood, clamped it and let it dry.
I took the block I had cut and sanded it down smooth on my belt sander.
Step 5:
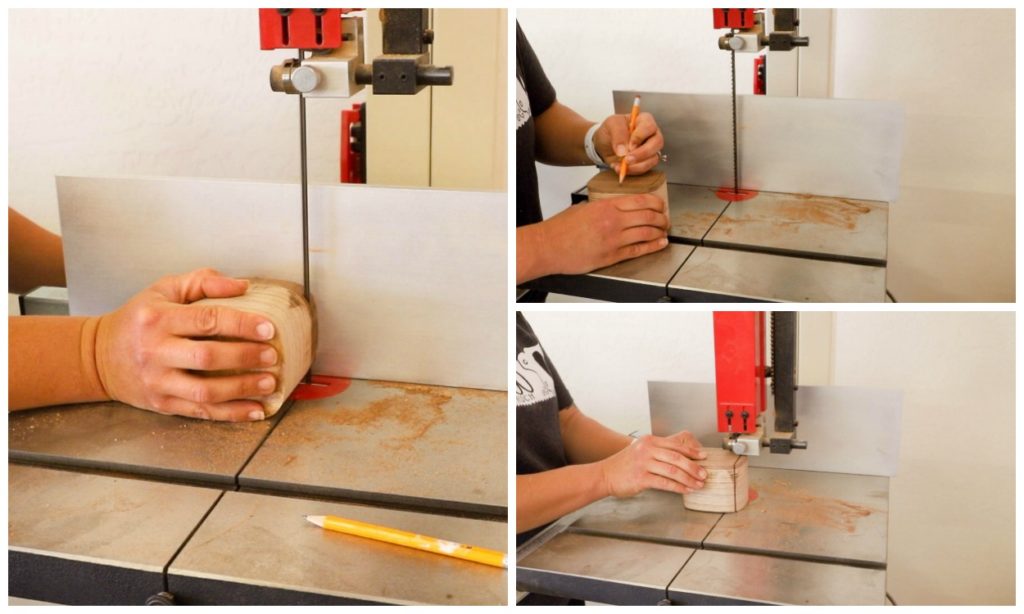
Once the block was sanded smooth, I needed to cut the front and back portions off. I cut 1/4″ off of the back of the block to make the back of the drawer. I cut 1/2″ off of the front to make up the front of the drawer.
I set the pieces aside and then drew out the line I would cut to hollow out the drawer box. I did this freehand, but made sure to leave a little over 1/4″ thickness for the walls of the drawer.
I set my bandsaw back up and hollowed out the drawer.
Step 6:
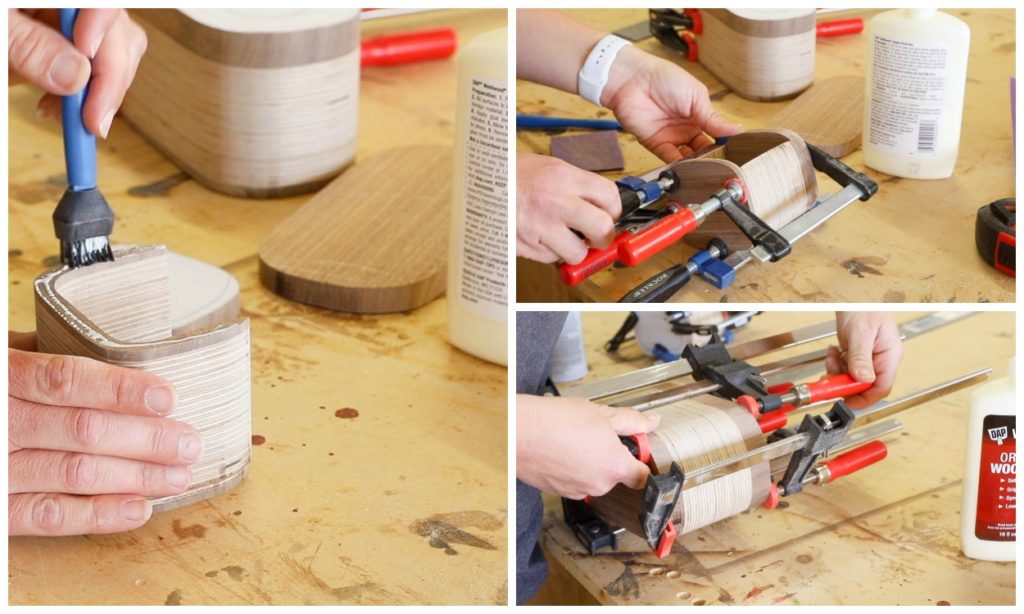
I sanded all of the drawer pieces smooth on my belt sander to remove any saw marks, then spread a thin layer of glue over the front and back ends of the drawer. I set the drawer front and back in place and then clamped them.
While that was drying, I also sanded the main box sides as well as where I had cut the back off, along with back piece. This again ensures a tight glue joint. I glued the pieces together, clamped them and set them aside.
Step 7:
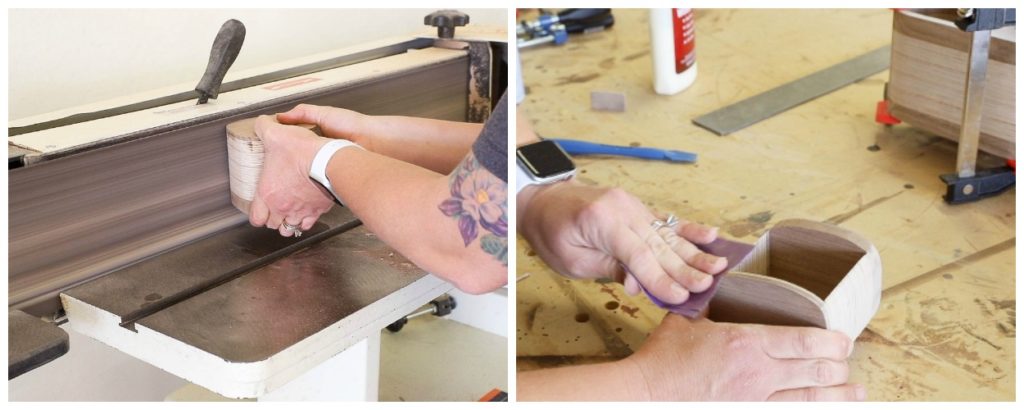
When the glue had dried on the drawer, I sanded it down one last time on the belt sander to remove any uneven spots and glue squeeze out. I took it back to my workbench and sanded it smooth with 220 grit sandpaper.
Step 8:
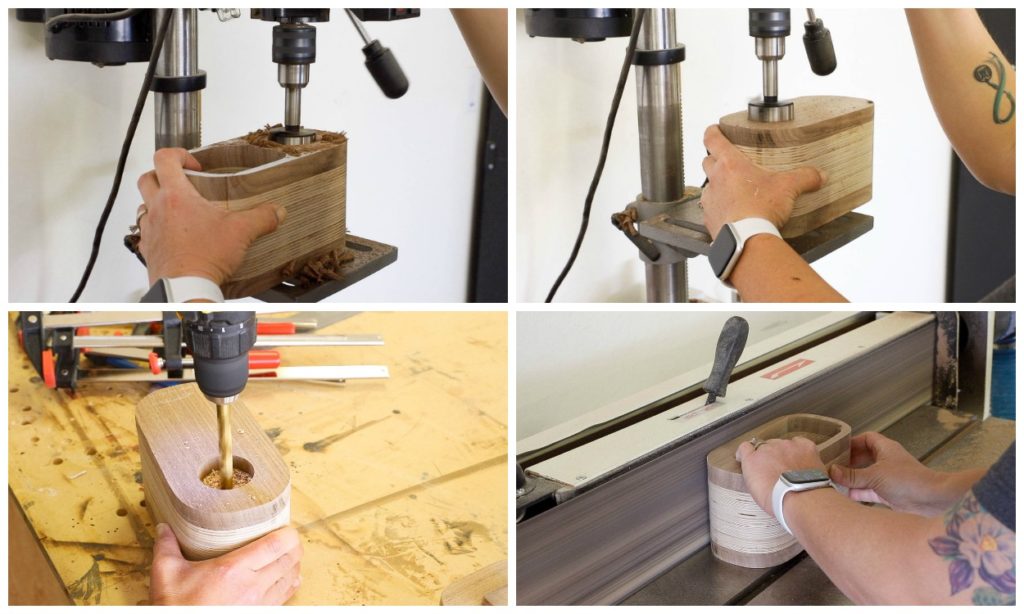
Once the glue was dry on the main box, I took it to my drill press and drilled a 1 7/8″ hole into the front of the box, approximately 2″ deep, to hold the speaker. I flipped it over, marked 2″ in and then drilled a hole in the backside approximately 1″ deep to hold the back of the speaker.
I took the box to my workbench and drilled a 7/16″ hole through the larger holes to pass the speaker wires through.
I took it back to my belt sander for a final rough sanding, then finish sanded it by hand with 220 grit sandpaper.
Step 9:
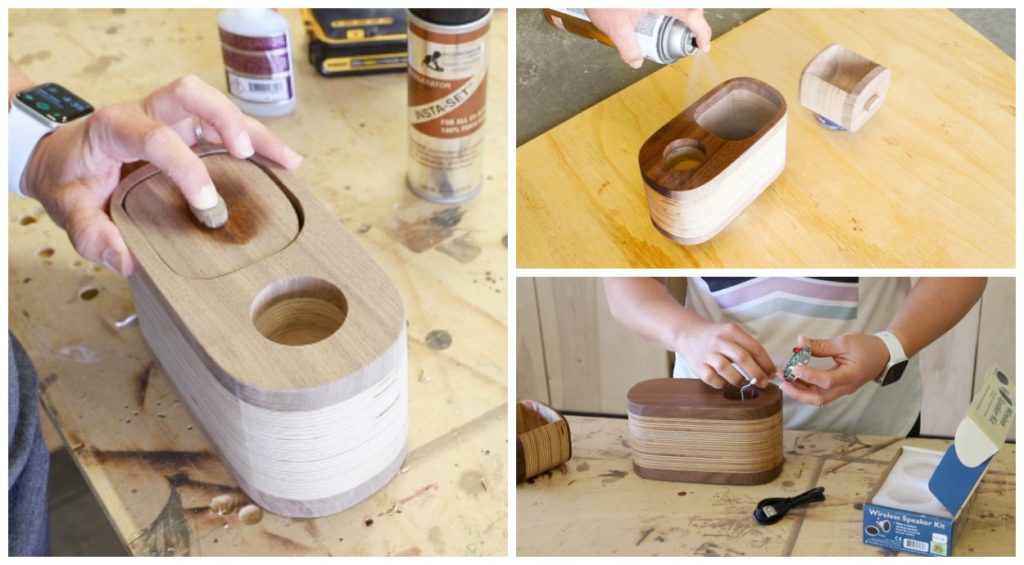
I made a small little knob out of walnut for the drawer and attached it with CA glue and activator spray. I sprayed three coats of polyurethane spray over the box and drawer to seal them, letting the polyurethane dry for several hours in between.
Once the polyurethane was dry, I installed the speaker kit, following the instructions that came with the kit.
The Build At Home Challenge


This challenge was beyond fun for so many reasons. For starters, it helped me to finally learn a new skill, and it pushed me to think outside the box a little (no pun intended) when it came to sourcing supplies at home. But it’s not just me in this challenge. There are so many other makers who completed incredible projects! I’ve linked to all of them below and I hope you’ll check out all of their work!
DIY Huntress
Walker’s Woodworks
Jaime Costiglio
Ugly Duckling DIY
Pneumatic Addict
Jen Woodhouse
The Build with Ethan
Lazy Guy DIY
Genealogist Woodworker
3×3 Custom
Anika’s DIY Life
Eye In The Detail
Penalty Box Woodshop
At Charlotte’s House
Cowdog Craftworks
Never Skip Brunch
If you are looking to get in on this challenge, it’s not too late! We want to see what you create as well! Just dig through your scrap pile and your supplies and create something amazing. Use the hashtag #buildathome on Instagram so we can see it!


Leave a Reply