Learn how to design and create your own custom built-in closet cabinets using these step by step plans. Turn your wasted closet space into a functional and beautiful storage solution that will meet your own personal needs.
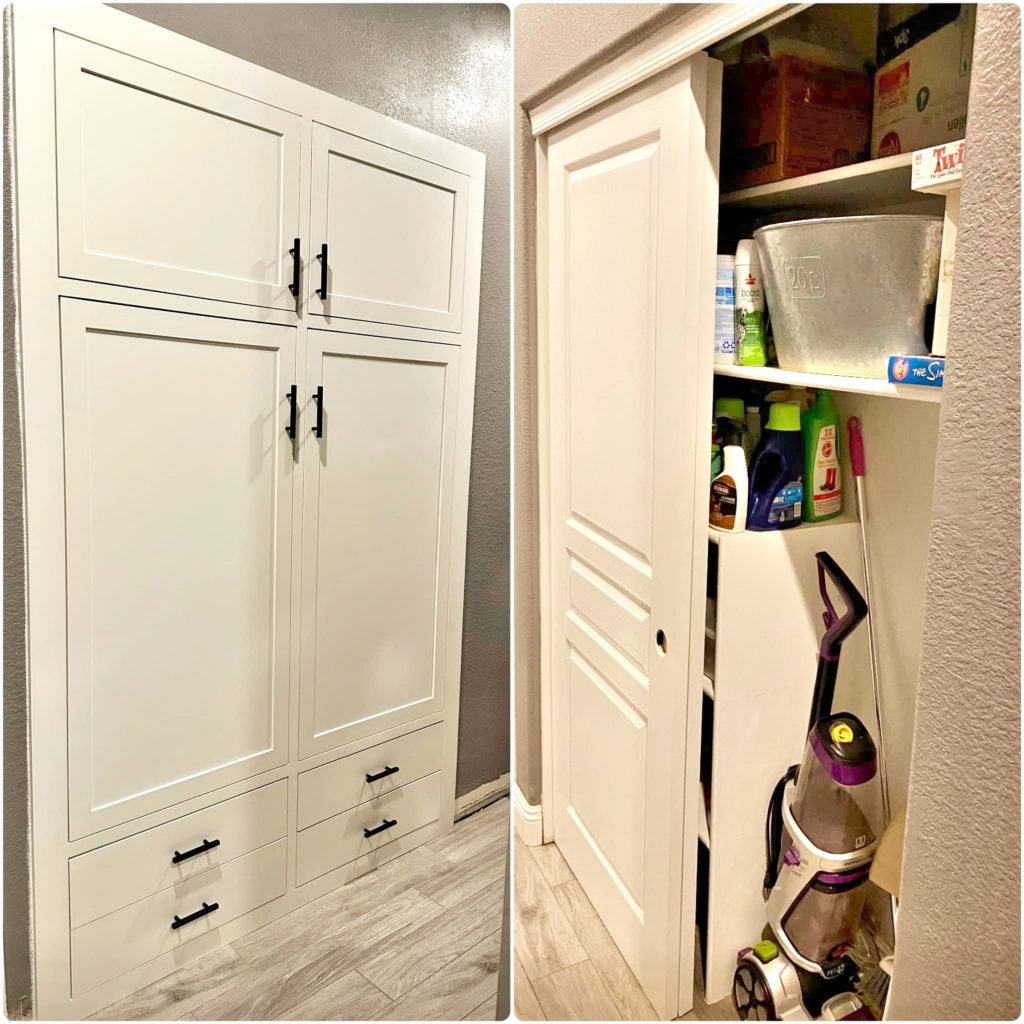
Do you have a closet space that you wish was a little more functional? Sometimes the standard closet just doesn’t fit our needs and needs to be modified a bit. I recently finished up this very type of project for some friends and I’m partnering with DAP Global today to show you how I did it!
Now, before we get started, I do understand that everyone’s space is different. I have put together printable plans based on the sizing of this particular closet, but these plans are super easy to modify to fit the size you have. This cabinet can even be built as a standalone unit! All you’d need to do is substitute the outer trim for 1×2 face frame.
Download the printable plans
For this project, you will want to download the printable plans. These will have the full materials list and cut list, as well as the step by step instructions on constructing these cabinets.
If you are building standalone units, omit the 1×4 trim and use only 1x2s for the face frame of the entire unit(s). Then you can add trim around the top of the unit, if you like.
Building the cabinets
For this project, I used 1/2″ and 3/4″ prefinished plywood to construct the carcasses of the cabinets. To simplify things, I designed the plans with 3/4″ plywood as the main walls and shelves, but the cabinet top is 1/2″. This is to maximize all of the plywood needed for this project and not have a ton of excess left over.
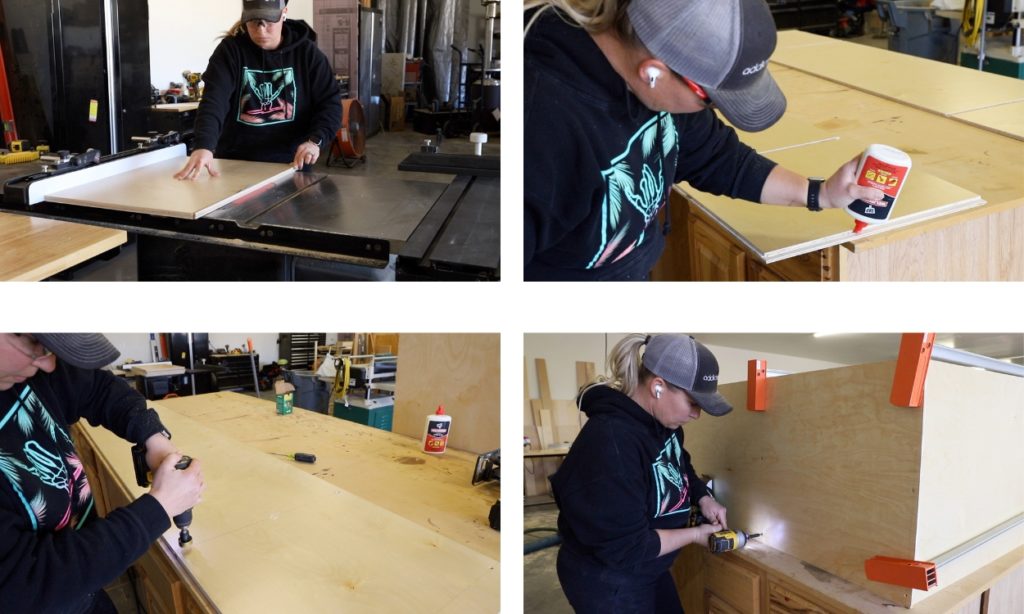
I cut the cabinet pieces down to size on my table saw and then got to work assembling everything. I used my router to create grooves (dados) in the cabinet walls to fit the fixed shelves into; however, this step is optional and I understand that not everyone has the tools and/or ability to do this. In the plans, these cabinet boxes are assembled without dados and utilize pocket joinery and DAP Weldwood Original Wood Glue to secure everything together.
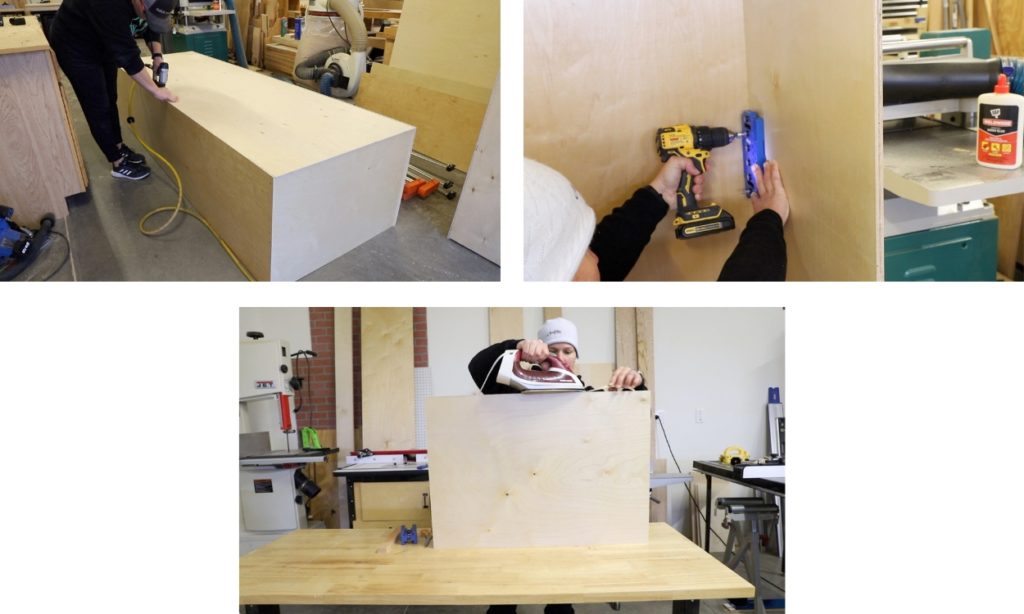
Next, I attached the 1/4″ backs to the cabinet boxes. Not only does this complete the overall look of the cabinets, but it helps them to maintain their structure. When attaching the backs, ensure that the cabinet boxes are square, then nail into place with a brad nailer.
For the adjustable shelves, drill shelf pin holes into the front and back sides of the cabinets in the middle and upper sections. I used my Kreg shelf pin jig for this.
I also added edge banding to the front edge of all of the adjustable shelves to give them a cleaner look.
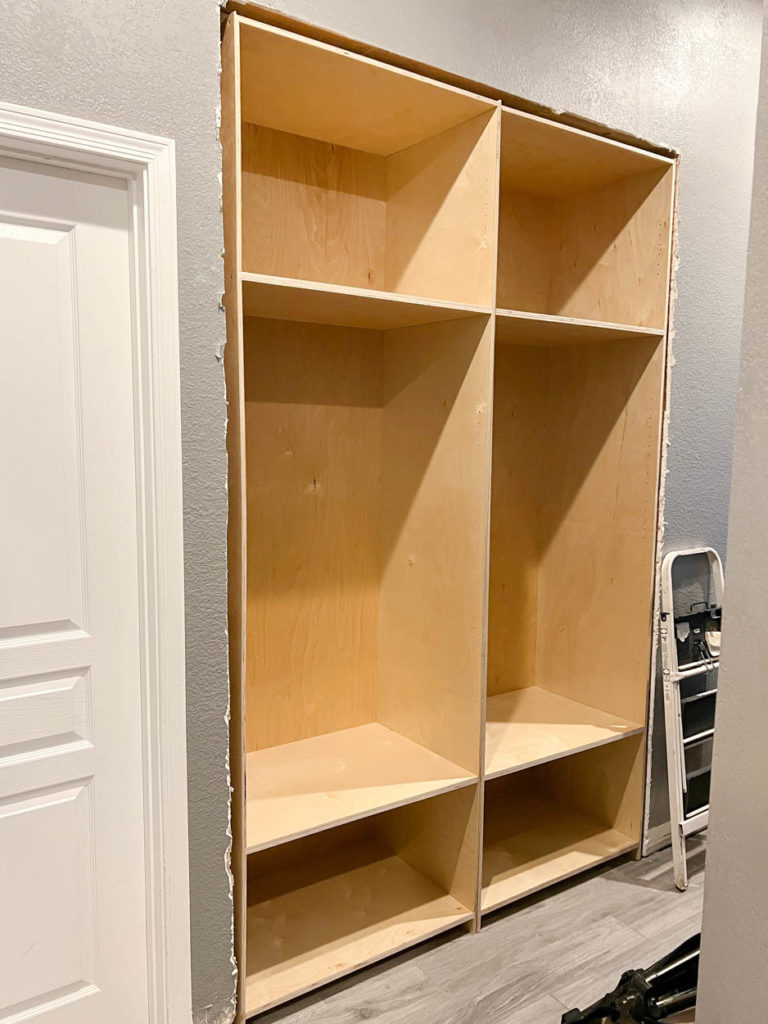
Next came installing the cabinet boxes into the closet opening. My friends had demoed the closet themselves and opened it up so that it was a little less than 8′ tall and a little over 5′ wide. I built the boxes so that there was a little bit of wiggle room on the sides, top and back. This is because there is never a guarantee that any space will be 100% square and I didn’t want to risk the cabinets not fitting at lets say the top of the opening but fitting perfectly in the bottom.
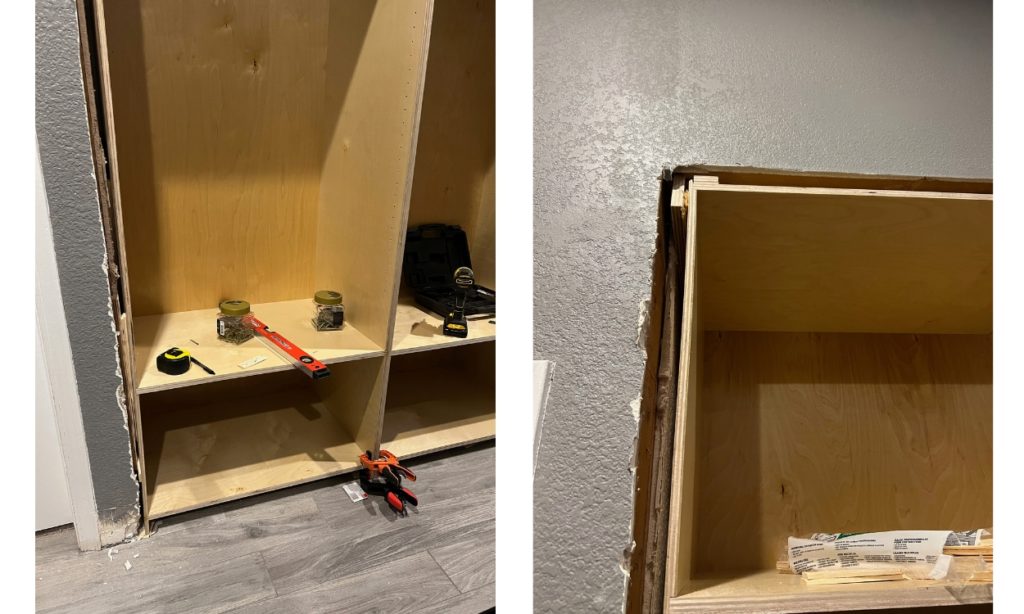
This is where wood shims and scraps plywood pieces come into play. They allow me to adjust the cabinets so that they line up perfectly with each other, are level, and fit snug into the opening. Once I had everything exactly as I wanted it, I used 3″ cabinet trim screws and drove them through the cabinet walls and into the studs to secure the cabinets in place. These screws are great because they have a very small head on them and blend in extremely well.
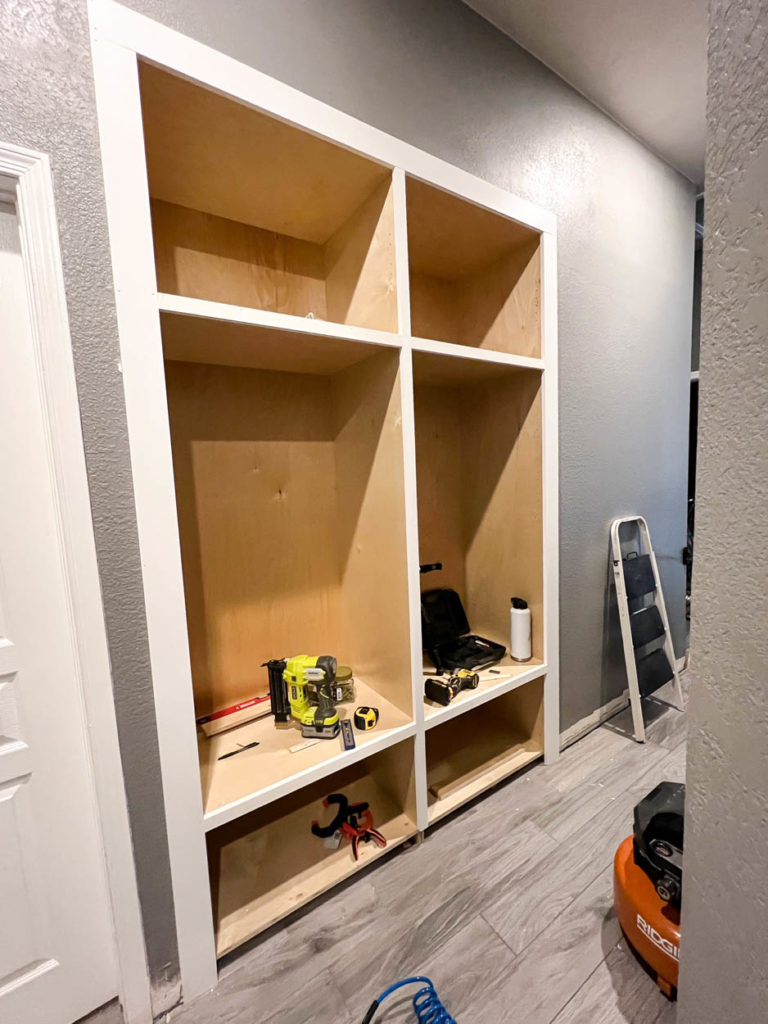
Once the cabinets were secured in place, I began cutting and attaching the trim pieces. I used primed pine boards for this. I started by cutting and installing the vertical 1×4 trim pieces first, leaving a 3/4″ overlay on the cabinets for the inset door hinges to attach to. I nailed them in place with 2″ brad nails.
I then cut the top trim piece as well as the face frame pieces and nailed all of them in place. The top trim piece was nailed in place with 2″ brad nails. The face frame pieces were nailed in place with 1 1/4″ brad nails.
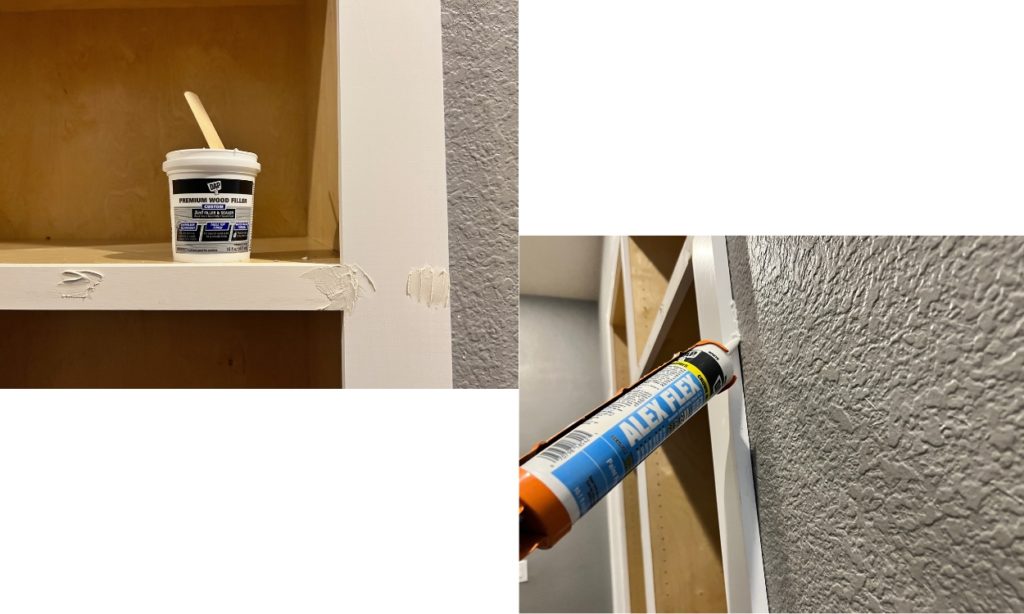
Once all of the trim and face frame was in, it was time to clean things up. I started first by filling all of the nail holes with DAP Premium Wood Filler. It’s my favorite wood filler to use on painted surfaces because it sands so smooth and it takes paint beautifully. To clean up all of the joints where the trim meets the wall, I used DAP Alex Flex Premium Molding & Trim Sealant. It’s my go to product when I am sealing joints in trim because it is quick drying and flexible, so I won’t need to worry about it cracking as it dries.
Once the wood filler was dry, I sanded it smooth and painted all of the trim and face frame. For the paint, I used my favorite trim color, Swiss Coffee. This actually comes as a pre-mixed color at my Home Depot in the Behr paints. Since this is a cabinet that will be used quite often, I used semi-gloss sheen to allow for easy cleanup and resistance of scuffs.
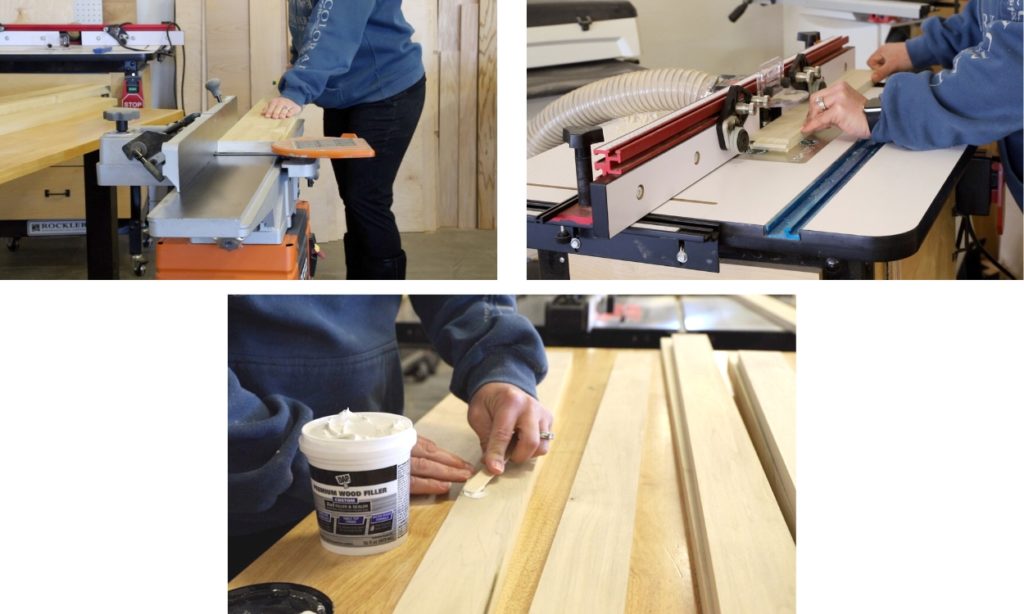
Back in my workshop, I started milling down the poplar that would become both the cabinet door frames and the drawer fronts. I used rough-cut poplar for this, which did require it to be milled down to flatten it and get it to 3/4″ thickness. You can also use clear pine for this and achieve the same results with a lot less work.
To assemble the cabinet doors, I used my shaker bit set and my router table. This is a tongue and groove assembly. I’ve included instructions in the printable plans for both tongue and groove as well as pocket hole joinery to assemble the doors.
When all of the pieces were milled down, I filled any tiny knot holes and imperfections with DAP Premium Wood Filler, let it dry, and sanded the boards smooth.
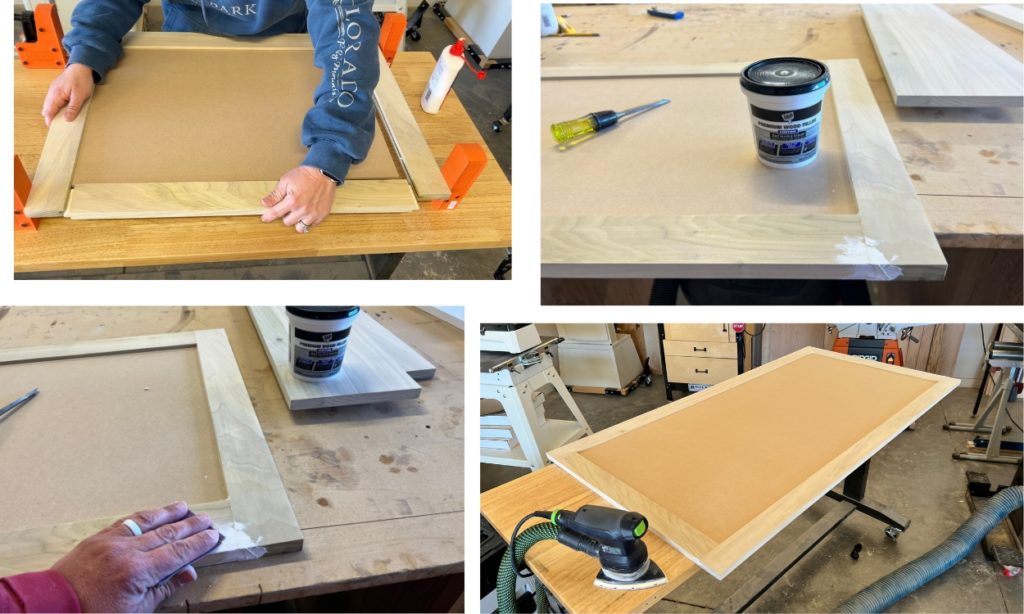
To assemble the doors, added a bead of glue to the inner groove as well as the tenons on the rails (upper and lower pieces), then lightly clamped everything together. You want to avoid clamping these too tightly and causing the wood to twist or shift.
Once the glue was dry, I filled the seams with wood filler and sanded them all smooth.
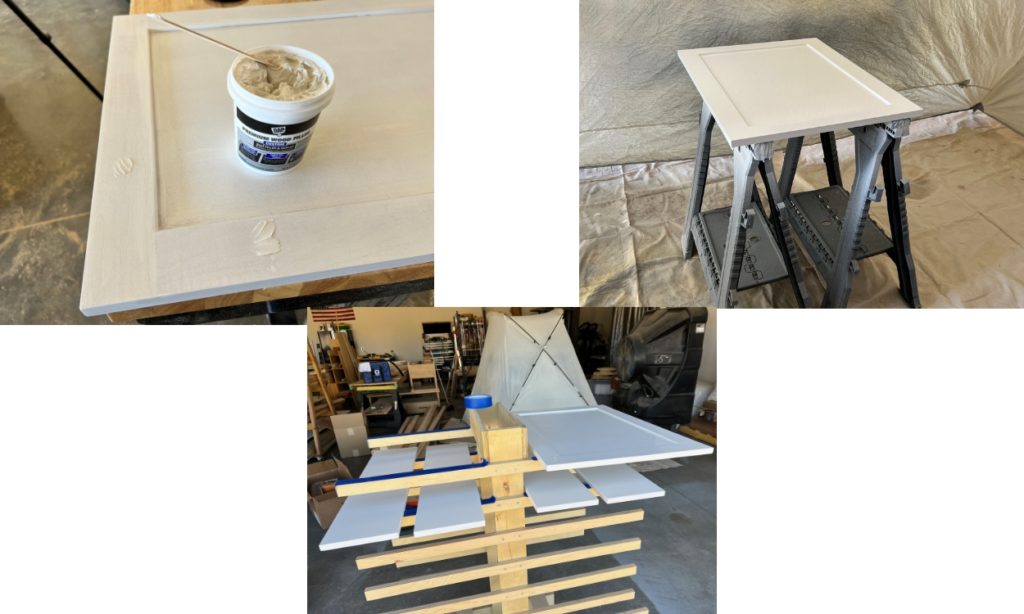
Prior to painting the doors, I used a shellac-based primer on all of the doors and drawer fronts. After doing so, I noticed a few more imperfections that needed to be filled prior to painting, and I went ahead and filled those and sanded those areas smooth. I sprayed 3-4 coats of paint on all of the parts and let them dry.
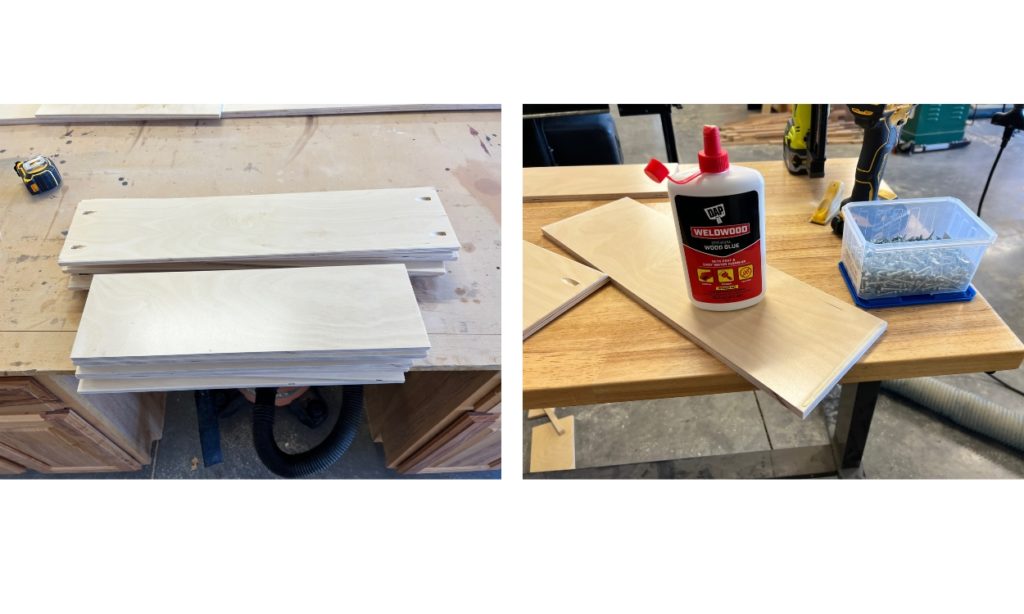
It was at this point in the assembly process where my step by step photos began to fall by the wayside. Apparently, I forgot to take more photos of building the drawers, but I do want to point out one important tip if building drawers with pre-finished plywood. Wood glue does not truly adhere to pre-finished plywood, because the wood glue needs to get into the wood grain for it to create a strong glue joint. To allow a better adhesion, I lightly sanded at the ends of each of the drawer pieces where they would meet the edge of its adjoining piece. Then added the wood glue. It will not hold a bond as strong as raw wood, but it will hold better than no sanding at all.
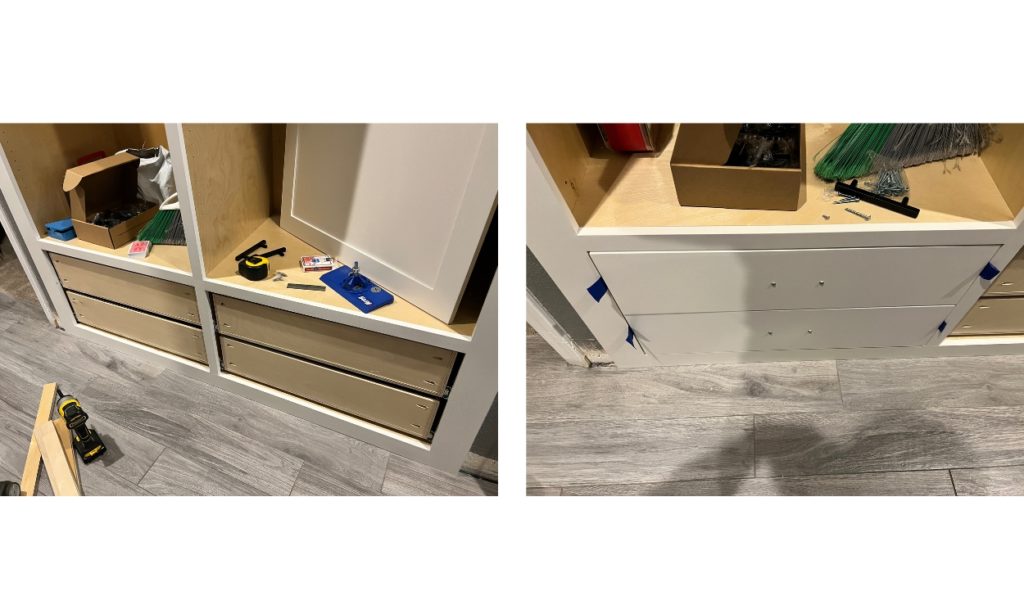
Once the drawers and doors were finished, I installed all of the parts and hardware and the project was done! If you are wondering how I install drawers and doors, I do have detailed instructions in this blog tutorial that show you how it’s all done!
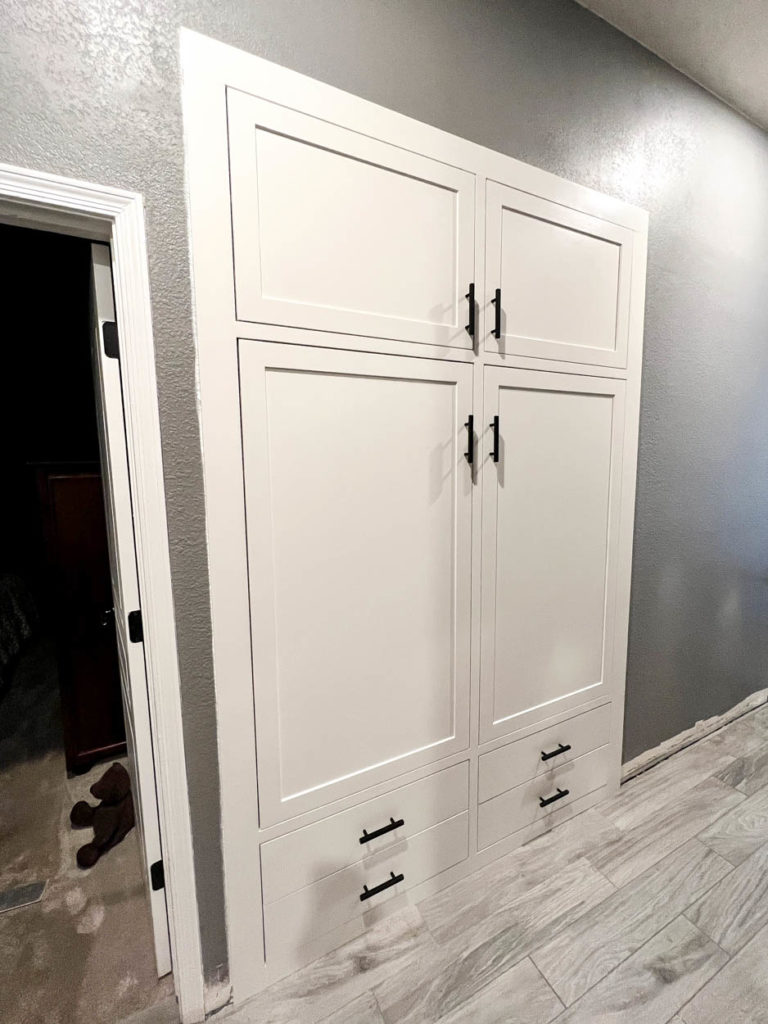
Not to pat myself on the back or anything, but the finished cabinet looked so amazing in this space! It is bright, clean, and my friends LOVE how much added space they have for storage and organization. The adjustable shelves allow them to have room to store brooms and a vacuum on one side, and tons of stuff on the other.
And like I mentioned earlier, this is fully customizable to fit the sizing that you need, but these cabinets are also able to be built as standalone units if you need extra storage in an office, den, or bedroom. If you missed it earlier, here’s the link to download the printable plans!
Special thanks to DAP Products for partnering with me on this project. For more information on all of their products, visit DAP.com.
DISCLOSURE: I was provided products and/or compensation for this post. All opinions and ideas are 100% my own. This post contains affiliate links. Should you purchase a product from one of these links, I may receive a commission at no added cost to you.

Leave a Reply