How to Build a DIY Butcher Block Countertop for a Kitchen Island
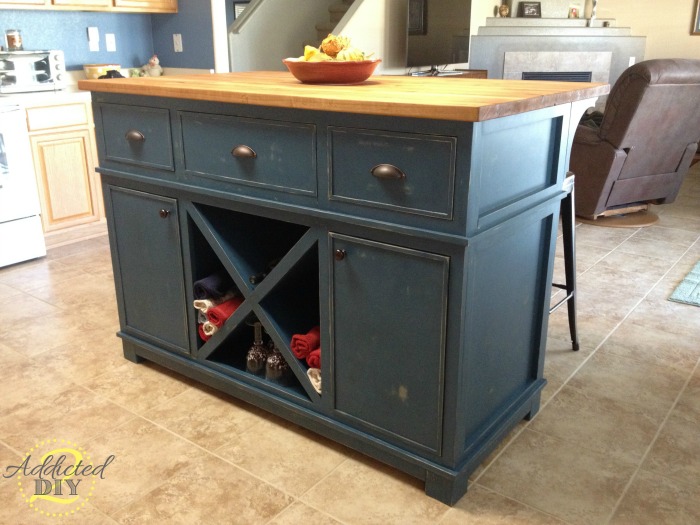
In my last post, I shared how I built this kitchen island for my mom, and this tutorial outlines how I built the DIY butcher block countertop for it.
When I started planning this project, I went back and forth on whether I should build the butcher block top myself or just buy one. By “buy one,” I really mean my mom would buy one since she purchased all of the materials for this project while I handled the labor. I searched everywhere for an affordable butcher block countertop in the size I needed, but everything I found was way over budget.
I briefly considered using wide planks instead, but my husband pointed out that narrower boards would be less likely to warp over time. That ended up being the push I needed to finally go for it. Once I found a butcher block tutorial that helped the process click in my mind, I realized building one myself was completely doable.
And honestly? I’m so glad I did.
This DIY butcher block countertop saved a lot of money, gave us a custom-sized top for the island, and added so much warmth and character to the finished piece.
Why I Chose Alder for This Butcher Block Top
Maple is one of the most common woods used for butcher block countertops because it is durable and hard-wearing. Originally, I planned to use maple for this project, but while I was at my local hardwood supplier, I spotted knotty alder and loved the look of it immediately.
Knotty alder is softer than hard maple, but it is still considered a hardwood and worked well for this kitchen island top. After talking it over with one of the employees, we agreed it would be a great option for this build. The biggest bonus was the price — it was about half the cost of maple.
That made it a much more budget-friendly choice without sacrificing the look I wanted.
Materials and Tools Used
For this butcher block countertop, I used:
- Knotty alder boards
- Titebond III wood glue
- Clamps
- Mallet
- Foam roller for spreading glue
- Orbital sander
- 220 grit sandpaper
- Butcher block conditioner
I also had the wood shop help with planing, ripping, squaring up the ends, and sanding the top flat after glue-up.
Step 1: Mill the Boards
I started by selecting my boards at the wood shop and had them planed to 1 3/4 inches thick. Then I had each board ripped into 1 1/2-inch strips so they would be easier to work with.
Having the boards milled ahead of time made the whole process much more manageable and helped create more uniform pieces for the glue-up.
Step 2: Cut the Wood Into Smaller Pieces
Once I got the boards home, I cut the long strips into shorter sections. Since I was using knotty alder, I also cut around some of the larger knots. That left me with a variety of lengths, which gave the countertop a more random and natural butcher block look.
For the final layout, I turned each piece on its side so the exposed face of each slat measured about 1 3/4 inches wide, creating a thicker, more substantial look.
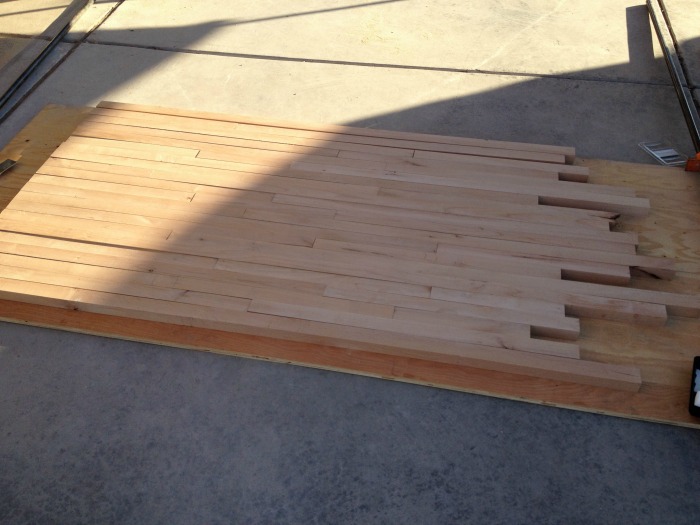
Step 3: Lay Out the Boards Before Gluing
Before reaching for the glue, I dry fit all of the pieces to get a look I liked.
This step is worth taking your time on. Because the pieces were different lengths, I was able to stagger the joints and create a more random pattern across the top. That helped the finished countertop look more custom and visually interesting.
If you are building your own butcher block top, I definitely recommend laying everything out first before starting glue-up.
Step 4: Glue the Boards Together in Sections
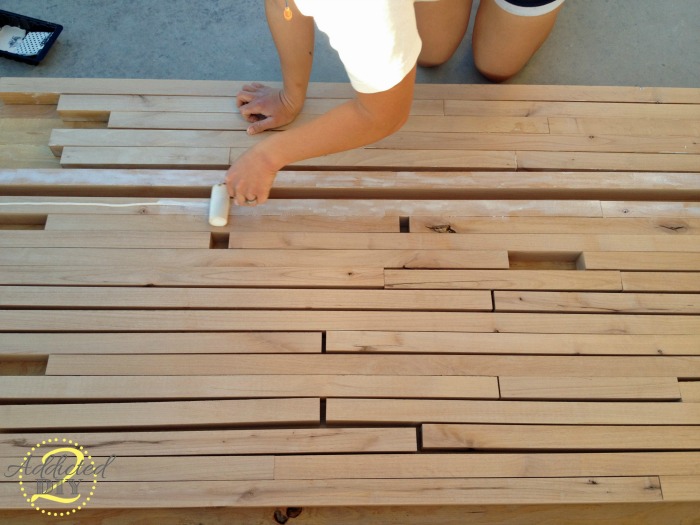
For glue-up, I used Titebond III, which is a great choice for butcher block projects because it is waterproof and food safe once cured.
I quickly learned that the glue started to skin over pretty fast in the Arizona heat, so instead of trying to glue everything at once, I worked in small sections — about two rows at a time. That made the process much less stressful and easier to manage.
To apply the glue, I squeezed out a bead along each edge and then spread it evenly with a foam roller. That worked really well and gave me much better coverage than trying to spread it by hand.
If you are using shorter pieces, make sure to glue the end joints too, not just the long edges.
Step 5: Clamp Everything Tightly
As I joined the pieces together, I used a mallet to tap the shorter boards into alignment and tighten up the joints.
Once the boards were in place, I clamped everything down tightly using clamps on both the top and the bottom. This is an important step because alternating the clamps helps keep the panel from bowing during glue-up.
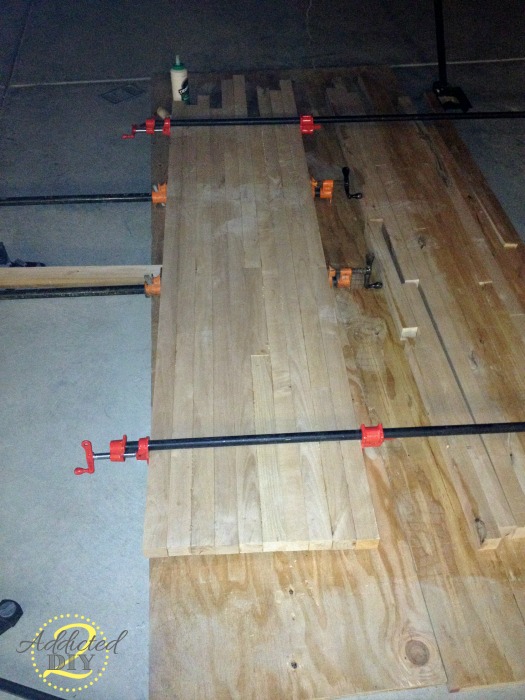
I only glued about half of the top together the first night, mostly because it was getting late and real life was calling. The second night, I finished the rest and used every long clamp we had in the garage to pull everything together nice and tight.
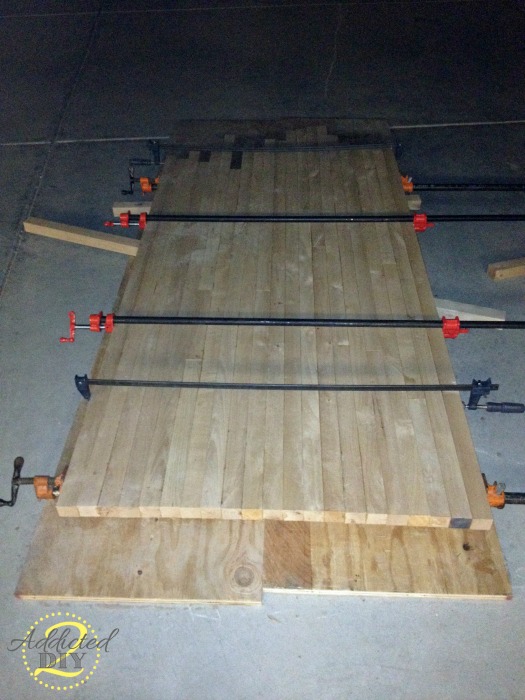
Then I let the whole top sit for 24 hours to cure.
Step 6: Trim, Flatten, and Sand the Butcher Block
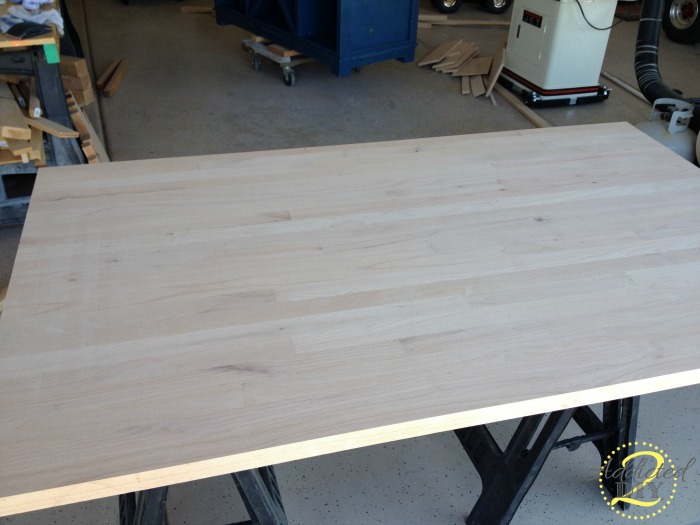
After the glue had fully dried, I took the countertop back to the wood shop and had them trim it to final size, square up the ends, and sand the surface smooth.
After milling and sanding, the thickness of the top went from about 1 1/2 inches down to a little over 1 1/4 inches.
Once I got it back home, I used my orbital sander to soften the edges and give the whole top a final sanding with 220 grit sandpaper until it felt completely smooth.
Step 7: Finish the Butcher Block
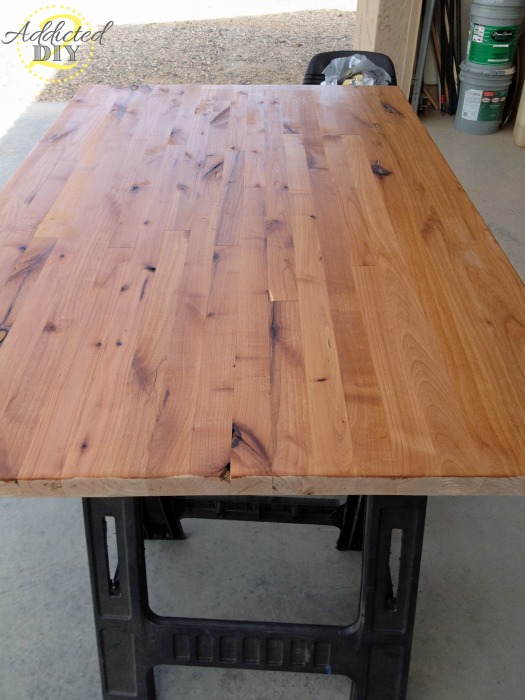
To protect the wood and bring out the beautiful tones in the alder, I applied butcher block conditioner to both sides of the countertop.
This step made a huge difference in the final look. The conditioner really enhanced the warm tones and natural character of the wood. It instantly made the whole top look richer and more finished.
If you are finishing a butcher block countertop, be sure to treat both the top and the underside so the wood absorbs moisture evenly.
What About Small Gaps?
I’ll be honest — during glue-up, I was convinced I was going to end up with a countertop full of gaps or that the whole thing would somehow fall apart.
Thankfully, neither happened.
There were a couple of tiny gaps where some of the end joints didn’t meet perfectly, but nothing major. I had read that a mixture of beeswax and mineral oil can help fill very small gaps in butcher block, and that is essentially what butcher block conditioner is made from. I just worked a little extra conditioner into those areas.
Problem solved.
Final Thoughts on Building a DIY Butcher Block Countertop
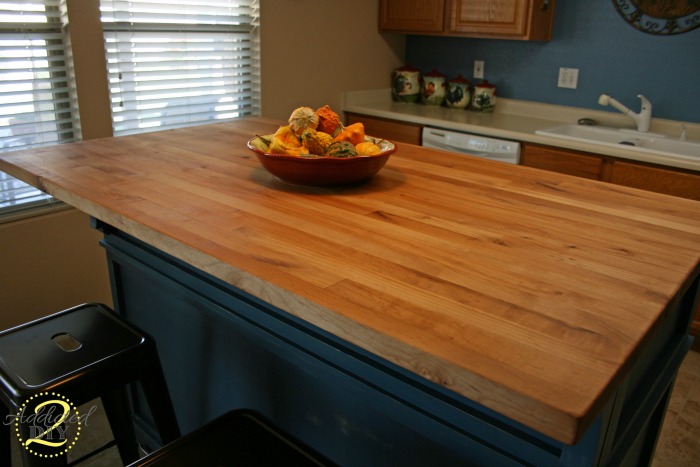
This butcher block top turned out even better than I imagined. It saved money, gave us a completely custom countertop size, and added so much character to the island.
If you are trying to stay on budget or you just love the satisfaction of building every part of a project yourself, I definitely recommend giving this a try. It may feel intimidating at first, but it is absolutely doable.
And as a bonus, if you have leftover hardwood scraps, they are perfect for making small cutting boards or serving boards. Those would make such great handmade gifts.
Tips for Building Your Own Butcher Block Countertop
- Use narrow boards instead of wide planks to help reduce the chance of warping
- Dry fit your layout before gluing
- Work in sections if your glue starts to set quickly
- Use clamps on both the top and bottom during glue-up
- Sand thoroughly for a smooth, finished surface
- Apply finish to both sides of the top
Frequently Asked Questions
What wood is best for a DIY butcher block countertop?
Maple is a classic choice because of its hardness and durability, but alder, oak, birch, and walnut can also work depending on your budget and the look you want.
Can you build a butcher block countertop yourself?
Yes! With properly milled boards, plenty of clamps, and patience during glue-up, building a butcher block countertop is a very doable DIY project. And there’s no shame in outsourcing the work if you have a local hardwood store that offers services like large drum sanding and squaring up edges.
What glue should you use for butcher block?
Titebond III is a popular choice because it is waterproof and food safe once cured.
How do you finish a butcher block countertop?
You can use butcher block conditioner, mineral oil, or another finish appropriate for the intended use of the surface. Currently, my favorite finish is wood honey by Total Boat. It even comes in a cute honey bear bottle.
DISCLOSURE
This post contains affiliate links. Should you purchase an item using one of these links, I may receive a small commission at no extra cost to you.