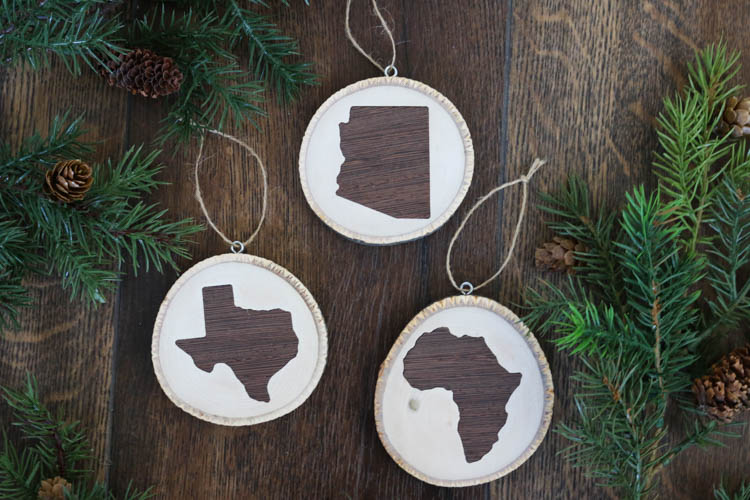
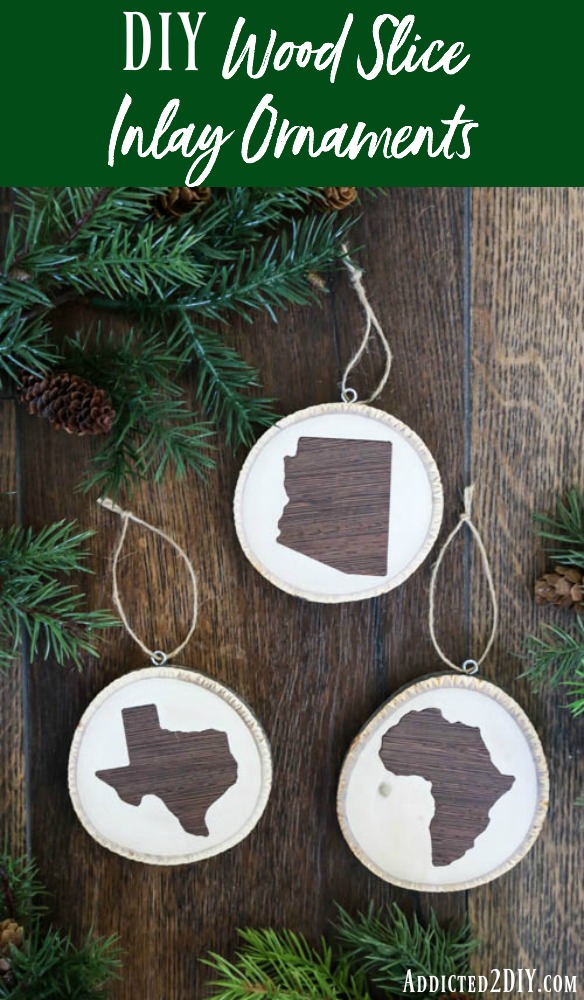
Hey everyone! I’ve got a great gift idea to share with you all today! I love to give gifts with sentiment and these wood slice inlay ornaments are both sentimental and can be displayed for years to come! I’m partnering with Inventables and DAP today to show you how to easily make these ornaments using the X-Carve and Rapid Fuse Wood Glue. I’ll be sharing the step by step tutorial on how to make these ornaments and I’ve also included affiliate links to the products I used for your convenience.
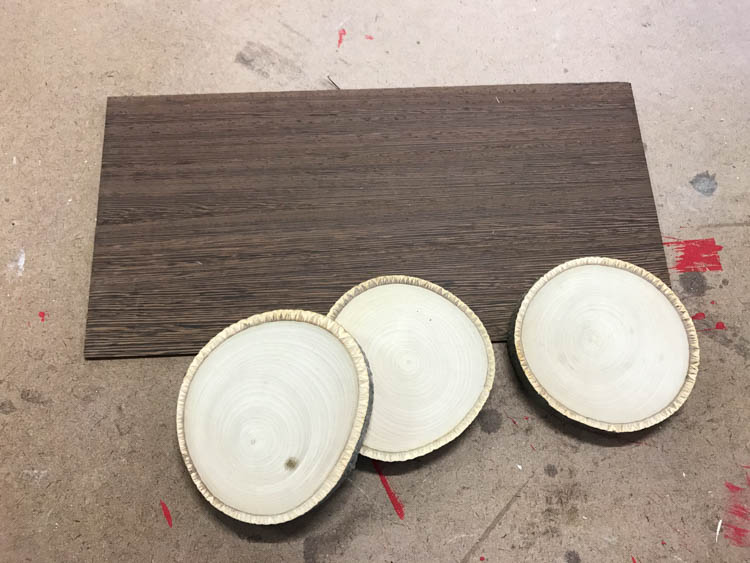
I bought three wood slices from Michaels and used 1/16” African Wenge for the inlay, which is sold on Inventables.com. The contrast and grain are gorgeous against the wood slices.
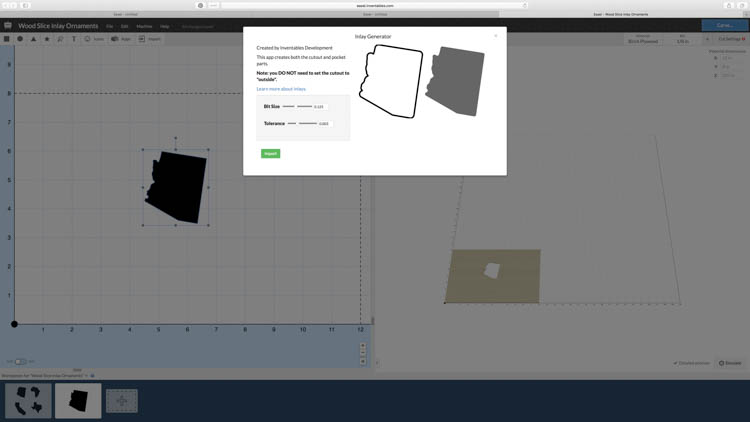
The first thing you want to do is design your inlay in Easel, which is the free design software on Inventables.com. These wood slices are about 3 1/2”, so you want to make sure your design isn’t too intricate that it can’t be carved at a smaller size. I downloaded shapes of states online and used them, but you can use any of the icons within Easel or even your own custom drawing. Once you have your image uploaded to Easel, use the inlay generator to create both the inlay and the pocket.
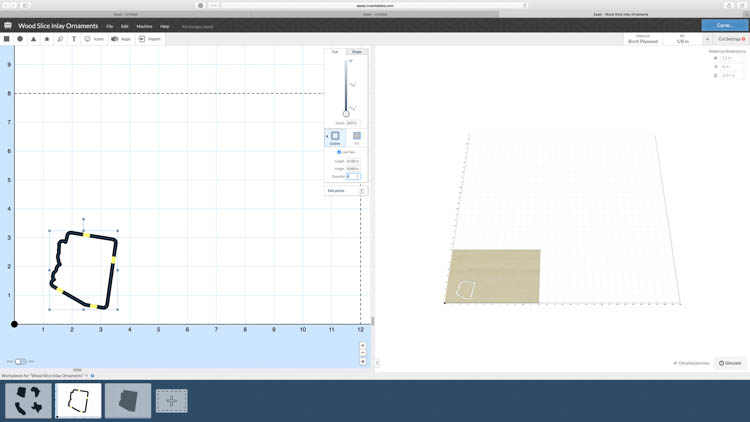
Open a new window at the bottom of the page within your project, then copy and paste the inlay cutout onto the blank workspace. Measure the thickness of your material and input it into the material dimensions. You’ll want to use tabs to ensure that your material does not move around while it is carving. I sized my tabs at .125” wide and .04” thick for the 1/16” wenge.
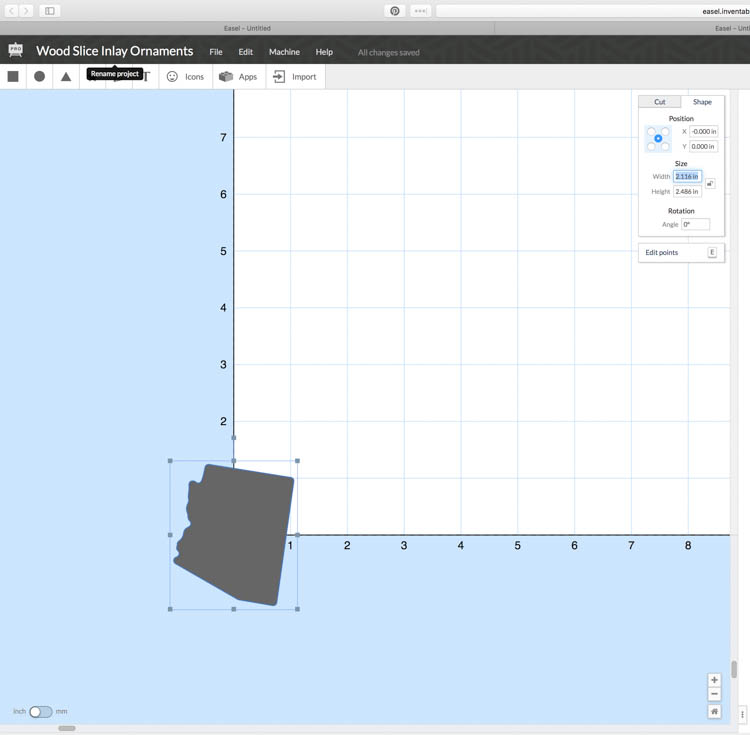
For the wood slice milling, you’ll want to copy and paste the pocket design into another blank tab. Because the wood slice is round, you’ll want to set your home position to the center of the wood slice. To do this, you highlight the design, and click the shape tab on the box in the upper right of the photo. You’ll see five dots which represent where you want the home position to be. Click the center dot, then set the X and Y axis to zero. This centers your design over the home position dot.
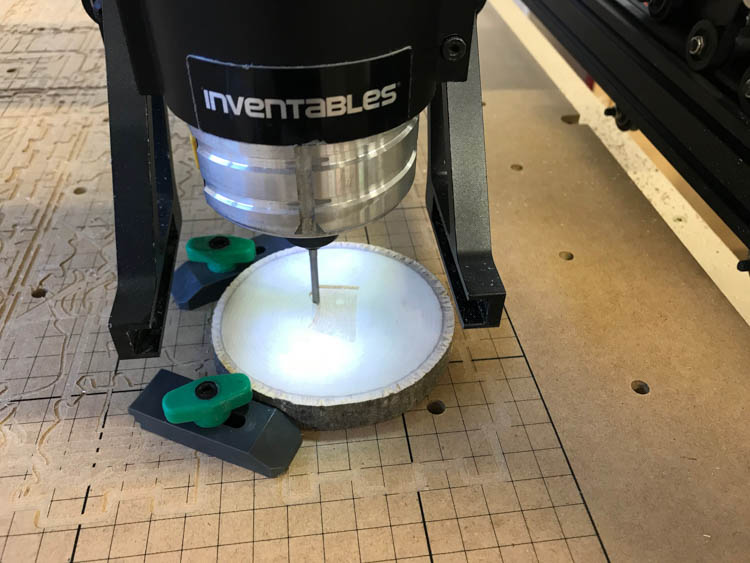
Secure your wood slice to the waste board with double-sided tape and then set the home position of the spindle centered over the wood slice. You can see that I used clamps here for added stability, but they ended up not even being necessary and I didn’t use them on the others I carved. Carve out the pocket for your inlay and then remove the wood slice.
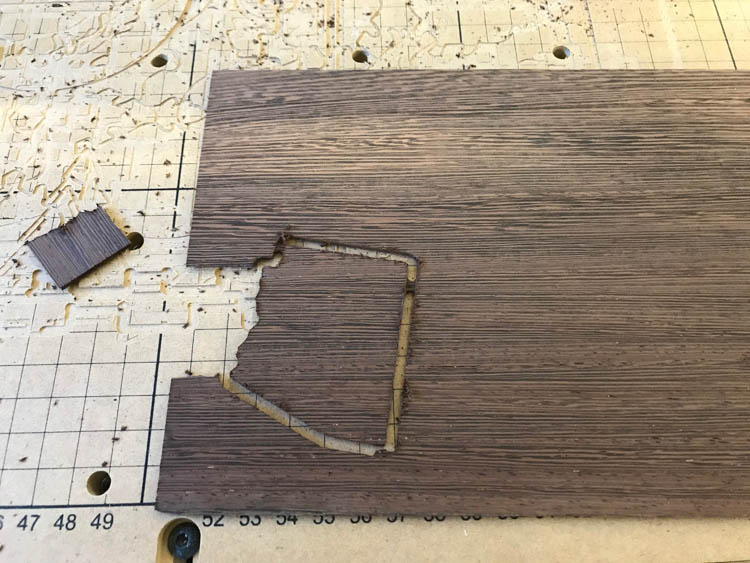
Secure your inlay material to the waste board with clamps. You can see that one part of mine chipped out, because I didn’t have a clamp on that side. It didn’t do anything to the design, though, so it wasn’t a big deal. Once the inlay is carved, carefully cut the tabs with a razor knife and then gently sand them down.
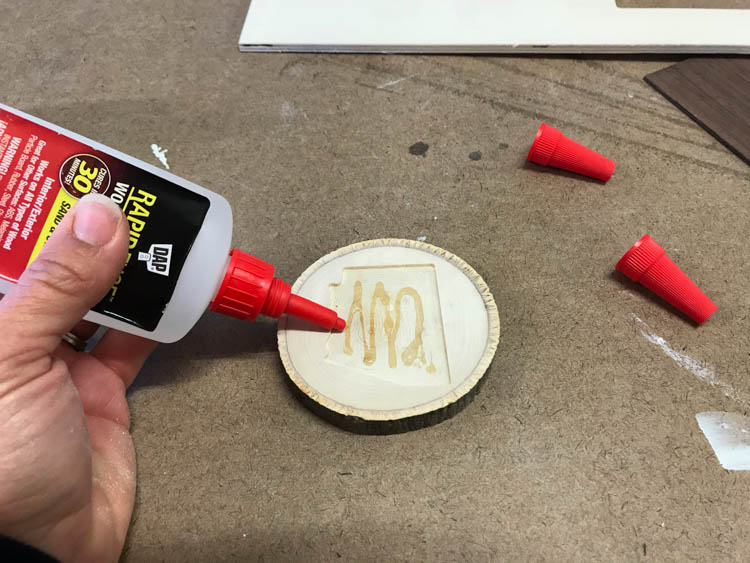
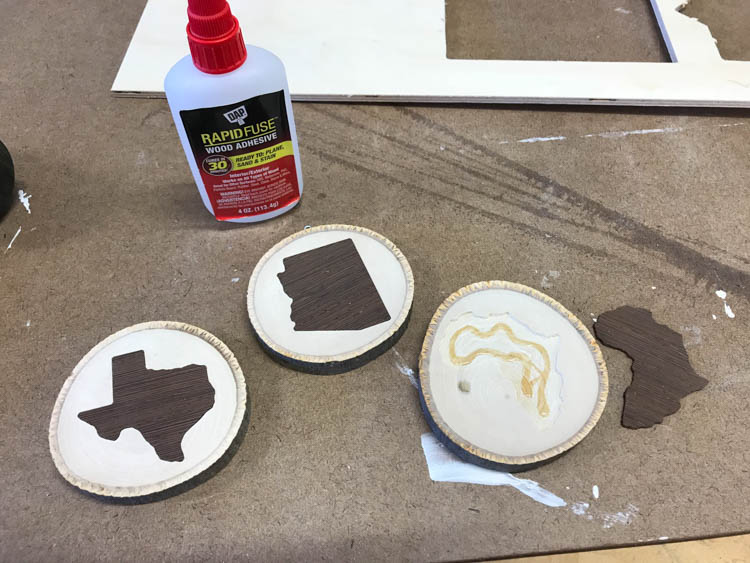
Add glue to the pocket in the wood slice to keep the inlay secure. I used Rapid Fuse Wood Glue from DAP, because it is crazy strong and it cures really fast.
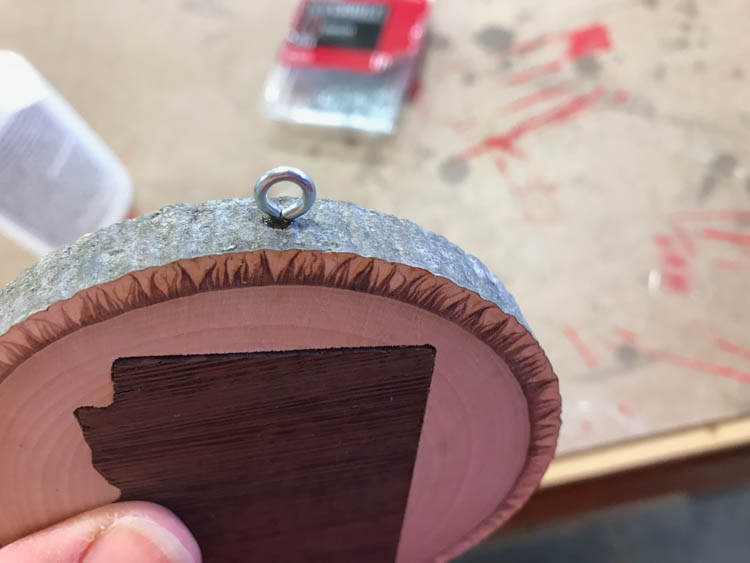
Drill a small pilot hole into the edge of the wood slice, dab a small bit of glue onto a small eye bolt, and then screw into place. The glue will prevent it from moving and at some point being stripped out.
I followed these same steps for the remainder of the ornaments I made and still had plenty of the wenge left to make more!
I’ve made three of these ornaments so far and I absolutely love them! I definitely need to make more before Christmas. They’re so fast to make and I can sign the back of them to make them double as a gift tag this Christmas! We have very good friends who travel to Africa every year on medical mission trips and the Africa ornament will definitely hold a very special place in their hearts. Especially given that it is made with African wood. The only thing I now wish I had was a branding iron. It would be so cool to add that to the backs of these! Be sure to check out my other projects on Inventables as well! There’s some great ideas that are still quick and easy to make before Christmas this year!
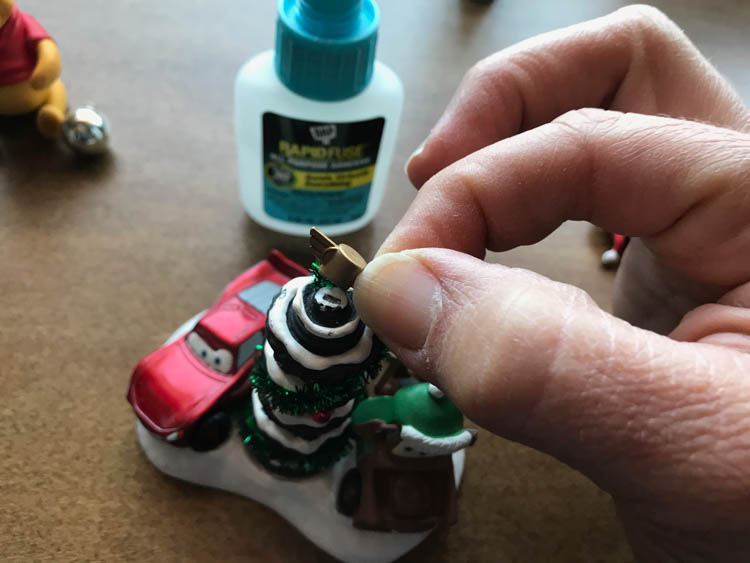
Oh! And if you’re like me, you probably have a basket full of broken ornaments that you haven’t gotten around to fixing over the years. I finally quit putting it off and grabbed my RapidFuse adhesive and fixed them all this year! It only took a few minutes and most of them are good as new! Some are still missing a few pieces here and there, but nothing that hampers them from being hung on the tree! Checking this off my list and not stressing about losing more of those loose pieces was definitely a relief.
DISCLOSURE: I was provided product and compensation for this post. All opinions and ideas are 100% my own. Please read my disclosure policy for more information. This post contains affiliate links. Should you purchase a product from one of these links, I will receive a small commission at not extra cost to you.

I just received my ryobi tools.They are great to use—THANK YOU & also RYBOI
Thank you so much for taking the time to enter the giveaway! Enjoy your new tools!