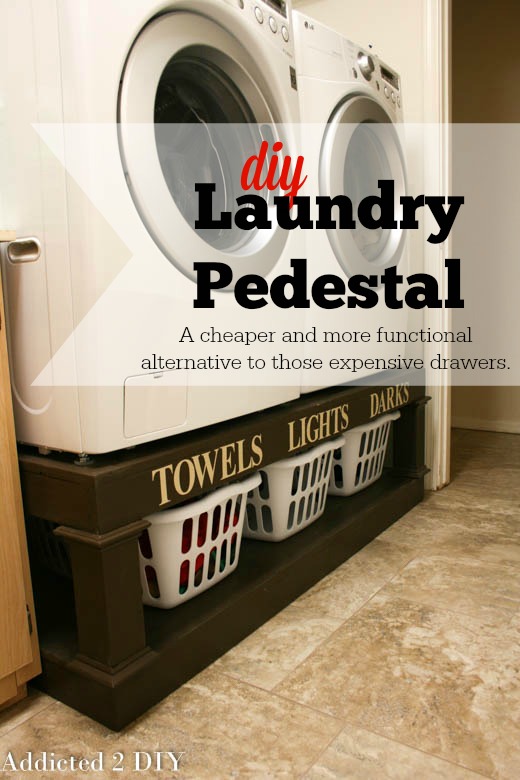
With the new year starting, it seems that everyone (including myself) is looking for ways to get organized. This laundry pedestal is a great start for your laundry room. My husband and I built this a year and a half ago for our new washer and dryer. There are a lot of oddities with our house (I could go on and on), but one of them is the size of our laundry room. At first glance, it’s a good-sized laundry room. Unfortunately, the space where the washer and dryer go is actually very narrow. Our old washer and dryer used to stick out so far that we could just barely close the laundry room door. Our dryer vent hose was at an angle that probably wasn’t ideal. My husband had wanted to purchase those expensive drawer pedestals for years, but we just couldn’t justify spending hundreds of dollars on them, and we didn’t know what we would put in those drawers. When I showed him these plans from Ana White’s website, he was totally onboard with building our own. We also happened to need a new washer and dryer at the time, so we went on the hunt for those as well. Because of the location of our dryer vent in the wall, we had to find a dryer that could have the vent hose attached on the side. We searched for weeks and happened to find the perfect set at the Best Buy near our house. It was closing, which we hated, but it also meant that we got an awesome deal on the pair.
We got all of our materials for this project at Home Depot. The laundry pedestal cost us around $125 to build. That’s less than purchasing one pedestal! You can find detailed instructions for these plans here.
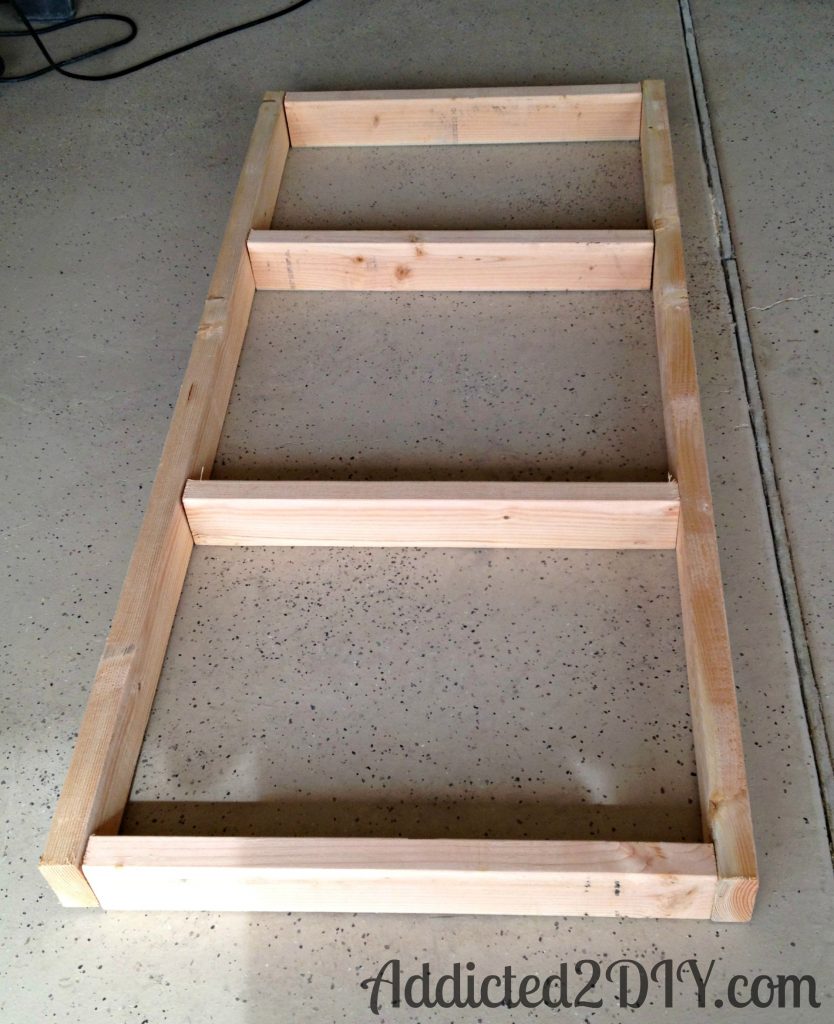
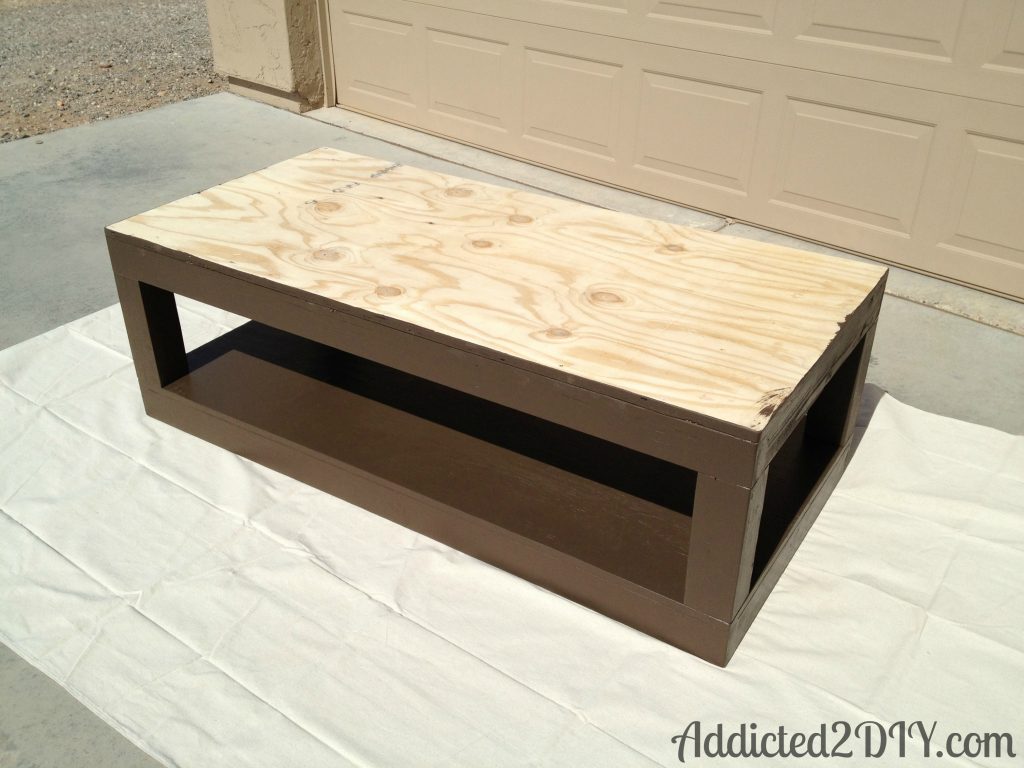
We started by building two frames. The top frame (the one that the washer and dryer sit on) will have more center supports than the bottom frame (pictured).
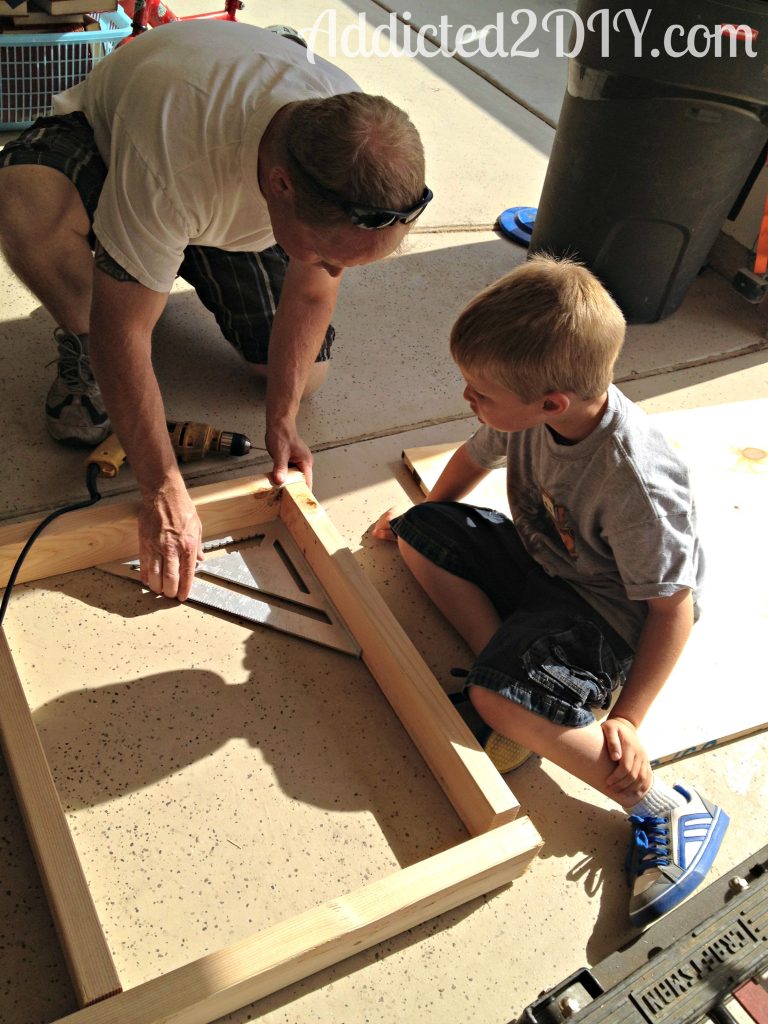
We squared everything up and screwed the frame together with 3″ wood screws. If you have a Kreg Jig (which we didn’t have at the time), you can also drill 1 1/2″ pocket holes and attach everything with 2 1/2″ pocket screws.
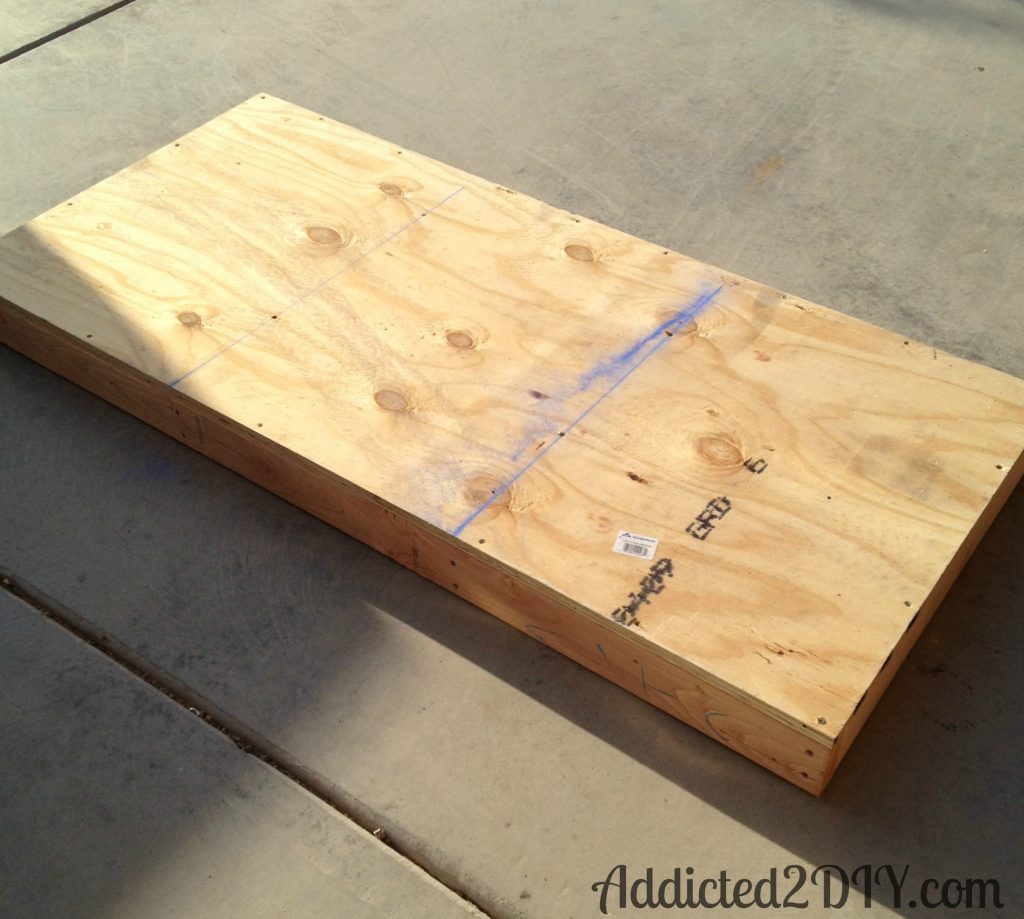
We cut our plywood pieces to size and snapped some chalk lines, then screwed them down with 1 1/2″ wood screws.
I got caught up in the moment and didn’t take any pictures of the next few steps. After the two frames were done, we attached the 4×4 pieces following the plan instructions and then filled all of the screw holes with wood putty.
The wood soaked up the paint like crazy, so we used two coats to paint the whole pedestal. After painting it, we attached the trim pieces with caulk and finish nails and then painted those as well.
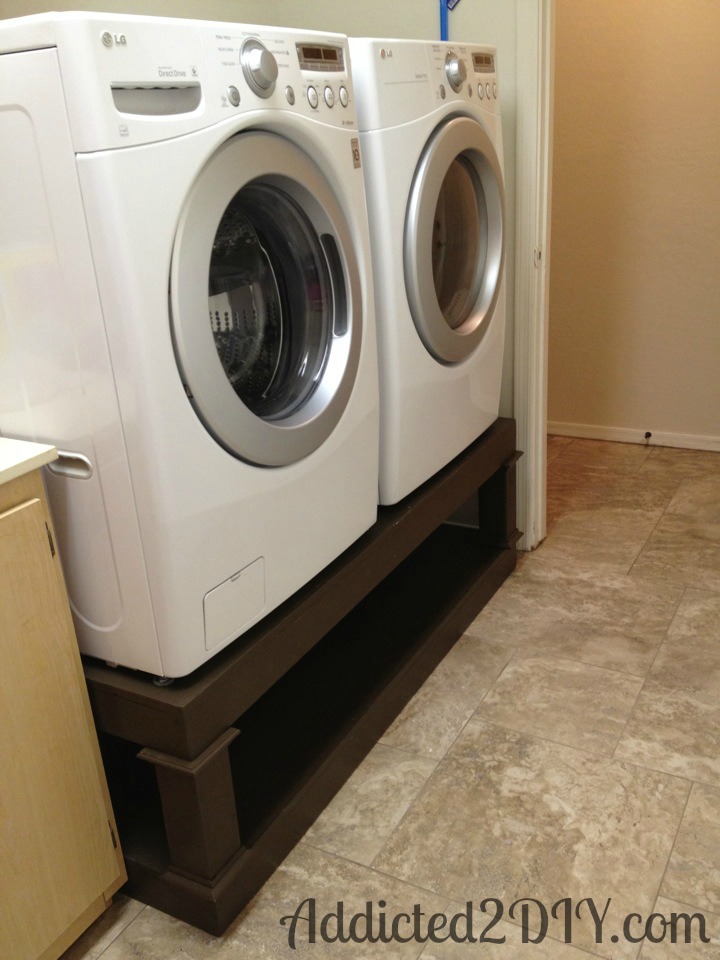
We couldn’t wait to get the pedestal in our laundry room.
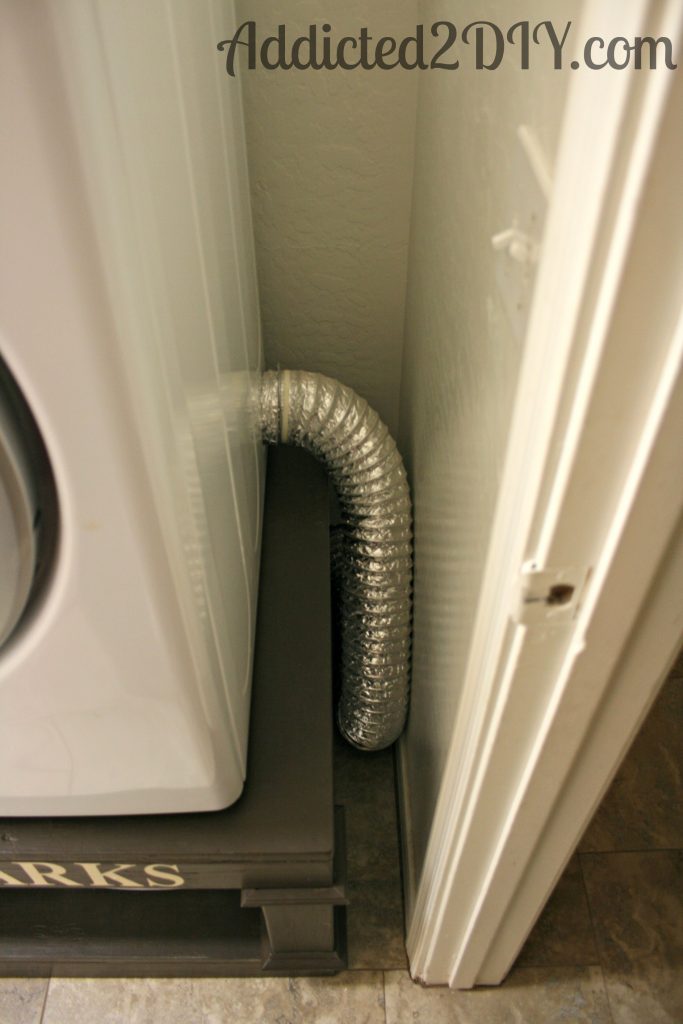
Now we don’t have to worry about our dryer hose being kinked at an odd angle. It sits nicely on the side of the dryer.
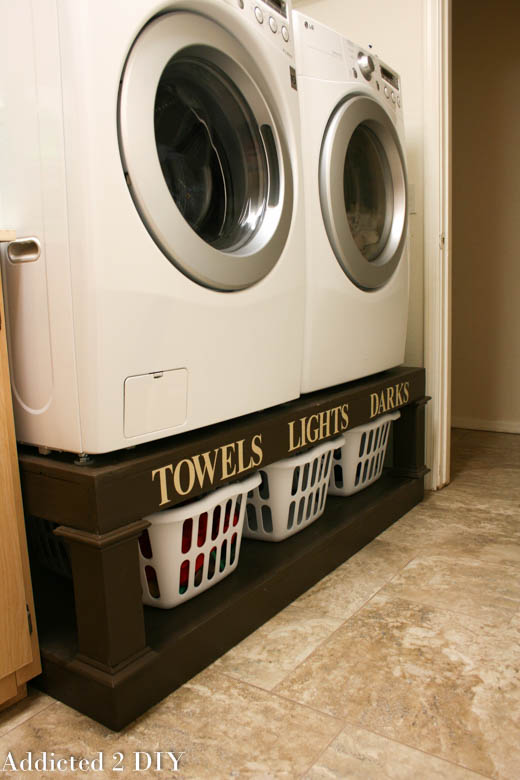
I got the laundry baskets at Walmart and then I used some vinyl to cut letters out to label the baskets. The best part is that my kids now sort their own laundry! It makes my life so much easier to be able to ask them to do that before I start a load. Plus, we now have a place to put dirty towels as well. Plus, I can just prop the big laundry basket right up to the dryer and take clothes out. I seriously love this thing. We’ve actually made a second one as a gift for friends and they love it too.
As always, if you have any questions about the project, I’d love to answer them. If you are thinking of buying those expensive pedestals, this option, in my opinion, is so much more functional. Please feel free to share, pin, like, etc!
~Katie
{This post may contain product links in which, if you purchase anything from those links, I will receive a small commission at no extra cost to you.}
You can find me over at these link parties:




This is so much better than buying pedestals! Great idea!
Melissa @ A Prudent Life recently posted…$0.99 Ikea Frame Makeover – Rub ‘n Buff Style
Thanks, Melissa!
This looks so good. I wish we had bought the front loading w&d just to have them on a pedestal like this.
Thanks! We had looked at top load when we were buying these, but my husband and I really wanted them on pedestals.
Do u get any vibration with your dig pedestal?
Not really, because our washer and dryer are balanced well. Sometimes if there is something in the washer that is overly heavy or bulky (like a load of jeans), it will make some noise, but for the most part I hardly notice it.
Um, awesome!! This is such a great idea and you probably spent a lot less than the pedestals would’ve cost! Love it!!!
So much less! One pedestal is about $250! Thanks for your sweet comment and stopping by, Christy!
I love the idea and concept of this. It would help alot with keep everything organised instead of looking like a tornado hit. I would love if you would come link this up at our Wednesday party.
Of course! I’ll stop by there next! Thanks for stopping by:)
I LOVE this! I bought my new washer and dryer the day after we moved into our new house because the previous owner’s existing washer stopped working. I got a fabulous deal on the pair I wanted in a beautiful blue. The only problem was that they didn’t have the pedestals in blue. They said I could get them in red or white. So I went with out. I mentioned building a pedestal ourselves to the husband but he just rolled his eyes. I’m totally showing this to him as soon as he gets home! Thanks so much for the how-to!
Bonnie @ Our Secondhand House recently posted…New Kitchen Faucet
This was seriously so easy to make and WAY cheaper than buying a pedestal. I know people that have the pedestals and they have no clue what to put in the drawers, or they forget they have stuff in them. Having the baskets underneath makes this so great for laundry sorting!
Thanks for sharing over at Do Tell Tuesday, this is awesome!
Diane @ Vintage Zest
Diane @ Vintage Zest recently posted…Do Tell Tuesday #6, Features and an ANNOUNCEMENT!
Thanks!!! 🙂
So handy Katie- I love it! I had this on my laundry room wish list last year when we ‘did’ the laundry room but I also wanted to be able to use the top of the machines as a counter surface because it is a laundry/mud room combo so I had to forgo these. Wish I didn’t have to – they are so practical!! Thanks for the tutorial- I am pinning it:)
Krista @thehappyhousie recently posted…Work it Wednesday {features} and Two Amazing Giveaways!
Thanks Krista! I do love countertops above the washer and dryer, but we actually have a decent amount of counter space in the laundry room. It’s ugly, but until we get to the point of remodeling the laundry room, it’s what we’ve got to deal with;)
I absolutely LOVE this idea! My w&d are in the basement which tends to flood so I thought maybe we could use this idea and just make the 4×4’s a little taller….oh and my husband says in grounded from your site cuz that means more work for him! Ha Ha! Love it!!! 🙂
Lol! Your husband and my husband sound like they would get along. I get an eye roll with every new project I throw at him;) you could make the 4x4s taller, but keep in mind that this pedestal is already taller than the standard pedestals you would purchase. This puts the washer and dryer about 19″ off the ground. Just an FYI:)
Nicely done. I’m gonna make this at home too.
Christopher James recently posted…boyfriend guru system
Thanks for stopping by!
Great tutorial! We put our washer and dryer on a pedestal this Fall and I am so glad we did! Thank you for linking up to the Hit Me With Your Best Shot Link Party…I’m featuring you this morning on OneKriegerChick!
Happy Weekend!
~Ariean http://onekriegerchick.com/
Ariean @OneKriegerChick recently posted…12 Inspiring Interior Ideas {Knockout Features}
Thank you for the feature! I’ll be sure to link up again next week!
Katie! These are incredible! I’m having some serious laundry room envy over here! Love, love, love what you did! Thanks so much for linking up at Hit Me with Your Best Shot! Hope to see you back tonight!
~Abby =)
Abby @ Just a Girl and Her Blog recently posted…3 Awesome Super Bowl Party Games!
Thanks, Abby! I do love it. I will definitely be stopping by your next party!
This is so awesome! Love the storage underneath!
Susan @ Oh My! Creative recently posted…Love Valentine’s Day Burlap Sign
Thank you Susan! It definitely has made my life easier:)
I love this idea and much more functional than the stand that comes with those sets.
Tammy recently posted…Blueberry Strawberry Muffins
Thanks for stopping by, and I totally agree! I am so glad we built this instead of buying stands.
I am LOVING this project! We sure could use one of these 🙂 Pinned!
Trish – Mom On Timeout recently posted…Chewy Chocolate Cherry Cookies
Thank you! I love it too!
Hey there! Just found your site via a post shared by Kreg Tools on Facebook. Nice work! Mind if I share this article in my “interesting stuff from around the web” series? Great project Katie!
Sure! That would be totally fine:)
I am a diy’er myself…what did you use to get the washer and dryer on the pedestals? Nice work!
My husband and I just lifted them up. The washer was pretty heavy, but we manged:)
Since my family is taller we got the pedistals with our set 8 years ago. Having said that I can see how this under everything could help with space a ton and eleminate the clutter that naturally happens on top otherwise. It will also make it easier to get to the dryer bottom panals to open it up for its semi-annual cleaning, and any repair work to the element, since it will be further off the floor.
Thanks for stopping by! It also makes the monthly cleaning of the washing machine filter and draining the water much easier to have it elevated this much. We love how functional it is and are so glad we built it.
Thank you for sharing this project. I’m definitely building this for our laundry room! We had our washer and dryer stacked, but then, when we got a new washer that is a different brand than our dryer, we had to unstack them. Since then, our little laundry room is quite cramped. I can’t wait to try this! Thanks again.
Karen @ Dogs Don’t Eat Pizza recently posted…Scene on Saturday: Wishful Thinking
I hope you like it! I am definitely glad we went this route instead of buying some. Thanks for stopping by! I’ll be visiting your blog next:)
This is brilliant. I bought some of the super expensive pedestals that matched my washer a dryer and have yet to use them a single time. This is such a better idea because I could use the space below for clothes.
Thank you, Stephanie! That was one of the things that stopped us from buying them. I wasn’t sure what I would put in the drawers.
This is amazing Katie! Thank you so much for sharing this with us!
Thanks! I just love it:)
Great use of space in the laundry room! Thanks for sharing this fantastic project at The Pin Junkie. It was featured at this week’s party. Please stop by to grab a featured button and party with us again at http://www.thepinjunkie.com/2014/02/friday-link-party-54.html
Bonnie @ The Pin Junkie recently posted…Friday Link Party #54
Thanks Bonnie!!!
I LOVE how this turned out! It’s crazy how expensive those pedestals are! I’m pinning this for when we get a new dryer and washer. Thanks for sharing how you made this!
I would love it if you’d link this up to the Frugal Crafty Home Blog Hop–we love seeing awesome projects like this!
Carrie This Home recently posted…Frugal Crafty Home Blog Hop 63
Thanks Carrie! I will definitely link up!
Hi Katie, I absolutely love the laundry pedestal that you made – it’s so much nicer (and sturdier I’ll bet) than the store bought metal ones. Kudo’s on a job very well done. You’ve inspired me.
I am new to DIY and have never used power tools (Yikes!). I was hoping you would be kind enough to answer a couple questions for me …
One – did you use a nail gun or just an old fashioned hammer and nails?
Two – did you cut all the wood at home or get the hardware store to do it. Someone told me that you could get them to do all the cuts for you? True or False?
Thanks so much
Nancy
Nancy recently posted…WordGirl …
Hi Nancy! I’d be happy to answer your questions. We didn’t use a nail gun. We used a drill/screwdriver and wood screws. I highly recommend using a Kreg Jig for projects like this though. It allows you to have good solid wood joints and you don’t have screws to try to hide later. Plus the Kreg Jig saves us a lot from the wood splitting like it would with traditional screw joints. We purchased our wood from Home Depot and had them cut the majority of it. At the time, we didn’t have a saw big enough to cut the 4×4 legs. They have always been great about cutting wood for us (Lowes too). It’s especially convenient for them to cut the plywood.
Love this pedestal and would love to have it, but I am afraid that it would make the machine too high for me to put my laundry soap into the dispenser. I guess we will have to measure it out and see!
I’m 5’4″ and I don’t have to stand on my tip toes if that helps:)
Great idea probably add two suggestions to it if anyone decides to do this project:
1) make the platform a little bit larger size wise so you can install some trim molding like a 2 x 4 as a guard just in case the washer or dryer should decide to ever shift or move and make the front piece removable just in case it needs to come down off the platform for whatever reason. Making the platform a little larger in case you also need a replacement. Would be nice if I had a ramp to load them up the platform as my washer is rather heavy. (lol)
2) I would also suggest adding (4) 2″ dolly wheels. Place (2) lockable dolly wheels in front underside of the platform and (2) regular dolly wheels in the rear under the platform so you can always move it out to service behind the machines. Like replacing or cleaning the dryer exhaust vent hose which should be done annually.
Thanks for posting! We’re planning to start this project shortly. Both our machines broke in the past week (15 month old Samsungs) and now we’re trying to figure out the best way to build it so the machines can still be serviced. They charge more if the machines are difficult to access. Any suggestions? Thanks!
I would definitely wait to put them up on the pedestal until after they are serviced, then. As far as accessing them, I’m not really sure. It really depends on the layout of your laundry room. Ours is a very tight space, but if you have open wall space on either side, then you shouldn’t have any problem with just scooting them a little to access the rear of the machines, if needed.
How do you access the spot where the vent goes through the wall for cleaning? I would love to build some pedestals but worry I’ll block my wall vent.
Ours is to the side of the pedestal, so it isn’t hard to access. I know some people cut a hole in the top of their pedestal to allow the hose to fit through and then into the wall.
The website with the plans no longer works. Do you have them still?
Her site must be temporarily down. It was working a little while ago. Hopefully it will be back up and running soon!
Are there limits on how tall you can make the pedestal? We are looking at putting our cat boxes under them but they would have to be about 20-22 in high.
I don’t think there would be a limit. It really is up to how tall you are and how high you want to reach
How did you get the washer and dryer lifted up on to the pedastals?
Thanks!
We lifted them ourselves. They were brand new, so there wasn’t any water in the drum of the washing machine yet. They were still heavy, but we got them up there.
I’ve thought of doing a project like this but I have a question. Once complete and the washer and dryer are in place did you have trouble with vibration? Do the machines stay in place? I’m worried this part of the pedestal would have problems.
My washer and dryer were brand new at the time, but the washer still vibrates when the spin cycle is on. I haven’t had a problem with it moving, shifting, or weakening the pedestal at all, and it’s been 3 years of almost daily use:)
Great DIY Project! I have priced out the stands that go under front loading washers and dryers and the are so very expensive. Thanks for sharing.
I love this idea! I see everyone talks about them being front loading….it will work with top loading as long as I can reach the washer, right? I didn’t know if there was a reason that it had to be front loading.
It would be pretty tough to reach the bottom of the washer if you were to put these under a top load washer. You could always create a smaller one that will work with just the dryer.
Building the bottom pedastal can u build out of 2×3 or 1×1 to make smaller on bottom since only laundry basket will be on it or will 1×1 be to little weight to support weight of washer dryer. Will it collaspe. Thanks
You could possibly use 2x3s for the frame, but you will want the legs to still be made of 4x4s for strength. I wouldn’t use 2x2s or 1x1s for it.
Since the pedestal is sitting on a solid floor (i.e., one that would support the W&D sitting on them without the pedestal), the bottom platform is really only providing vertical support at the base of the legs and only moderate lateral support for the legs (i.e., keeps the legs from spreading apart). There’s no need for all the strength that the bottom platform in this design is providing. A simple sheet of plywood would accomplish the same lateral support needed. For added stability 1x4s across the back and side edges along the bottom should be all that’s required. This approach would allow the pedestal height to be shorter (if needed to fit under existing cabinets) or allow more room for taller
baskets.
Love love love these ideas! will definitely try out in my house sometimes. Thanks a lot for sharing!!!
Pandoraflora
https://www.pandoraflora.com
What are the measurements? Width, depth , length and height? Really like this idea. Another add on the honey-do list.
Hi Thomas,
It is 28″ deep, 60″ wide and 19 1/2″ tall
This is a great idea but I was wondering how do you stop your washing machine and dryer moving from the top of these when they are on? (i.e. due to the vibrations?)
Thanks
Mine haven’t moved at all, and my washer can sometimes vibrate a lot.
Love the pedestal! Just a suggestion, you should consider replacing that vent hose with a rigid metal hose. Those plastic ones are a huge fire risk
Thanks for the tip! I’ll have to look into that.
My wife will love this one! And we have exactly the same appliances 🙂
What a great idea. I don’t think I can train my partner yo use them correctly though!
can you make a cut in base for dryer vent and another in top to attach? This would allow platform to sit flush against was but concerned about stability Thank you
Since the base is made of 2x4s, you would not be able to make a cut for a dryer vent to fit through. I’m not sure of the orientation of your dryer vent, but you could make a hole in the top and then run it through the hole and then into the wall.
Seriously need to get rid of that fire hazard foil type vent hose.
Thank you for your plans!! I already have a set of pedestals under both my washer & dryer. I am in need of a new dryer & we have been thinking of replacing the washer as well but we were very irritated to learn that the pedestals cannot be reused as they change the footprint (feet) of the units each model year…basically a way to get you to buy a new one each time. I happen to love my pedestal drawers, not only for the height but I store old towels & rags in them as I never had room in my old house. But we have since moved & have room in my garage now. I’m thinking I could use the old drawers in my garage & build this! Definitely makes the thought of buying both a washer & dryer easier now!! 🙂
Oh wow! That is just infuriating that the companies do that! I’m so glad you found these plans so you can still have the height and storage you’re looking for without the cost of purchasing the pedestals.
Lovely and loved the pictures. I was wondering if the washer sometimes dances because of the load and it moves toward the edge. Do you have the feet anchored down. Thank You, Jeanette,
We’ve had this for over 4 years and it hasn’t moved once. Our washer sometimes gets a little off balance, but we have never had to move it back into position:)
I am unable to view the original plans from Ana. Any chance you can email them to me please?
Here is the link to the plans. http://www.ana-white.com/2011/01/sausha’s-washerdryer-pedestals
Hey!I just wanted to let you know I mentioned this post in one of my blog posts because I used the coffee lover tin idea last year. Here is a direct link to the post if you would like to check it out
My washing machine tends to dance during a cycle. Would this pedestal be a bad idea to put under a washing machine that shakes??
We never had an issue with ours. It’s extremely sturdy.
I love this. Question thought. My washer has the drain in the same location. How have you successfully drained your washer for cleaning without it going everywhere?
My Sara,
My washer has a hose on it, so I pull the little hose out and drain it into a cup. It definitely makes it easier when draining it from an elevated platform.
This looks amazing! And just what we have always needed. Unfortunately we are selling our house but I think this would really enhance our small laundry room for the sale but are on a time crunch. If we get Home Depot to do the large cuts as you suggested, how long do you expect this project to take someone with experience making wood creations?
Honestly, it’s not long at all to build. The time consuming part is the painting. Granted, that time can also be drastically reduced with a paint sprayer.