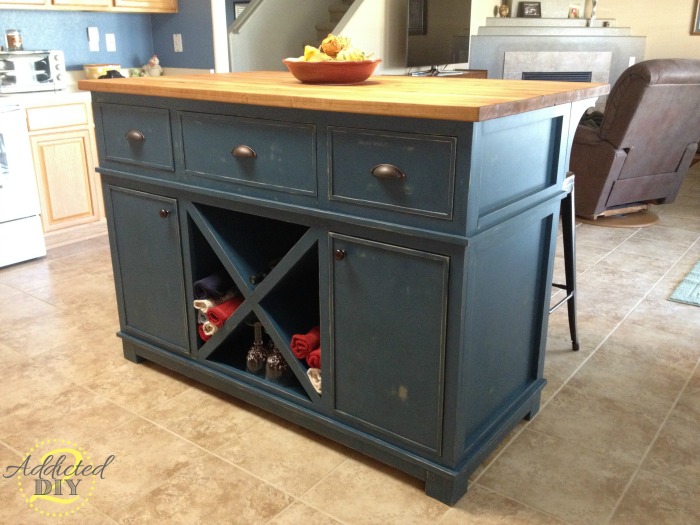
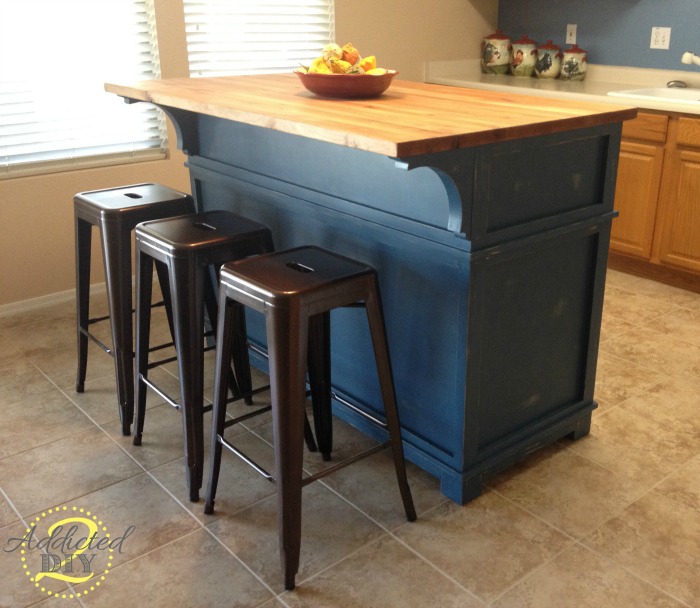
Hey everyone, I’m so excited to finally share with you the project I’ve been working on for the past month. My mom has wanted an island in her kitchen for pretty much forever. She finally decided that it was time to have one and she asked me to build it for her. We went through several different plans on Ana White’s website and she fell in love with this Shepard Kitchen Island. It was the biggest project I’ve tackled to date and my second solo build. I absolutely love how it turned out! I joked with my husband that I almost want to rip out our kitchen island and build another one. He didn’t think it was very funny;)
I haven’t tallied all of the receipts yet, but I would say that this project was in the $600 range. I built the butcher block top myself, which saved at least one to two hundred dollars. You can find that tutorial here. This island is big too. It’s 36 inches wide and 60 inches long by 42 inches high. It’s the perfect height to gather around at a party or to do some food prep.
We got all of the wood for the base from Lowes. I used 3/4″ maple veneer plywood and select pine for the base and trim. The corbels came from Home Depot. I had lowes cut the 3/4″ plywood down to size for me. Keep those scraps for later. Those will become the cabinet doors and drawer faces.
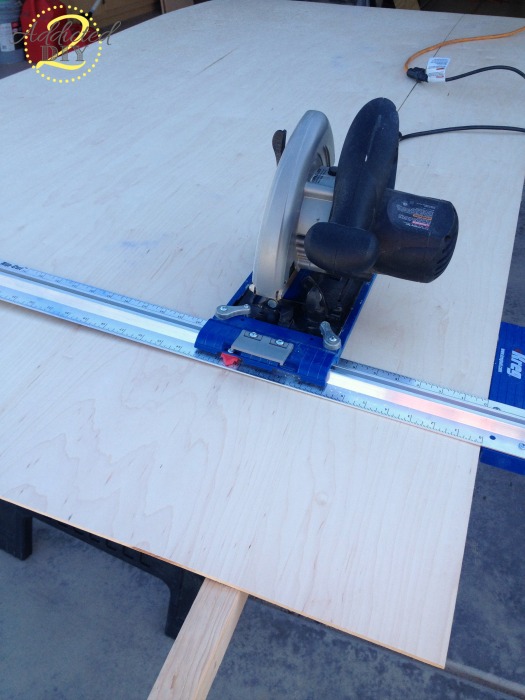
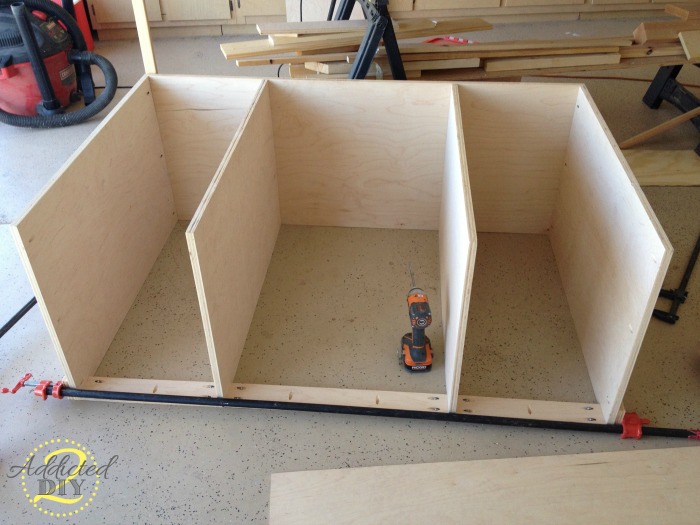
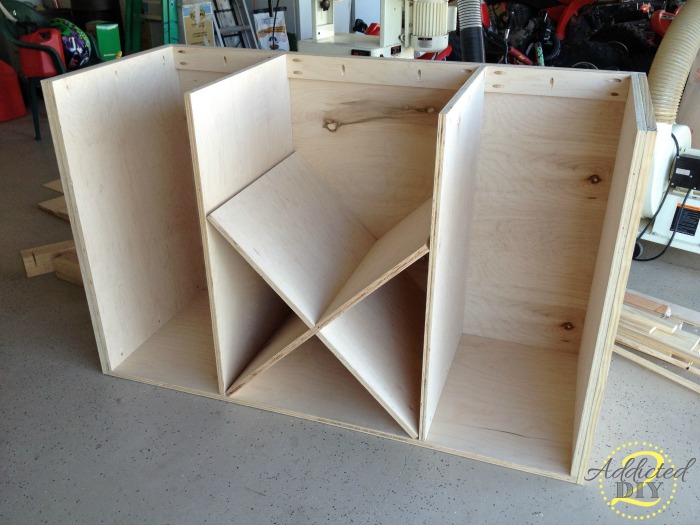
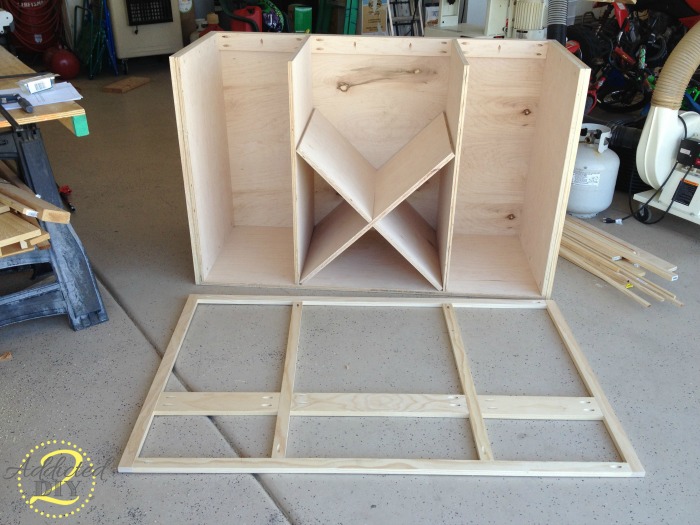
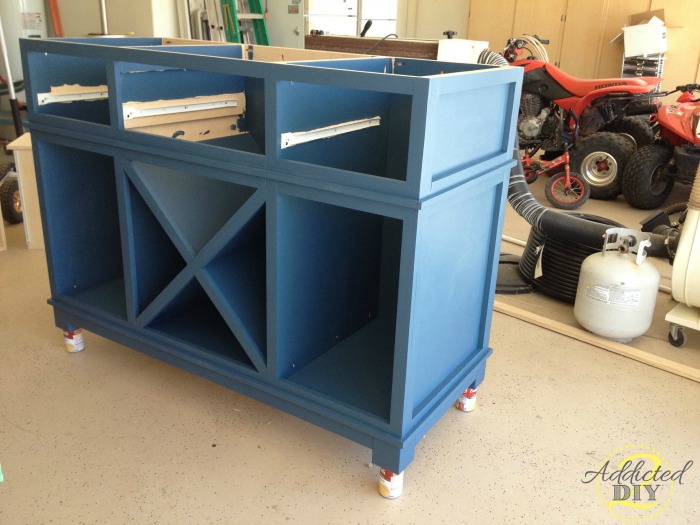
The base of the island is basically a plywood box. I used my Kreg Jig to drill 3/4″ pocket holes and glued and attached all of the pieces with 1 1/4″ pocket screws.
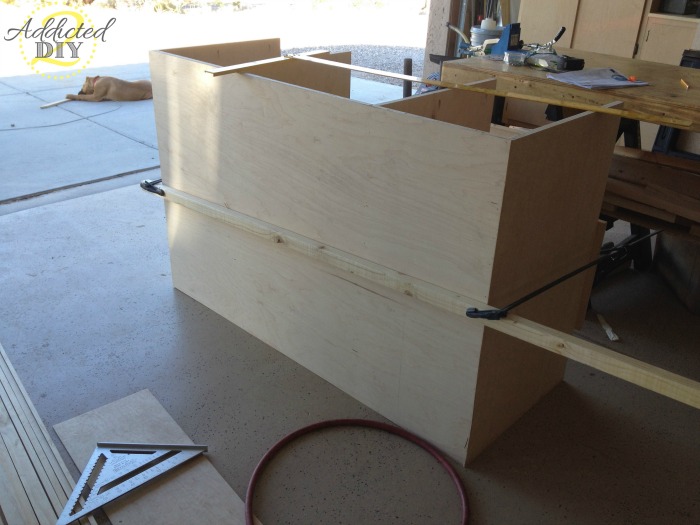
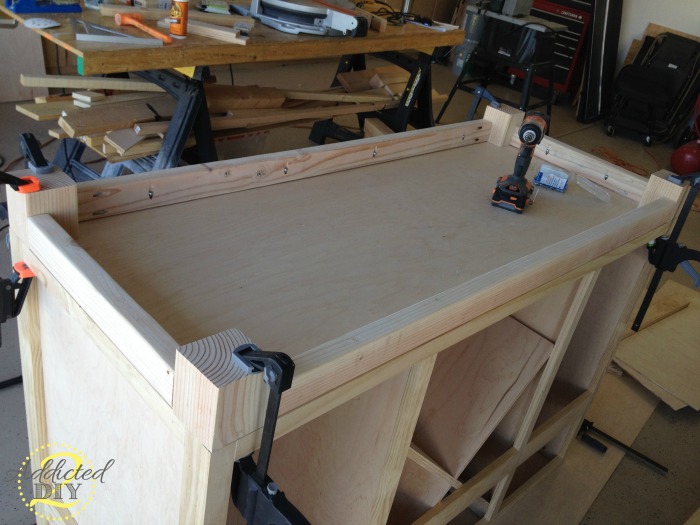
Using a brad nailer and glue, I attached the 1/4″ plywood backing with 5/8″ nails. I clamped a 2×3 across the back to hold the plywood against the cabinet and drawer inserts so that I could nail them.
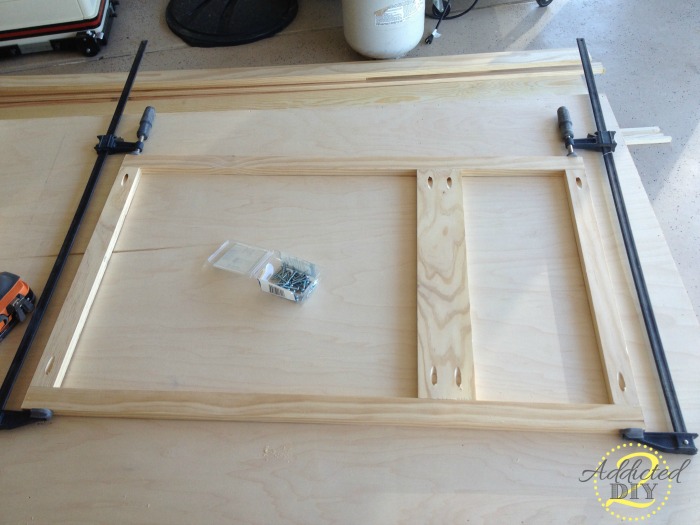
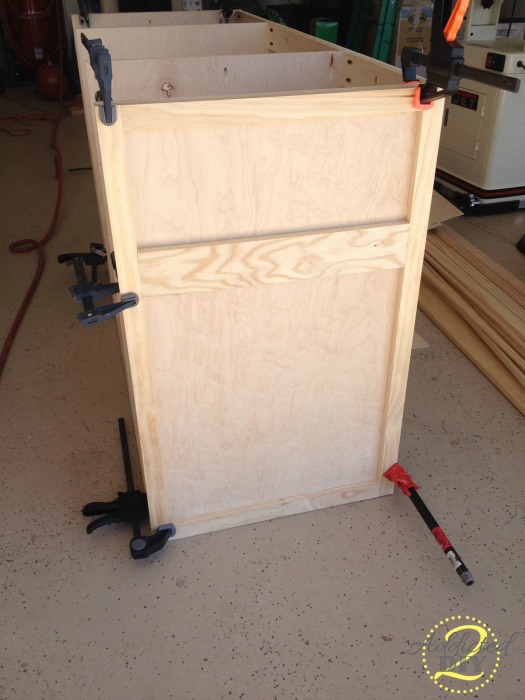
For the trim around the entire island, I built the frame with my Kreg Jig and pocket screws and then glued and nailed it to the island base.
You’ll do the same thing for all three sides of the island base.
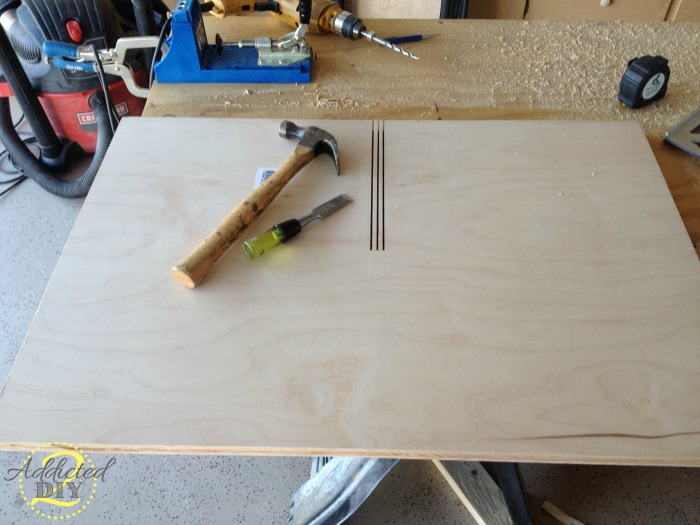
For the X in the center, I found the center point and marked my cuts to give me a 3×4″ wide slot. I cut both sides of the slot and then made one cut down the middle. Using a 3/4″ chisel and a hammer, I chiseled out the wood and made sure any excess wood was cleared away.
I did the same thing to the other piece for the X and slid the pieces together, then stuck it in the middle of the island.
I built the frame for the front the same way I did for the sides and back and then attached it with glue and 1 1/4″ brad nails.
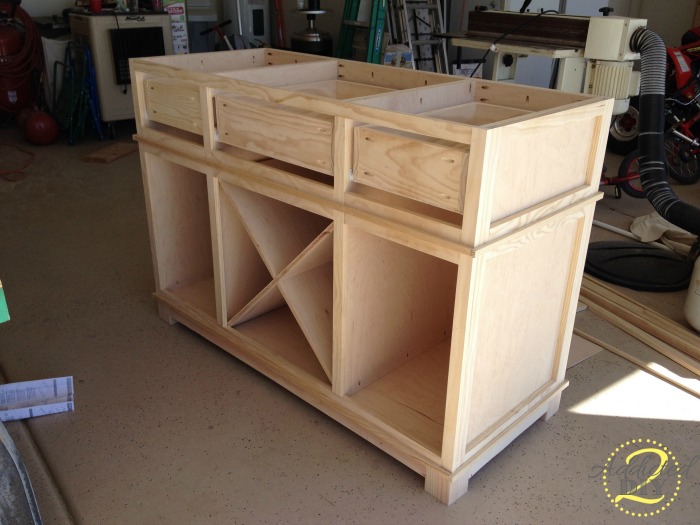
I carefully flipped the entire thing over to attach the legs and front and side aprons. I say carefully, because the X wasn’t attached to anything yet, so it just slid down when I flipped the base.
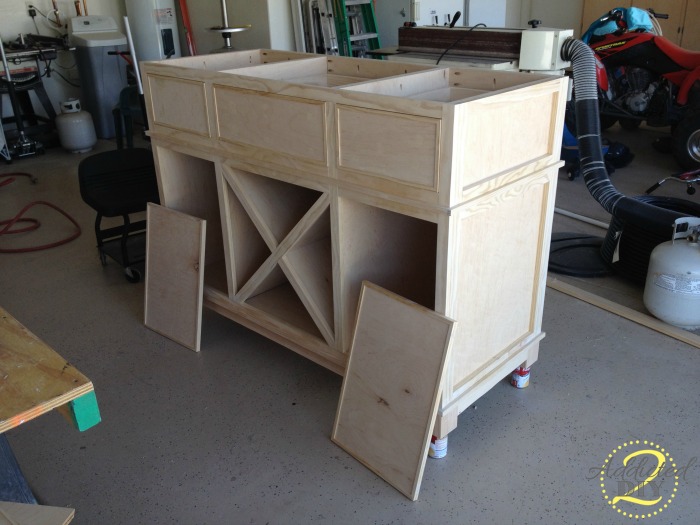
Once the legs are attached, it was time to build the drawers. You will want to build these to size. The guy at Lowes that cut the plywood warned me that they could only do rough cuts and could be plus or minus 1/4″ inch on their measurements. The bottom piece of plywood ended up being 1/8″ shorter than the plans called for, so I had to make adjustments based on that, which means one side has a cabinet door and drawer that is 1/8″ smaller. I also cut the 1×1/2″ trim pieces to size and glued and nailed them on.
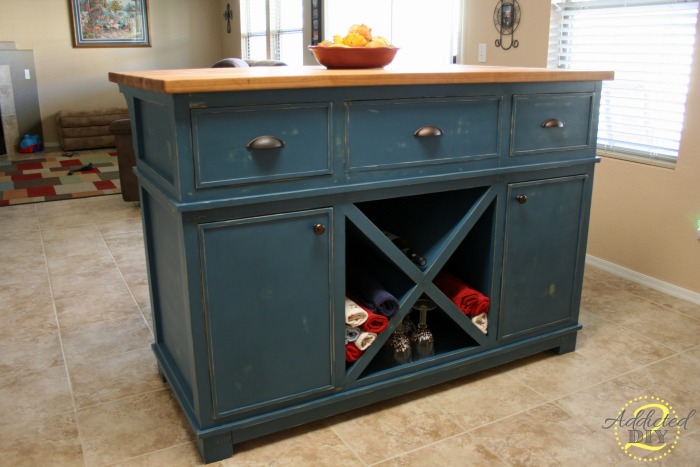
I used the leftover plywood to make the doors and drawer faces. They are trimmed out with the 1×1/2″ trim as well. The trim is offset by about 1/8″ inch, which gives the doors and drawers some nice definition. Since the plywood is made up of approximately 1/8″ layers, I used the super scientific method of just eyeballing it and nailed the trim to the sides leaving one layer of plywood on the bottom. I also glued and nailed the trim for the X, which secures it in place.
My mom chose Valspar paint + primer in Deep Twilight Blue. If you have a paint sprayer, I would definitely recommend using it on this project. It will save you from trying to crawl into the depths of the island. That being said, hand painting can be done and it turned out just fine. It just took a lot longer. I painted the corbels separately and then attached them with the included screws. I sanded it and used antiquing glaze to distress it a bit. You can find my tutorial for that here. Once all of the distressing was done, I used Minwax polycrylic spray to seal it. I was nervous about the spray, but it actually went on really well.
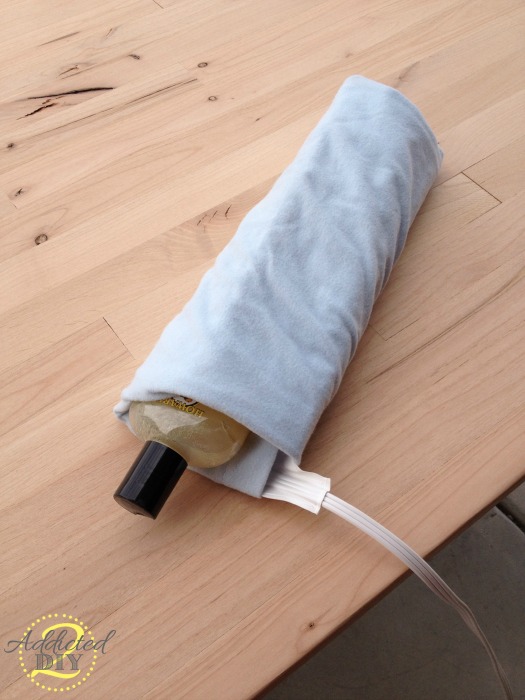
If your butcher block isn’t finished, you’ll want to either use something to condition it or use polycrylic. I was told by a few different people that butcher block conditioner is the way to go rather than using butcher block oil or mineral oil. I used Howard Butcher Block Conditioner. You can find it at wood working stores or on Amazon. Since it is made of beeswax and mineral oil, it is recommended that you apply it to the wood while it is warm (melted). I just wrapped it in a heating pad to keep it melted in between coats. I applied 3 coats, letting it dry for 20 minutes and buffing in between coats.
I attached the top with 1 1/4″ pocket screws and then attached the hardware. Make sure that you purchase door stops with the hardware since these are inset cabinet doors.
My mom got the bar stools from Target. They’re normally $99 for a set of two, but they happened to be on sale for $75 when she bought them. They go great with the island and match her hardware so well.
The X is meant for wine, but she’s not much of a wine drinker, so she’s also using it for her kitchen towels, which is a great idea.
I’d love to hear what you think about this and if it is on your “to do” list of home projects. I love how it turned out and so does my mom. She told me yesterday that she just keeps staring at it:)
As always, I would love for you to also pin, tweet, like, and/or share this project. Thanks!
~Katie
{This post contains affiliate links. If you purchase an item from these links, I will receive a commission at no extra cost to you.}

Very nice work. I love the color too.
Thank you!
Your island looks amazing! Great job building this.
Thank you so much!
LOVE IT!!! You did a great job.
Thanks:)
I was really worried about it based on your post, but this method was really easy. The only reason I knew to do it this way was because of notching out the legs for our farmhouse table. Otherwise I probably would have pulled my hair out trying to do it. Thanks for originally sharing this project! I know my mom loves having it in her kitchen:)
Love the island, beautiful color! Instead of the “X” could you of just left it open and slide a woven basket in there for potatoes and onions? Or does the x give it more support?
No, you don’t have to put anything in there. It doesn’t give the island additional support. The framing on the front gives it support as well as the fact that I drilled pocket holes upward through those pieces to attach the table top.
Wow, I am blown away! You have some serious DIY skills, girl! My kitchen is definitely on my to-do list for 2014 which will include an island. You broke the steps down really well! I also learned about a new tool…need to add a Kreg Jig Rip Cut to my Christmas list…I usually clamp a piece of moulding as a guide, but this looks much easier! Amazing job!
XO,
Christy
Thank you, Christy! Yes, the Rip-Cut is an amazing tool. I saw it around this time last year and got it for my husband for Christmas. There’s a helpful video on how to use it as well that I recently discovered that gave me some great pointers I hadn’t even thought of before:) Our next tool is going to be a cross cut sled. It almost works like the Rip-Cut, but you can square up the sled and then attach the circular saw to it, whereas the Rip-Cut is specifically made for just that, ripping pieces of wood that are already square.
Katie
This island is amazingly beautiful! You noted that you made the butcher block top yourself. Do you have a DIY tutorial you could point me to? Thanks so much!
Yes, I have just updated my post. I probably should have done that a while ago;) Here is the link for the butcher block tutorial: http://addicted2diy.com/2013/11/21/how-to-build-your-own-butcher-block/
Hello there! Would you mind if I share your blog with
my facebook group? There’s a lot of folks that I think would really appreciate your content.
Please let me know. Many thanks
Feel free to surf to my blog post … celeb hair fashion
celeb hair fashion recently posted…celeb hair fashion
Of course!
Hi! Love this island and am considering following your method/plans!! Did you ever add up the costs? I’m actually surprised that you thought it was 600- do you have a breakdown? I’m working on a budget as we are a one income family until I finish school, but we NEED an island with seating in our open concept great room kitchen!
I’m thinking grey with a dark hardwood top (I actually have some bamboo flooring that I may be able to use as my ‘butcher block’)
Hi Tara,
I do not have the actual total cost anymore as this was a few years ago when I built it. I do believe the total cost was close to $600 though. This is a pretty large kitchen island and the butcher block top did make up a decent portion of the cost. I also used select pine for all of the trim, which increased the cost.
Hi, I love this island, do you think this plan would be able to take a granite countertop instead of the butcher block. would it be strong enough.
Absolutely! It’s very sturdy and a granite top would work just fine on it:)
I love the design and build, your island is incredible! I love the color and hardware that you chose. I wanted to share the Drop Leaf Kitchen Island that I built, which can be great for people with smaller kitchens: http://bacheloronabudget.com/diy-drop-leaf-kitchen-island-cart/
Looking forward to trying out some other projects on your site!