Learn how to build this beautiful dining table using the step by step plans, tutorial, and video.
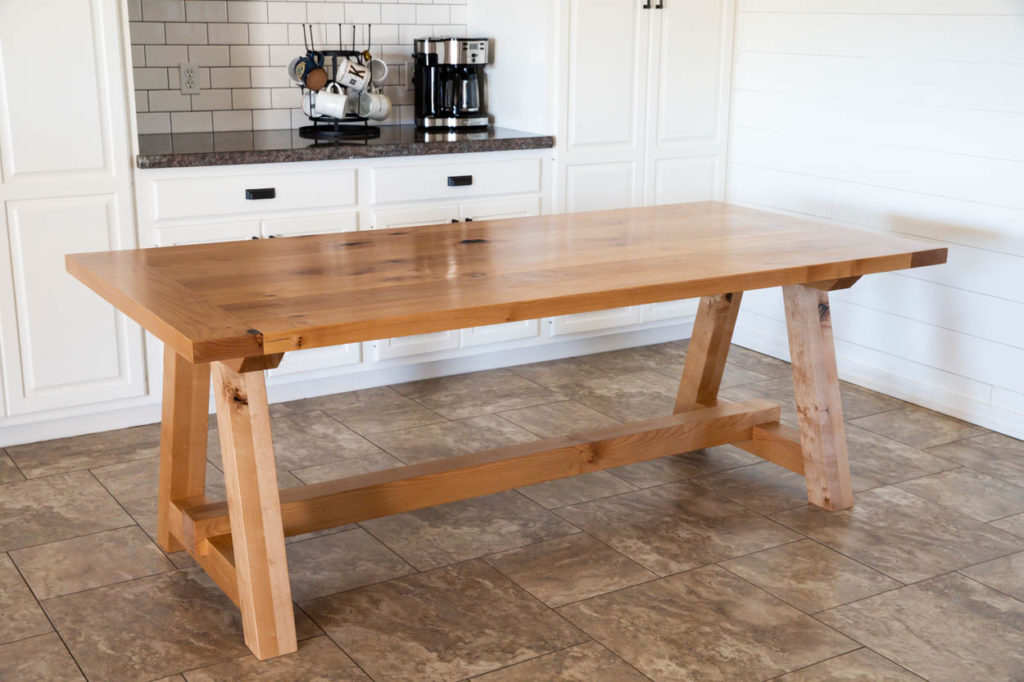
I’ve been wanting to build a new dining table for a while now. Our old one was great and it was one of my first builds, but it was definitely starting to show some wear and I was ready for something different. I’m partnering with DAP Products to show you how I built this gorgeous new table for our dining room. I used DAP Weldwood Wood Glue and DAP Tank Bond Clear Epoxy for this build and I’ll show you just how I used these products in the tutorial and YouTube Video.
Printable Plans
I’ve put together a set of printable plans that will detail the entire process and also the materials and cut list for this table.
Watch The YouTube Video
Sometimes, it’s hard to explain in writing every single process of a build and I’ve put together a YouTube video of the entire build for those who prefer a video over written tutorials.
Milling Down The Lumber
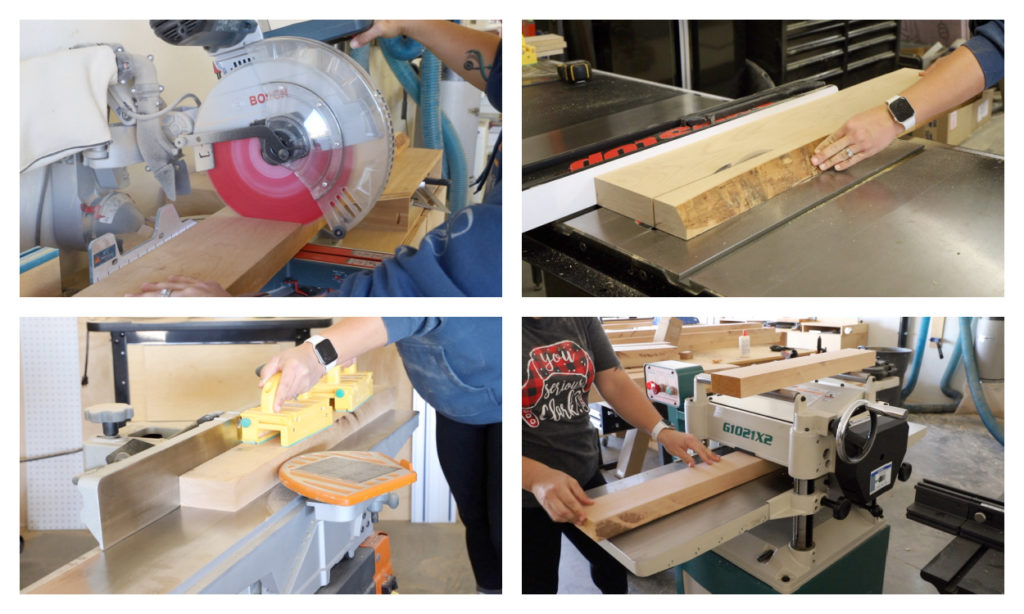
I purchased 8/4 alder for this project. It’s my favorite lumber to use for builds as it is relatively inexpensive and behaves much like pine.
I cut my boards down to rough sizing, then ripped them down on my table saw. Again, I did this with rough sizing, because I will be milling the pieces down further on my jointer and planer.
I flattened one side of the boards on my jointer, then ran them through the planer to flatten the other side and make everything a uniform thickness.
Gluing Up The Legs
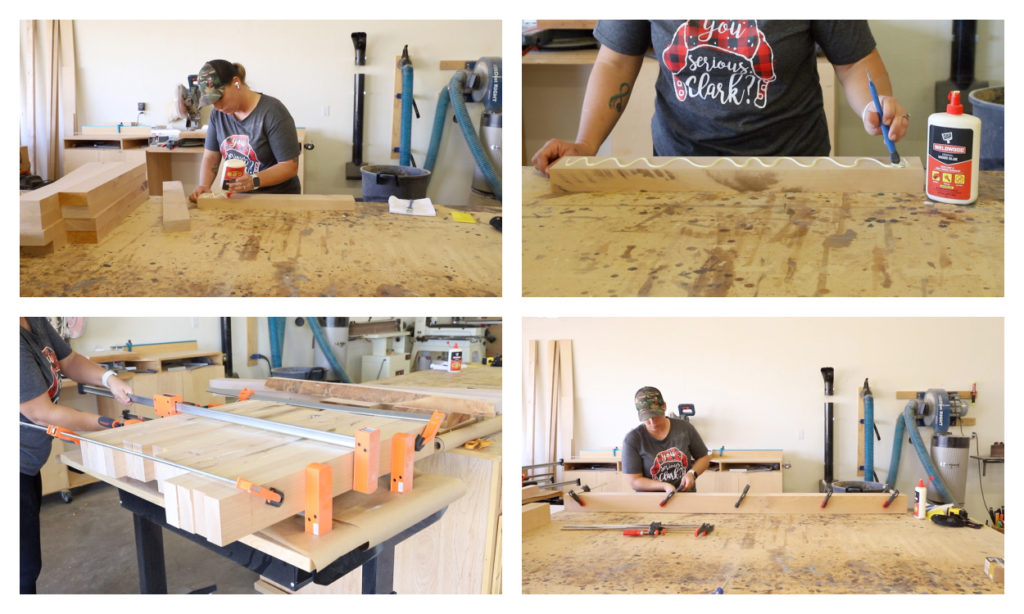
All of the elements of the table base are 3 1/2″ square, so I paired up pieces and glued them together to make those chunky legs and stretchers. As I glued up the pieces, I set them together in a set of clamps and then clamped them down to give them all equal clamping pressure and essentially knock them all out at once. For the longer bottom stretcher, I glued that up individually with smaller clamps.
Milling The Pieces To Final Thickness
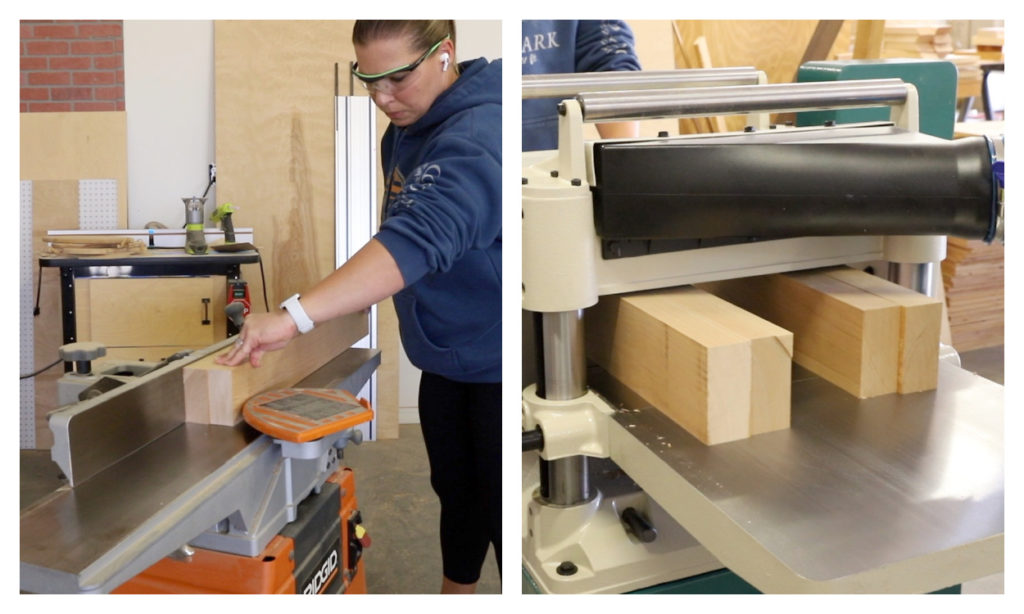
Once the glue was dry, I ran all of the pieces through my jointer on one edge to flatten them out and take out the glue squeeze out. Once all of the pieces were finished, I ran the other edge through the planer. Then I worked to plane them all down to their final thickness of 3 1/2″ x 3 1/2″.
Cutting The Base Pieces To Size
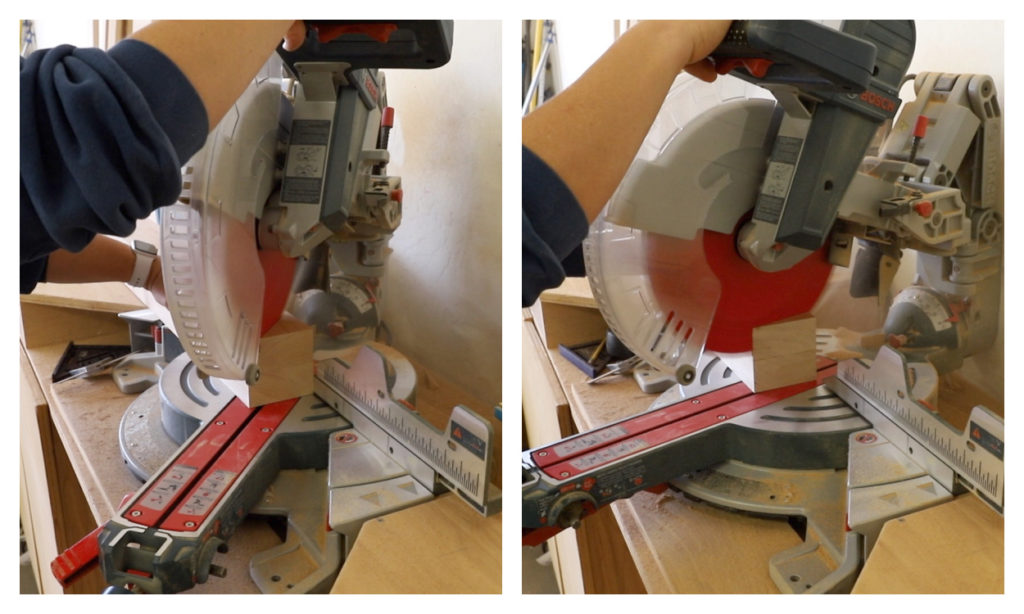
Once all of the pieces were milled to size, I started cutting them to length. The upper supports are cut at a 45 degree angle and the legs and lower supports are cut at 15 degrees.
Notching The Lower Supports
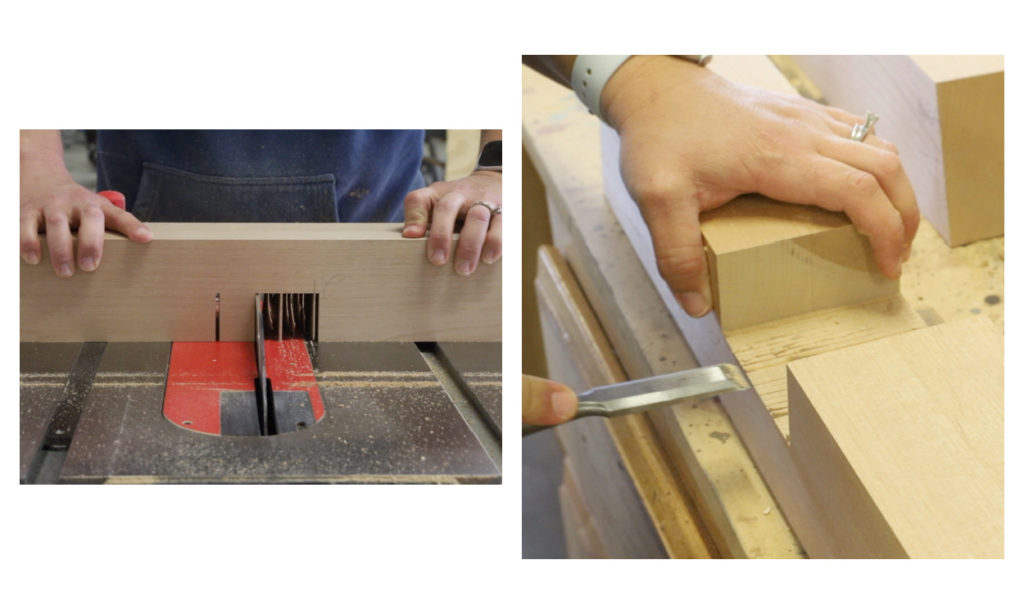
The lower supports are notched to hold the bottom stretcher, so I marked the location of the notches, then ran the wood through my table saw to create the notch. I cleaned up the area with a chisel and then sanded it smooth.
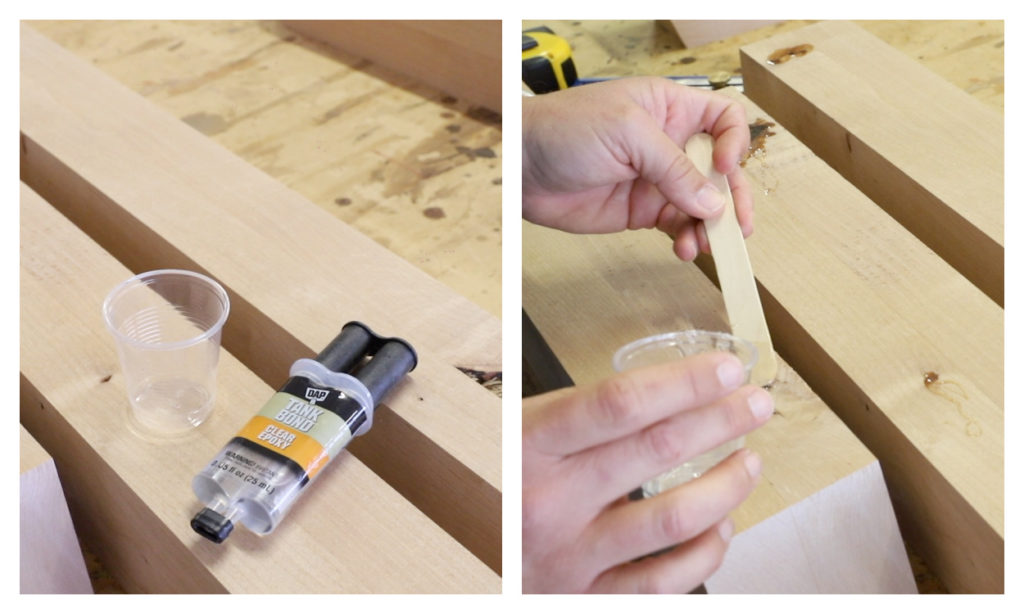
Although the lumber I purchased is considered clear alder, there were still some small knots that needed to be filled throughout the boards. Because they were very small, I grabbed my DAP Tank Bond Clear Epoxy and mixed some up to fill them. I love this method for small knots and checks in the wood, because its easy to mix and no measuring is required. Plus it dries in as little as 5 minutes! I don’t have to wait 24 hours before I can sand the wood smooth.
Assembling The Legs
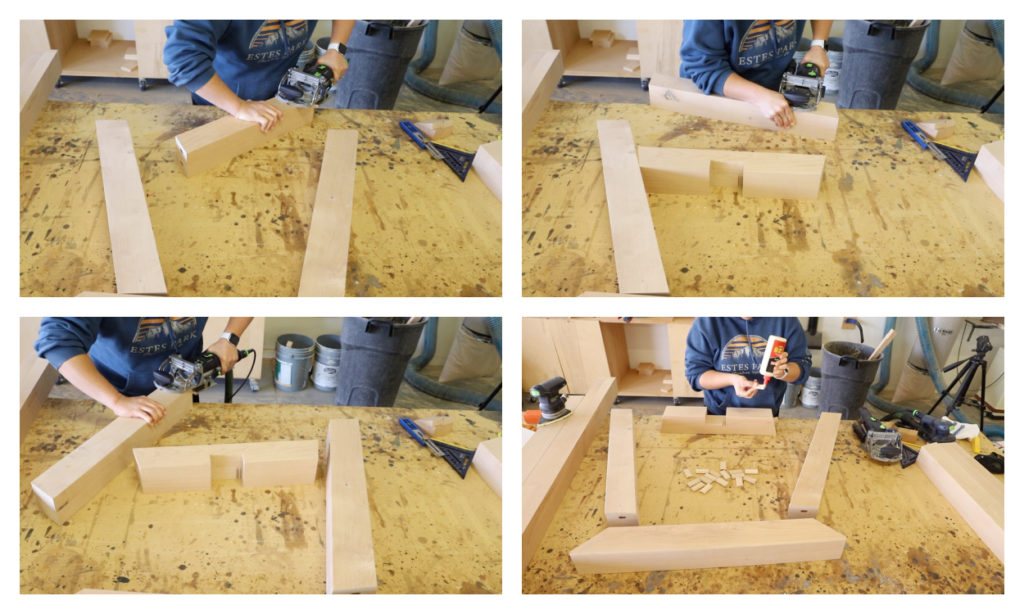
To assemble the legs, I used my Domino to route out mortises on each end of the lower supports and the legs where the supports would be joined to them. I also routed out mortises at the tops of the legs and the upper supports where the legs would join to them. If you don’t have a Domino, you can definitely use a Kreg pocket hole jig in place of the Domino Tenons and drill the 1 1/2″ pocket holes in the same locations on the lower supports and the tops of the legs. You can fill the holes with DAP Premium Wood Filler to hide the holes and then stain or paint when finishing the table.
Once all of the mortises were made, I glued all of the Domino tenons into the mortises with DAP Weldwood Wood Glue.
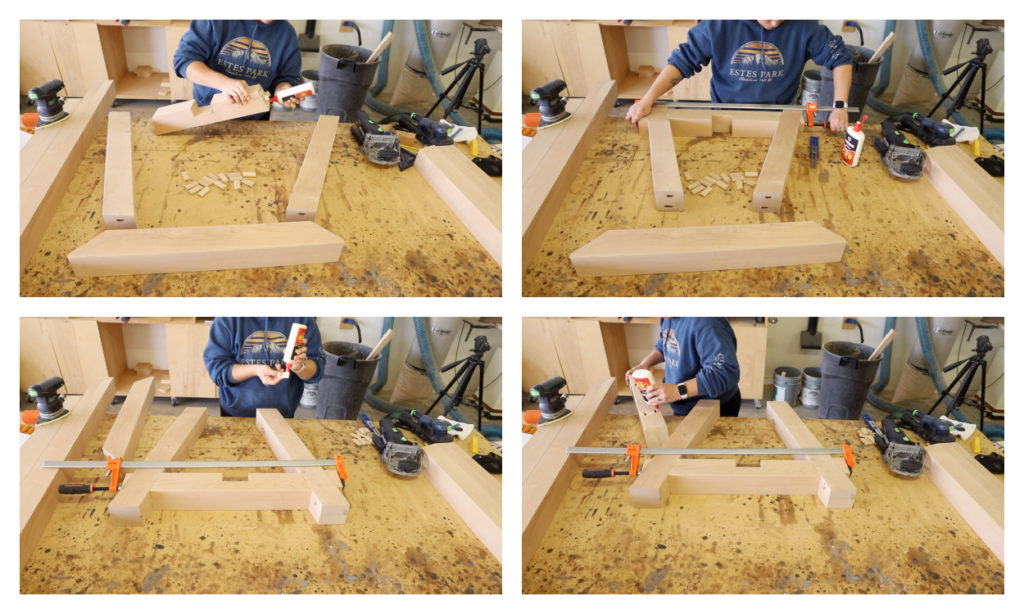
I added glue to the ends of the lower support and to the domino tenons, then fit the supports to the lower section of the legs. I clamped them together to secure the glue joints until they were dry.
I then added the domino tenons to the tops of the legs and glued those to the upper supports, clamping those joints together as well.
Build The Table Top
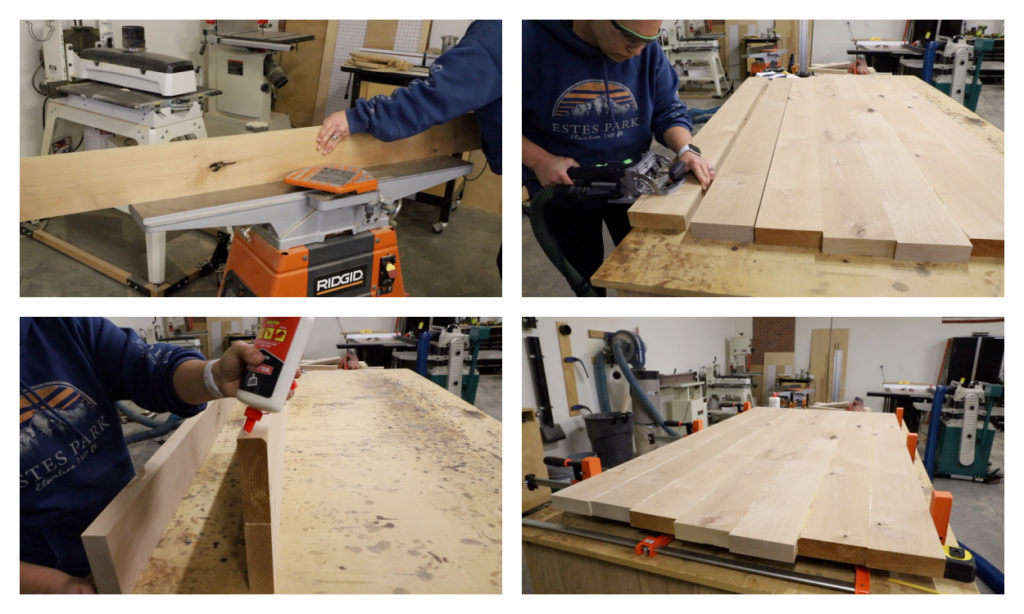
While the glue on the base dried, I got to work on the table top. First, I ran all of the boards through the jointer to make sure the edges were nice and flat. I also ran them all through the planer to make sure they were uniform thickness.
I added domino mortises to each of the boards and then glued in the domino tenons. This step isn’t a requirement; however, it does help with the alignment of the boards and I think it keeps everything nice and flat when clamping.
I added the dominos to each board one by one, gluing them together and building onto that with each board.
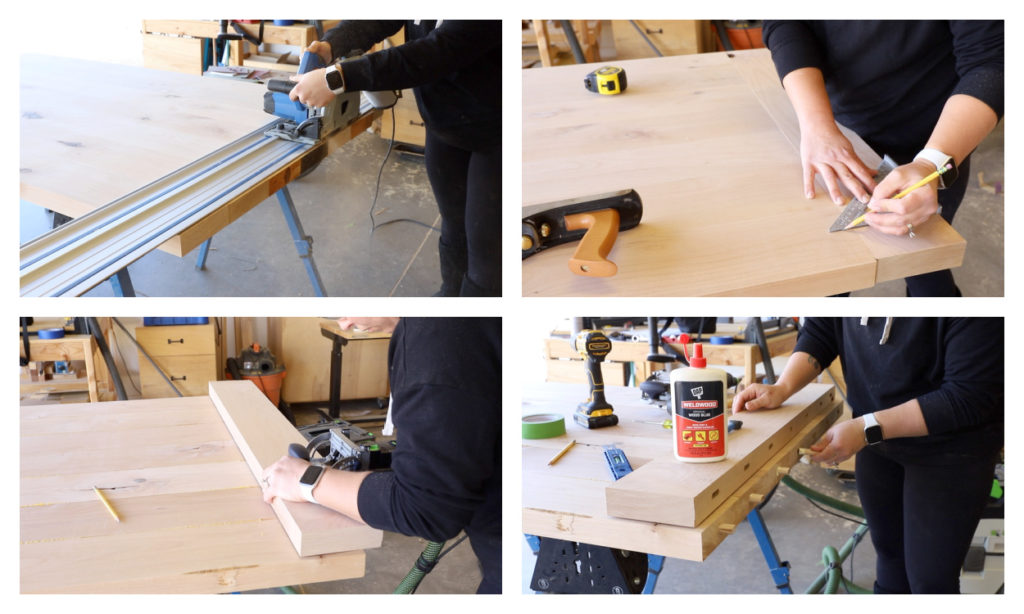
When the table top was dry, I cut a straight edge on each end and then added the breadboard ends. I could write an entire post on how to properly attach the bread board ends, but it is much easier to follow along in the video I put together.
The breadboard ends don’t absolutely HAVE to be added in the way that I did and I’ve certainly built many other tables using pocket joinery and glue to attach them. The theory is that you want to allow for wood movement and therefore using the method I did is best; however, I have never had an issue with the furniture pieces I’ve built using the fully glued method. This being said, I live in a dry, desert climate, so wood movement doesn’t happen as much here due to very low humidity.
Final Table Base Assembly
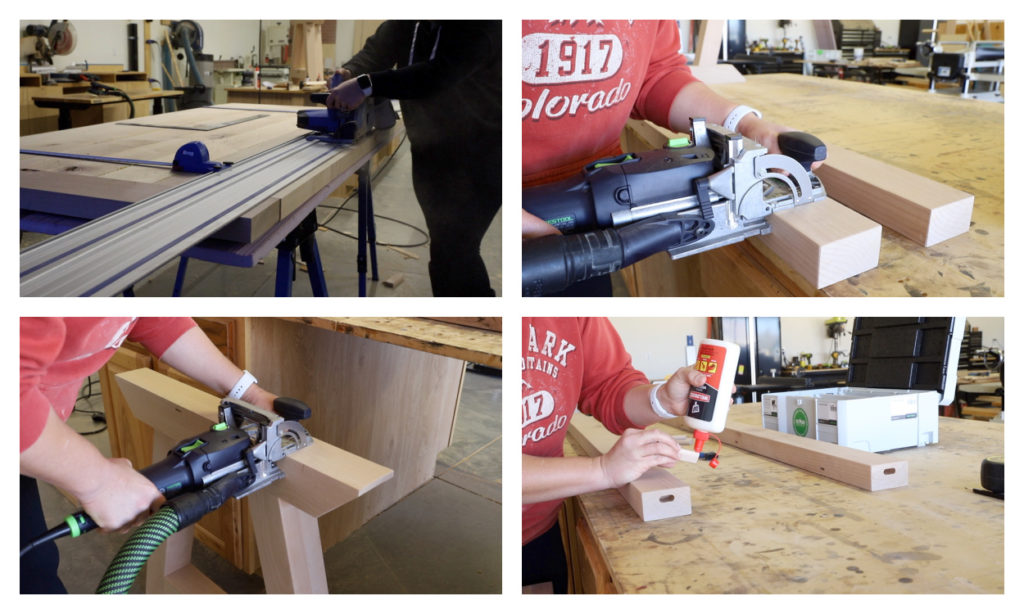
Once the breadboard ends were attached, I trimmed up the table to its final width. I purposely built it a little wide so that I could trim the ends rather than try to perfectly match the breadboard ends to the width of the table.
To finish assembling the base, I cut to upper stretchers that will attach to the tops of the table legs. These will add additional support and also more points of contact for the table top to be attached. I chose to use z clips to attach the table top, so I used a smaller bit on my domino to route out the grooves. A biscuit joiner can also be used for this, or running the edge through your table saw to cut one long groove also works.
I switched back to my largest bit and routed the mortises for the stretchers to attach to each of the table legs. I glued and inserted the tenons into each end of the stretchers using my DAP Weldwood Wood Glue.
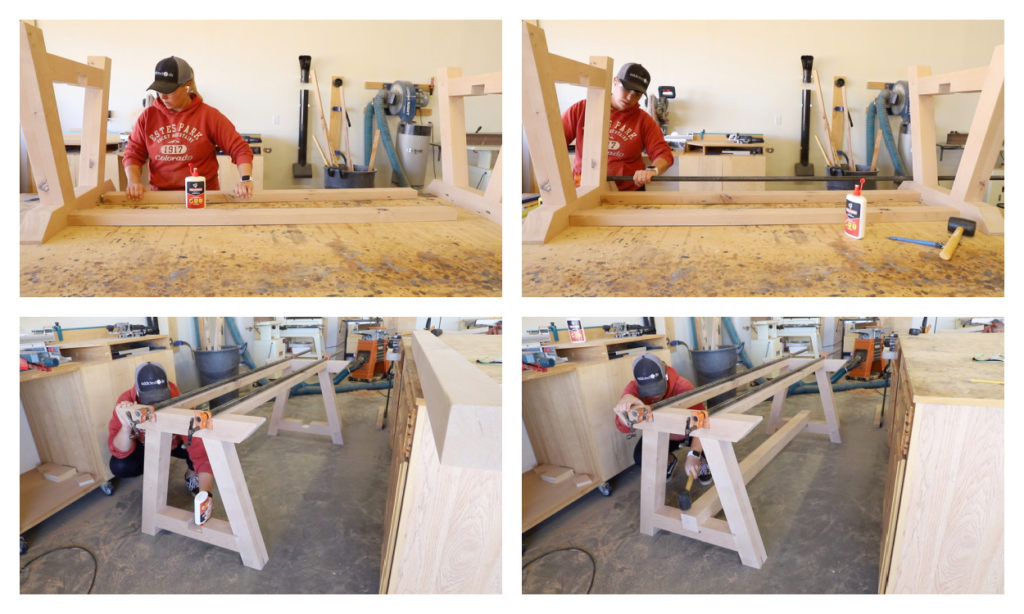
I glued each end of the table base to the upper stretchers and then clamped them in place. With an extra set of hands, I flipped the base upright and moved it to the ground, re-clamping the base together.
I added glue to the notches on each of the base pieces and then added the bottom stretcher, leaving a 1″ overhang on each end. It should be a tight fit and I used a rubber mallet to pound it in place. I clamped it and let it dry.
Finishing The Table
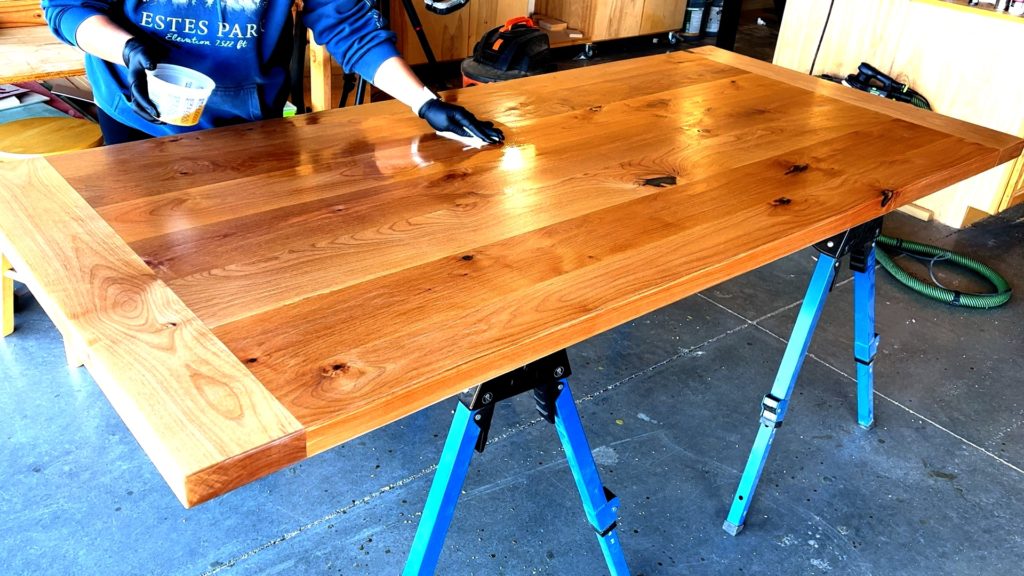
Once the base and table top were finished, I did some final sanding on both with 220 grit sandpaper. Normally, I stain furniture pieces before adding a finish, but this time I wanted to go with just an oil-based wipe on polyurethane. The oil-based finish added a beautiful golden color to the wood and I love the natural look of it. I added 5 coats of the wipe-on poly to the table to make sure there was a good layer of protection as this will be used every single day by my family.
Attaching The Table Top
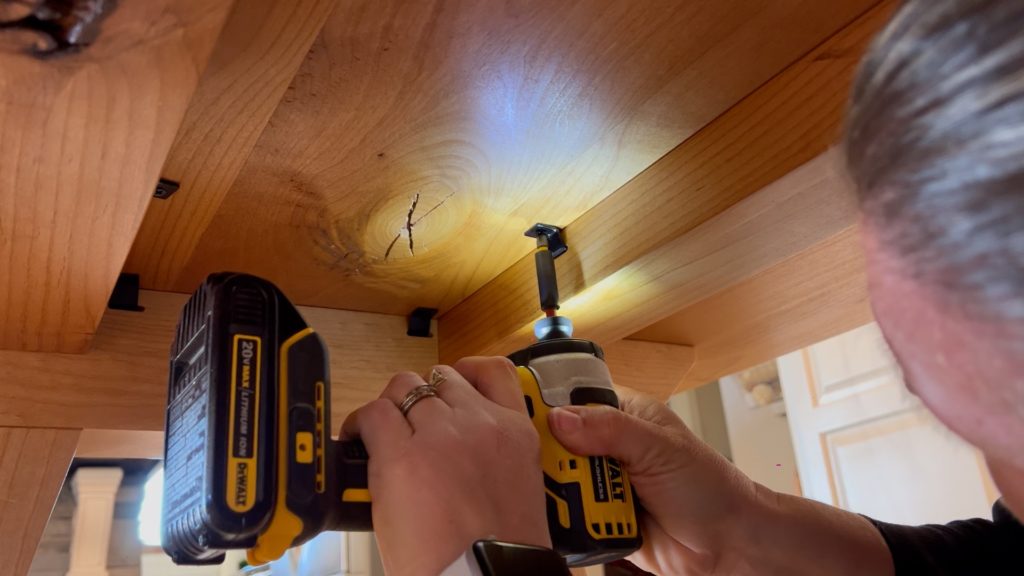
To attach the table top to the base, I used Z clip fasteners, which will secure the table together, but also provide the ability for any wood movement that may occur. Alternately, the table can be attached using just wood screws; however, be advised that this will not allow for any wood movement should the ambient humidity change frequently.
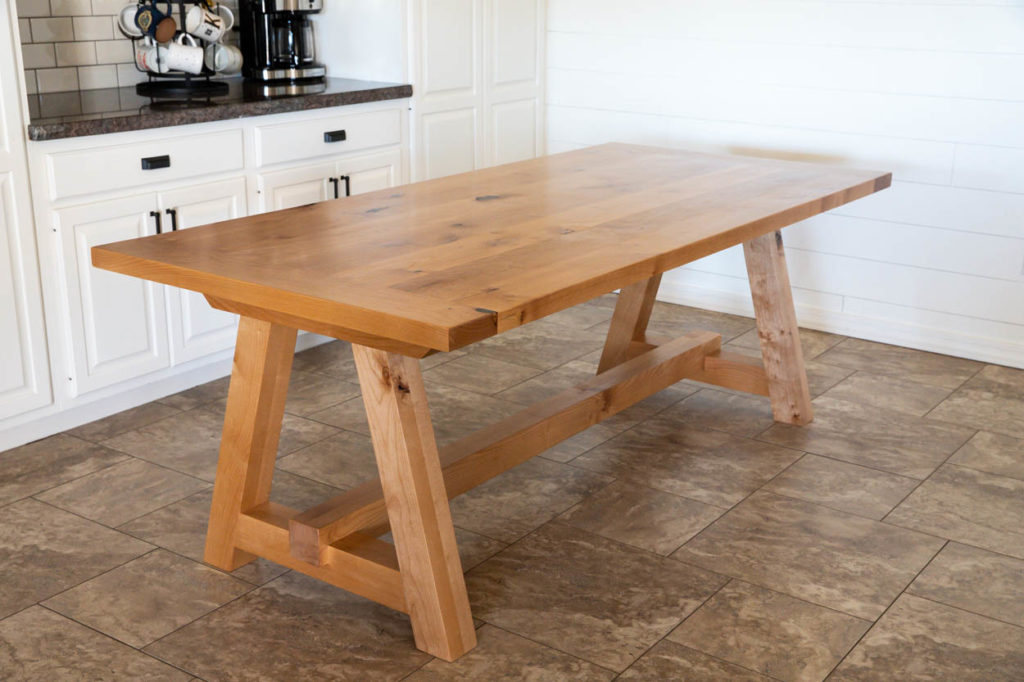
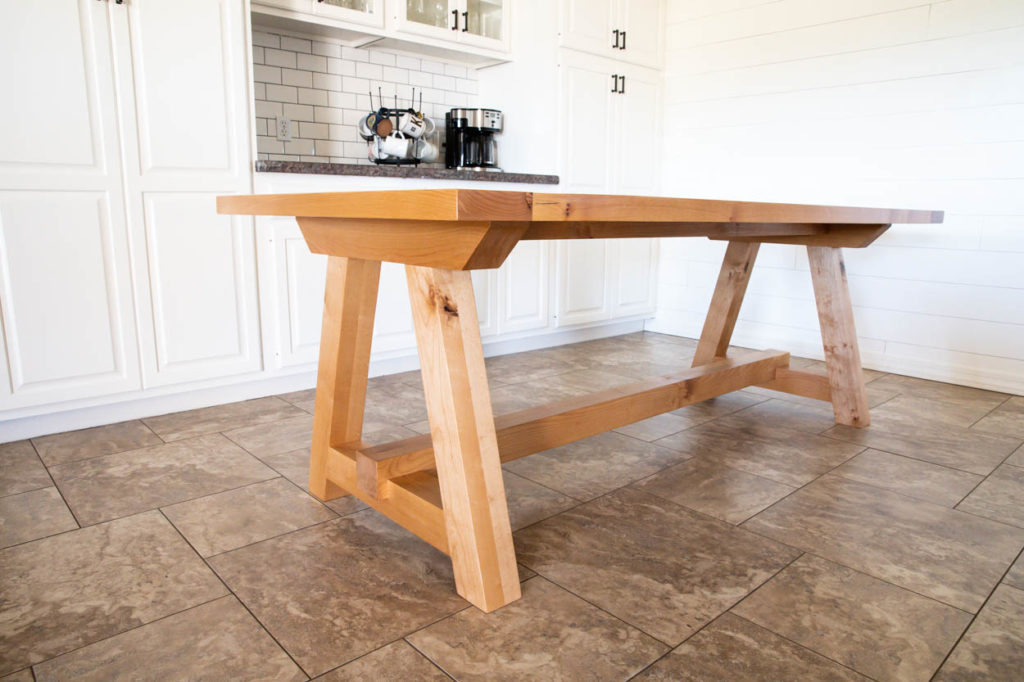
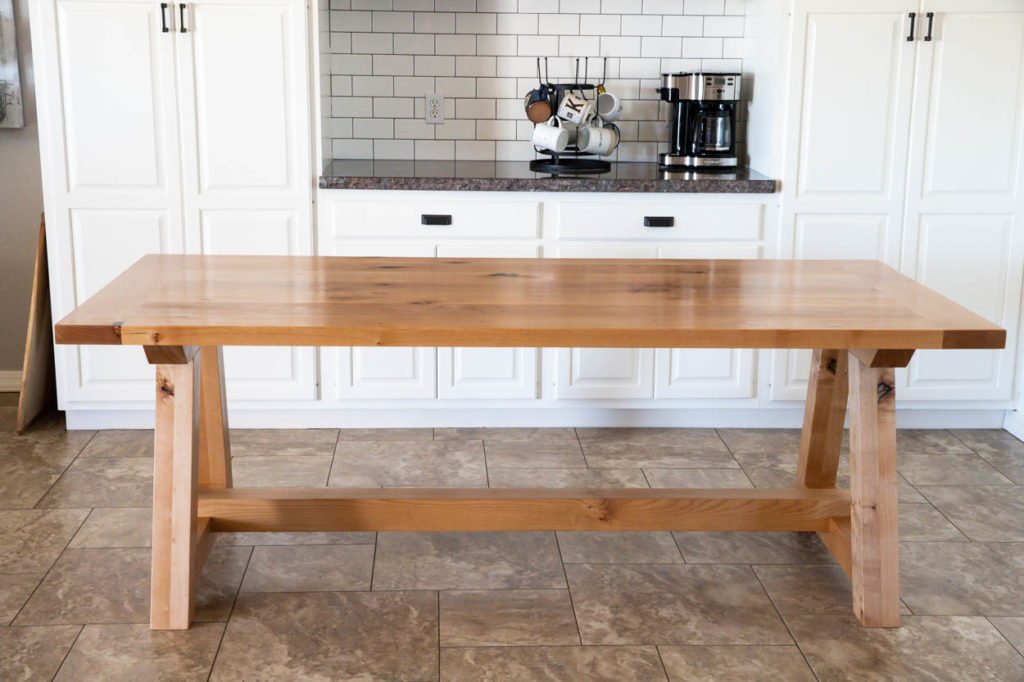
I am so happy with how this table turned out and it looks just as I had imagined. If it looks a bit familiar, I got the original inspiration from a table I saw at Pottery Barn, but I added my own spin to it with the breadboard ends and it being a solid top.
Huge thanks to my sponsor, DAP Products for helping me to build this beautiful table! If you’d like to see all of the products that they offer to make building or home remodeling projects easier, make sure to visit their website.
Also, don’t forget the printable plans that I have put together for this project and check out the YouTube video that I made!
DISCLOSURE: I was provided product and compensation for this post. All ideas and opinions are 100% my own. This post contains affiliate links. Should you purchase an item from one of these links, I will receive a small commission at no extra cost to you.

OMG!! I SO LOVE YOU FOR THIS😃!! I’m in the process of figuring out my table build and this helps me tremendously, as well as inspires me too. It looks so good. The quality is superb. You did an amazing job!🤩
Thank you so much!!! I am so happy with how it turned out!
I love the table you made!!!
I definitely want to try making one!!!
Thank you!
Thank you so much!!