Learn how to build DIY corn hole boards with these easy to follow steps and plans.
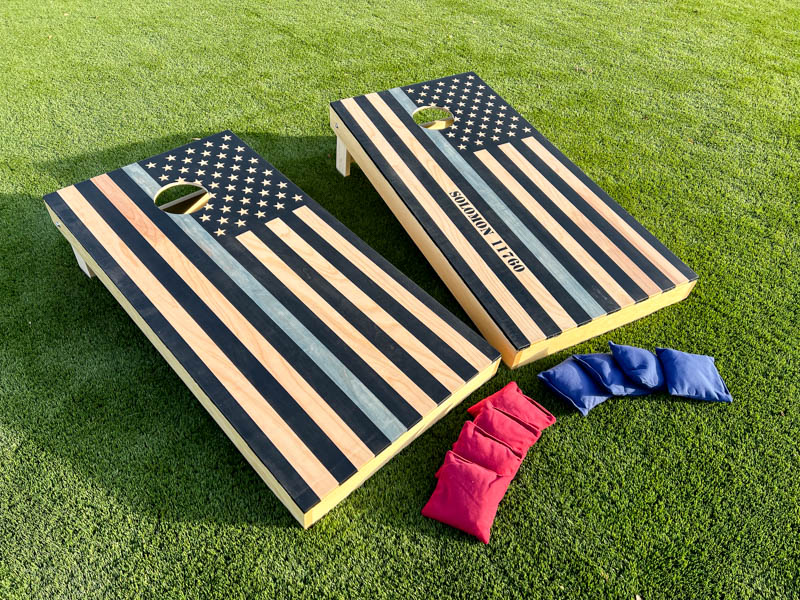
Cornhole is a super fun game to play with friends and family in the backyard, tailgate party, camping trip, or wherever you want to bring your boards. I’m teaming up with my friends at Kreg Tool Company to show you how I built these American flag corn hole boards. Whether you’ve been wanting to build a set for yourself, or you’re looking for a great gift idea, make sure you follow along with this tutorial as I show you some tips and trips to make some beautiful boards that will last you for years to come.
I’ll be honest, up until I built myself a set this summer, I was HORRIBLE at this game. As in, couldn’t hit the broad side of a barn with the bags kind of bad. So if you feel like you probably hate this game because maybe you aren’t very good at it, give it another shot and keep practicing! And have the same foot forward as your throwing hand. Apparently that was what was really messing me up.
Tools and Plans
I found some plans that I really like online, but there are one or two details that I felt were left out. I’ll list those steps within the tutorial, so make sure to read through everything and and write notes on the plans after you print them out. I’ve also included affiliate links to a lot of the tools I used.
As for tools, you’ll want to have a few key tools and supplies to get the job done.
- Kreg Accu-Cut
- Circular Saw
- Kreg Pocket-Hole Jig 720Pro
- Drill
- Impact Driver (optional)
- Jigsaw
- 18ga nail gun
- Orbital Sander
- Miter Saw
- Compass
- 1/4″ drill bit
- 4 – 2″ x 1/4″ bolts
- 8 – 1/4″ washers
- 4 – 1/4″ nylon lock nuts
- 1 1/4″ pocket hole screws
- Wood Glue
- 1 1/4″ nails (18 ga)
- 1 sheet of 1/2″ veneer plywood
- 4 – 1×3 pine boards @ 8′ long, plus 1 @ 4′ long
- Corn filled corn hole bean bags
Cut List
- 4 – 1/2″ plywood @ 2’x4′
- 4 – 1×3 @ 48″ long
- 6 – 1×3 @ 22 1/2″ long
- 4 – 1×3 @ 12″ long
- 2 – 1×3 @ approx 21″ long (measure and cut to length)
How to build the cornhole boards
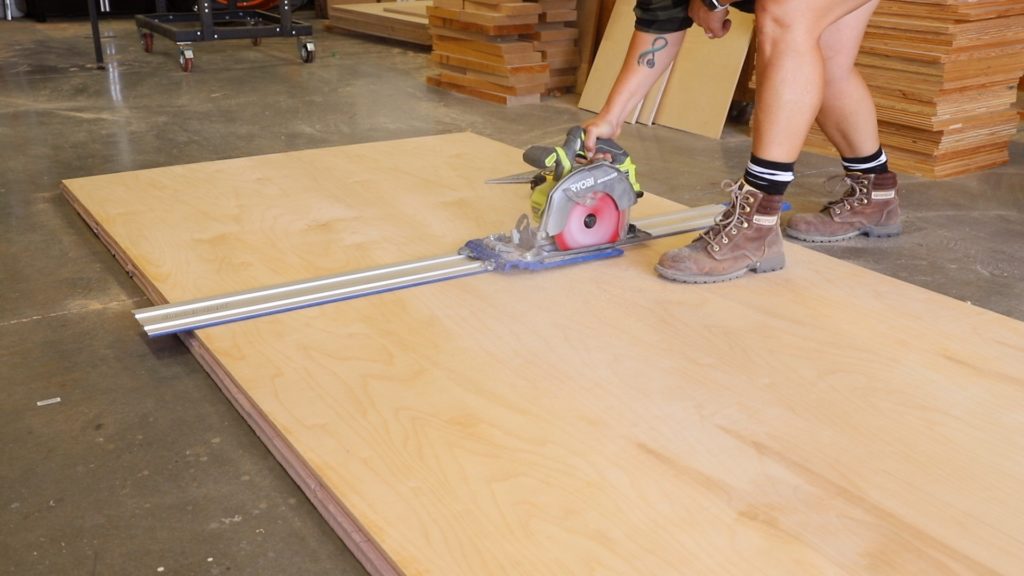
To start, I bought a 1/2″ sheet of veneer plywood. You can purchase 2′ x 4′ sheets at your local home improvement store, but with how much they cost, it isn’t much more to just buy a full sheet.
I first cut the plywood in half with my Accu-Cut and circular saw, then cut each of those pieces in half to give me 4 – 2’x4′ sheets of plywood. I set the other two aside to build another set later. Breaking down plywood can be tough, but the Accu-Cut makes it so easy to get the pieces you need cut down to size with ease.
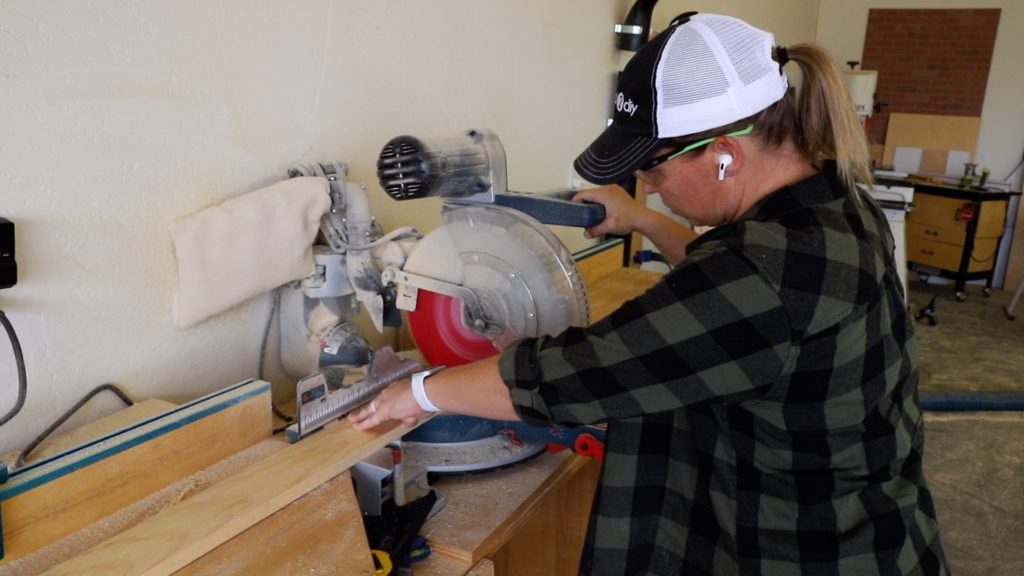
I moved over to my miter saw and cut all of my 1×3 boards down to size. Cut all of the boards EXCEPT the board supporting board that goes between the two legs. You’ll want to measure that one and cut it to size.
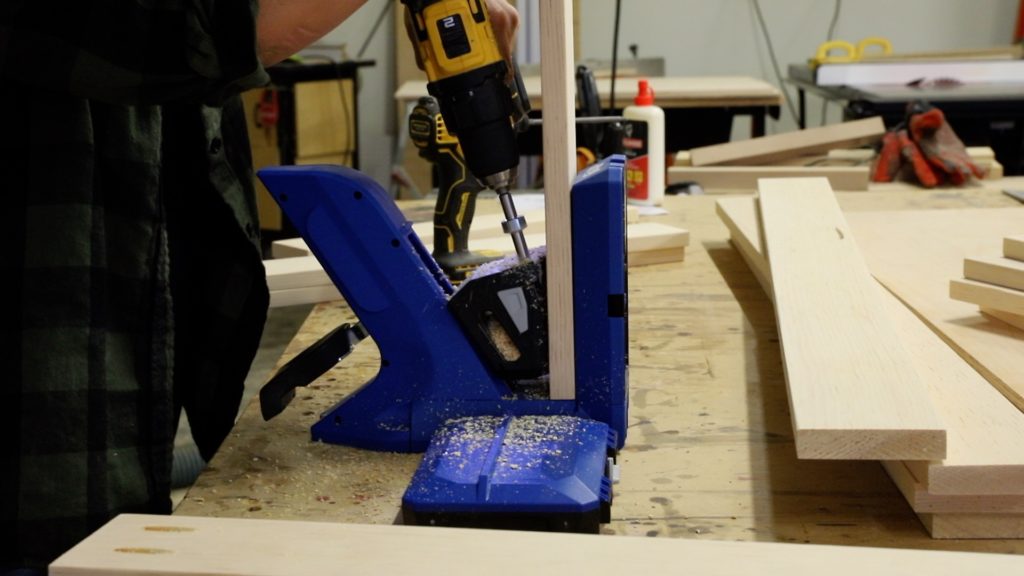
Using my Kreg Pocket-Hole Jig 720Pro, I drilled 3/4″ pocket holes into each end of all of the 22 1/2″ boards. I used my orbital sander to sand all of the boards smooth prior to assembly. I really love the new 720Pro from Kreg. This tool makes the process of drilling pocket holes so fast, as it automatically adjusts to the thickness of whatever wood you are working with. The new drill bits have markings on them so you can quickly adjust the depth of the stop collar based on the thickness of the wood. All of the necessary accessories are stored within the pocket-hole jig, so you have just about everything you need in one place.
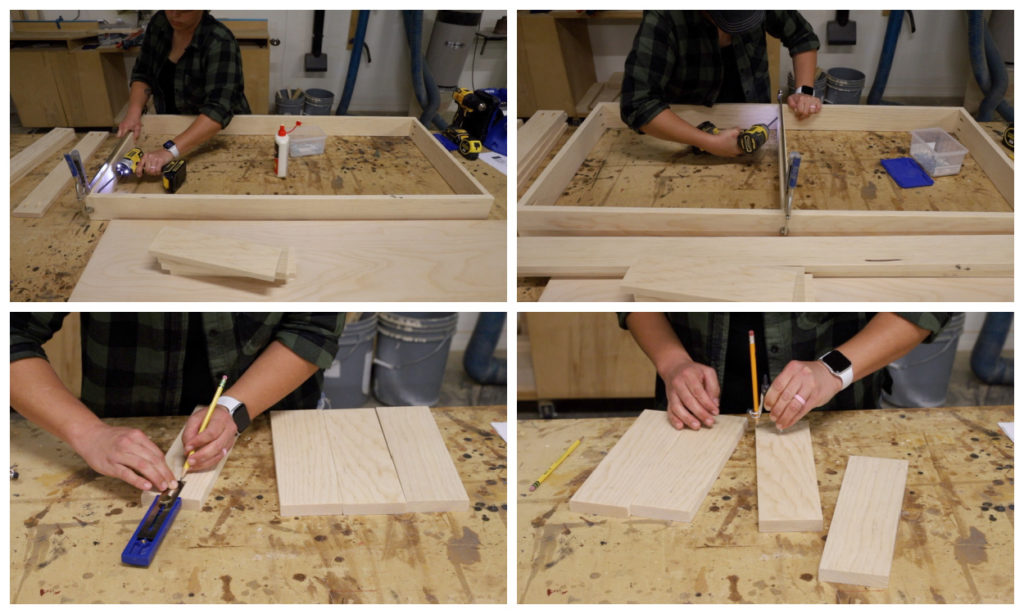
- I assembled the outer frames of the boards with wood glue and 1 1/4″ pocket screws.
- I found the midpoint of the frames and then glued and clamped the center support in place, attaching with 1 1/4″ pocket screws.
- For the legs, I used my multi-mark tool to mark 1 3/4″ down from the edge of the board and in from the sides.
- Using my compass, I placed the point of the compass on that mark and then marked the rounded end on each of the legs.
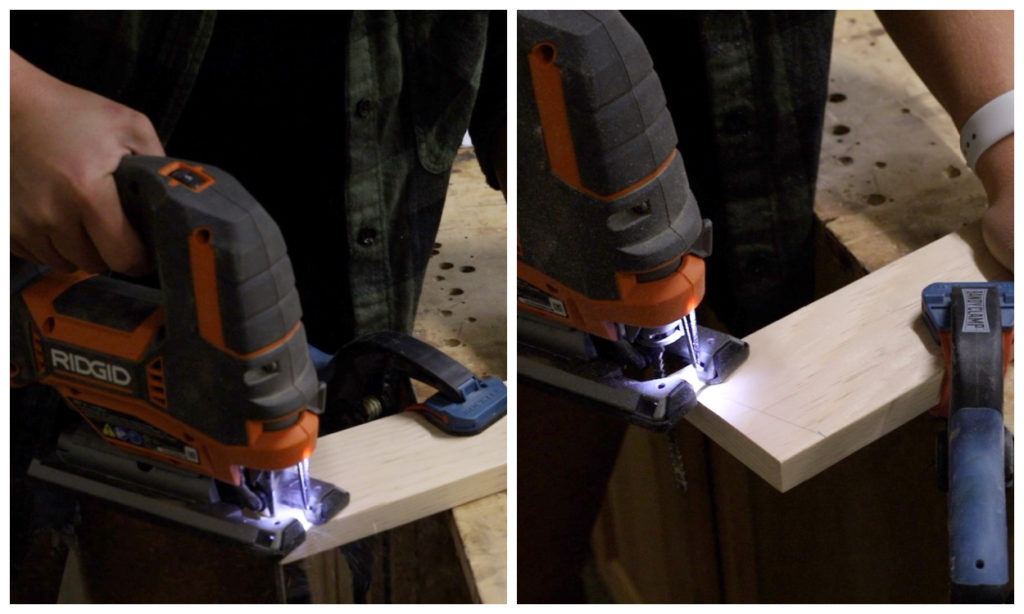
- I used my jigsaw to cut along the line I drew, then sanded the rounded edge smooth.
- On the other end of the legs, I marked 1″ up from one corner and drew a diagonal straight line from that mark to the other bottom corner. I cut that portion off with my jigsaw. This will allow the legs to sit flat on the ground when the boards are being used.
- I also drilled 1/4″ holes into the legs where I had initially marked them at the 1 3/4″ mark.
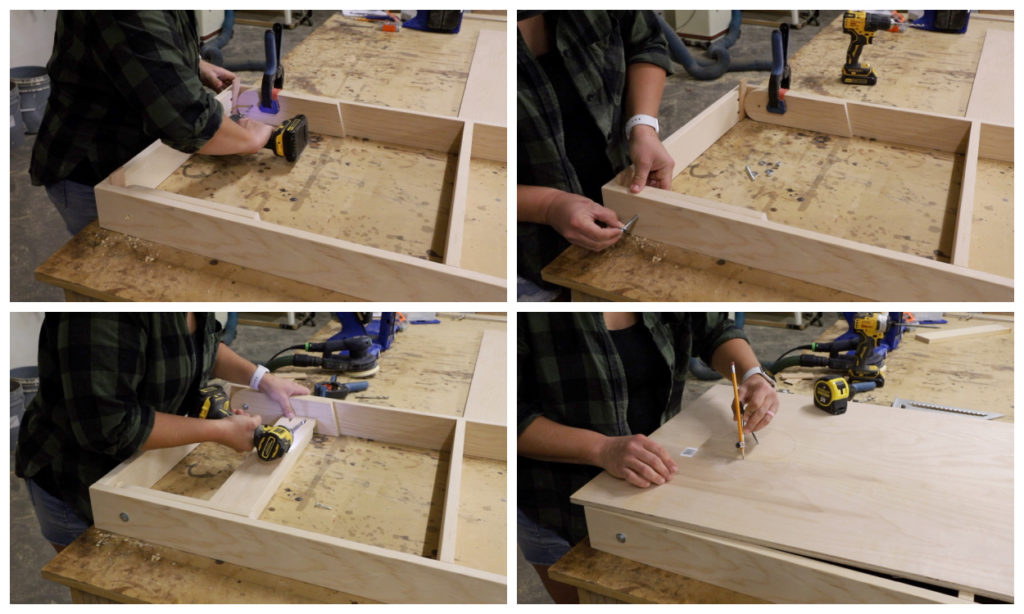
- The legs need to be installed 1/4″ down from the top edge of the frame, so I used some 1/4″ scrap pieces of wood to act as spacer blocks. I clamped the legs in place and drilled through the hole I just drilled into and through the frames.
- I attached the legs with the bolts, adding a washer to each end, then tightening the nylon lock nuts just tight enough that the legs will still have some movement, but won’t be super loose.
- I measured and cut the supporting boards to size and then drilled pocket holes into each end and attached them to the legs. I don’t really measure where they go, but I do put a piece of scrap 1×3 under them to give them a little spacing on the back side.
- On the 1/2″ plywood panels, I measured 9″ down and 12″ across and marked that point as the center point of the hole. I used my compass to mark a 6″ circle on the plywood.
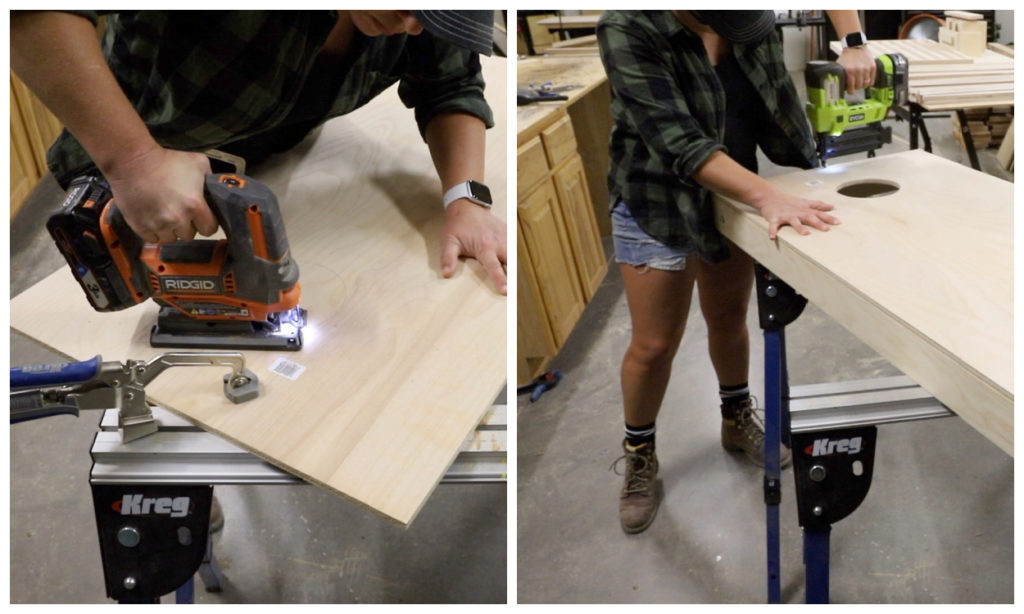
- I drilled a 1/4″ hole into the inside edge of the circles to feed the jigsaw blade through, then carefully cut the holes. I cleaned them up a little with some sandpaper.
- I added a bead of glue along the outside edge of the frame as well as across the center support. I used my 18ga brad nailer to attach the plywood panels to the frame along the outer edge only. With the glue on the center support, it will hold it well enough that you won’t need to nail that area down.
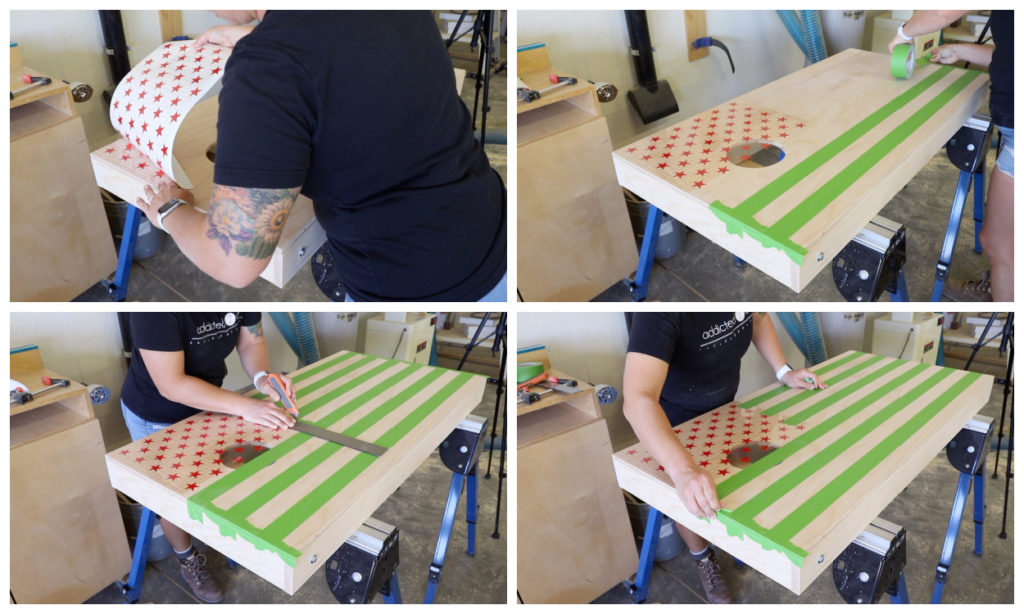
This corn hole set is going to be stained with an American flag, so I worked on creating that stencil on the boards.
- For the union, I scaled it to fit a 2’x4′ area and used my vinyl cutter to cut out the stars. I placed transfer paper over the stars and cut the transfer paper to the exact size of the union. This allowed me to line up the top and side edges of the transfer paper to the boards and then adhere the stars.
- For the stripes, it took some math and some trial and error. The top and bottom stripes are offset a bit, so I had to determine the width of those and then factor in the width of the tape I was using (1.88″ tape). I marked 1 9/16″ up from the bottom of the boards and then lined small pieces up tape up on each of those marks. The small pieces of tape are just temporary spacers/guides for the full length pieces of tape. I added tape lines up the rest of the boards following the same pattern of using spacer pieces, then full lines.
- Once the tape was added, I used a square and lightly cut the tape along the edge of the union.
- Once everything was marked and cut, I peeled up all of the spacer pieces as well as the transfer paper on the stars in the union. Be careful when doing this that you don’t accidentally peel up any stars.
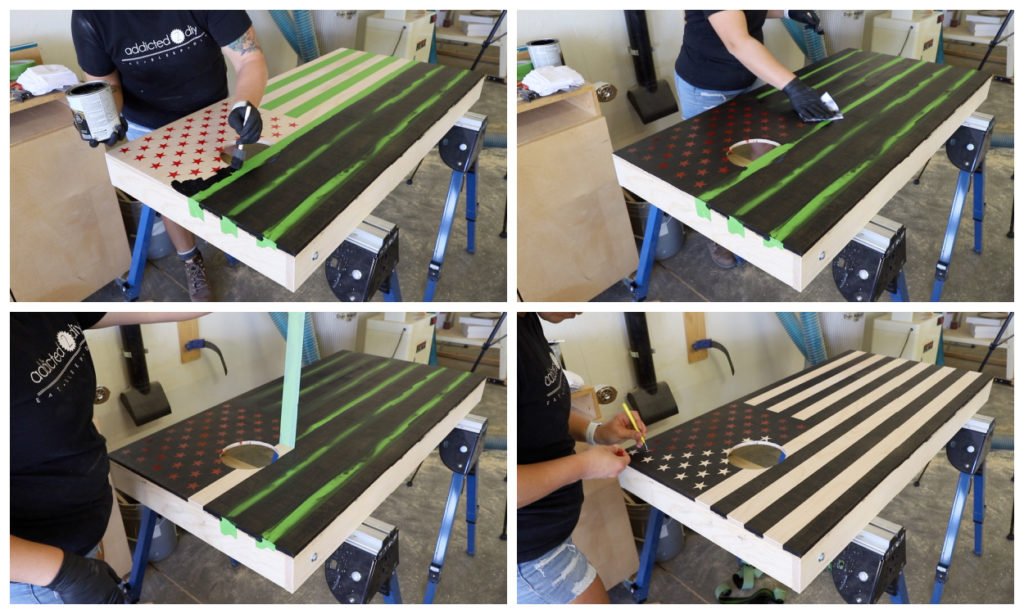
- I used a foam brush to apply the black gel stain to the entire flag. For the stars, you want to be careful not to peel any of them up with your brush strokes. I found it best to just lightly dab the gel stain on. Gel or paint is best for this type of application. Regular stain runs the chance of soaking in and bleeding underneath the tape and vinyl, which won’t give you crisp lines.
- Once the stain was applied, I lightly wiped away the excess.
- You can wait for the stain to dry for several hours, or you can peel it up right away. If peeling it up right away, be very careful to not touch the tape, then touch the boards or you’ll risk smudging stain on the natural areas.
- I used a weeding tool to peel up the vinyl stars.
- This was a custom set of boards, and I added blue stain to one of the stripes and also personalized it, as these were for a custom request from a friend. You can choose to personalize your boards any way you like with whatever design you like.
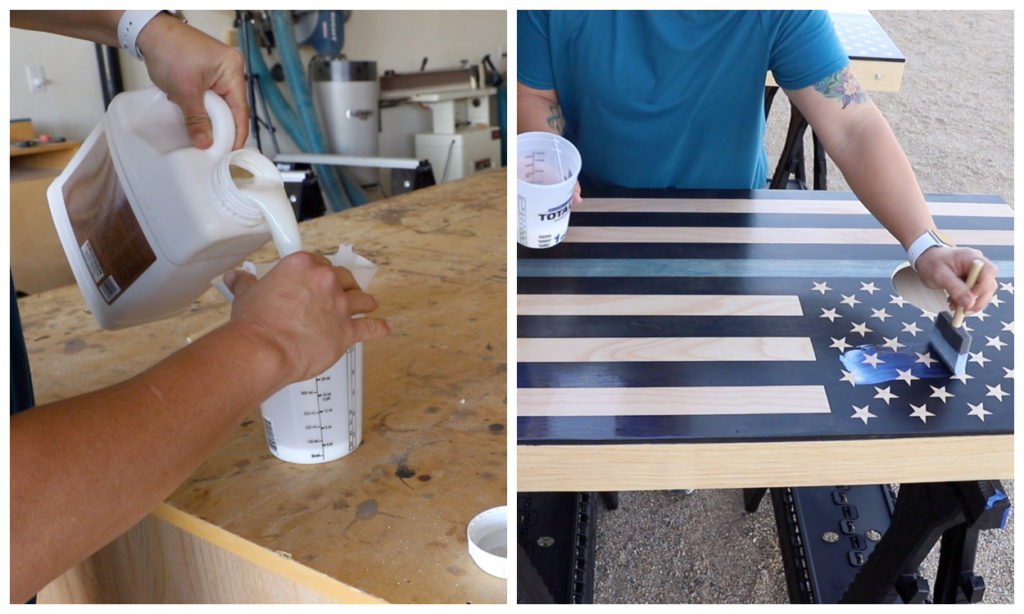
- To finish off the boards, I used Pro Finisher Water-Base Polyurethane in Semi-Gloss. It is sold in a 1 gallon bottle, so I poured it through a strainer into a cup for each coat.
- I applied the polyurethane with a wide foam brush, letting it dry for about an hour or so in between coats. I applied 5 coats of the polyurethane, then gave the boards a light sanding with 320 grit sandpaper to smooth them down completely before I applied the 6th coat. You can sand in between each step if you like, but I wanted to try this method and see how it worked. I still ended up with perfectly smooth boards, so do as you wish when it comes to finishing. I also added the same number of coats to the sides of the boards to keep them protected as well.
- It’s important to note that you’ll want the boards to have a good layer of polyurethane to keep them protected and the finish from wearing away after lots of use. 5-10 coats is recommended for these. Using a water-base polyurethane is a great choice as it dries completely clear and dries quickly. You can also use oil-base polyurethane, but be aware that it will give the natural wood an amber finish.
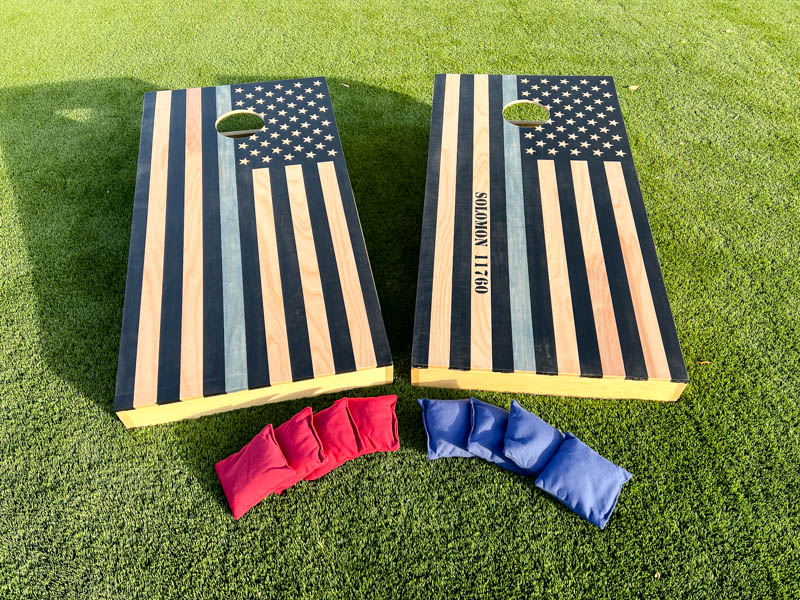
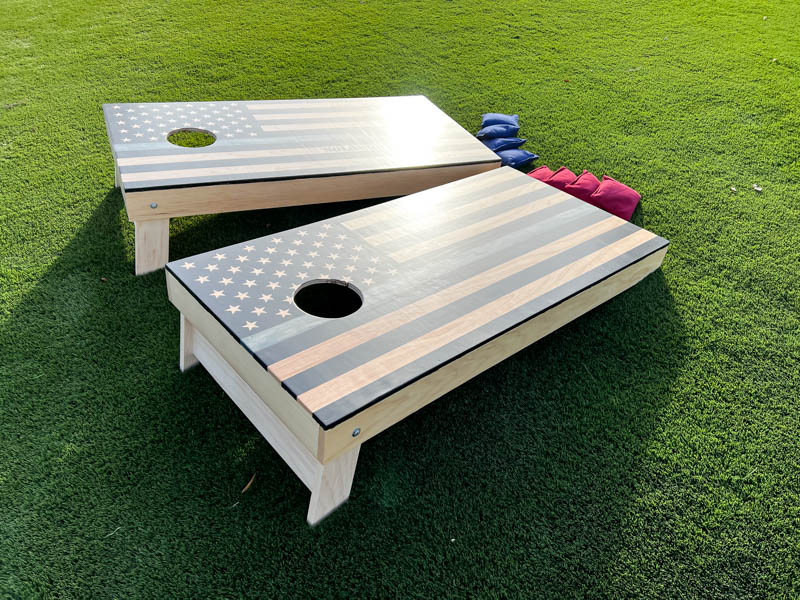
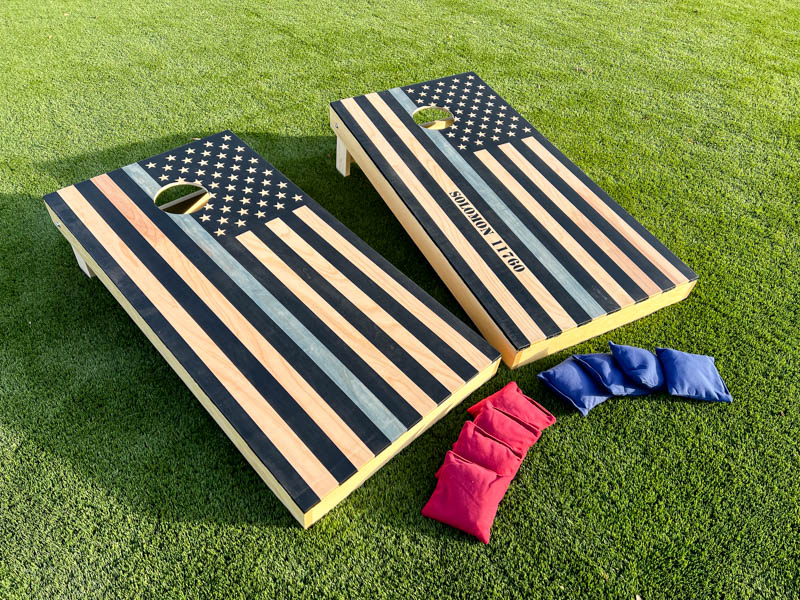
Give the finish a day or two to dry and then you’re ready to play! These boards are such a great game for the whole family and make for an awesome gift! With so many ways to personalize them, its a great way to get really creative and make them to your liking.
DISCLOSURE: This project was sponsored by Kreg Tool Company. All opinions of the products used are my own. I have included affiliate links to many of the products I used within the post. Should you purchase anything from one of these links, I will receive a small commission at no extra cost to you.

Leave a Reply