Learn how I disassembled our outdoor sectional set and used the wood to build an Adirondack chair.
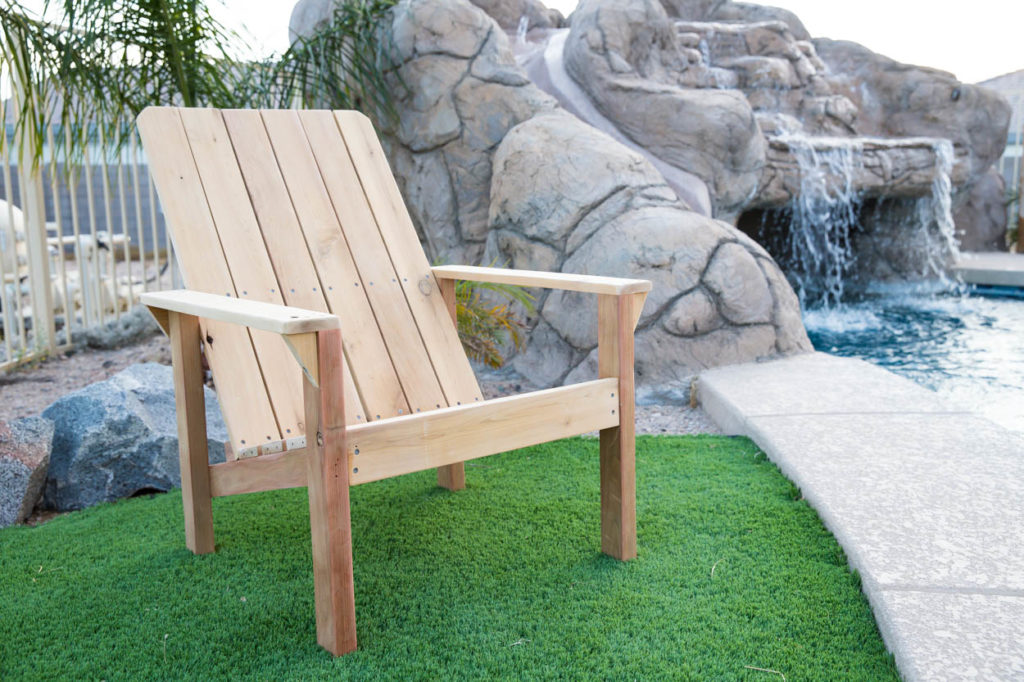
It’s time again for the monthly DIY challenge! This month, in honor of Earth Day, the challenge was upcycling! So basically just find something and turn it into something else or give it a new lease on life. I’ve linked to all of the participants below, so make sure you keep scrolling to see what they made! Hopefully it gives you some inspiration to transform something for your own home.
A few years ago, I built an amazing outdoor sectional set for our patio. We loved how it looked and our guests loved it too! The problem was that the cushions rotted completely away after two years. I don’t know if you’ve priced out cushions, but they aren’t cheap! Even the less expensive version I bought was still a total of $300! Just for cushions! Sunbrella fabric is ABSOLUTELY worth the cost, but I really didn’t want to spend close to $600 for just cushions. That and we had some crazy monsoon storms two summers ago and it tossed our sofas across the yard like they were dollhouse furniture…and they weren’t light!
I had been brainstorming ideas for building some wooden Adirondack chairs for around our fire pit. The wood might take a little annual maintenance, but at least I wouldn’t need to replace cushions all of the time. That’s when it hit me! Why not just use the wood from my sectional set? Then it wouldn’t go to waste. I got to work brainstorming how I could build chairs from the wood I had in the sofas and today I’m going to show you how I built one of the chairs. I’ve only built one so far, because this week was just a little crazy and I didn’t get around to building a second one.
Step 1:
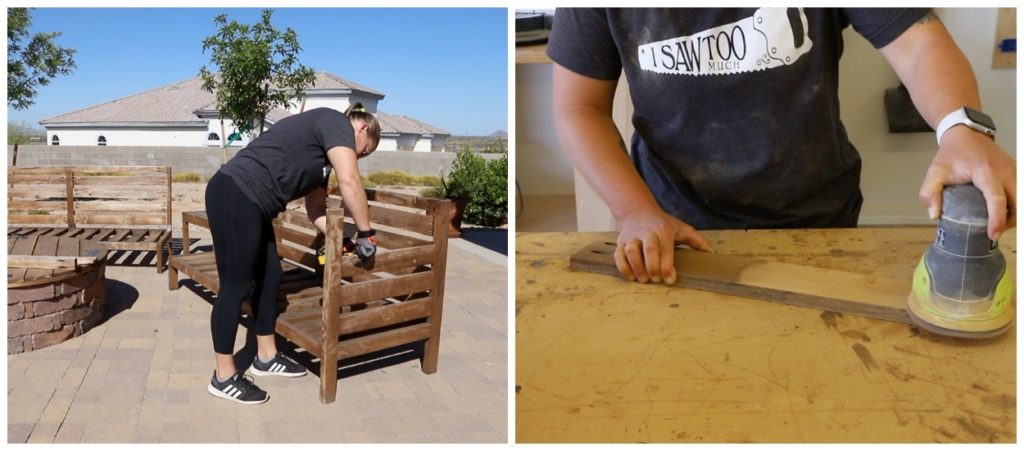
To get started, I disassembled the sofas. I took them apart piece by piece and organized them into piles based on dimension. I also saved all of the screws and my husband kindly separated those by size and stored them away for me.
Once the sofas were completely disassembled, I sanded the stain off of them with 150 grit sandpaper on my orbital sander. This was a lot of work, but well worth it. For starters, cedar isn’t exactly cheap (even from Home Depot), and the wood underneath the stain was still perfectly good!
Step 2:
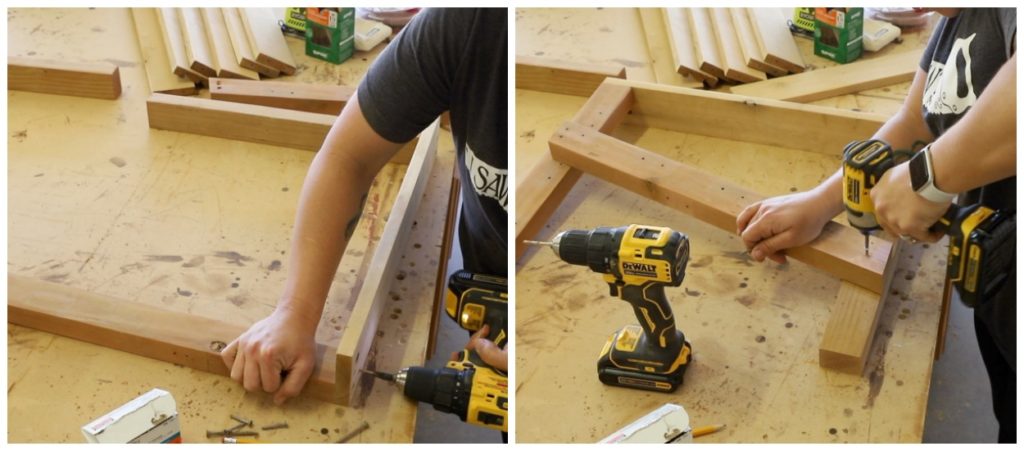
Once all of the wood was sanded down, I started to build the chairs. The chairs are made up of 1×4 cedar boards and 2×3 redwood boards. I’ll provide the full cut list in the printable plans.
I attached the arm rests to the legs, with 1 1/4″ outdoor wood screws. Because this wood was super dry, I predrilled counter sunk pilot holes to make sure the wood didn’t split at all.
The support for the slats that make up the seats is set at 13 1/4″ up from the front legs and 6 up from the back legs. I laid the 2×3 across the chair legs at those marks and marked the angle to cut them down to size on my miter saw. The angle ended up being 15 degrees. The support should be 3/4″ in from the front of the legs to accommodate the front apron that I’ll attach later.
I attached these supports with 2 1/2″ outdoor wood screws, again predrilling pilot holes to prevent the dry wood from splitting.
Step 3:
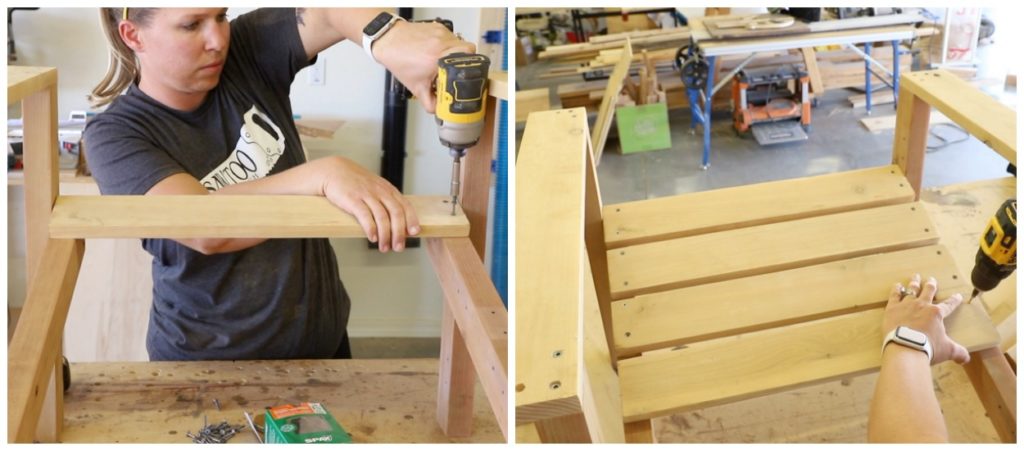
Once the chair sides were assembled, I could attach the seat slats. I installed the first slat flush with the front edge of the 2×3 supports using 1 1/4″ outdoor wood screws.
Once the first slat was attached, I began attaching the remaining three slats using a 5/8″ wide piece of scrap wood as a spacer.
Step 4:
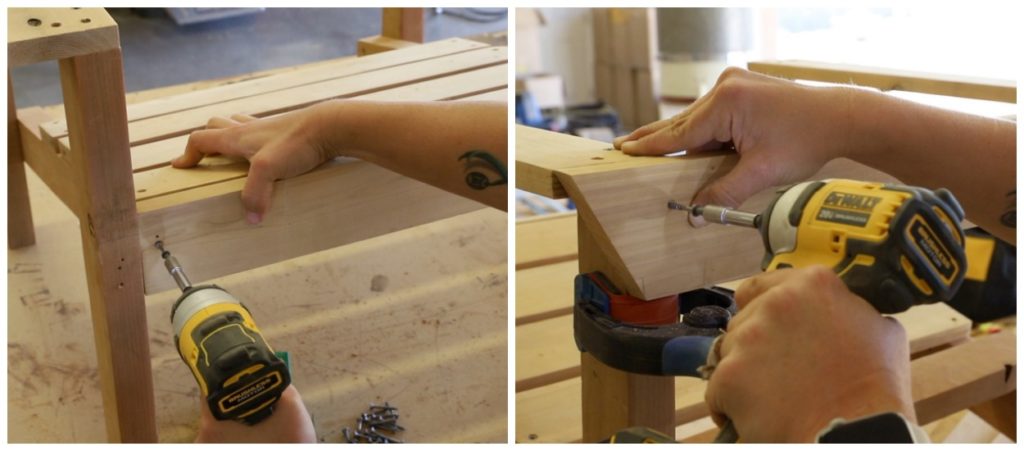
I attached the front apron to the 2×3 supports using 1 1/4″ outdoor wood screws. I also cut a 1×4 board the same width as the arm rests and attached it to the back of the chair to act as a support for the back slats. I cut a 30 degree angle off of each end of the support to reduce any sharp edges and also make it look a little nicer.
Step 5:
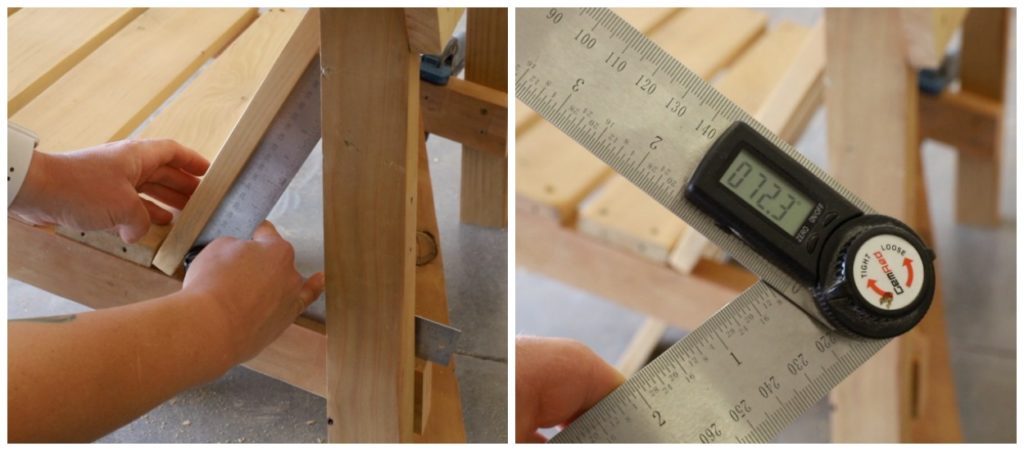
I dry fit one of the back slats in place to work on figuring out how I would attach it and keep all of the slats supported. I decided on using a 2×3 attached to the seat supports, but I needed to give it a bevel so that the slats would sit flush against the support. I grabbed my angle finder and to figure out what my bevel needed to be set at. The angle finder said 72.3 degrees, so essentially I needed to cut the chamfer at a 30 degree angle.
Step 6:
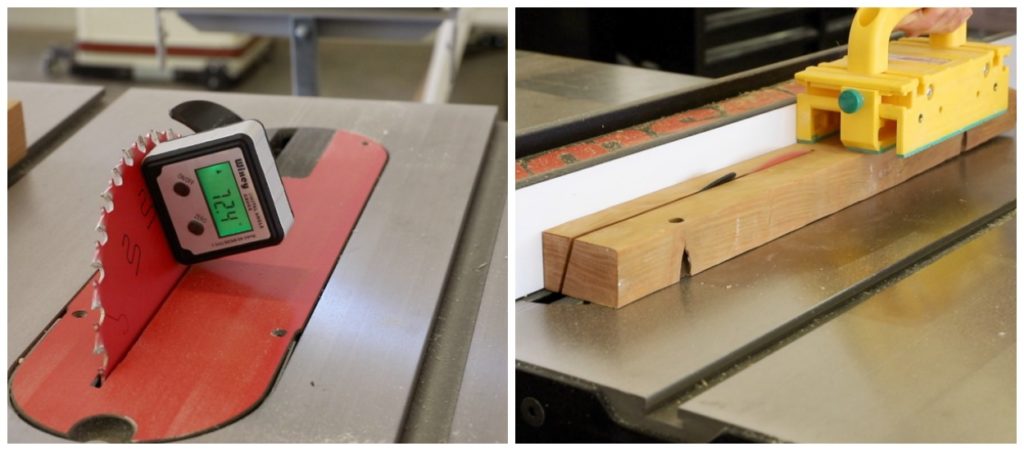
I went over to my table saw and grabbed my digital angle finder for my blade. Before you say anything, yes. I understand that this says 72.4 and the previous reading was 72.3. Honestly, I couldn’t remember EXACTLY what the reading was, but I figured close enough was good enough for me.
I ripped a 2×3 down to have the beveled edge, setting my table saw fence at 1/2″. You’ll want to keep the cutoff for later use.
Step 7:
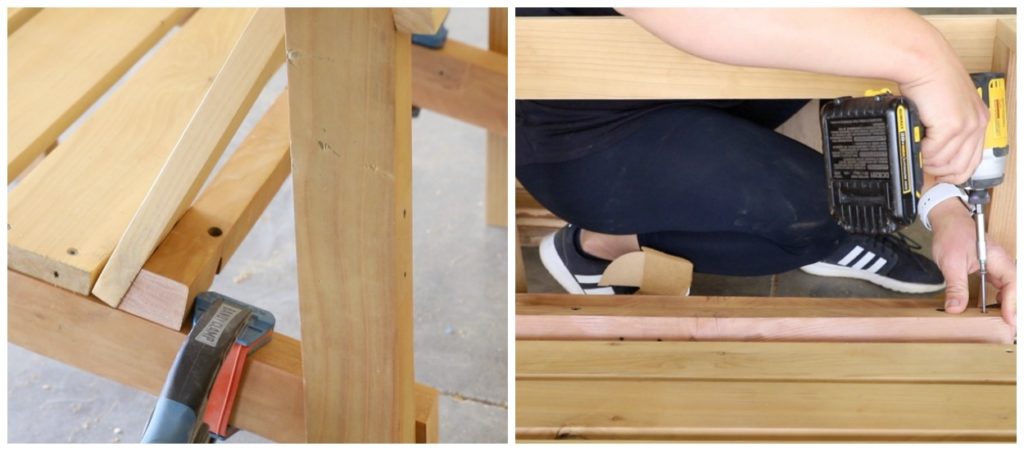
I clamped the support in place and then attached it to the seat supports with 2 1/2″ outdoor wood screws.
Step 8:
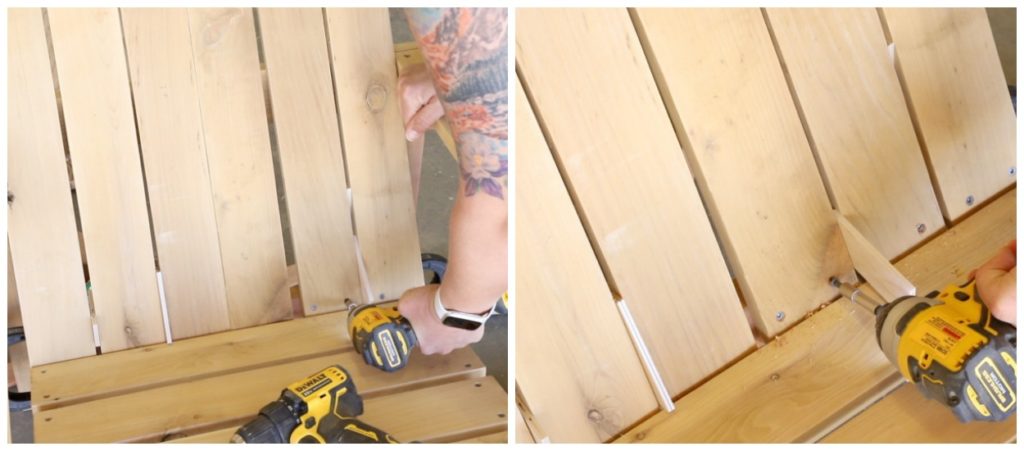
Once the support was secured, I began attaching the back slats to the chair. I pre-drilled pilot holes and then attached the slats with 1 1/4″ wood screws. I used 1/4″ plywood as a spacer for all of the slats.
Step 9:
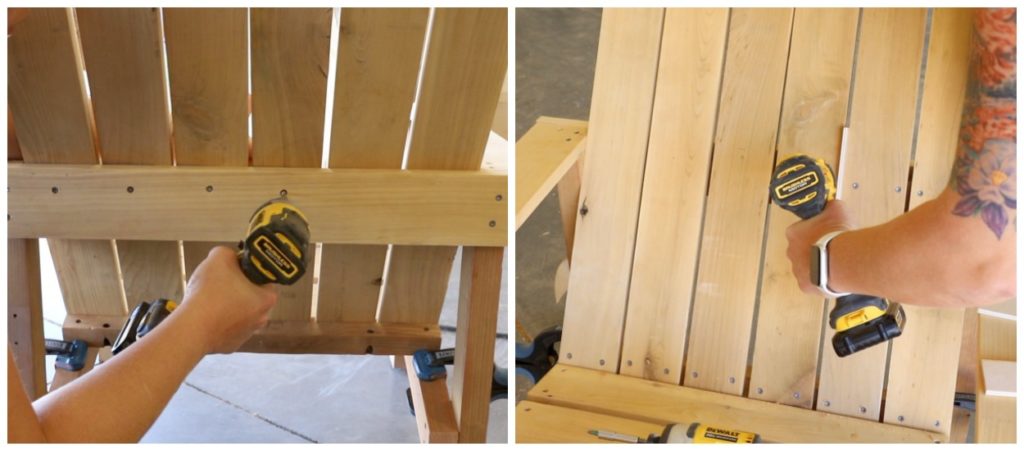
Remember that piece I told you I saved from the bevel I ripped down on the 2×3? I used that as a shim behind the back support on the chair. I attached it to the back support with 1 1/4″ outdoor wood screws. I went WAY overboard on attaching it to the support and really didn’t need to add a screw at every slat location. Honestly, I’m not even sure why I did it other than just that I probably got myself a bit confused. The shim will not fit perfectly in there, but it will reduce the gap between the back slats and the rear chair support. It will also give the screws more to bite into.
Once the shim was attached, I went back to the front of the chair and added 1 1/4″ outdoor wood screws to the front of the slats to secure them to the shim, which was VERY firmly secured to the back support.
Step 10:
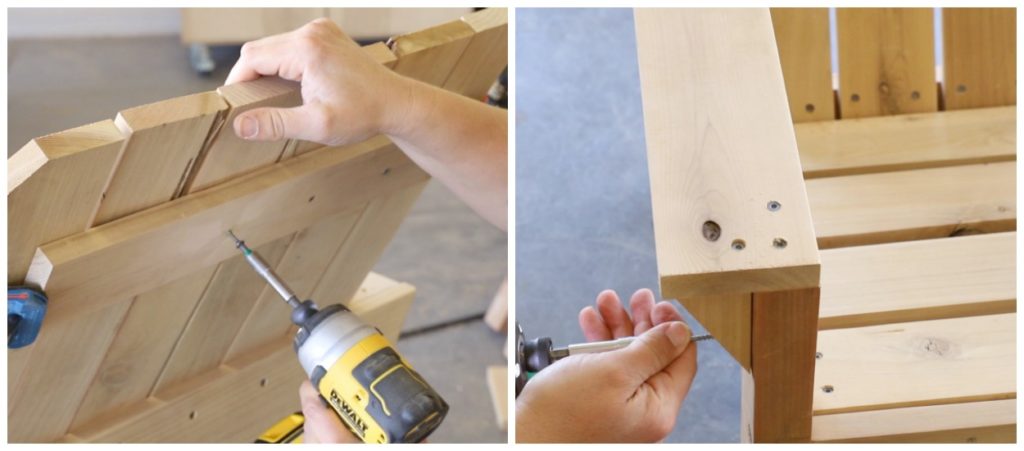
The top of the back slats still needed one more bit of support to keep them in line, so I cut another 1×4 piece and attached it to the back slats, 3 or 4 inches from the top, using 1 1/4″ outdoor wood screws.
I also cut a small 3″ long x 30 degree angled triangle to act as a support for the armrests. I attached it to the armrests and chair legs using pre-drilled pilot holes and 1 1/4″ outdoor screws.
Once everything was finished, I sanded it down with 220 grit sandpaper to take off any rough edges and corners.
DIY Upcycled Adirondack Chair
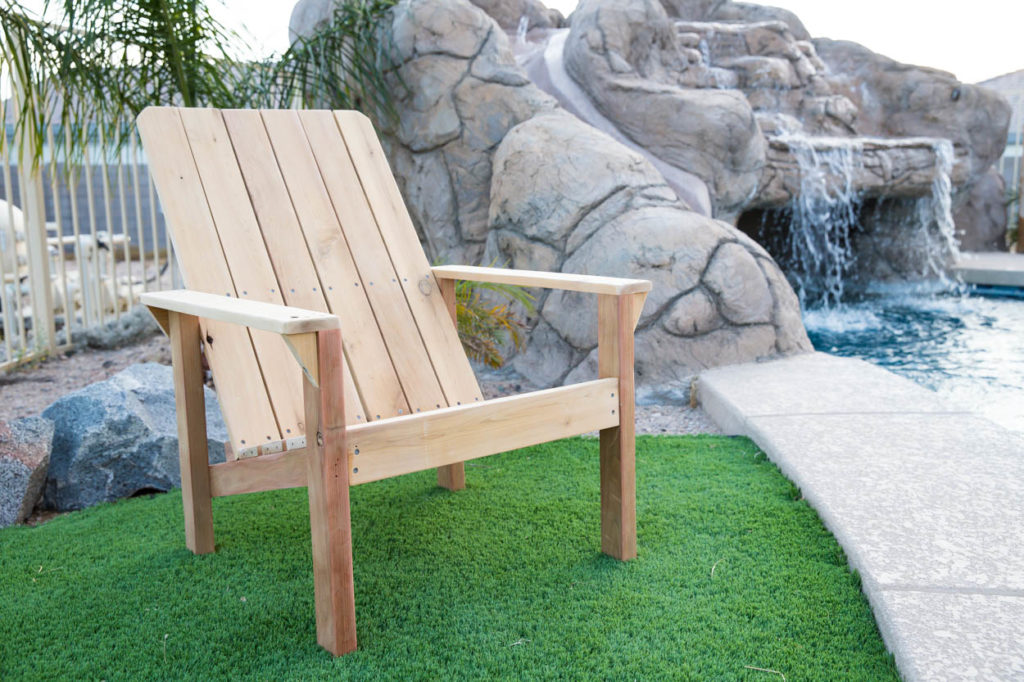
I’m so happy with how this chair turned out. Like I said, I have the intent to build two. I just didn’t have the time before publishing this. I have almost enough wood to build at least one more chair, though I did have to buy another 1×4 cedar board to have enough slats. I ordered a matte varnish from TotalBoat to finish off the chair and I’m still waiting on that to arrive. I can’t wait to apply it to the finished chairs. These will be perfect around my pool this summer and around our fire pit in the winter.
To see the other upcycled projects made by my fellow blogging friends this month, make sure you check out the links below!
My Repurposed Life
The Awesome Orange
At Charlotte’s House
The Created Home (project coming soon)
Thanks so much for following along with us each month! I have been having so much fun with these challenges and I hope you’ve enjoyed them as well!

Katie,
Your adirondack chair turned out awesome. I think I need on of those angle finders. I’m the WORST at finding any angle. 🙂
What an awesome space you have for that chair (and it’s mate when you make it).
As always, thanks for keeping this crew together. I love our monthly challenges.
pinned!
gail