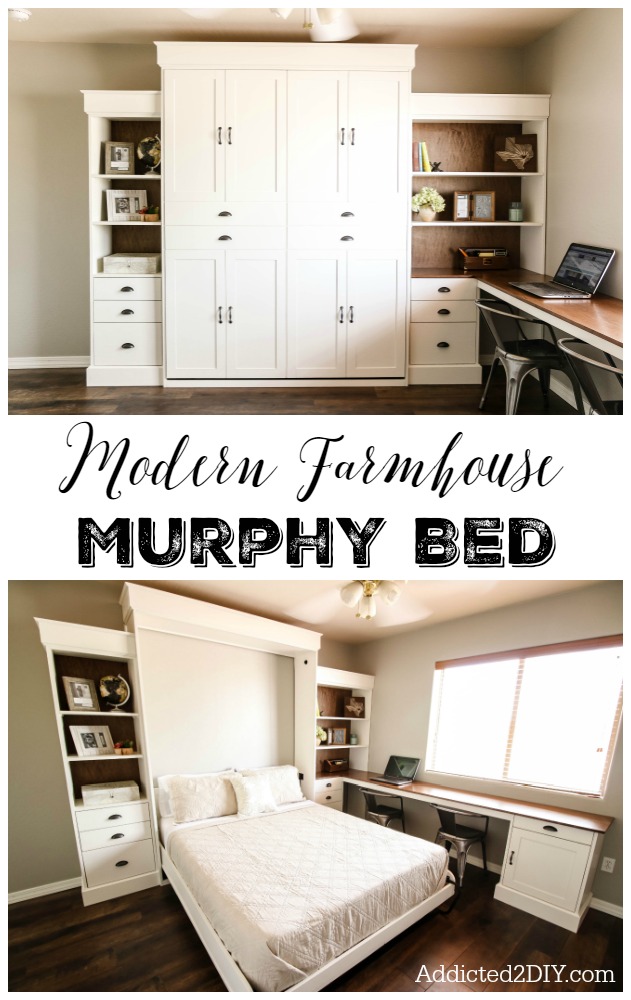
A Murphy Bed is a great way to turn any room into a guest room with the pull of a handle. This DIY Murphy bed project is easy to follow with the step-by-step tutorial and free printable plans.
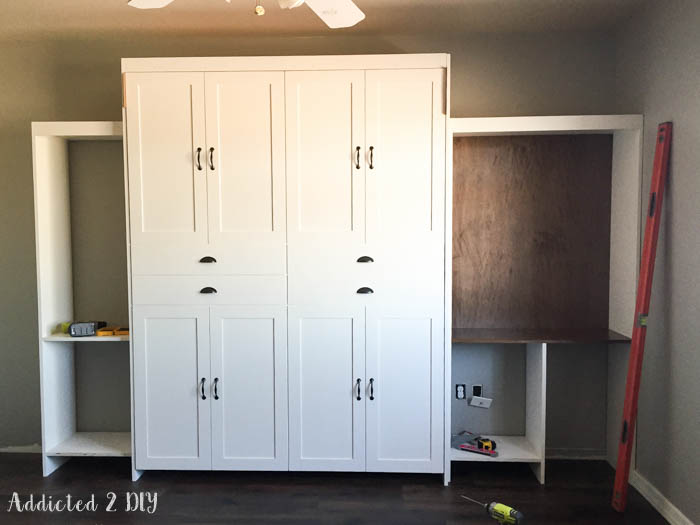
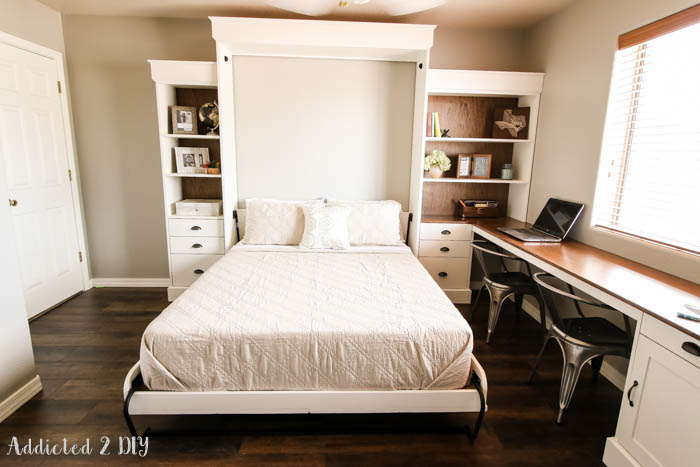
Hey there everyone! I can’t believe the day has finally come when I can share the tutorial for how I built this beautiful Murphy bed! If you’re new here, I’ve been remodeling my office/craft room to make it a more functional space. So far we’ve repainted the walls and replaced the baseboards as well as ripped out the old carpet and replaced it with wood laminate. The biggest portion of this remodel plan was the Murphy bed. Up until now, whenever we had out of town guests, they slept in our ‘guest house’ aka the trailer. It works great for long-term visits, but it’s a bit of a pain to prep and then clean up for overnight or weekend stays. I proposed the idea to my husband of building a Murphy bed and somehow also incorporating a desk space into it. He reluctantly agreed, though he wasn’t quite sure how I was going to incorporate a desk space for us to share. I wasn’t exactly sure either, but I knew that inspiration would strike at just the right moment. I had seen the plans and hardware for a deluxe Murphy bed on Rockler’s website and I loved the look of it. I figured that a few simple modifications could turn it into a functional office space for my husband and I. Because the desk modifications would make this post take a month to read, I’ve shared them here in a separate post. For now, here’s how I built the Murphy bed and smaller bookcase.
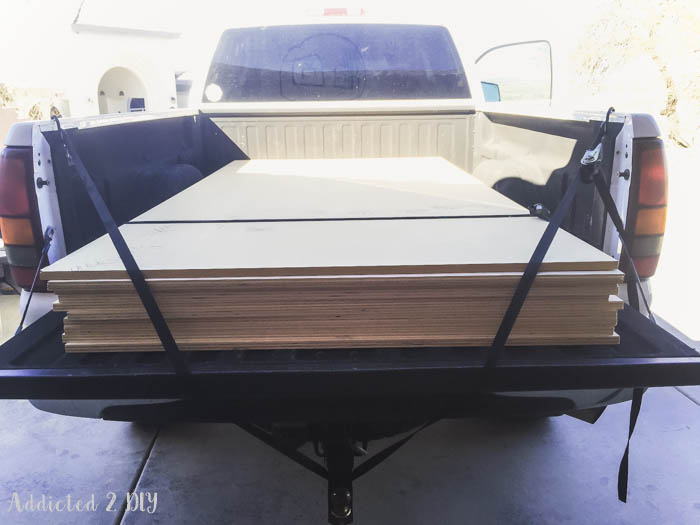
The first thing you want to do before beginning this project is read over the plans very carefully. Make sure you purchase the proper quantities of wood, hardware, and other materials. If you follow me on Instagram, you may have seen the gigantic stack of Purebond plywood that my husband and I bought for this project. I think we had about 12 sheets in all of 3/4″, 1/2″ and 1/4″ plywood.
I chose to build this project with Purebond plywood for a multitude of reasons. First, it’s a high-quality plywood made with renewable, responsibly-harvested North American hardwoods. It’s also formaldehyde free, which I think goes without saying how important that is when using a material that will be in your home. You can purchase it in various sizes in stores or online at The Home Depot, so it’s also convenient! I chose to use the maple veneer plywood for this project, but you can also find it in various species such as birch and oak.
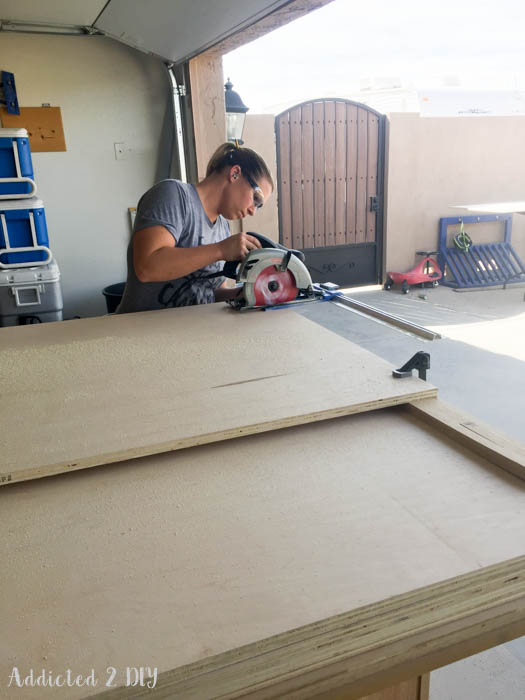
I started the project by ripping down all of my plywood pieces with my Kreg Rip-Cut. This way all of my pieces were cut and ready to go for assembly. The instructions are very specific on the plywood cuts to ensure that you get the most out of every single sheet.
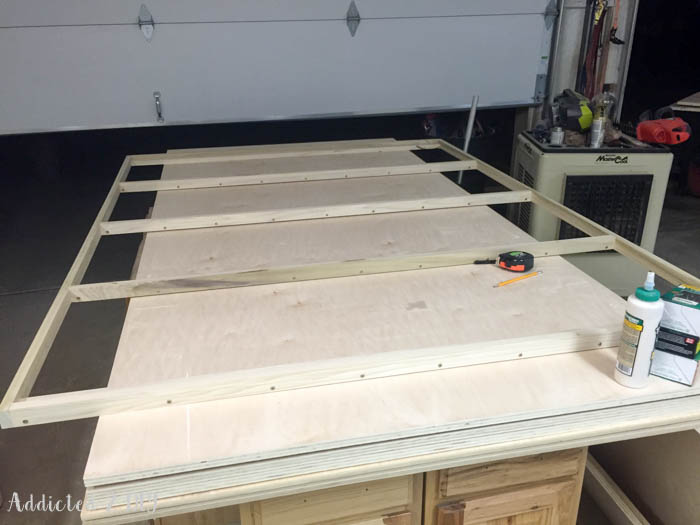
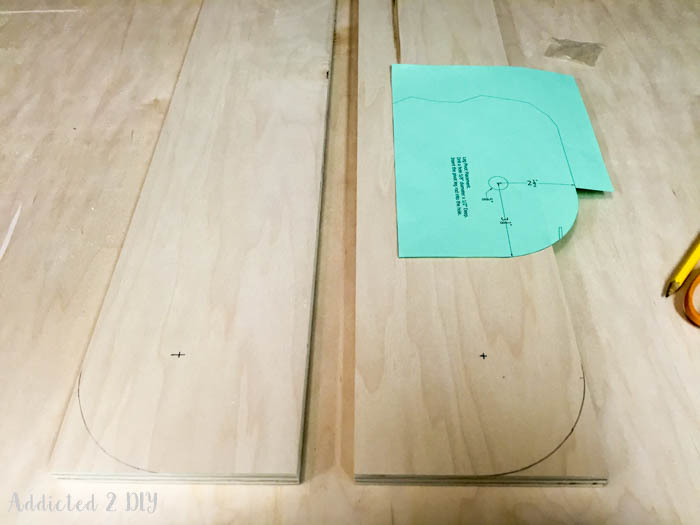
While the plans I used for this bed are able to be downloaded from Rockler, the Murphy bed hardware itself also comes with an instruction packet. In that packet are templates you cut out to mark your radius for the side rails and also to drill the holes. While this project may seem intimidating, the detailed instructions and measurements make it very easy to follow and build. There are slight differences in cuts and measurements between the two plans and that is due to the modifications made from Rockler to add the taller moulding and bookcases. I would highly recommend using the downloaded plans when planning out your plywood cuts. We were bouncing between the plans and ended up cutting our bookcase verticals shorter based on the hardware plans. It didn’t actually affect the project in any way, other than the moulding we used has less plywood behind it now. It is still held securely, so no harm done. It will save you from a moment of panic though when you think you’ve completely screwed up the whole thing.
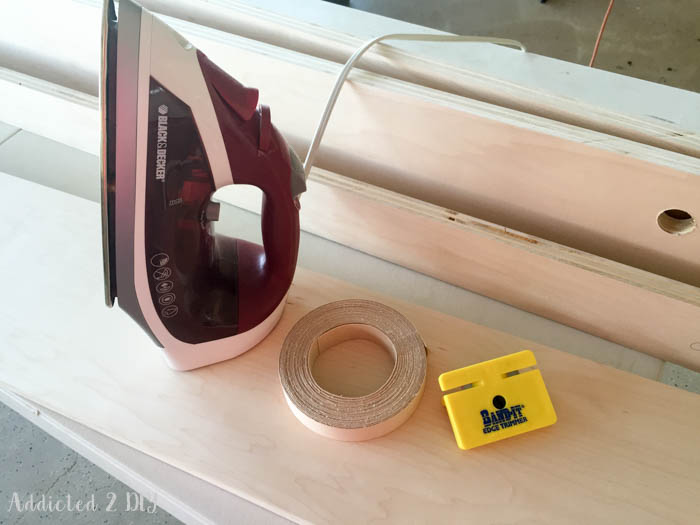
Because the majority of this project is constructed of plywood, you’ll want to apply edge banding to all of the edges of plywood that will be showing. You can find the edge banding at Home Depot and it’s easily applied with an iron. I HIGHLY recommend getting the Band-It Edge Trimmer to trim your edge banding. Coming from someone who once tried to use a utility knife to trim my veneer banding, this little tool is a life saver!
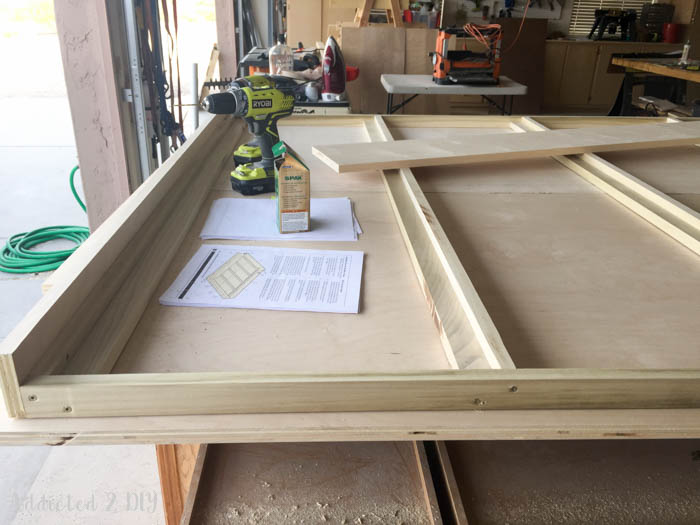
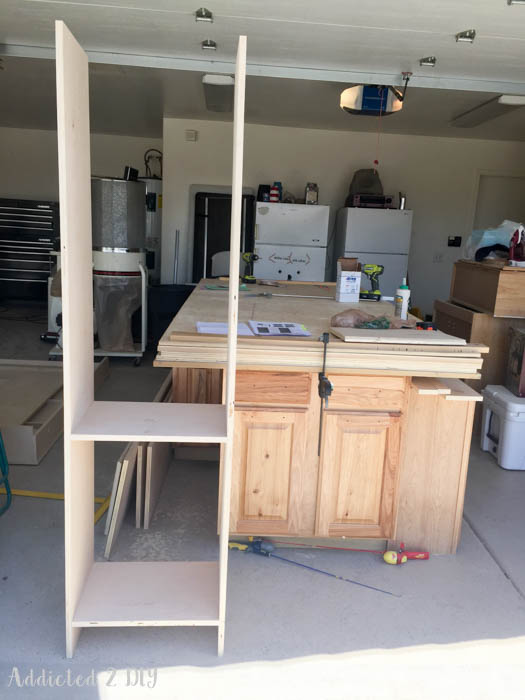
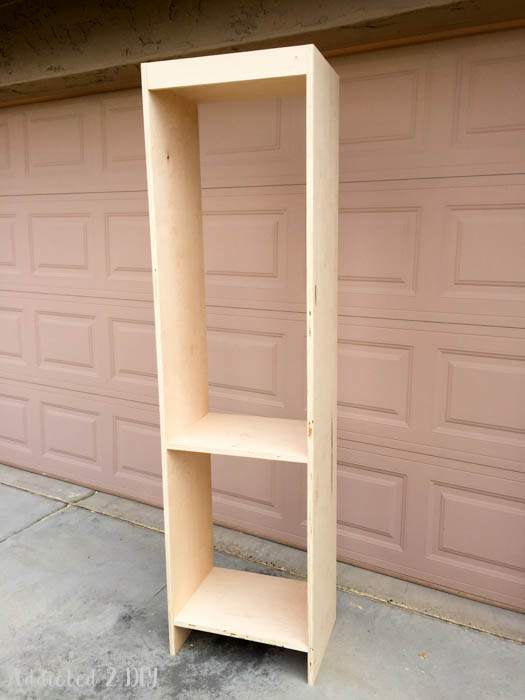
I deviated from the plans a little when assembling the book case. The fixed shelves are supposed to be set in a 3/4″ dado, but I decided to use pocket holes to attach them. This also meant shortening the fixed shelves to reflect that change. I cut them at 18 1/2″, which is the inside dimensions called for on the plans. I rabbeted the inside edge of the backs of the cabinet verticals to allow the 1/4″ plywood backing to sit flush inside the book cases. Again, all of these details are spelled out very well in the plans. I modified this bookcase slightly to fit in with the desk modifications, so the middle fixed shelf measures 30″ at the top of the shelf from the bottom of the book case vertical.
To attach the book case front and rear headers, I made 3/4″ dados using my router and a straight bit. If this isn’t something you’re willing to do or try, you can attach the front and rear headers using pocket hole joinery. Again, you just have to cut the top of the book case to reflect that, so 1 1/2″ shallower.
Once my book case was constructed, I added the edge banding to all of the plywood edges that would be visible. CONFESSION TIME: I didn’t add edge banding to the bottom fixed shelf, which I now regret. I figured it would be covered with the moulding, but the edge banding does have some thickness to it, so when I attached the front moulding to the book case, it didn’t sit flush against the bottom shelf.
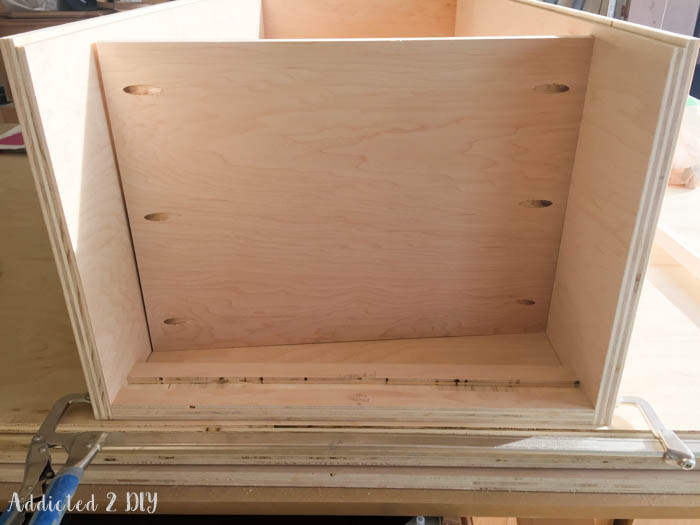
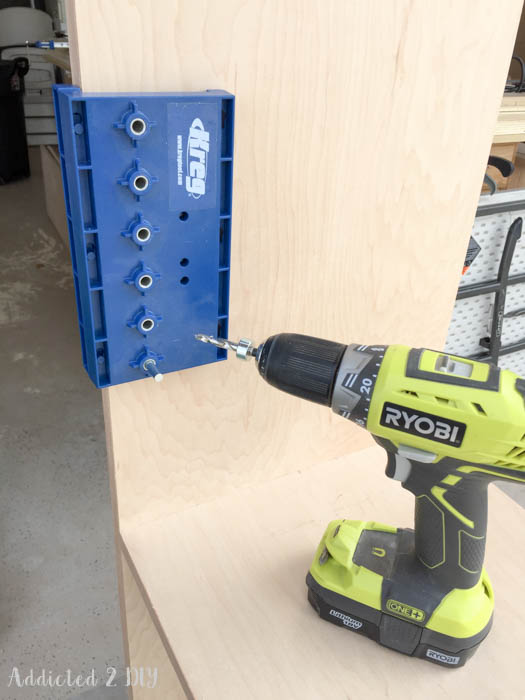
The two additional shelves on the book case are adjustable. I used my Kreg shelf pin jig to drill all of these holes. Again, another tool that you may not use often, but is absolutely worth its weight in gold when you do. The plans call for the adjustable shelves to be cut at 18 1/4″ to fit inside the 18 1/2″ cabinets. I found this to be way too much of a gap on each side when I built and installed the shelves, so I ended up making new shelves and cutting them at 18 3/8″.
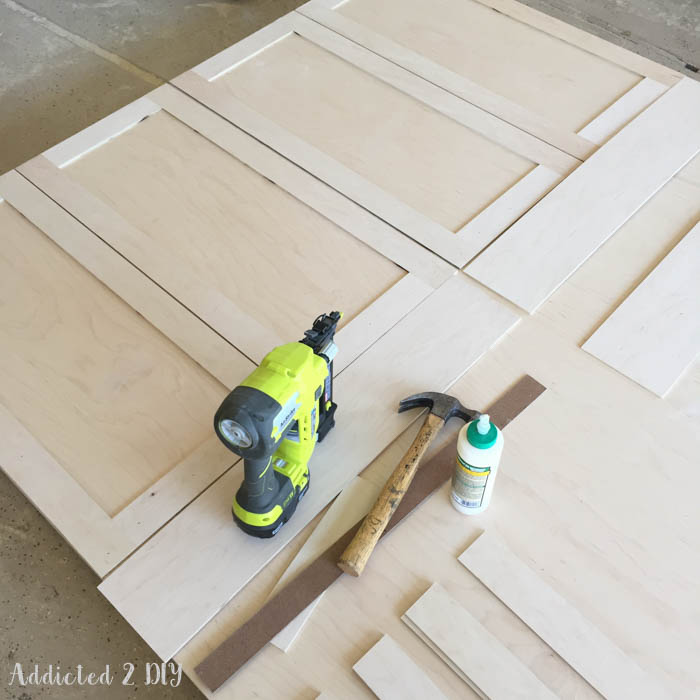
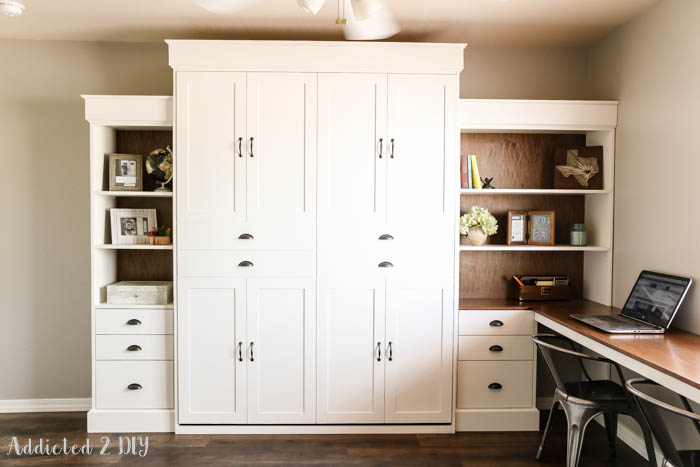
The front of the Murphy bed can be customized in any number of ways. You can do simple faux fronts to make it look like two big doors, or you can make it look like an entire cabinet system. The plans call for 1/4″ solid wood for the faux fronts. Since I was painting this, I opted to use 1/4″ PureBond plywood for the faux fronts.
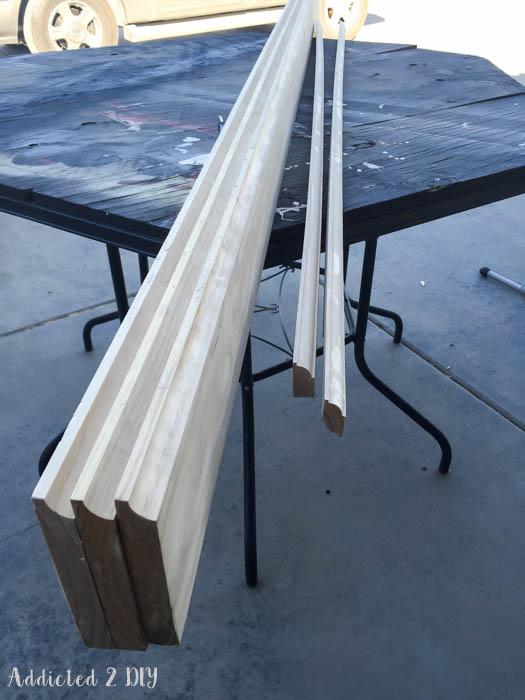
One of the things that intimidated me about this project was making my own moulding. I don’t use my router often, so it’s not something I’d ever done before. The plans call for a rule joint router bit set, but to buy them separately it’s just a 1/2″ x 3/4″ roundover bit (for the crown moulding) and a 1/2″ by 5/8″ cove bit for the 5 1/4″ moulding. Both of these bits I was able to purchase at Home Depot. I have to say now that I am kind of loving the idea of making my own moulding! It makes me want to make it for every project now!
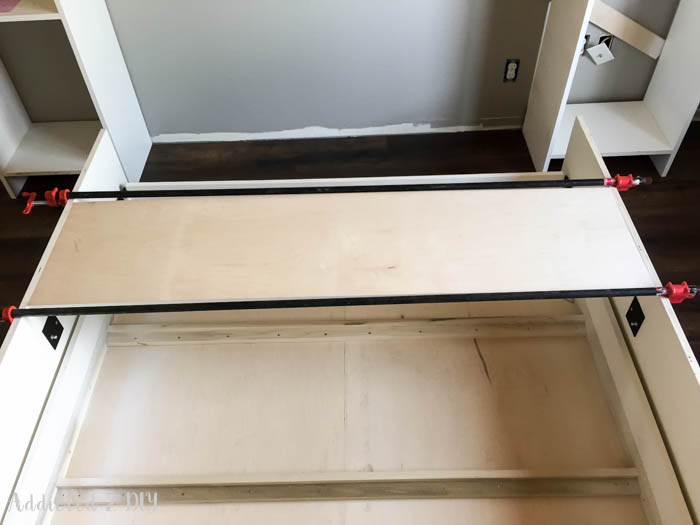
Once the bed was painted, it was assembly time. We started by assembling the bed platform to the cabinet verticals, then installing the headboard. All of this was done in the office. We laid a blanket down on the floor to prevent the front from getting any scratches or scuffs.
Once the bed cabinet was built, we stood it up and attached the header. Then it was time to install the gas springs. This part was actually really simple. They clicked right into place without effort. Installing the bed stops was probably the most difficult and stressful part of this entire project. For this step, I’d highly recommend having four adults to help. One to pull the bed platform out and hold it. Two to hold the cabinet verticals up, and then one to install the bed stops. There were four of us doing this, but two of those people were our 8 and 9 year old boys. It got a little hairy, but we got it done without incident.
Before we pushed the bed back against the wall, we installed the hardware.
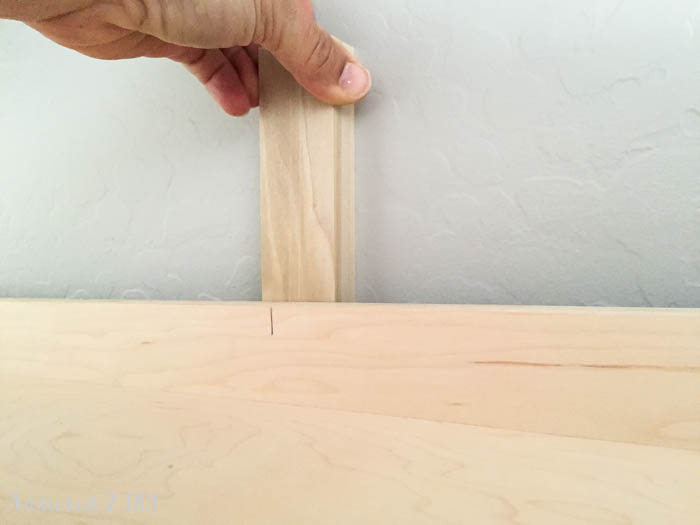
I secured the bed to the wall with four lag screws. My plan was to use 3″ lag screws into the studs, but quickly discovered that, while the bed stood level, our walls are not completely plum. When you have something as tall as this bed, the gap becomes very large by the time you reach the top of the bed. I ended up using 3/4″ scraps of poplar as shims between the bed and the wall. I marked my studs, drilled pilot holes, and secured the bed to the wall using 4″ lag screws to make up for the additional 3/4″ gap. Needless to say, this thing isn’t moving.
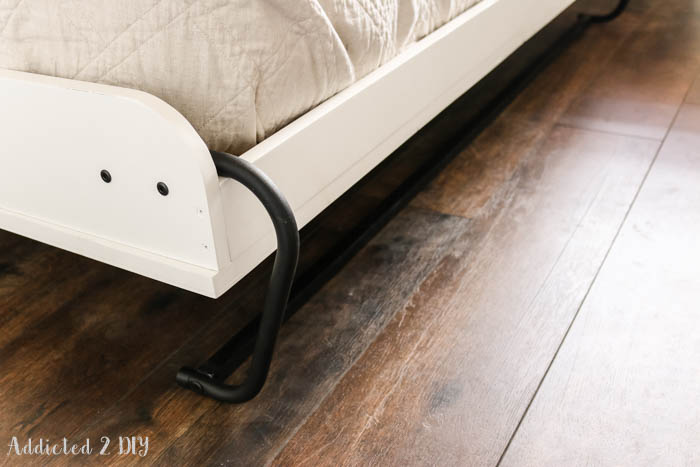
With the bed firmly secured to the wall, we installed the pivoting legs and support rail, the 1/4″ plywood mattress supports and the elastic mattress supports. Two 15 pound weights were sufficient to keep the bed down while we did all of this. Just for fun, we stuck our 6′ level on the bed rails and there was nothing more satisfying than seeing that bubble perfectly centered.
I made the leg support rail out of 3/4″ x 3/4″ poplar that I had ripped down and then spray painted a flat black to match the pivoting legs.
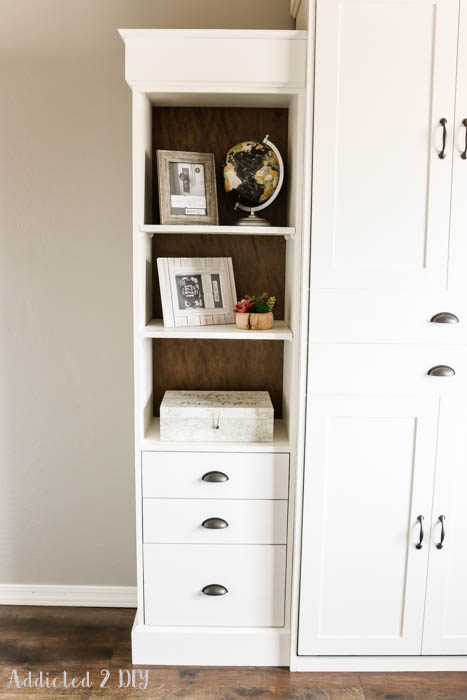
I attached the book cases to the side of the bed cabinet verticals using 1 1/4″ screws. I installed the top moulding to the headers using 1 1/4″ screws and the bottom moulding with 1 1/4″ brad nails. Make sure to measure and cut all of this to size. For the book cases, I installed the crown moulding after I attached the top moulding. For the bed, I had to attach the crown moulding to the top moulding prior to attaching it. We only have 8′ ceilings so there wouldn’t be enough clearance for me to attach it after the fact.
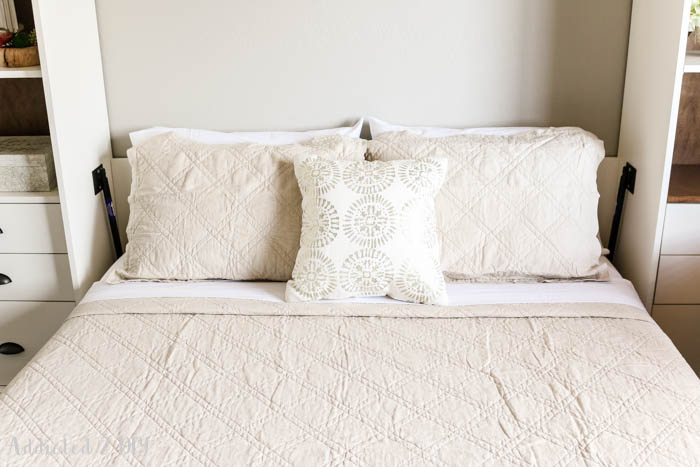
I found an amazing deal on a ‘bed in a box’ mattress on Amazon. It’s a Brentwood Home 11″ gel memory foam mattress. I wanted our guests to be comfortable when they stayed with us. I purchased the bedding from Target. I love the simplicity of the quilt and it fits perfectly with the modern farmhouse feel of the room. Because the bed gets folded up into the wall and the bedding needed to be tucked in, I knew that a quilt would be a much better choice than a comforter. Everything stays nicely in place when the bed is folded up. The pillows have to be removed, so I’ll be getting a big basket to store those in the closet.
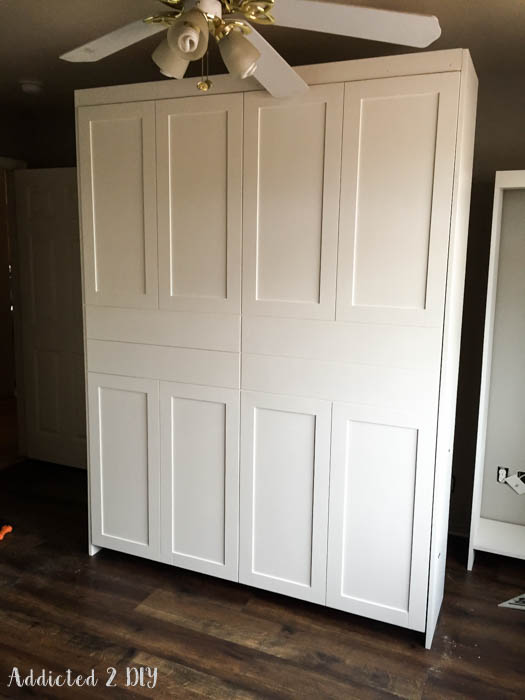
I am absolutely in love with the finished project! I had a vision in my head, but the this far exceeded my hopes and expectations! I find myself staring at it every time I walk past the office and I am so excited to get the rest of the room finished and get moved back in! Like I said, it seems a little intimidating at first, but it really isn’t hard to build. As long as you pay attention to detail, this project goes together so nicely.
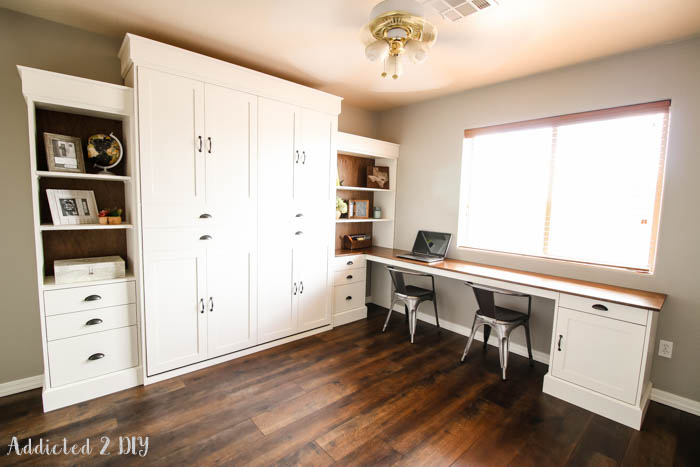
Have you ever thought of adding a Murphy bed to your home? If so, I highly recommend using these plans! I’m happy to answer any questions about them, plus Rockler has a great support team that you can call any time you have questions.
*This post is sponsored by Rockler and PureBond Plywood. All opinions of the products used in this post are 100% my own. For your convenience, this post contains affiliate links to products I used to build this project.



This is beautiful and brilliant!!! Love it so much! Pinning 🙂 Seriously might try to make this!
Thank you so much, Lindi! You totally should make one! I can’t wait to have guests stay over now!
This is is absolutely beautiful. Would love to try making one for my office/kids playroom. What size is this room?
Thank you, Courtney! The room is approximately 10×13.
This bed is awesome and I am so envious of your woodworking skills! If I didn’t already have a king bed in storage waiting to be installed in May when our son gets married and moves out, I would really try to convince my husband we need this. I love seeing all the things you make on your site!
Thank you so much, Donna! And that’s funny! It took some convincing on my part to get my husband to agree to completely tearing apart the office, but he always ends up liking the end result:)
This is beautiful! Ballpark figure on how much this cost YOU (not including tools or your time….)??? I realize materials vary in different parts of the country.
Thank you Sheri! I haven’t tallied all of my receipts, but with all of the hardware, wood, etc., I’d say maybe around $1300. It’s not the most inexpensive project when you add up the materials; however, for bookcases, office storage, a guest room bed, and a huge desk, it is quite the bargain. I found one version semi-comparable on Wayfair with a desk for $5,300. http://www.wayfair.com/Queen-Murphy-Bed-GBVH1504.html
That is awesome! To clarify, does your guesstimate include *everything*? Mattress, shelving units, AND the desk??? My husband and I would LOVE to build this too, but I want to be sure before I go any further, lol!
I did not include the mattress in the total cost, as the price can vary so much. When I bought the mattress, it was on sale for $350 and I happened to have an Amazon gift card, which took the price of it down to $275. The rest of it does include the bookcases, desk, hardware, etc. Prices of dimensional lumber do vary depending on where you live, so that could also have an impact on the cost. Hope this helps! If you do build it, I’d love to see a picture of your finished project!
Katie, you’ve outdone yourself it is so gorgeous!!!
Thank you so much Amy!
Katie it is seriously amazing and beautiful and perfect!! You totally rocked it girl! Wow!!!!
Mindi recently posted…Creativity Unleashed No 114 and a Home Right Steam Machine Plus Giveaway!
Thank you Mindi! That means the world to me:)
Katie, this is amazing!!! The bed, the desk, the shelves, what an incredible custom piece! We’re huge fans of Purebond and have been using it in the RV. We know there are some components we can’t change as far as off gassing goes, but figure we will use greener materials when we can 🙂
Katie recently posted…RV Renovation Progress Week 7
Thank you Katie! And you are so right about the materials. You want to use the best and safest materials possible and I can feel confident that the PureBond plywood I use in my house is safe for my family.
Love it! I’ve been researching Murphy beds as I want to do the exact same thing in our home. One question, in my research it has said NOT to use the memory foam/gel mattresses. Have you noticed any problems with yours? I have about four months till we downsize from a four bedroom to a three and have to combine my guest room with my craft room so would love to hear that this can work!
Thanks Jen! I haven’t heard anything about NOT using them, but it could be that some are just really heavy? I know that my Murphy Bed hardware said the mattress needs to be between 60 and 80 pounds. The one I bought is actually 50 pounds, but the mechanism still works perfectly.
I have. Put a memory foam mattress in my RV – that lifts up somewhat for storage. Granted, I am a 65 year old woman, but I feel like I’m pretty strong – but that mattress is heavy!!!!! I can barely lift it a couple of feet to get out the wine that is stored underneath!
This mattress seems to be fairly light compared to regular spring mattresses. I also think that not all memory foam mattresses are created equal, so some are definitely heavier than others. The particular brand that I purchased actually sells a variation that is specifically for RVs. It’s a little thinner and lighter.
This is amazing thank you for sharing! I’ve been looking for a good solution for my guest bedroom. I like to use it as an office space but it never feels welcoming when I have guests over. I think I’m going to have my boyfriend look into this and build it for me! I love that all the instructions are easily downloaded.
It really has made such a difference! I work in this room every single day and I love that it feels like a functional office but turns into an inviting guest room almost instantly.
Did you use a Murphy kit or did you but all materials at the hardware store I been trying to figure out how to do this without needing the kit
I used a kit with Murphy bed hardware. The kit comes with the materials list and instructions to build the Murphy bed.
Amazing work!! I love it!
Beautiful! I am making plans to do this in my daughter’s room once she graduates from college. Since I work from home several days a week’ this will make a perfect office space/guest room. You mentioned you have 8″ ceilings, but what was the wall space this is on? Thanks
Hi Peggy, the wall that this is on is approx 158″ long. 30″ of that length is taken by the swing of the door. Hope that helps!
That’s a nice idea. I’ll try to do it. Thanks for sharing!
Jack recently posted…A Guide to Neuromuscular Massage
Where can I find the 1/4″ x 3 x 8 and the 1/4″ x 8 x 8 that the plans call for? None of the big box stores seem to carry it.
Where can I find the 1/4″ x 3 x 8 and the 1/4″ x 8 x 8 that the plans call for? None of the big box stores seem to carry it.
Hi Ryan,
I used 1/4″ plywood for mine. Since I was painting it, it is not even noticeable. I know that you can get 1/4″ hardwood from your local Rockler store or order it online from Rockler. Another option is to have 4/4 lumber resawn at your local hardwood store, or saw it down yourself and plane it if you have a bandsaw and planer. If you are painting it; however, the 1/4″ plywood works great.
Truly Beautiful. Lived in NY City with a Murphy Bed in My studio apartment for 14 years. Never should have sold it. Brilliant idea for a Den/Guest Room!! My husband would flip a gasket if I asked him to make one for our den. How long did it take to make from start to finish? Cheryl
Hi Cheryl,
It took me about a month to build. I didn’t work on it every single day, though.
Not sure if the excited made me miss it – but what size mattress is this for and what were the final measurements? My son’s room is like the size of a closet so something like this would be AWESOME!
This is for a queen size mattress; however, you can order different hardware kits for full or twin sized mattresses.
Sry final measurement for the ENTIRE piece – including the desk you later added. I noticed you used a few diff sized wood than the plan called for so wondering if that changed anything
The finished unit is about 124 1/4″ wide and the depth with the desk included is 110″.
I will most definitely follow your plans when building mine! It looks great 🙂
In Germany, murphy beds are not really popular so I can’t find kits. You mentioned in one comment that the mattress from your kit needs to be between 60-80 pounds. Could you actually let me know if there’s a Newton measurement written on your gas pistons? this would be very helpful for me since the mattress I already have is much heavier!
Thank you!
Marie-Lise
I don’t believe there was a newton measurement; however, you can contact Rockler who makes this Murphy Bed hardware kit and they might be able to answer this question for you.
Hey there! We are about to attempt this and are very nervous 🙂 What did you use to paint the unit? Also, did you use a paint gun?
Oh I’m so excited to hear that! I used Behr Premium paint in Swiss Coffee. I used my HomeRight Finish Max to paint it. Here’s the link for the tutorial on how I painted it: http://addicted2diy.com/2016/04/16/how-to-get-a-professional-paint-finish/
I’d love to see pictures when you’re done building yours!
This is beautiful. When the bed is down how much space is underneath the bed?
Hi LeAnn, I’d say there’s about 8-10″ underneath the bed when it’s down.
Hello,
I was looking at murphy bed designs and was about to drop 2000$ on a costco one with a smaller desk and no bookshelf, I’m glad I found your post! I had a quick question, I see there are kits ranging from 270-370$ does it matter which deluxe kit is purchased?
Thanks
Hi Peter,
The kit that I linked to in my post from Rockler is the one I used and recommend for this project. Good luck with your project!
Could this be modified for a King size bed?
It does not look like they offer the hardware for a king size bed. They have it for twin, full, and queen.
Thank you for this detailed post! We are planning to build a murphy bed using Rockler hardware in our basement. Quick question – did you remove the base molding at the point where you have the bed against the wall? I’m assuming it would be best to leave the base molding off the wall where the bed goes until after the installation. Thank you in advance!
Yes. I removed the base moulding when I installed the new floors and then added it after the fact. If you don’t plan to remove all of your base moulding, then you can measure and cut out the area where the bed and desk fit flush against the wall.
This is REALLY gorgeous! I am not handy AT ALL but love your website for ideas! One question…my murphy bed will need to be horizontal because it’s in my basement with 7-foot ceilings (and a vent I need to work around). I’m planning on hiring someone to build this for me…will it be a fairly easy modification for a carpenter to do a similar look but horizontal? Any chance you also made horizontal plans??? 🙂
Thanks!!
They actually have plans for a horizontal bed on the Rockler site, so no modifications needed!
Beautiful. This is what we are putting in our laundry/guest bedroom. Ever since we bought this house and started renovations 15 years ago we have talked about plans for that room. It’s getting close to upstairs construction and that’s where the laundry/guest bedroom is located. I’m so excited. I think we’ll likely go with your plans. My husband is a carpenter and he’ll have no trouble with it.
Thank you so much for sharing your dream.
kesha
Ever since I first saw this a year ago I can’t get it out of my head. Can you tell me the finished dimensions of the entire bed and side cabinets
Hi Karen,
I will send you the file. Thanks!
Nice work. Love it! Keep it up.
Hi, could you tell me approximately how much did this cost you to build w/o the desk option? i know prices can fluctuate, but just a ballpark figure?
It would be hard to try to figure that out, because I bought all of the wood at the same time. I believe it cost me around $1,300 to build the entire unit, so subtracting the desk could make it around $1,100 or so. It all depends on where you live and where you purchase your materials. I’ve found that prices vary by region.
Beautiful! It’s time to reorganize my small house I want to do the exact same thing in my son’s room. You’ve inspired me. I will be trying to make Murphy Bed
How many hours did you spend on the project? Time to build the bed and bookcases, and time to install the bed/hardward?
Hi Kelly. I spent a month from start to finish with building the entire project.
You are amazing!!! Been wanting to do this, and hope to follow your plans!!
Love your blog and this murphy bed is just what I’m looking for. Could you tell me your ceiling height. I am dealing with a ceiling height of 89″ and everyone is telling me I need 90″ for a cabinet of 87″.
Our ceilings are 96″.
Have you noticed any separation between the layers on the memory foam mattress? I have heard that this can be an issue when they are stored upright for extended periods of time. If you haven’t had any problems, I would also like a comfortable and affordable option for guests, and I think memory foam is the way to go! Love your project. Thanks in advance for your response.
Hi Tanner,
I have not noticed that at all with this mattress and it has been over a year since finishing the Murphy Bed. We’ve had guests sleep on it many times since then and everyone has been very comfortable:)
Is there any reason why the bookshelves couldn’t be the same height as the bed? I love your site & am looking forward to doing (or at least trying) some of your projects. Wish we had had our contractor do this when we built our house but so many fantastic ideas have come up since then (13 years) & didn’t seem appropriate for a Victorian home. Now I don’t care & am going to do what I like even if it’s not totally Victorian anymore. Want more shabby chic & lots of shipman (probably never should have started watched “Fixer Upper”!
I don’t think there’s any reason why they couldn’t. This just adds dimension to the project to have them lower.
I’m curious how the mattress stays on platform when you close up the Murphy bed??
I’m curious how the mattress stays on platform when you close up the Murphy bed??
Hi Debra, the murphy bed hardware kit has elastic bands that attach to the platform and hold the mattress in place when it is in the upright position.
Hi! I’m new to your blog, but as I am hoping to merge my office and guest room, I am so found I found you. There’s just one problem – the first part of your plans are giving me an error. I can only seem to open and save the desk add-on part. Is there any way you could share them again? Thanks so much!
Hi Monica,
I’m so sorry you were having difficulties. You are not the only person, apparently. I will email you the PDF plans now:)
This is so beautiful! This is EXACTLY what I’ve been looking for to revamp my home office/guest room! However, the links to the murphy bed .pdf plans don’t seem to want to work. The links for the desk modifications work, but not the murphy bed plans. Is there anywhere else on your site I could find them? Thank you so much for these instructions I can’t wait!
Hi Chariese,
I am not sure why the plans would not work, but I just downloaded them and I will email them to you now:)
The plans for the Murphy bed are no longer accessible. Do we have to purchase them?
Hi Crystie,
I was able to download the plans just now. I will go ahead and email them to you just to be on the safe side:)
Tried clicking the plans link, didn’t work.
Hi Lisa,
Thank you for letting me know. I will email the plans to you and follow up again with Rockler as to why the link isn’t working.
Hi, nice blog post! I was looking for a piece of plywood strong enough to withstand body weight. How do you reinforce the sheet of plywood? I heard that cracks and splinters need to be sealed up because those are points of vulnerabilities.
Hi Cece, the plywood in the bed platform is supported with a dimensional lumber frame to ensure there is no flexing or weak points.
Beautiful bed! I love it! I tried opening it as well and could not get it to work 🙁
Hi Laura,
Thank you for letting me know. I fixed the link, so hopefully it will work now. I’ll also be emailing you the PDF plans. Thanks for stopping by and I’d love to see photos of your finished project, should you build it!
Love this! We need to do this in our guest room. Can you email me the plans for the Murphy bed. I am unable to get it to work.
Hi Kim,
Yes, I’ll email them to you now!
Hi Kim,
How is the walk around room on the desk side of the bed when down? How wide is the walking space? Do you have plenty of room at the desk?
Thanks and incredible job!
-Scott
Hi Scott,
There’s plenty of room to walk around the bed when it is down and also when sitting at the desk. I have used my desk numerous times while the bed was down and haven’t felt cramped at all.
Thanks!
Katie
This is so beautiful! We are making our list now of materials we need to buy to build this!! Can you tell me what stain/color you used for the desktop? We just love that color! We are so excited about this project!!
Hi Jamie, thanks so much! The stain color is Special Walnut by Minwax. I’d love to see photos when you’re done building it!
I’m totally making this for our youngest sons room. He is 13 and enjoys his “floor space” and has been wanting a desk too. So, win! Win! I may falter from the bookshelves initially Bc he’s a teenager and if he hated it well, I’m not sure how well that would go over. Lol. I am addicted to making furniture though and I love these pieces. Thanks for sharing.
I’m sure he will love it! I’d love to see photos once you’re finished building it!
This is exactly what I was thinking of when designing my new room so that you do much for posting this. I wanted to use my bedroom as my crafting and sewing room too and this will work perfectly! Amazing !!
THank you Shelley! Yes, it is a perfect solution when needing/wanting both a craft or office space AND a guest room:)
This has been a challenge but i will jump up and down when I’m done!!!
The plans that you posted vary some in wood dimensions. The header board: front rail, rear rail and mounting cleats are different widths on my Rockler plans.
This has been a challenge. But I will jump up and down for joy when I’m all finished. I did run into an issue with the plan that you posted in the way that it differs from the plan from rockler.
The bed header : the front rail, rear rail and mounting cleats are different dimensions on the two plans.
Yes, the plans included with the hardware and the plans on Rockler’s site are different. We ran into that exact same issue and had to just make it work.
These plans look great. Do you think the Murphy bed could be installed over carpet? Thanks for your advice.
Yes, it can be. It is mounted to the wall, and very heavy, so you shouldn’t have any issues with it moving.
I finally got my Murphy Bed done after having the kit from Rockler for 2 1/2 years! Lol! One suggestion I have is if you can, assemble as much as you can in the space where it will reside. I was lucky and had my woodworking group over for a meeting and “hoodwinked” my friends to get it upstairs! It was not an easy task!
I can only imagine! And yes, I totally agree with you. It’s definitely easiest to assemble where it will be. We did as much as we could in the house, but ours is also a single story:)
This is my favorite! Can I see a close up of the “drawer” pulls and “door” handles? Thank you!
Hi, Could these plans be adapted to use a King sized mattress? Obviously the only thing that would need to change would be the bed size, but not sure if they make a mechanism for that? Thanks!
I don’t believe so. This can be made in a twin size, but I don’t believe they sell the hardware to account for a king sized mattress.
Hi Katie,
I just ran across your site while searching for an office/guestroom solution. I love the fact that you don’t have to put away your office equipment and stuff (computers etc) once the Murphy bed is lowered.
My questions are how easy would this be able to make if you are living in an apartment and have limited work space. What power tools and other tools are required (I admit I have not downloaded the plans yet) ? How much of a mess is the construction process? And if one was motivated what do you think the time frame would be from start to finish?
I love this idea for our new small space (downsizing from a 4 bd/3ba house to a 2bd/2ba apartment) and the fact that we can take it with us when we move.
Thanks,
Shawn
It might be difficult to build in an apartment if you don’t have a dedicated garage space. Ideally, you would want a 2 car garage to be able to move around and build the project. You would need a circular saw, miter saw, a drill, etc. It took me a solid month to build it, but it was worth every second.
Hi there.
I certainly hope you still check this message thread. I wanted to ask you about your Murphy bed plans. How would you recommend one go about editing them to fit a horizontal bed that is full size…???
Any help you could provide would be VERY much appreciated!
Hi Cathy,
Rockler does sell a horizontal Murphy bed hardware kit. You can then modify the plans to include bookcases if you like:)
Hi Katie, do you have the plans for the table and book shelves and drawers?
Hi Sarah,
Yes, I have the links to those in the post that is linked in this one for the bookcase with desk.
It looks amazing! How much did you spend in total for this project?
It was about $1,300 in all. It’s hard to give an accurate price; however, as lumber prices vary depending on where you live. It may cost slightly less or slightly more.
Gorgeous! Thank you!!
Is it possible to use your plans but modify it by making it narrower and using a full instead of a queen mattress? Thank you.
It would be difficult to do, but not impossible. You would have to do a lot of figuring when it comes to every single measurement that takes into account the width of the project.
Beautiful!! All hardware kits and plans that I’ve seen are for mattresses 12″or less. Anyway to adapt it to make it fit up to a 14″ mattress?
It’s hard to say if a 14″ mattress would work. They are heavier and therefore could affect the way the mechanism operates. As for modifying the plans, you would have to make all of the dimensions deeper to accommodate the thicker mattress.
Great looking project.
1) The most important .. This will be for a student apartment so I can’t attach anything to the wall. How can I modify this project so that it is Free Standing but Sturdy (especially when pulling it down and bring it back up) without changing (expanding) the footprint of it much?
2) and please relist the materials to just the murphy bed? I have no room for the lovely bookcases as I share the room with 2 other roommates ( and 2 more apartment-mates in a 2nd bedroom).
3) Do you think it’s possible to build small sections of it it away from the apartment ? Then I can put it in a van and transport it and put it together at the apt as there is no room to actually build it there ( no garage, no extra floor space and restrictive common area rules ). How can that be done ? What steps are changed ?
4) I plan to have the murphy foldout at the side of the bed instead of from the foot. My desk will be at the head of the bed so when the murphy is up, I can have floor space for my chair.
Yours is the best looking and straight forward plans I have seen and I love to add bookcases when I finish school and no longer have so many roommates.
I can’t wait to make this and show you the final product.
Hi Lil,
I would highly discourage building this if it will not be attached to the wall. It needs to be anchored in order to safely pull the bed down. As for the style of the bed, Rockler sells either vertical or horizontal hardware, so you definitely can have a bed where it pulls down from the side. The hardware also comes with plans and those plans do not include bookcases. The link to the plans I shared on their site also can be built without adding the bookcases. You’d just need to omit those parts as you build. As for building it elsewhere and transporting it, you certainly can. I built mine in the garage in pieces and then we carried it all into the house and assembled it. Hopefully this helps!
Hi Katie!
Oh my stars! What a gorgeous project and incredibly detailed post!
My husband and I have been considering a Murphy bed for our den for a while now and hub’s honey do list has shrunk enough for him to take it on this winter! Yay!
Would you mind telling me what you used for paint? Brand and finish? How was it held up?
Thanks so much for sharing your time and talents with us!
Hi Candace,
Thank you so much! The paint I used on the Murphy bed was Behr paint + primer in Swiss Coffee. The finish is satin. It’s held up great over the past three years!
I love your detailed plans. However I didn’t see any idea of total cost, is that something you’re willing to share?
Also a few questions regarding your build specifically. Could you disassemble the bed box, frame and book cases to move and reuse again?
I ask this because we’re a military family that loves a lot, and I couldn’t imagine leaving this beauty when we sell our home or move every few years.
The actual frame is where I am drawing a blank on building. Every example I find plans for shows finishing the frame by building in room, glueing, and securing all pieces together. This will not be easily dissembled and moved. If I can’t take it apart I cannot get the framed portion which is tallest in and out of the room. Clearing the door frame and the hall is an issue. Is there a better way to do this than what I am thinking? We have a full size bed, but we could use a queen in that space if we have enough room to do so.
I did not glue the pieces together when I assembled them in the room, so you do have the option of disassembling it and moving it when/if needed. Hopefully that helps!
Have you had any problems with storing the mattress upright? Has it gotten lumpy? It looks so beautiful!
Not at all! It’s been 3 years and the mattress looks and sleeps (according to our guests) the same as when it was new:)
I LOVE this so much. My daughter has a smaller room and I would love to take this project but add a wardrobe on one side for extra closet space. I always am curious how hard is the bed to pull down and push back up? Thank you so much!! And I would stop and stare every time I walked past this room too! lol you guys did a GREAT job!
Thank you! The bed is actually very easy to pull down. The mattress acts as a counterweight for it.
I have been looking for a Murphy bed and desk combo but none of the ones I am finding I like. This would work PERFECT for what i’m Needing for our guest room. This is GORGEOUS! I just wish we had the time! (We have almsot a 5 month old that keeps us busy and my husband works crazy hours). Would you be interested in making me one and shipping?! Lol
LOL! I can’t even begin to imagine the shipping cost of that! 😉
Where can I buy the hardware? On the face panels. Not the kit.
I purchased my cabinet pulls and handles from Home Depot.
Hi, I love the Murphy bed and especially the desk modifications you made! Our ceilings are 87 1/2. If we adjust the crown molding on top of would it fit? The bed face panel is 81 3/4 so I am thinking so, but I would hate to begin this project only to find a bed can’t fit!
Hi Jillian,
Yes, if you reduce the size of the moulding on top, you can easily make it fit into your room!
I was just curious what was your total budget with this project when you finished or an estimate so I can plan for it please if you happen to know
Hi Kelly,
It’s been a while and prices vary depending on where you live. For me, the entire bed was under $1500 to build.
Did your edge banding come in white or as a wood product ? Looks like you put it on then painted it ? Love the ideas and design , can see myself attempting one this spring . Maybe i missed it but did you order the murphy bed hardware online ? Thanks for any reply !
Hi James,
Yes I ordered the hardware from Rockler. You can find a link to it in my blog post. Also, the edge banding is birch edge banding, so it’s a natural wood color that I then painted with the rest of the project.
hello,
this room looks amazing!
can i know thw size of the whole unit? width, length and hight.
henk you in advance..
Hi Heli,
All of the dimensions for the project are in the printable plans, which you can find links for in my post. Thank you!
I love this! My boyfriend and I would really love to try and build this. The only thing I’m wondering is if it would be difficult to flip the plans so that the desk is on the other side. That would work out much better for the room we have.
Nope! That wouldn’t be a problem at all! The bookcases are attached to the main bed frame at the very end, so you can easily just flip the plans and it will all work out the same.
Wow, just wow! I’ve done seen a few of these pull down beds working for the Handy Squad doing removals but this hast to be the best one I’ve seen done DIY. Great blog! Luke
Thanks so much!
Hub there! I’m hoping you see this as your tutorial is still so popular! Do you think it could be built following the plans and leaving off the bookcases? Are the bookcases just “extra”. Not adding anything structural or for anchoring purposes ? It’s just amazing what you did with the plans for your space!
Yes! The bookcases are completely optional. You can just follow the simple plans included in the hardware packaging, which do not include the bookcases on either side:). Thank you for stopping by!
I’m looking forward to making this! I see the rockler plans but it sounded like you had modified plans? All of the links were rockler. I do see your desk plans and am able to get those. Thanks!
Hi Ellen,
Yes, the original plans for the bed are from Rockler. I included my modifications in the desk post. Thank you!
This came out wonderful! I’m planning on trying this project, but I’m curious about the materials. When I look at say the 1x2x6 poplar is that what you used? In other words, did you follow the material list on Rockler as is or make some adjustments like not using cherry and not using certain pieces and instead used plywood?
Hi Melissa,
Yes, I made adjustments based on the materials I could find. For example, the false fronts on the front of the Murphy bed are 1/4” thick cherry in Rockler’s plans. I was not able to locate 1/4” thick material for this step and instead used 1/4” plywood, since I would be painting it. As for the poplar, yes, that is what I used. I purchased 4/4 poplar from my local hardwood store and milled it down to the 1×2 dimensional lumber called for in the plans.
I LOVE this bed! Definitely something I want to tackle with my hubby in the future. Quick question: would it be possible to make the bed/cabinet and attach to existing bookshelves? I have a bookshelf that’s solid wood that I’d like to use next to the bed. Or, could I just attach the bed to the wall and leave the shelves as separate units?
Hi Rebekah,
You can absolutely build just the bed! It attaches to the wall and the bookcases then attach to the bed, so you can certainly use your own existing bookcase.
Thank you so very much for these plans! I have been eyeing this for our guest room forever and a client shared your site with me asking if I could build it for her. I was so excited to finally be able to build it and I can’t wait to build it for my home too!! You made an intimidating project so do-able, so thank you thank you!!
Thanks so much for your kind words!
You have inspired me, a military Interior design wife, to take this project on…I need an office space, but it normally ends up having to share with the guest bedroom. This will be the PERFECT solution so I don’t have to lug out my heat press and just all the things to do my crafting.
I printed out all the plans and will have to flip flop the side with the desk modification for the room I’m putting it in, but I have a few questions.
1. So in the plans I see I will definitely need to get, a circular saw, Kreg Rip cut, Band it edge trimmer, pocket hole jig, Kreg shelf pin jig. Are there any others that I might have missed?
2. Did you find the maple veneered wood at your local hardware store?
Thank you!
Hi Ashley,
You’ll also want a miter saw if you don’t have one. You can purchase the veneer plywood at your local home improvement store, as well as the rest of the wood needed for this project. When it comes to the trim at the top and bottom of the bed, it’s totally optional to use a router to make it, or you can just go with store bought trim (or even just use a board without routering the edges).
What is the depth of the mattress that can be used? We have a pillow top that is about 14″ and would like to use that without buying a new mattress.
This mattress is 11″. I believe 12″ is the max you can use for this.
Amazing! Absolutely love it!!! Thank you for sharing your talents.
Thank you so much!
I’m going to start building this. step one is buying the kid from Rockler. I noticed the link is not working though on their site. did they retire that SKU? is there another vertical murphy bed on their site you could ‘re-affiliate’ with? i noticed there are a few options and i want to get the right one. thanks for any help!
Hi James,
I’m so sorry for the delayed response. Here is the updated link in case you are still needing it! https://www.rockler.com/frameless-murphy-bed-kits-vertical-mount
Hi my husband and I are going to be doing this. can we use a queen mattress that we already own and it isn’t as thick as what the plans say to use. Also, can we use a smaller trim piece at the top instead of the 5.25″ size? I am so excited to get this built, I want to be able to use our spare bedroom for my workspace too. Do you have any other advice for us as we prepare to build this?
thank you,
Hope
Hi Hope,
As long as your current mattress is not too heavy, you will be fine. I believe the weight limit is 75 pounds for the mattress. You can certainly use a smaller trim piece on the top as well. As for advice, just take it one little bit at a time. It’s a large project and will take some time to build, but the plans break it down nicely.