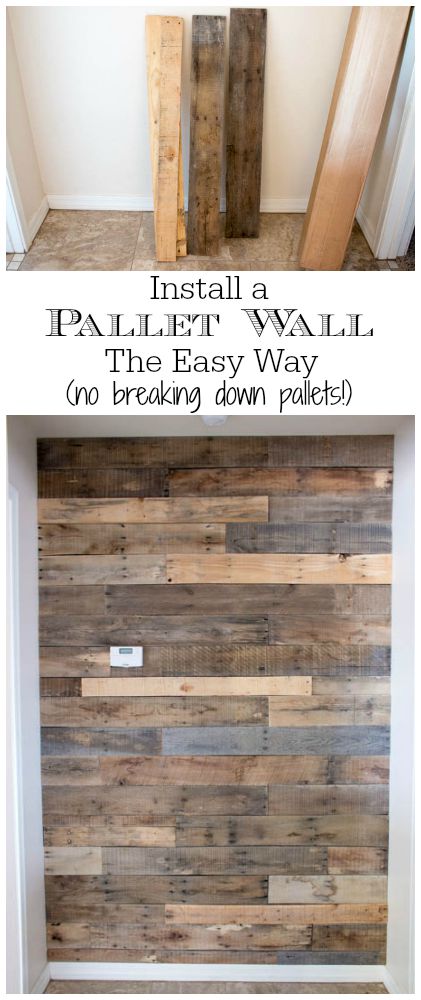
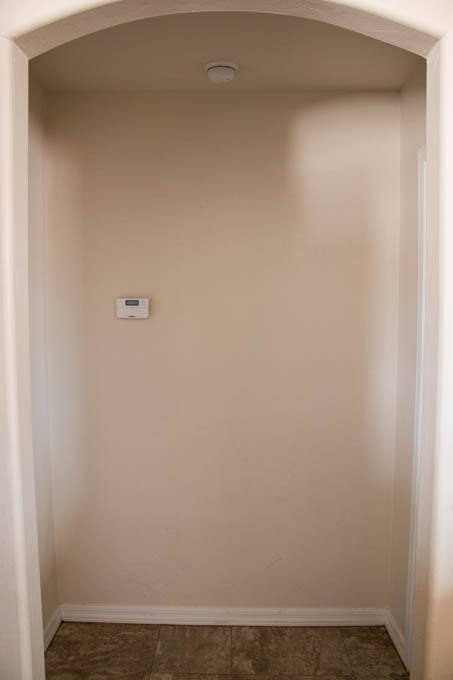
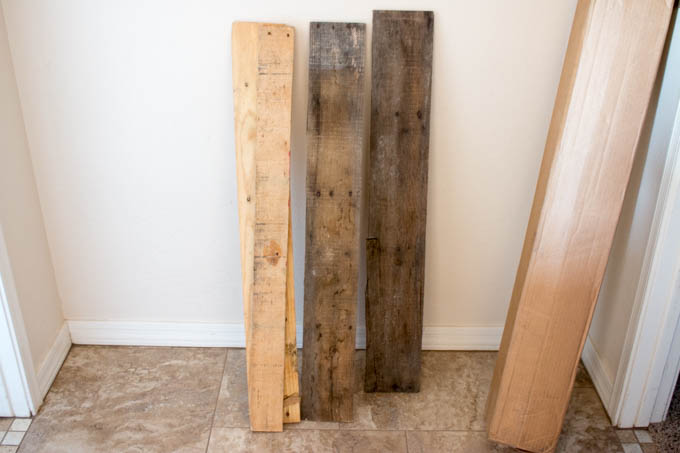
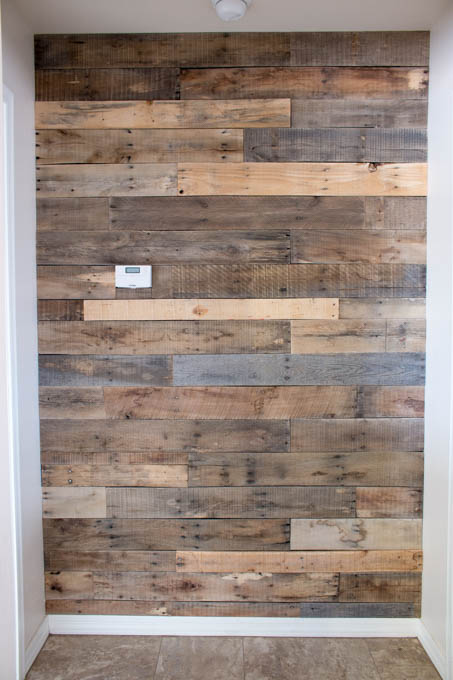
Hey everyone! I’m so excited to share this post with you today. It’s a project that has been on my list for quite some time and I’m happy to say that I finally get to check it off! I have been wanting to give the hallway between my boys’ bedrooms an update for a while. It was pretty boring and I wanted it to have some interest. It’s not a large hallway, but with our open floorplan, you see it from almost every vantage point. I thought that a pallet wall would be the perfect solution to liven it up a bit. The best part? I didn’t have to break down a SINGLE pallet! Yep, you read that right. No prying, pounding or cutting was needed for me to get these gorgeous pallet boards. I recently discovered that Crates and Pallet sold already broken down pallets online from Home Depot. At around $26 for a full pallet, it’s a great deal compared to buying an assembled pallet and breaking it down yourself.
Before I get into how I installed this pallet wall, I should inform you that I was sent these pallets and compensated for this post by Crates and Pallet. That being said, this was a project I was planning to do anyway, and I was already going to purchase this pallet wood from Home Depot.
The hallway wall I wanted to install the pallet boards on was about 40 square feet. Not too big, so I received four whole broken down pallets to work with.
Before I got started, I sanded all of the boards down with 220 grit sandpaper. I wanted to get off any of the rough spots so my boys didn’t end up with splinters if they rubbed (or pushed each other) against the wall.
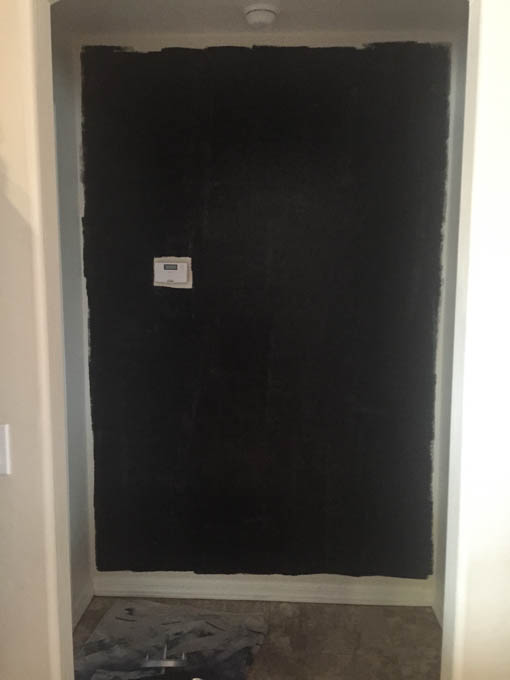
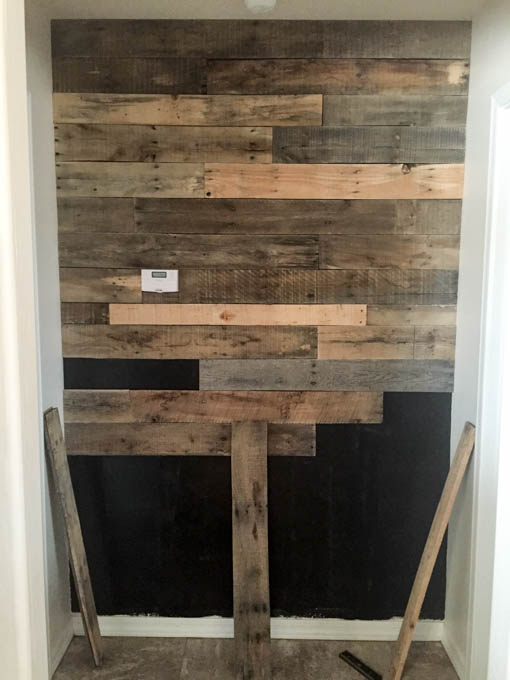
Before you install the pallet boards, you want to paint the wall they’re going on a dark color. Pallets are not perfect and no matter how hard you try, there will be a gap or two here and there. The dark wall color hides those gaps for you. I happened to have some black paint in my garage cabinet so I grabbed it and quickly painted the wall. I didn’t even do that good of a job, just a quick single coat.
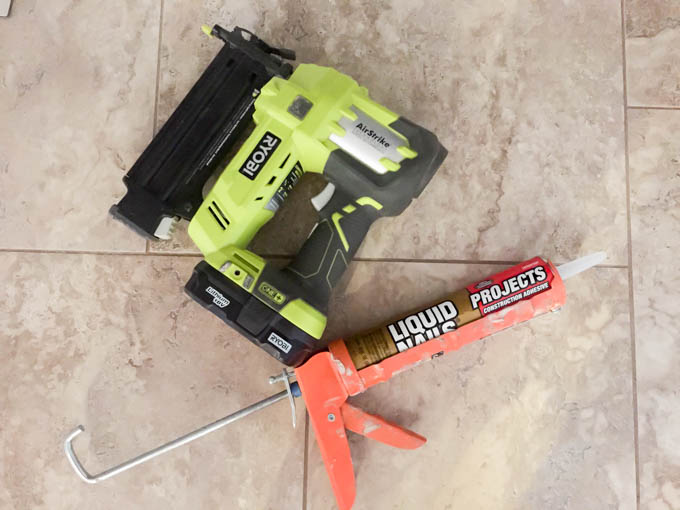
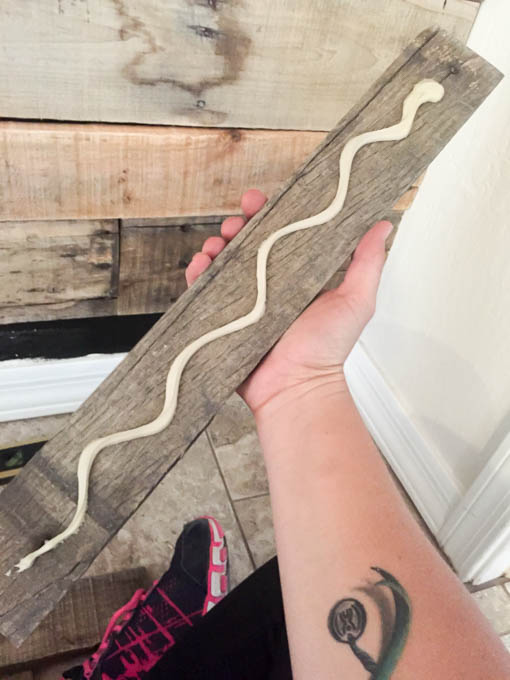
You don’t need many materials to install the boards. I used liquid nails and my brad nailer. On the other side of this wall is my boys’ bathroom and I didn’t want to recreate the great flood of 2010 when we hit our water main while installing chair railing in my youngest’s bedroom, so I went with shorter brad nails (1 1/4″) to avoid hitting the plumbing in the wall. Really, I just wanted them to hold the boards in place until the liquid nails dried. Keep in mind that this method means that you’ll be replacing your drywall if you ever decide to take it down.
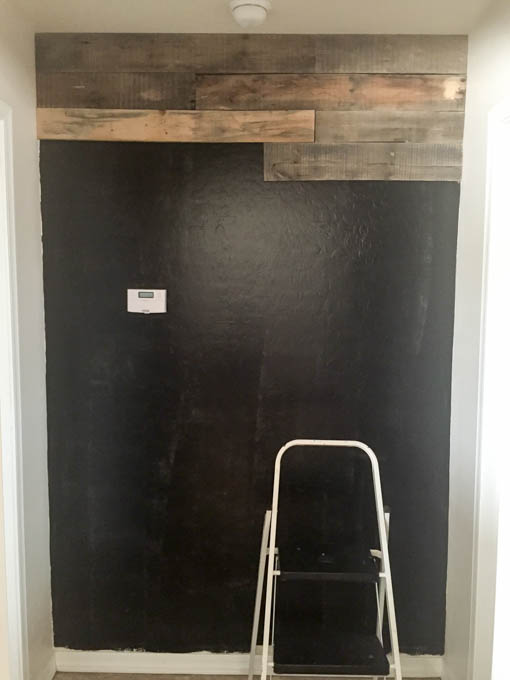
I started from the ceiling and worked my way down. I knew that I wouldn’t have a whole piece when I finished this and I preferred that it be at the bottom rather than the top of the wall.
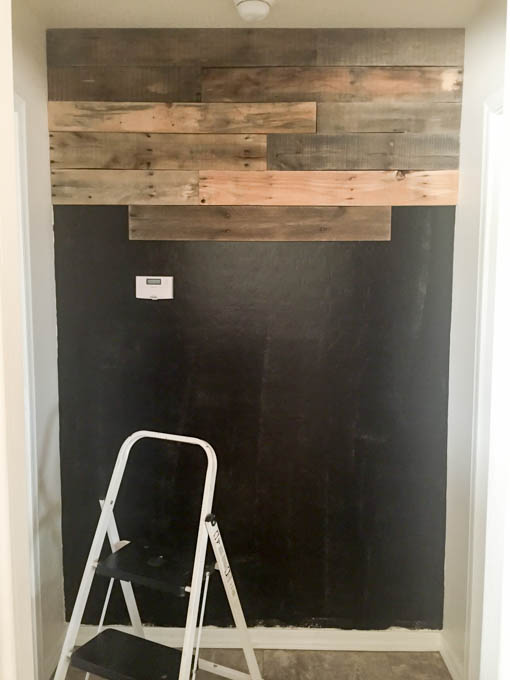
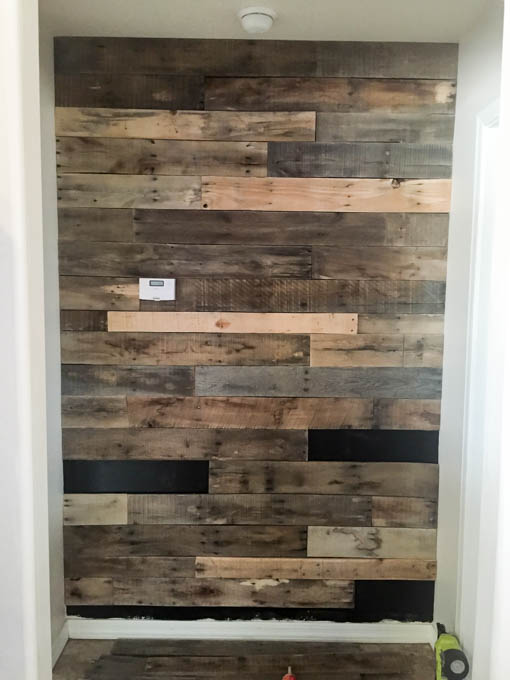
I worked my way down the wall, trying to make sure that I changed things up with the pattern to make it as random as I could. The pallet boards aren’t all the same width, so you want to be careful not to get too carried away with installing the whole boards and cutting later. I ended up having to rip some of the boards down to make them the correct width. Some of the boards were in great shape and some were pretty rough, so I used those uneven or broken pieces when I needed to rip something down.
I tried to mix up the colors as much as possible and keep the boards level. I didn’t grab my level too often, but sometimes I’d check if things looked off. When it was finished, I ended up with a 2 1/2″ strip on the bottom of the wall that I needed to rip the boards down to fit. I chose to keep the baseboard on the wall, but it’s just personal preference.
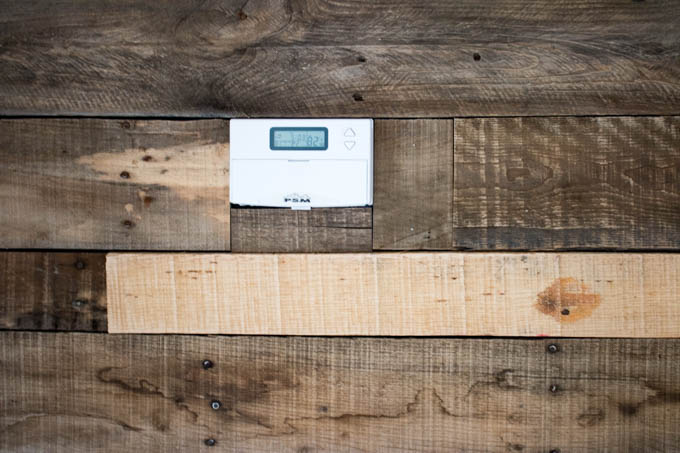
I got pretty lucky with the thermostat on the wall. Working my way from the ceiling, it ended right at the top of the thermostat. I had to make just a couple of little cuts to fit the boards around it, but I was pleasantly surprised at how easy it was.
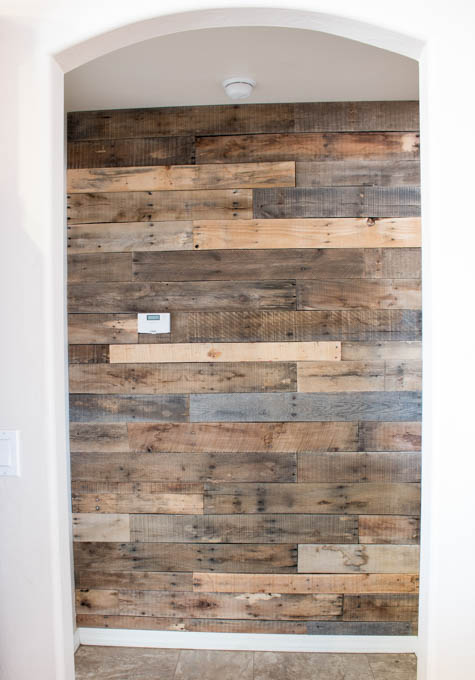
The finished wall looks better than I even imagined! I find myself staring at it every time I walk by. It adds so much dimension to this hallway and actually makes the ceiling look taller! I love the random colors and weathered look of the boards. My favorite is the weathered grey oak piece in the middle. I’m definitely happy about the fact that I didn’t have to break down any of the pallets for this project. It made the job so much easier. I spaced it out over two days (paint one day, pallets the next), but that was more because I was working on 10 projects at once. Realistically, this entire project could be finished in just one day. I’m even thinking I’ll order some more for a few other walls in my house.
I have even more plans for this hallway that I can’t wait to share with you, so stay tuned!
DISCLOSURE: I was provided products and compensation for this post. I would not share a product with you that I did not truly believe in and all opinions of this product are 100% my own. This post contains affiliate links for your convenience. Please click to read my full disclosure statement.

This looks awesome, Katie!!
Thanks Breese!
With the liquid nails are you able to hang anything on these boards? I have a huge frame and long horn skull I would like to put up on the wood wall. I just don’t want them falling on me in the middle of the night since they will be over my bed.
What I would be sure to do is make sure the the nails (screws would be great too) go into studs. At least for that area. Liquid nails holds pretty firm, especially if you use enough of it. We had to do some extensive drywall repair in our house after taking down shelves that the previous owners attached with liquid nails and screws.
I second that….!!!!
Looks great.
One question-how do you prepare the wood surface so it does not provide an endless supply of splinters?
This seems like a pretty difficult issue for me as the pallet wood I have seen is of a very rough and unfinished surface.
Thanks for a great idea.
Hi Bob,
All I did was sand them down with 220 grit sandpaper. The boards maintained their coloring, but were nice and smooth.
It looks awesome…!!!
Thanks so much, Tammy!
Hi great job. Can you tell me what colors you painted the boards. Thanks.
I didn’t paint any of them. They came that way. All I did for prep was sand them down:)
Just sand or did you treat the wood for bugs or mold????
Just sanded them down:)
I just adore this look. I’m hoping to re-do my bathroom before long and I thought about doing this on the wall behind the toilet. I’ve seen another one like that and it’s about 3 ft wide so I could get a good feel if I really like it (I know I will). Thanks for your instructions and the info about the broken down pallets. That will make it handy. Love your site.
Thanks so much Kellie! I think it would look amazing on your bathroom wall!
This is absolutely beautiful! Great job
Thanks so much!
Why would you buy pallets for $16.99? I just went to a store yesterday and got 88 for FREE!!! Yes, I do need to tear them down but for $16.99 per pallet I will gladly tear them down myself. And if you want any torn down let me know and I will tear them down for cheaper than you can buy them for at Home Depot!!!
My first experience with taking pallets apart was one of frustration in the beginning. When I discovered the reciprocating saw my journey was brightened. No more splits or breaks. My pallets were free and not the best either. All has been worth the trouble as I have lined the walls of my backyard workshop. Not perfect but I don’t get many visitors either.
No kidding. $17 for an old pallet is just laughable
Ok Chris, move on.
I really like the idea . been fooling with the idea in my hall way too
It has made such a difference and everyone who sees it wants to do the same in their own homes.
OMG I love it. I want to do something like this on my kitchen floor. I think it would look amazing.
I love that idea! I bet it would look gorgeous!
Looks great!!! I want to do this in my bathroom. Did you stain them? Wondered if I should put a sealer on them
I didn’t stain them. They came in those color variations. You could seal them, but all I did to these was sand them.
Hi Katie
I checked this post out since I’ve been wanting to do something with the wall behind my bed.
The only pallets I’ve come across in Australia are all one colour- one type of wood (boring!). The ones you’ve used have an amazing variety of woods and colours. I really like the top two rows and then some of the more ash grey ones further down. For some reason, in the photos, the lighter coloured, narrow strip just below the control panel really bothers me. Does it bother you? Have you been tempted to darken it at all?
We don’t have anywhere to get stripped down pallets here so I was kind of hoping your post was going to tell me how to use pallets without tearing them apart. I really couldn’t imagine it and didn’t expect to see that they were bought that way. I must say, it was a little disappointing, though the rest of the post and the finished product was worth the read.
I’m not planning on using pallets. Instead I want to use fence palings. (I’m going to use the fence palings for some outdoor projects too- since they are already weathered.) We have an abundance of old wooden fences here that seem to be gradually being replaced with aluminium fences (yuk!).
For the bedroom wall I’m going to build a frame that I can attach to the wall studs and then nail the boards to the frame. I have concrete walls so I can’t really just nail straight into them. I’d have to drill and put screws in- too much bother. Also, I figure it will be easier to install onto a frame if I want to remove it later.
I just hope mine turns out as well as yours.
cheerio, Lou
Check out stikwood.com
You can make a stain for the wood to look aged by using steel wool soaked in white vinegar or water i believe. Google will pop it up. Or you can use tea.
Steel wool and used coffee grounds ( usually great big bags free from Starbucks/ costa etc ) work like magic.
I stained a modern pine bed to look like aged oak , no sanding needed the steel wool does the work for you .
Were four full pallets enough to do your 40 sqft wall? Do you think i could get away with 9 full pallets for a 90 sqft project?
I used 3 boxes of the pallet wood, which is supposed to equal out to three pallets. If you are ordering the broken down pallets, I would say you can easily get by with 8 or so boxes. That being said, it’s always good to err on the side of caution. Worst case scenario, you take an unopened box back to Home Depot:)
Love this pallet feature wall!! I cannot wait to do this in my home! Thank you for sharing! http://www.lovesthefind.com
Did you leave the nail holes open or fill them in?
I left them. You don’t see them and it’s so rustic that it doesn’t take away from the wall at all:)
Wow, why would you pay $17.00 & tax for broken down pallet wood? What a joke. Do CL search, a bazillion pallets for free anywhere in/near any metropolitan area, Takes a whole 5 minutes to break one pallet down, tops.
Dude who cares.. thats not the point.
Looks fantastic! Though I do have to say, the idea of spending $17 on 1 pallet instead of taking the 5 or so minutes to break down as many free pallets as you can find is a bit puzzling. 🙂 One tip for others that are planning to do this; instead of using liquid nails and brads, simply mark the walls with pencil where the studs are and nail the boards directly into them (you won’t find plumbing inside of a stud). You won’t need anymore than 4 nails per piece of wood, and if you plan out the wall ahead of time, you’ll be sure to nail into 2 studs for each board. We did a wall in our bedroom this way and it looks great as well, and, we won’t have to replace the drywall when, and if, we decide to take it down. Lot’s of spackling though! 🙂
The dumpster dive is what adds to the appeal of this diy. Your looks great. I found my pallets behind whole foods and pets mart. Spent a lil time breaking them done and went for it!
Amazing, and very helpful!!
Hi I am the Marketing Assistant at Goodwill Industries of Southwestern Michigan. We have a recycled pallet cash competition fundraiser called PalletPalooza – PalletSWMI.com
I have been making a few things out of pallets for inspiration pieces for this event and my kids told me to do a pallet wall for our kitchen. Thank you so much for the tutorial. I am going to share it on twitter and I hope to give it a try myself. It would fit it good with my farmhouse. 🙂
Absolutely! It will fit in perfectly:)
I am currently working on an accent wall as well. I have been going to industrial and construction sites for the pallets. I found that the older the pallets which are ones they throw away since they cannot be used any longer are the best ones. They weather to different shades of grey, very similar to barn board. A light coat of semi-gloss verathane also brings out the colour.
This looks really nice! I love how the pallet wall is a great accent to the adjacent walls. Thanks for sharing, I’ll have to try it in my own home!
It really is super easy to install. I can’t wait to do it elsewhere in my house:)
Hi Katie
Great ideal and Great job..Spring I’m doing one of the walls in my bathroom. All winter I left my pallets (got for free) outside and a lot of the pallets has that grey tone now, just beautiful. Also after the bathroom I’m planning on doing a outdoor sectional made from pallets, can’t wait. I will post pic’s.
It looks absolutely amazing! I’m starting to work on 2 pallet walls as accent walls instead of a odd colored paint. Thanks for the tip about Home Depot I would have been breaking down pallets for a week. Huge inspiration! Can’t wait to see what mine looks like!
You will love it! And yes, the broken down pallets from Home Depot are such a huge time-saver!
What did you use to stain the boards? They color combo is gorgeous!
I didn’t need to stain them. They came just like this:) All I did was sand them down to smooth out any rough spots.
How much liquid nail did you end up using?
I can’t remember, but I think no more than two tubes:)
I am looking to do this idea on an internal wall but the other side of it is an external wall. Will this matter? e.g. Will damp occur after time?
I can’t see dampness being an issue. Your home should be watertight as it is, so adding this to your wall should be fine.
It looks great. all I would say is make a datum line roughly in the middle of the wall and check distances between the line and the ceiling if you are starting at the top, because if your ceiling slopes to one side at all (which in older properties it is likely to) all your boards will follow the slope so will look odd. It is best to start in the middle so that you know your boards are horizontal and then you can cut in any boards top and bottom.
We are doing a rustic theme in my baby’s room and I was trying not to break the bank. Did this with pallets from work and it turned out great! Used a recriprocating saw to cut pallets, liquid nails and a trim gun with 2 in nails to hold in dry wall. Thanks for the idea!!!
What were the stain colors used
Hi Diane,
No stain was used! The boards came just like this. All I did was sand them down a bit:)
So beautiful! I’d like to recreate this on the ceiling of our dining room. Would you do anything different knowing gravity is sometimes a cruel foe? Thanks!
Thanks Holly! I don’t think I’d do anything differently. You definitely want to use some sort of adhesive just to give it the added insurance that you won’t have a board fall on your head after a while;)
I would really like to do this in my home. This is the easiest tutorial by far. However, I do not want to rip the drywall down if I ever needed to take the boards down. Do you think putting plywood behind the pallets would work to save my wall in the long run?
There’s a few different ways you could do this. You can attach plywood to the walls, screwing it to the wall into the studs, then attach the pallet boards to the plywood with adhesive and nails. You can also locate the studs and nail the boards directly to the studs and skip the adhesive. The downside to this is that the boards will be different sizes as you stagger the seams, so you may not always hit a stud where you want to place a nail.
Did you stain or paint any of these pieces?
Nope! They all came this way. All I did was sand them down to smooth them out a little.
Does the wood overlap or stick out further at the bottom where the baseboard is? Does it look funny because the wood’s not flush with baseboard?
Hi Nikki,
This was something I was worried about as well, but it actually doesn’t look bad at all. The wood barely overlaps the baseboard, so it isn’t even noticeable.
It’s not as easy as you think, it’s much cheaper to get your own pallets and break them down yourself you can get them for free at many places. I did my man cave and it took all winter to break , cut, burn and brush and clean. The last wall I used T 1/11 I burned , wire brushed and washed and treated with linseed oil came out great . I had to do some of the pallet busting outside in the snow with my home made breaker bar. Froze my ass off then cut inside then burn with my blow torch out side . Then wash outside then get the wood inside my heated garage before it froze. It was worth it now I have to dust the furniture and move it in place. I would rather be outside freezing my ass off breaking the pallets .
I bet your man cave looks awesome! Here, it’s a little harder to find pallets. With the pallet wall trend, lately, people are now selling their old pallets for up to $15 each. Then you still have to go through the time and work of breaking them down. For me, having them show up on my doorstep ready to go made the project go much easier and faster.
I started collecting old pallets from around my city. Big box stores and building materials companies are great sources. I wound up with about 100 free pallets and started breaking them down. At first the nails were hard to get out with a hammer or crowbar as some of the nails used are threaded like screws. After much sweat I figured out a better idea that didn’t damage or break the boards. Take your reciprocating or circular saw and cut the boards at each end where they are attached to the 2 X 4 s. Do this for both sides. You will wind up with the only nails being in the middle 2 X 4, I then loosened the nails by twirling the boards (like a windmill) until the nails were loose and out far enough to remove them with a hammer. It took about 5 -10 minutes per pallet and much less waste. Pallets are usually made with hard woods so sometimes you will get some nails that are very difficult to remove. Try sawing the nails flush with a hacksaw or cutting them flush with a good pair of wire cutters.
Just looked at Home Depot and the broken down pallets are now $26 dollars. Smh ????
I LOVE THIS! And as far as paying for the broken-down boards, in my case it would be worth it to me unless I were really pinching pennies. For one thing, you could pretty safely assume they are at least somewhat clean and bug free or you could take them back. For another, I am a little older, female, not too skilled and not as willing to do too much manual labor. Even though it’s easy, I don’t want to get tired and let myself get overwhelmed before I even start! Just give me the boards and my crazy glue! LOL! This would be my first DIY of any real impact. And I’m feeling pretty darn inspired. THANKS for sharing this.
Wow, that looks great! I strongly doubt I could build it even with your instructions, but I admire the work. I’m more of a “hang a painting on the wall herself” kind of girl. 🙂
Anna recently posted…Äntligen fredag igen
Looks amazing, but good call warning us that it is permanent! The day i discovered the powers of guerilla glue, i started on a few DIY adventures i’m regretting now – but what’s done is done. In any case, your wall looks fab, and i’m sure it made your home much more cozy and authentic!
Thanks so much, Adriana! Yes, my method did make it permanent; however, those who wish for a more temporary version can use just nails. A lot of holes to fill after the fact, though:)
This looks amazing! Great job. What tool did you use to cut the boards to make them the size you needed? Also for that bottom piece.
I used my table saw to rip the boards down to a narrower size and then my miter saw to cut them to length.
Beautiful job! I love it
its look amazing, you did a great job! I am wondering to install in my bathroom. did you use any point on it ? Thanks
Hi Marcus. No, all I did to the wood prior to installing it was sand it down to prevent anyone from getting splinters.
This looks amazing and easy to boot! Thinking of making a pallet accent wall on the wall behind our woodstove. Do you think the wood would get too dry? If that’s the case would I have to seal it?
It really depends on how hot it gets back there. This pallet wood is already very dry and all I did to it before installing was sand it smooth.
I want to do a small wall in my kitchen that is shared with a dining room wall. Did you stain these with a solution, wax them or seal them ?
Hi Ingrid,
All I did was sand them! You could certainly finish them if you wish, but it is not necessary:)
I have a wall in my basement that I would like to convert as a pallet wall. However, it is not a dry-wall wall. It is, um, you know…. like a cement wall. It is smooth and even though. Would I be able to glue (liquid nail) the pallet wood to that?
Yes, you could use liquid nails, though it would be easier in that instance to start from the bottom and work your way up, rather than start from the top.
I have a old home so most of my walls are sheet rock/plaster. Do you have to repair any cracks in the sheet rock or plaster before installing? I know someday I will remove those walls so ruining the current walls is not a concern. I hate to remove any rim as it is old and I would like to keep it. What would you do to protect the wood if you install it in a bathroom where it can get hot and damp? I love your wall and would love any pointers from you or anyone!
Thanks
A single mom on a budget
No, I don’t think you would need to repair them at all. The nails are really just holding the pallet wood in place while the liquid nails cures:)
Did you spray/treat the pallets for bugs?
I didn’t. All I did was sand them. I haven’t had any issues since installing it.
I just started Doing my garage and it looks great. I plan on doing my whole garage. Your hallwall looks great and you did a great job, not bad for the first time.
Donnie C Gastonia NC
B
Thank you! Your garage will look awesome when it’s done!
Do the pallet boards stick out from the wall further than baseboards? I want to do this but think it looks funny if the base boards aren’t the same or more thicker than the plank wall. Let me know your thoughts.
Apologies for the delay! They stick out slightly further than the baseboard, but it is not at all noticeable.
I decided to do a feature wall in our master – never again will I work with palette wood – this project is pain staking and difficult … the palette boards are different widths, thicknesses, is how do you get am even laying pattern with all the boards being different in every way – we have so many little holes to fill, it’s incredible as well as gaps from all the different thicknesses and things not butting properly !! I’m in Day 3 and still not done – still need to fill the gaps, sand, stain and varanthane – I’m so over this project !! And dismantling palettes is not for the weak !! It was torturous and labor intensive – broke one reciprocating saw in half !! I do not recommend this project to anyone !!!
Hi Denise, I’m so sorry you’re having so many problems with yours. Yes, dismantling the pallets can be a difficult task. Especially for a large project. That is why this was a far easier alternative for me, with using already dismantled pallet boards. As for the different widths, I tried to make sure to line them all up and place like boards together in a row. If I couldn’t do that, I ripped them down on my table saw to equal out.
I want to do this to my dining room wall. You did a fantastic job! What did you use to tint the pallets? Love the colors in you boards. Wish me luck!
Thanks so much! I actually didn’t do anything to the pallets beyond just sanding them smooth. I love that the boxes of wood already had so many different color variations:)
I love the look of pallet walls. Want to do this in my master bath behind the toilet. But…no saw, no nail gun. I’m thinking its a little too much for me to handle alone.
Yours DOES look enticing, though!
Thanks so much Patti!
We are doing this for a wall in our powder room to create a rustic feel. I did a Google search in our area for reclaimed wood and pallet wood and was able to buy a stack of planks (already pulled off the pallet frame) for $16.00. I was thrilled at the price. I was wondering if cleaning and sanding would removing the different colorations. We have some dirty boards that need cleaning but I don’t want to look new when we are done. I guess I’ll avoid the pressure cleaner and just use a brush and soapy water.
I didn’t need to clean mine, but I did sand them down and didn’t experience any loss of color in the boards:)
Did you jam the boards together or leave a bit of space for expansion? I wouldn’t want them to buckle due to the humidity here in SC. Looke great! I’m thinking of covering a popcorn ceiling.
I didn’t jam them in there. Just placed them. We don’t have much fluctuation in humidity in AZ, so there hasn’t been any issues of expansion and buckling.
I love your work except the one light colored board set right in the middle of the wall drives me crazy and sets the entire wall off. Just a recommandation but I would remove that piece and replace it with a darker color. Its really erks me I don’t know why. Lol
Jade, i think you could just add a bit of vinegar/steel wool mixture to that lighter piece to darken it up. Much easier than prying it off and cutting anew!
My husband and I have collected old fence boards and are planning to plank the wall behind the toilet in our main bathroom as well as a wall in our laundry room. My question is, what would you do if the wall width is not exact? My husband thinks to add a piece of trim down both edges of the planked wall, but I know that I will not like that look as well as your untrimmed look. Those of you who have encountered this problem, please advise! Would you just cut all boards to the narrowest width, leaving little fluctuations in the gaps at each end? If the planked wall does not end with a crisp vertical edge left side and right side, I feel that will bother me, but I also don’t want to have to add a trim piece. Thanks for any help!
I would honestly just measure and cut to width as you work your way down the wall. It takes a little more time, but the boards will all fit as they should. No walls are perfect, unfortunately, so things like this are always a challenge!
Looks good Katie. I’m planning a pallet wood wall in a stairwell leading down to a wine cellar. Because the walls are very tall, but very narrow I’ll mount the planks vertically, and I’m planning to mount and screw them on to horizontal wooden strips screwed to the wall. I know this will take longer, but I’m not brave enough to glue them to a wall for a ‘forever’ scenario! It doesn’t look like you’ve filled the screw holes and your nail or screw heads are showing? It clearly adds to the ‘organic’ effect. I was thinking of filling the holes with dark wood filler on the light planks and light wood filler on the dark planks maybe….
I bet that will look amazing when you’re done. You’re right. I left the nail holes, etc. to give the wall some character.
I love your tutorial, thank you so much. I didn’t know the pallet wood could come without all the work. I’m planning a pallet wall in our “mud room” entryway. My intention is to put an eclectic variety of heavy coat hooks to provide a coat room for guests (we love to entertain). My husband wants to put plywood on the wall so that the coat hooks are stronger without the need to put them only in studs. I have been researching & planning this project, but your post gave me impetus to move forward quicker. I’m excited & motivated. Thank you so much,
I am currently working on a pallet wall, just finished taking the boards off the pallet and I notice that there are critters and im wondering how to get rid of them and keep them off? I was also planning on staining some to give them different looks because a lot of mine are grey tho I do like that color I just want more variety. so if I seal them after sanding and staining what do I use
Hi Kathy,
You can spray the boards down with a mixture of vinegar and water, which should kill off any bugs in the wood. You could seal them with either polycrylic or polyurethane. A wipe on polyurethane such as Minwax would be perfect if you plan to sand them smooth.
Hello, are these pallets free from harmful chemicals? they said that only Canada pallets are free from chemicals since it is just heat treated
I would think so, given that they are selling them to the public for home use. Unfortunately, I cannot give you a definite answer on that.
I built a wall and finished it with Danish oil. It looks great if anyone is interested in what it looks like you can check out my video on YouTube just search my name. The video is titled WOOD WALL! Built From used Pallet lumber! Tips how to Finish with Danish Oil!
Hello, great job what is the name of the product you brought I love that style and color?
Hi Novene,
They’re broken down pallets from Crate and Pallet, which are sold online from The Home Depot.
Super job! I’m currently in the middle of sanding down palette boards. My husband gets free palettes and just tires them apart, for different stuff so I’m grabbing a bunch to use for one wall in our living room. As the wall is not the greatest to paint and the boards will give it a lot of character. Just like yours. He’s going to help with placing or nailing them up. I’m very nervous that the beams are going to be too far apart for nailing. We shall see how that goes. I’ve never heard of liquid nails before. Thanks for sharing this project!
Caution there can be plumbing and or electrical running through studs. So it is possible to strike a pipe or powered wire while running nails through studs in an unfamiliar area. Minus my issues with able bodied individuals buying pre disassembled pallets for nearly $30 each. This is a nice decor idea for the economically minded. Thanks for the post.
Love this, currently doing a hallway in my home. It is an older double wide and I’m running into a few hiccups, but am super excited to do this project. I unfortunately had to tear my own pallets apart but I got them for free, will not complain
So sorry you’re running into a few issues, but I’m sure it will look great! We still love the look of this wall 5 years later:)
Any concerns of inconsistent plank thickness? I understand keeping the widths similar so the boards will align and stay level. I have boards that vary in thickness from 1/2 to 7/8. Im placing the pallet wall on as an accent on my stairs. Any advice is appreciated!
Thanks!
Ours are of varying thickness as well and it was not an issue at all. It adds a nice bit of dimension to the wall with the different thicknesses.
Omg I’ve been obsessed withthis project for about a year I originally saw it on Pinterest and when I went to go find out how to do it I know it’s kind of self-explanatory by the picture but I just wanted to break down of instructions and I could never find anything quite right until your post I love the wall I love your wood pallet projects page thank you so much
i have a red brick wall , nailing is not an option , is there any way i can glue them using tile adhesive ?
You can certainly attempt to use an adhesive, but you would want to work from the bottom up rather than from the top down.
I am about to do something very similar to this in my half bath. I am curious how this wall has held up over the years using liquid nails and brad nails. I am doing research now to see how I want to put the boards up.
It has held up beautifully! We still love it just as much today as we did when I installed it.
Hello, your wall looks great. Congrats! I’d like to maybe try something like this but my house was built in 1950 and the walls are plaster so not sure about using a nail gun. Could I just use the liquid nails?
Thanks
The liquid nails are the more permanent hold. The nails are to hold it in place while the liquid nails dries.