This is a Sponsored post written by me on behalf of Krazy Glue for SocialSpark. All opinions are 100% mine.
Fall is upon us, which means soon it will be time for most of the country to switch their clocks and “fall back.” We don’t participate in daylight savings time here in Arizona, but I still always have to be aware of it given that I have a lot of family and friends who live all over the country.
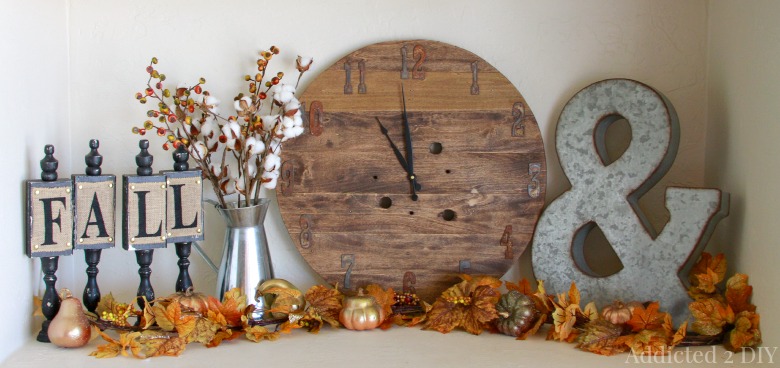
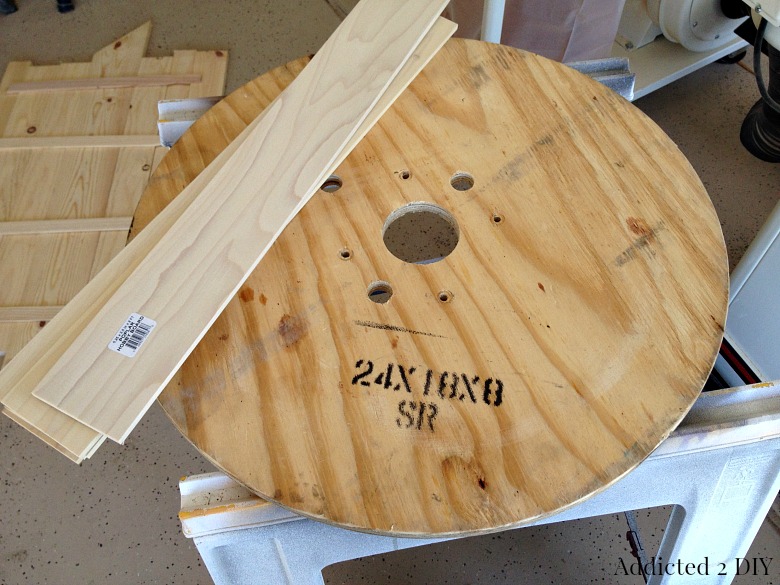
The past few months, I’ve been hard at work making tons of fall projects to decorate my home for a fall home tour that I participated in. One of the areas of our home that I decorated was a large niche in our built-in media center. The space is so large, which means that I need large items to fill it. Otherwise it just looks sparse. Other than our oven and microwave, we don’t have any clocks in the house. I’ve always wanted to make a rustic wooden clock and when one of my friends told me she had access to some wooden spools, I jumped at the chance to get one for a clock project.
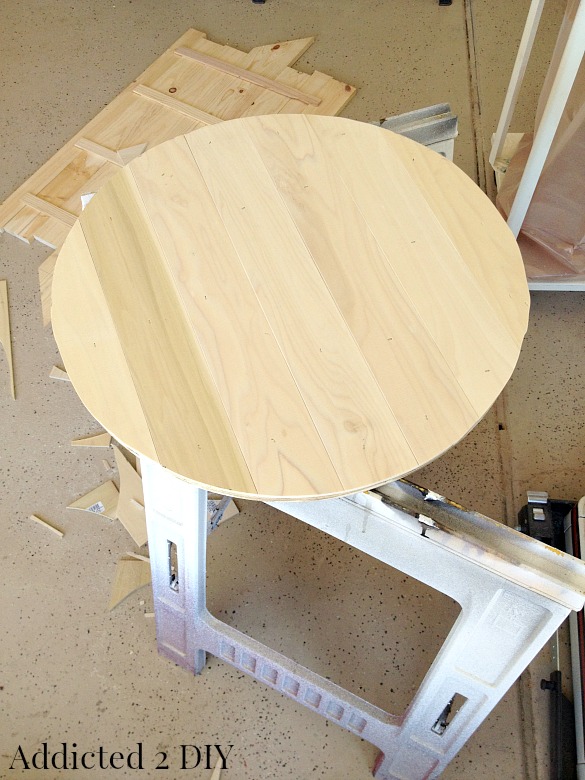
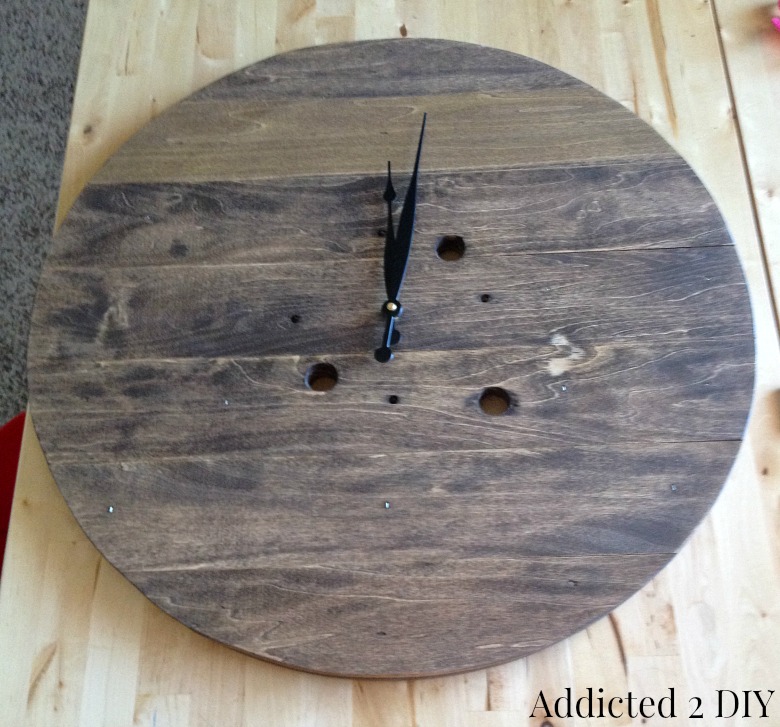
Since the hole in the middle of the spool was so big, the clock mechanism would just fall right through. I bought some 1/4 x 4″ poplar boards at Home Depot that were 24″ long. 6 of them covered the face of the spool just perfectly.
I glued and stapled the boards down on top of the spool making sure that my staples didn’t end up going through one of the holes in the spool. Once that was all done, I grabbed my jigsaw and cut around the edge. It wasn’t a perfectly round cut, so I sanded the edges down with my orbital sander and 120 grit sandpaper.
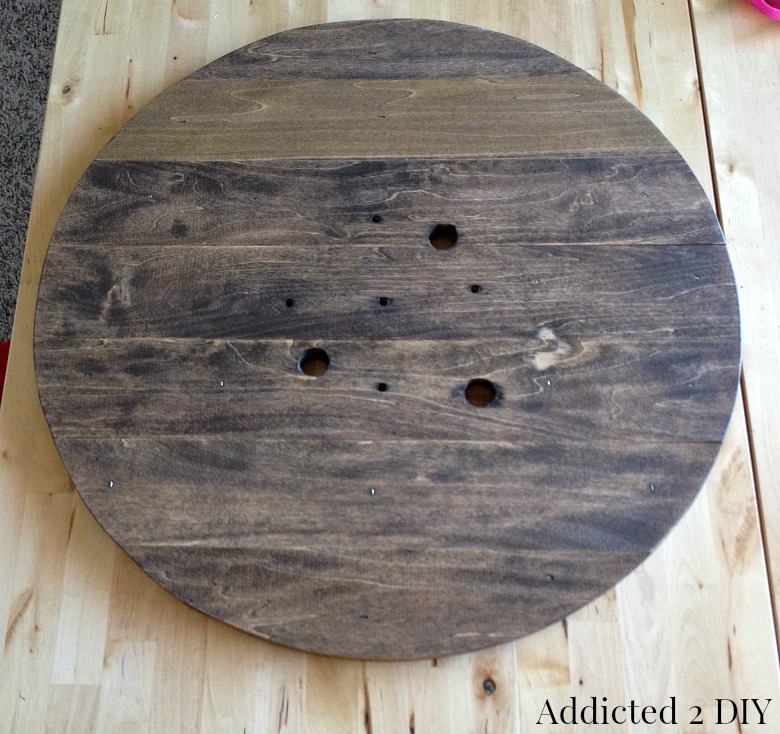
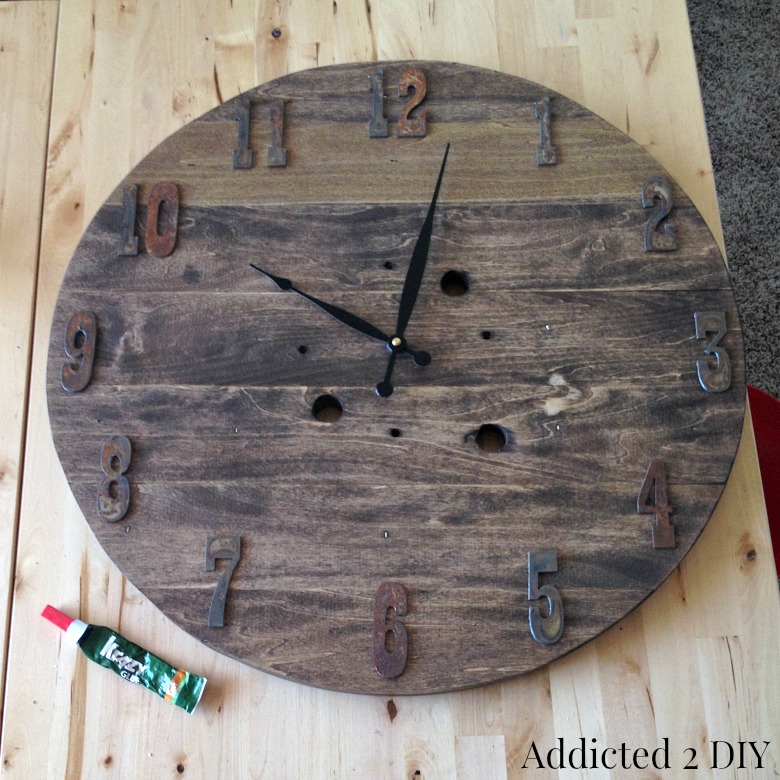
I flipped the spool over and grabbed some drill bits to drill holes through the 1/4″ poplar to recreate the holes in the spool (minus the large one in the middle). The larger holes required a 1″ paddle drill bit. I also drilled a hole in the middle to allow the shaft of the clock mechanism to fit through.
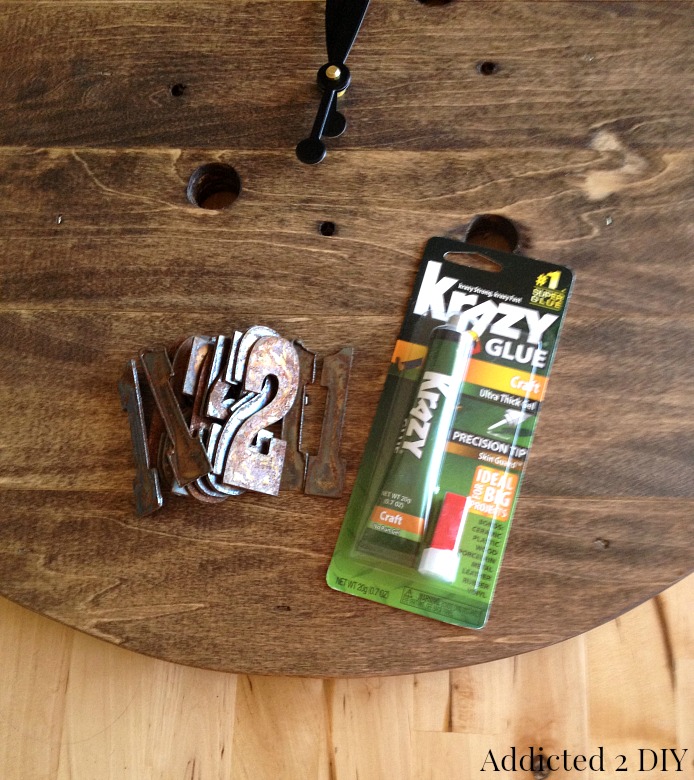
I ordered these 3″ metal numbers on Etsy. They weren’t the original font that I ordered, but I really wanted the clock done for my fall home tour, so I just went with it. They have such an awesome rusty patina to them and they ended up working perfectly for the clock!
I used Krazy Glue to attach the letters to the clock face. It worked perfectly. I always smile whenever I see Krazy Glue because I can’t help but think of “The Kragle” in the Lego Movie.
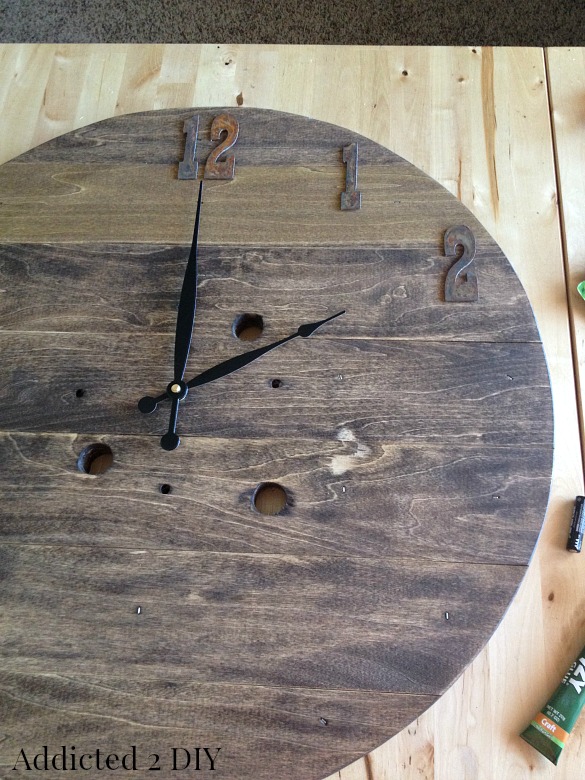
When I attached the numbers. I set the clock hands to 12:00 and then glued those numbers down. I then worked my way around the clock, turning the minute hand until the hour hand hit each hour and I glued the remaining numbers down.
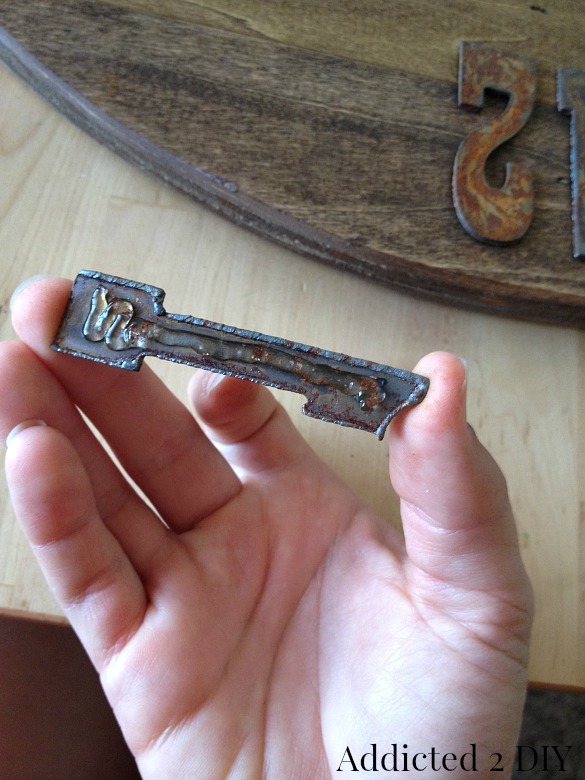
Normally, you would not need this much glue to glue your numbers down, but these numbers had a lip on the bottom of them, which caused them to not sit perfectly flush. I had to put the Krazy Glue on a bit thicker so that it would bond the wood and metal together. The gel formula was perfect for this though and there wasn’t any sort of mess when I flipped my numbers over to glue them down.
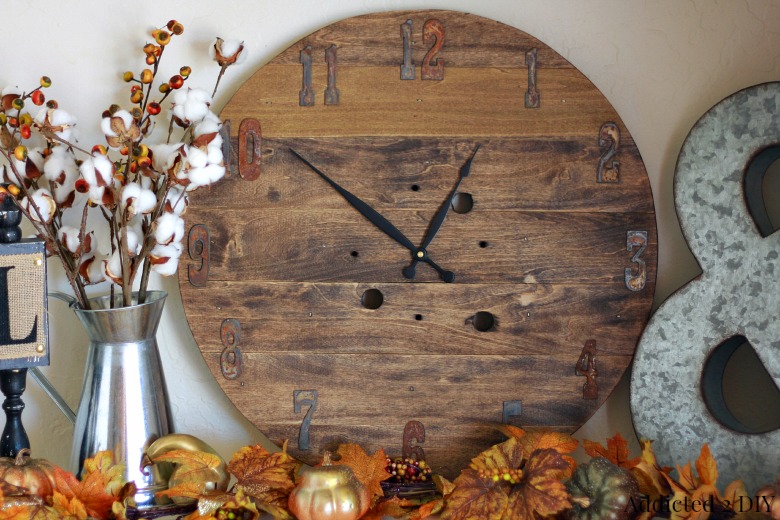
Once all of my numbers were glued down, I let them dry for a bit. Then it was ready for it’s new home in the large niche in my media center.
I love how the clock turned out and it is so perfect with my fall decor. I may have to make more of these clocks as gifts for Christmas! It was so easy to make and the Krazy Glue made attaching the numbers so easy!
Do you use Krazy Glue for your DIY crafts and projects? What would you make? Here are a few reasons why Krazy Glue is so great to use!
- You can create masterpieces in minutes with Krazy Glue.
- Krazy Glue’s unique craft products bond the smallest, most delicate design elements with the same strength and speed that make Krazy Glue America’s #1 instant adhesive.
- Krazy Glue helps me complete a craft faster than it takes to set and heat up a glue gun properly.
- I can tackle larger projects with Krazy Glue’s new 20 gram gel formula.
- Krazy Glue makes crafting as spontaneous and free-spirited as your own imagination.
- Krazy Glue’s craft gel formula enables me to glue vertical surfaces with no runny mess and fill in gaps when bonding mismatched surfaces.
- Krazy Glue works on porcelain, pottery, plastic, rubber, metal and glass, or vinyl, eliminating the need for glue guns and other expensive tools.
- Small enough to store in my kitchen, toolbox, car, purse and desk, Krazy Glue can go wherever my craft ideas take me.
- In making crafting more accessible and less time-consuming, Krazy Glue welcomes a new circle of potential artisans and reminds them there are no rules, no need for an arsenal of tools and no expectations.
- Unlike a glue gun, Krazy Glue’s precision tip and brush-on applicators bond the smallest elements with no mess, burns or glue strands.
- The Skin Guard™ formula delays skin bonding, giving me extra working time before the glue dries.
For more ideas, be sure to visit the Krazy Glue website Krazy strong, Krazy fast or their Pinterest page masterpieces in minutes! Happy crafting!
Linking up at these parties:
Maybe She Made It, Tatertots and Jello, Remodelaholic, Designer Trapped in a Lawyer’s Body

Beautiful mirror! I love the stain and the rustic look of the metal numbers! Pinned!
Katie @little house of four recently posted…Friday Feelings
I seriously have had something like this on my to-do list forever! Love it!
Carissa Rasmussen recently posted…Outside {the Box} No. 5
Thanks! I’ve been wanting to for a woe as well and a friend just happened to have access to cable spools:)
LOVE those numbers, great project!
Chloe recently posted…Best Pinterest Wedding Boards
Thank you Chloe! Have a great weekend:)
Where did you buy the arms and the clock mechanism?
I found them on Etsy.
I love your clock and mantel. I have a spool sitting around…
Lisa at Mabey She Made It recently posted…Some Big News
Thanks Lisa! I got a few extra spools from my friend that are just begging to have something creative done to them;)
Falling in love with it. You did a great job, very creative. I may ask my husband make one for our house.
Once again, you are a Godsend! I am making a clock and needed to know how to attach the metal numbers. Thank you!
Ps, I’m in AZ too, if you need another bestie . . . 😉
Lol! Thanks! Glad I could help!
Hi Katie! I’m thinking of like repurposing a cuckoo clock into a round wall clock like the one you’re making. I got it after reading this: https://www.cuckooforest.com/pages/cuckoo-clock-buying-guide pretty convincing stuff. haha
Anyway, I’m hoping to like make a round face and then insert the cuckoo mechanism in the middle. Which do you think would be better, i take out the mechanics and transfer it to the new one or just make a whole big enough to fit the cuckoo clock in? Your thoughts would really be much appreciated!
Hi Caroline, I’m having a hard time picturing what you are asking.